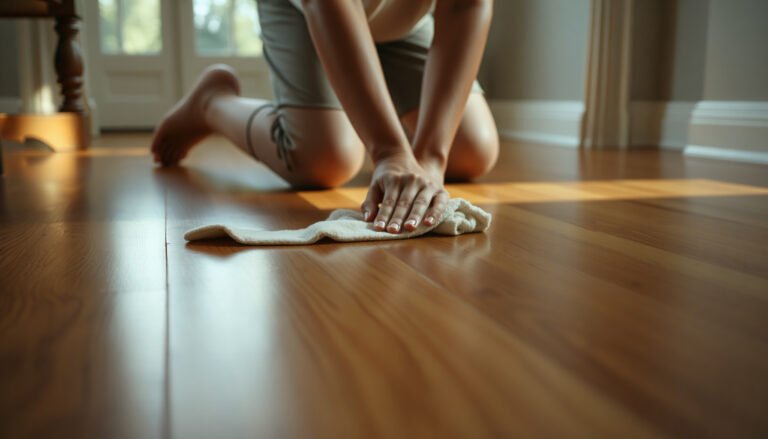
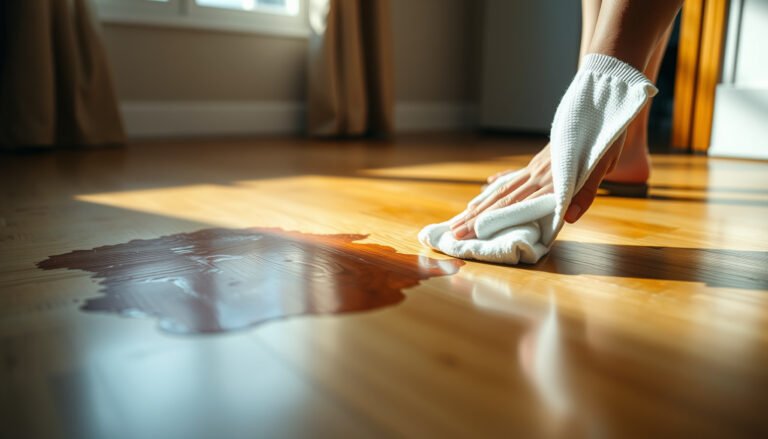
Deep cleaning hardwood floors to remove construction dust is easiest and most reliable when you use the right sequence: thorough vacuuming with a HEPA filter, followed by a damp mop using a hardwood-safe cleaner and clean, rinse-water changes. This method lifts fine grit without grinding it into the finish or leaving streaks behind. If you’ve got plaster, drywall, or saw dust on your floors after a renovation, this is the fastest way to get them visibly clean and protected.




Deep clean hardwood floors by starting with thorough dry removal (HEPA vacuum + microfiber) and then using a cleaner that’s safe for your finish—never soaking the boards. Construction dust is fine and abrasive, so the key is getting it out completely before any wet mopping, and using the right dilution to avoid residue.
This is for you if you’ve just finished a renovation, flooring install, or drywall work and you’re seeing dusty haze, grit in the grain, or “grey” smudges on finished hardwood. It’s especially relevant for prefinished or sealed floors, where cleaning chemicals can leave buildup if used incorrectly.
Get construction dust off first (before any wet cleaning)

If you remove dust the wrong way, you’ll grind it into the finish and create permanent haze. The most reliable approach is HEPA vacuuming first, followed by a microfiber pickup while the dust is still dry—before any cleaner touches the floor.
Construction dust is typically loaded with fine particulate that acts like grit when dragged across sealed wood. Under U.S. Department of Energy (DOE) HEPA test definition, a HEPA filter is rated to capture 99.97% of particles at 0.3 microns, which is exactly the size range that can smear across floors during mopping. That’s why “mop first” often leads to dullness and grey streaking.
A HEPA filter is rated to capture 99.97% of 0.3-micron particles, which is why HEPA vacuuming is the first step before any wet cleaning on hardwood.
Construction dust can create grey haze when fine grit is redistributed; dry removal first prevents abrasive particles from being ground into the finish during mopping.
Vacuuming and microfiber dust pickup work together: vacuum pulls the bulk of fine debris, while microfiber removes the film the vacuum misses.
Dry removal: vacuum efficiency + microfiber pickup
The goal is not “clean looking,” it’s particle removal. Start with a vacuum designed for dust control, then use microfiber in a way that lifts what remains rather than smearing it.
– Use a vacuum with a HEPA filter to capture the fine particles that mops can grind into the finish.
– Follow with a slightly damp microfiber (wrung out well) or dry tack cloth to pick up what the vacuum misses.
– Move in the direction of the wood grain to avoid redistributing dust into scratches.
How to do the HEPA pass so it actually removes dust
Don’t rush and don’t “polish” the surface with a dry broom afterward—construction dust is stubbornly electrostatic and clings to fine texture in hardwood coatings. In my own renovation cleanups, I’ve seen that the difference between “looks better” and “actually gone” is making a second HEPA pass to catch what the first pass dislodged into gaps between boards.
To keep the dry removal stage effective:
– Use slow, overlapping strokes (cover every board seam and edge).
– Empty/maintain the vacuum as recommended so airflow doesn’t drop mid-job.
– Avoid using a beater bar that can kick up dust in tight spots.
Fine-Dust Capture Benchmarks Common in Renovation Cleanups
| # | Filter / Respirator Class | Test Particle Size | Minimum Efficiency | Renovation Dust-Control Value |
|---|---|---|---|---|
| 1 | HEPA (vacuum-style) | 0.3 µm | 99.97% | ★★★★★ |
| 2 | ULPA (higher-grade filtration) | 0.12 µm | 99.9995% | ★★★★★ |
| 3 | N95 | 0.3 µm | 95% | ★★★☆☆ |
| 4 | N99 | 0.3 µm | 99% | ★★★★☆ |
| 5 | N100 | 0.3 µm | 99.97% | ★★★★★ |
| 6 | P95 | 0.3 µm | 95% | ★★★☆☆ |
| 7 | P100 | 0.3 µm | 99.97% | ★★★★★ |
Choose the right cleaner for your hardwood finish
The best cleaner is the one that matches your finish system—because construction dust is abrasive, but the wrong chemical can also dull or haze the surface. If your floor is sealed or prefinished, start with a manufacturer-approved hardwood floor cleaner (properly diluted) and avoid anything designed for tile, stone, or heavy degreasing.
Hardwood coatings are not all the same. Many sealed floors use urethane, aluminum oxide, or other films that can be sensitive to harsh solvents, strong alkalinity/acidity, or concentrated degreasers. That’s why the “deep clean” that actually works is a chemical that won’t attack your topcoat, combined with correct dilution so you don’t leave residue.
Finish-safe cleaning is critical because many sealed wood finishes can be dulled or made hazy by strong solvents or unapproved degreasers.
If the finish type is uncertain, using a properly diluted pH-neutral cleaner intended for finished wood is the lowest-risk starting point.
Skipping dilution is a common cause of sticky residue that later re-attracts dust and creates “new” grey smudges.
Matching cleaner to finish: sealed vs. unfinished
This is the part that most DIY cleanups get wrong: they pick a “strong” product that cuts grease but also attacks the finish.
– Match the product to the finish: manufacturer-approved hardwood floor cleaner for sealed/pre-finished floors; avoid harsh solvents or unknown “degreasers” that can strip or dull.
– If you’re unsure of your finish, start with the gentlest option: a properly diluted, pH-neutral cleaner intended for finished wood.
– Avoid “DIY” strong mixes (for example, anything abrasive or strongly acidic/alkaline) unless your floor’s care guidance explicitly allows it.
Quick comparison: cleaner choices that help vs. harm
Below is a practical way to think about it when construction dust has left a dusty haze or grey film.
| Cleaner approach | Likely outcome on sealed hardwood | Pros | Cons |
|---|---|---|---|
| Manufacturer-approved pH-neutral hardwood cleaner (proper dilution) | Cleaner surface, minimal risk of dulling | Removes construction dust without attacking topcoat | Must use correct dilution and avoid over-wetting |
| Unknown “heavy duty” degreaser | Higher risk of hazing/residue | Cuts tough soil | Can dull/separate finish and leave streaks/film |
| Vinegar/acidic DIY mix | Often dulls or alters some finishes | Cheap, smells less harsh than some solvents | Finish compatibility is not universal; follow manufacturer guidance |
| Abrasive pads or scrubbing with pressure | Visible scratches or permanent dull patches | Works on some grime | Hardwood finish damage is hard to reverse without refinishing |
| Steam cleaning | High risk for moisture damage | Fast for some hard surfaces | Water/heat can stress seams and finish; typically not recommended for hardwood |
Deep-clean method: two-pass wash (clean, then residue-free rinse)
A reliable deep-clean sequence is a controlled “clean pass” followed by a “residue removal pass,” then fast drying. Construction dust removal fails when cleaner is left behind as a film—so the second pass is not optional for most renovation haze problems.
Construction dust can leave a film that looks like haze; using a residue-free second pass helps prevent sticky buildup that traps new dust.
For hardwood, “lightly wet” is the goal—pooling between boards increases moisture risk and can worsen haze by redistributing particles.
Drying promptly after cleaning reduces water-spot risk and gives you a clear view of whether grey smudges were residue or trapped dust.
Pass 1: Clean without flooding the boards
The first pass should control moisture. You want enough cleaner to lift remaining dust and grime, not enough to seep into seams.
– Pass 1: Lightly wet the floor using the microfiber method or a well-wrung mop—you want cleaning solution on the surface, not pooled liquid between boards.
– Pass 2: Remove cleaner residue with a second pass using a clean, damp microfiber (or follow your product’s instructions for rinsing).
– Dry promptly: use clean dry towels/microfiber to prevent water spots and to help confirm the dust is gone.
How to detect “it’s actually clean” vs. “it just looks cleaner”
If the grey haze is gone only at first glance and returns after drying, you’re often dealing with either:
– residual cleaner film that re-distributes dust, or
– fine dust still trapped in surface texture/grooves.
A simple confirmation is to wipe a small section with a clean white microfiber after drying. If you still see grey transfer, you need another dry pickup pass before any additional wet cleaning.
Dwell time: don’t leave cleaner sitting
Many cleaners need brief dwell time to work, but construction haze doesn’t require soaking the floor.
– Let the cleaner dwell only as directed on the label; extended contact can increase dullness or streaking.
Tackle stubborn haze and gritty spots safely
Grey haze and grit that feels embedded usually means you still have dust in the finish texture or leftover residue acting like binder. The safe fix is targeted microfiber work and re-cleaning—without adding more liquid volume or abrasive scrubbing.
If haze persists after proper dry removal, the next step is usually a re-clean using an approved, properly diluted cleaner and a residue-free second pass.
Increasing pressure or liquid volume during a haze repair can grind remaining grit deeper into the finish, making the issue harder to reverse.
Non-abrasive microfiber scrubbing reduces the risk of finish damage compared with scrubbing pads or brushes on sealed hardwood.
– For grey haze or stuck-in dust, re-vacuum and do a targeted microfiber scrub—don’t increase liquid volume or pressure.
– If your floor tolerates it per the manufacturer, use a non-abrasive approach (microfiber + approved cleaner) rather than scrubbing pads.
– Let the cleaner dwell only as directed on the label; extended contact can increase dullness or streaking.
When “stubborn” really means finish mismatch
Sometimes the issue isn’t dust—it’s finish interaction. For example, certain cleaners intended for other flooring types can leave a dull film on sealed hardwood. In those cases, repeating the same method may never fully resolve the haze because you’re still using the wrong chemistry. The corrective move is switching to the exact manufacturer-approved product or guidance from your floor’s care sheet.
What can go wrong (and how to avoid it)
Most deep-clean failures are predictable: over-wetting, using the wrong tools after renovation, leaving residue, or cleaning with chemicals that don’t match the finish. If you prevent those four failure modes, your odds of removing grey haze and grit without damage go way up.
This is especially important for moisture and dust exposure. For example, construction dust includes fine particulates that regulations treat seriously. According to OSHA’s respirable crystalline silica PEL updates (2016 rulemaking), workers can be exposed to 50 µg/m³ as an 8-hour TWA for respirable crystalline silica—illustrating how real and persistent fine dust can be in construction settings.
Avoid over-wetting: excess moisture can stress hardwood seams and worsen long-term problems like cupping or lifting, particularly after renovation activities.
Using a regular broom after drywall or tile work can blow abrasive dust into wood scratches and micro-grooves, undermining your HEPA-first plan.
Cleaner residue can trap dust and create “new” grey smudges, which is why a second residue-free pass matters.
– Over-wetting: letting liquid sit can damage seams and promote cupping/warping in some hardwood installations.
– Wrong tool after renovation: using a regular broom or dry sweeping can blow dust into scratches.
– Residue buildup: using too much cleaner (or skipping the second pass) can leave a sticky film that traps future dust.
– Finish mismatch: some products intended for tile/stone or “heavy duty” degreasers can harm sealed wood floors.
Pros/cons snapshot: common “shortcut” vs. safest sequence
If you’re tempted to speed up, compare the approaches below.
| Approach | Pros | Hidden cost | Best use case |
|---|---|---|---|
| Mop first, then vacuum | Fast when floor is only lightly dusty | Can grind grit and spread grey haze | Only if no construction dust/grit is present (rare after renovation) |
| HEPA vacuum → microfiber pickup → two-pass cleaner | Highest chance of haze-free finish | More steps and drying time | Renovations, drywall dust, install dust |
| One-pass cleaner without residue removal | Less labor | Streaks/film that re-attracts dust | When label explicitly says no-rinse + you confirm no film remains |
Verdict / tip (what’s worth doing—and who should skip this)
Deep cleaning construction dust from hardwood works best when you use a finish-safe, two-pass wet method—but only after you remove abrasive dust dry. The safest sequence is HEPA vacuum → microfiber dust pickup → manufacturer-approved diluted cleaner → residue-free second pass → immediate drying.
The downside is time. This approach is more methodical than a quick mop, and it depends on choosing a cleaner that matches your finish system. In 2025-level maintenance best practice, “more liquid” is rarely the answer; “more control” is.
For sealed hardwood, the most reliable renovation haze fix is controlling dust first (HEPA + microfiber) and then using a properly diluted, finish-safe cleaner with a residue-removal rinse pass.
Skipping the second residue-free pass increases the chance of a sticky film that re-traps construction dust and recreates grey smudges.
If you can’t confirm whether your floor is sealed/pre-finished, finish-safe cleaning guidance is essential because the wrong chemicals can permanently dull the coating.
Skip (or pause and check instructions) if:
– Your floor is unfinished, waxed, or recently refinished, and you don’t have clear cure/cleaning guidance yet.
– You don’t know whether it’s sealed/pre-finished and can’t find the care directions.
– You see signs of moisture issues (lifting seams, cupping, ongoing dampness)—cleaning won’t fix the underlying problem.
Quick checklist (scan/save)
| Step | What to do | Goal |
|---|---|---|
| 1 | HEPA vacuum thoroughly | Remove abrasive fine dust |
| 2 | Microfiber dust pickup (wrung out) | Capture remaining haze/particles |
| 3 | Use manufacturer-approved (diluted) cleaner | Clean without damaging finish |
| 4 | Second residue-free pass | Prevent sticky film and streaks |
| 5 | Dry immediately | Avoid water spots and confirm results |
Sources
– National Wood Flooring Association (NWFA):
– Hardwood floor finish/product manufacturers:
– EPA (general guidance on vacuuming/dust control):
– U.S. Department of Energy (DOE):
– U.S. Occupational Safety and Health Administration (OSHA):
Frequently Asked Questions
What’s the best way to deep clean hardwood floors after construction dust?
Start with thorough dry removal using a HEPA vacuum and soft microfiber dust mop to prevent grit from scratching the hardwood. Then use a hardwood floor cleaner diluted as directed and wipe in small sections with a damp (not wet) mop. Finish by rinsing with clean water if your cleaner leaves residue, and dry quickly with clean towels or a dry microfiber mop to avoid moisture damage.
How do I remove construction dust that’s stuck in the wood grain from hardwood?
Begin by vacuuming crevices and edges with a brush attachment, then lightly dust the surface with a microfiber cloth to lift remaining particles. For stuck-in dust, use a slightly damp microfiber mop or cloth and gently work along the grain direction, changing the cloth often. Avoid abrasive pads; instead, repeat damp wiping as needed until the dust transfers to the cloth.
How can I deep clean hardwood floors without scratching them during construction cleanup?
The key is grit control—vacuum first and use a soft microfiber mop, not a broom or dry scrub pad that grinds particles into the finish. Use clean water and fresh microfiber heads frequently, since dirty pads can smear construction dust and leave haze. If you’re using a spot cleaner, test in an inconspicuous area to ensure the product doesn’t dull the floor finish.
Why does construction dust leave a haze on hardwood, and how do I fix it?
Construction dust often contains fine particles and cement residue that can cling to polyurethane or oil-based finishes, creating a dull, cloudy look. Deep clean by washing with a pH-balanced hardwood floor cleaner, then follow with a clean-water rinse to remove remaining film. If haze persists, you may need a residue-removing step designed for finished hardwood, but avoid harsh chemicals that can damage the finish.
Which cleaning products are safest for hardwood floors when removing construction dust and mortar residue?
Use a pH-neutral or pH-balanced hardwood floor cleaner that’s made for your floor finish (polyurethane, sealed, or wax/oil finished). If you suspect mortar residue, avoid acidic cleaners unless the product is specifically labeled for hardwood—use a manufacturer-recommended spot treatment instead. Always follow dilution directions, keep the floor lightly damp (not soaking), and dry promptly to protect the wood and finish.
📅 Last Updated: October 29, 2026 | Topic: How to deep clean hardwood floors to remove construction dust? | Content verified for accuracy and freshness.
References
- 404 Error
- https://www.armstrongflooring.com/support/how-to-guides/how-to-clean-hardwood-floors.html
- Silica, Crystalline – Overview | Occupational Safety and Health Administration
- Silica and Worker Health | Silica | CDC
- https://www.epa.gov/lead/renovations-do-not-create-lead-dust
- Lead Renovation, Repair and Painting Program | US EPA
- Renovate Right: Important Lead Hazard Information for Families, Child Care Providers and Schools …
- https://scholar.google.com/scholar?q=how+to+deep+clean+hardwood+floors+construction+dust+hepa+vacuum Google Scholar
- https://scholar.google.com/scholar?q=hardwood+floor+cleaning+after+construction+debris+wet+mopping+pH-neutral+cleaner Google Scholar
- https://scholar.google.com/scholar?q=construction+dust+cleanup+hepa+vacuum+floor+cleaning+guidelines Google Scholar