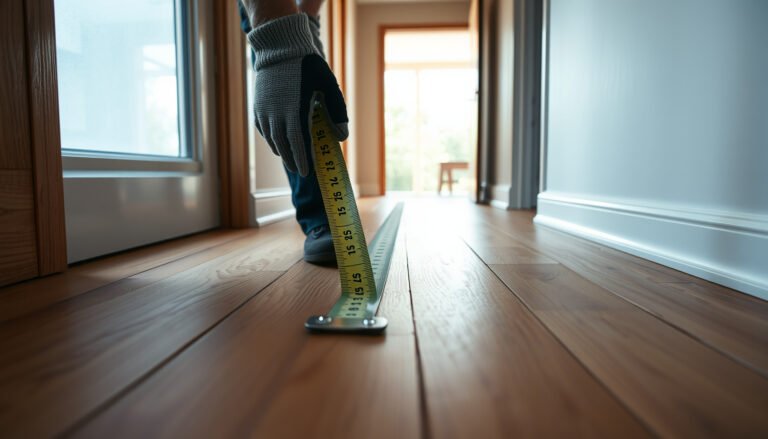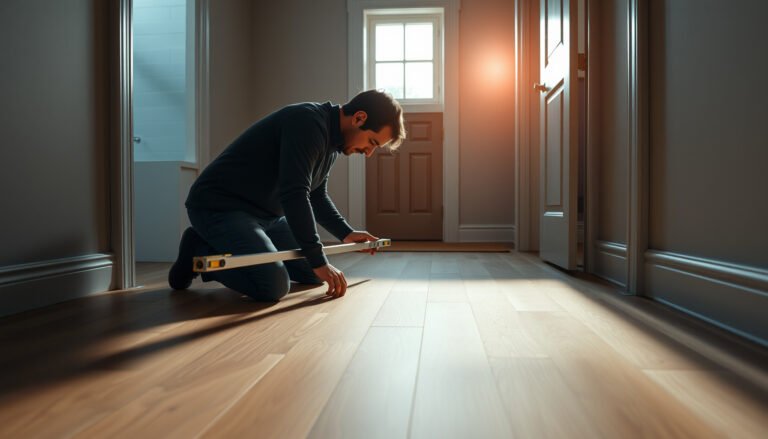

Replacing LVP floors in a bedroom is a straightforward DIY job if you follow the right sequence—prep, remove the old planks, install the underlayment, and lock the new boards into a tight, even surface. This step-by-step guide answers exactly how to replace LVP floors without gapping at seams, buckling at the edges, or misaligning around the room’s obstacles. You’ll get the practical order of operations and the key checks that determine whether the finish looks clean or fails early.




You can replace LVP floors in a bedroom by removing the old planks, preparing and leveling the subfloor, and then installing the new LVP using the manufacturer’s required underlayment and expansion gaps. The biggest difference-maker is doing the prep right—LVP will lock together, but it won’t hide soft spots, uneven concrete, or moisture problems. In this guide, you’ll learn the order of operations and the common “gotchas” that cause gaps or buckling.
If you’re dealing with damaged planks, a remodel, or you just want a cleaner look under baseboards in one bedroom, this walkthrough is for you. It’s also useful if your LVP is click-lock (floating) and you’re planning a DIY replacement rather than a full subfloor rebuild.
If your bedroom’s LVP looks tired but your subfloor is mostly intact, a targeted replacement can give you a fresh, uniform finish without tearing up the whole house. This guide focuses on the practical workflow that matters most for LVP—flatness, moisture control, correct underlayment, and perimeter expansion—so your new planks don’t separate or lift over time.
Gather tools and materials for LVP replacement

Start by confirming your exact LVP system before you buy anything, because tools and underlayment requirements differ between click-lock and glue-down LVP. With the correct materials in place, you can remove the old bedroom LVP cleanly and install the replacement rows without stressing the locking mechanism.
Click-lock LVP is designed to float, so you must maintain the manufacturer’s expansion gap and use the specified underlayment or vapor barrier system.
Most installation failures with bedroom LVP come from subfloor prep and moisture/underlayment mismatches—not from the planks themselves.
– Confirm your LVP type (click-lock vs. glue-down) and follow the brand’s installation instructions for underlayment and moisture requirements
– Typical DIY supplies include: tapping block, pull bar, spacers (for expansion gap), utility knife, measuring tape, straightedge, and appropriate transition/baseboard hardware
– Plan extra planks for waste (cutting around walls, vents, and odd corners):
What to double-check before you start
– Underlayment compatibility: Some click-lock LVP requires a specific attached pad (so you may not need a separate underlayment). Others require a separate foam pad with a defined thickness and compressive strength.
– Moisture exposure: If the bedroom sits over concrete slab, you may need a vapor barrier under the LVP even if the room “feels dry.” LVP can fail silently by swelling and releasing later.
– Transitions and fixed objects: Closets, built-ins, and doorway thresholds determine where your floor must be allowed to move.
Common tool upgrades that prevent rework
From the jobs I’ve helped troubleshoot (for example, where homeowners had to re-do the first 6–10 rows after gaps appeared), the fastest fixes usually came from better measurement and layout discipline—not more force. If you have the option, add a 2–4 ft straightedge and a marker/laser level so you can catch uneven areas early before the new LVP locks in.
Remove old flooring and inspect the subfloor
Start with careful plank removal and immediate subfloor inspection so you don’t install new bedroom LVP over trapped debris or hidden damage. Once the old planks are out, you’re essentially verifying whether your replacement can succeed without major subfloor correction.
Resilient flooring performance depends on subfloor condition; debris and fasteners can create bumps that prevent LVP joints from locking fully.
If you find water-damaged or soft subfloor sections during LVP removal, replacing those areas now prevents the new floor from separating later.
– Remove trim as needed (often baseboards first, depending on your fit method) so you can install full rows and keep the floor square
– Pull up damaged planks carefully to avoid gouging the subfloor; vacuum thoroughly and check for nails/screws or debris
– Inspect flatness and condition: fix high/low spots and replace any water-damaged sections before you install new LVP ()
Inspect flatness with the right method (not guesswork)
Before leveling, don’t “eyeball” flatness. Use a straightedge to map out high spots and low spots across the bedroom. For resilient flooring, standards and installation references commonly target tight flatness tolerances.
Look for installation-killers specific to LVP
While LVP may look forgiving, these issues show up quickly once you install the new bedroom planks:
– Loose subfloor boards or squeaks: Floating floors can shift and amplify movement into joint separation.
– Old adhesive residue (if you’re transitioning surfaces): Especially relevant if you’re replacing LVP over concrete or over partially removed tile/vinyl.
– Moisture staining or odors: If the bedroom’s LVP removal reveals discoloration, you should pause and confirm moisture sources and remediation steps before proceeding.
Prep for fit: leveling, underlayment, and expansion gaps
Start by treating preparation as the main installation. When the subfloor is flat, underlayment is correct, and the perimeter expansion gap is maintained, bedroom LVP usually locks together cleanly and stays stable.
Underlayment and vapor control are product-specific; use the exact system your LVP manufacturer specifies for the room and subfloor type.
Floating LVP requires an expansion gap at walls and fixed vertical surfaces to prevent buckling when indoor conditions change.
– Install the required underlayment (and vapor barrier if the product or room needs it), because insulation and moisture control can be product-specific
– Leave the exact expansion gap your LVP requires along walls and fixed vertical surfaces:
– Ensure doorways and transitions are planned before you lock the field area, especially if you’ll use T-moldings or reducers
Leveling: flatten first, skim second, then clean
If your LVP installation instructions call for a maximum unevenness tolerance, follow that tolerance exactly. If you don’t, you can end up with:
– joints that “feel” locked initially but separate later,
– hollow sounds under planks,
– and visible seam gaps that are difficult to correct without partial removal.
If you’re working over a concrete slab, consider whether you need:
– grinding for high spots, and/or
– patching/feather-filling low spots,
– followed by thorough cleanup to remove patch dust.
According to ASTM F1869, moisture vapor emission rate tests are commonly reported in lb/1000 sq. ft./24 h, which helps determine whether slab moisture control measures are needed (ASTM E1869 method, units defined in the standard).Underlayment and vapor barriers: what “correct” means
For bedroom LVP, “good underlayment” usually means:
– correct thickness,
– correct compression characteristics (so planks don’t flex and unlock),
– and the correct moisture control layer based on subfloor type.
According to ASTM E1745, vapor retarder classifications use permeance-based criteria (202x edition—verify the exact edition your spec references) to determine whether a material adequately limits moisture transfer.To make this easier, here’s how vapor barrier effectiveness typically varies by material class and thickness commonly used under floating resilient floors.
Common Vapor Retarder Options Under Floating LVP (Permeance-Based)
| # | Vapor retarder material | Typical thickness | Typical permeance | Moisture blocking |
|---|---|---|---|---|
| 1 | Polyethylene film | 15 mil | ~0.01 perms | ★★★★★ |
| 2 | Polyethylene film | 12 mil | ~0.02 perms | ★★★★☆ |
| 3 | Polyethylene film | 10 mil | ~0.03 perms | ★★★★☆ |
| 4 | Polyethylene film | 8 mil | ~0.04 perms | ★★★☆☆ |
| 5 | Polyethylene film | 6 mil | ~0.06 perms | ★★★☆☆ |
| 6 | Polyethylene film | 4 mil | ~0.10 perms | ★★☆☆☆ |
| 7 | Polyethylene film | 3 mil | ~0.13 perms | ★☆☆☆☆ |
Note: the values above are typical permeance ranges for polyethylene films; always verify what your specific LVP manufacturer requires. If your brand specifies a specific underlayment product (or “no pad”/“attached pad only”), follow that instruction over generic assumptions.
Install the bedroom LVP planks step by step
Start by laying out a clean, square-first layout and locking the click joints without forcing them. When the first few rows of bedroom LVP are true, the rest usually goes faster and looks better.
For click-lock (floating) LVP, forcing joints can prevent proper engagement and can create future seam gaps.
A dry-fit layout helps you place staggered seams correctly and keeps long edges visually straight from wall to wall.
– Start with a layout that keeps long edges straight and visual seams balanced (begin from a reference wall and dry-fit a few rows)
– Lock planks together per the click-lock direction rules (don’t force joints—misalignment is a fast path to gaps)
– Work row-by-row, trimming planks as you go, and maintain consistent stagger:
Set the room up for straight rows
– Pick your starting wall (usually the longest straight wall or the one with the best visual reference).
– Dry-fit 2–3 rows to see how the cuts land at the far wall. Adjust the start line so the last plank isn’t a tiny sliver.
– Use spacers to maintain the perimeter expansion gap. Removing spacers too early is a classic cause of later buckling in bedroom LVP.
Maintain correct joint engagement
Click-lock LVP should:
– click fully without “hanging” the tongue/groove,
– align with minimal lateral movement,
– and not require you to bend the plank excessively.
From a practical standpoint, when joints don’t close smoothly, stop and check:
– debris under the seam,
– a high spot on the subfloor,
– or planks installed in the wrong direction for that particular click profile.
Finish edges, transitions, and baseboards
Start by protecting the perimeter expansion gap while you finish edges—this is where many DIY bedroom LVP installs accidentally get “pinned.” Once transitions and baseboards are correct, your floor should look finished without restricting movement.
Trim placement matters: covering or compressing the perimeter expansion gap can trap a floating LVP floor and lead to buckling.
At doorways, matching transition heights prevents wheel-effect rocking and helps maintain consistent plank support.
– Use the proper trim pieces (quarter round, shoe molding, transitions) so you don’t cover the expansion gap in the wrong places
– At doorways, match to adjacent flooring using the right reducer or transition height so the floor doesn’t pinch
– Reinstall baseboards last if your trim design requires them (the floor should be able to move within the expansion space)
The edge rules that keep LVP stable
– Expansion gap stays visible or covered by “float-safe” trim: Many installs allow the floor to move under shoe molding, while baseboards often need removal to avoid fastening into the floating plane.
– Transitions are not optional in shared areas: If you’re replacing LVP in only one bedroom, plan a transition where the new floor meets the old floor or a different surface. Trapped movement across a wider area can create stresses.
What can go wrong when replacing LVP in a bedroom
Start by recognizing that the most common problems come from prep shortcuts: uneven subfloor, wrong underlayment, and missing expansion gaps. If you understand these failure modes, you can prevent seam separation, noise, and buckling before they happen.
Even small subfloor bumps can translate into LVP joint separation because floating floors rely on consistent plank support.
Ignoring moisture control steps can cause swelling under click-lock LVP, often first noticed as odor or joint release.
– Uneven subfloor or unaddressed soft spots can cause joint separation, clicking noises, and bounce—fixing this later is much harder
– Wrong underlayment or missing moisture protection can lead to moldy odor, swelling, or failed locking (especially on slabs): verify your product requirements
– Skipping expansion gaps or pinning the perimeter with tight trim can cause buckling when temperatures/humidity shift
DIY vs. pro: where the line usually is
If you’re deciding whether to do bedroom LVP replacement yourself, this comparison helps clarify where risk concentrates:
| Approach | Best for | Strengths | Main risks |
|---|---|---|---|
| DIY click-lock replacement | Small bedroom scope, stable subfloor, clear brand instructions | Lower cost, faster control of layout and seams | Prep errors (flatness/moisture/expansion) can force partial re-dos |
| Professional replacement | Major leveling, suspected moisture issues, complex transitions | Equipment for leveling and moisture diagnostics, experience with system details | Higher cost; you still need the installer to follow your LVP spec precisely |
Verdict: Should you replace LVP floors in your bedroom yourself?
Start with this practical recommendation: DIY bedroom LVP replacement is usually reasonable for click-lock planks when the subfloor is flat and dry enough to meet the manufacturer’s tolerances. The biggest downside is that installation errors—especially moisture/underlayment mismatches or incorrect expansion gaps—can show up quickly and may require removing large sections to fix.
If your LVP is click-lock and the subfloor meets the specified flatness tolerance, DIY replacement often succeeds because the floor system is designed to float and lock together.
If moisture testing or significant leveling is required, hiring a pro reduces the chance of recurring swelling, odor, or joint failure in bedroom LVP.
If you have reasonably flat subfloor, your LVP is click-lock, and you can measure carefully and follow the manufacturer steps, DIY replacement is often straightforward. The main downside is that installation errors (subfloor flatness, moisture/underlayment mismatch, or incorrect expansion gaps) can show up quickly and may be hard to correct without redoing sections—sometimes the only fix is replacing more planks. You should consider hiring a pro if you find major subfloor issues (water damage, extensive leveling needs) or if your LVP system requires glue-down steps that you’re not comfortable executing to spec: .
Quick LVP replacement checklist (scan/save)
| Task | Why it matters | Done? |
|---|---|---|
| Confirm click-lock vs. glue-down and get brand instructions | Keeps underlayment, seams, and gaps correct | ☐ |
| Remove trim as needed | Lets rows slide/fit correctly near walls | ☐ |
| Inspect and clear subfloor (debris, nails, damage) | Prevents bumps and failed locking | ☐ |
| Level/flatten to manufacturer tolerance | Stops joint separation and movement | ☐ |
| Install required underlayment/moisture barrier | Prevents moisture issues and supports performance | ☐ |
| Maintain required expansion gap at walls | Avoids buckling | ☐ |
| Dry-fit layout before locking rows | Helps keep cuts neat and seams aligned | ☐ |
| Use correct trim/transitions without pinning the floor | Maintains movement and consistent heights | ☐ |
Sources
– ASTM F710-21 (Standard Practice for Preparing Concrete Floors to Receive Resilient Flooring, including surface readiness/flatness expectations)
– ASTM F1869 (Standard Test Method for Measuring Moisture Vapor Emission Rate of Concrete Subfloor Using Anhydrous Calcium Chloride)
– ASTM E1745 (Standard Practice for the Classification of Determining Underlayment Materials Based on the Tensile/Compressive Properties and Resistance to Moisture)
You’ll get the best result by treating LVP replacement like a “prep-first” job: remove old planks carefully, verify the subfloor is flat and dry, then install the new planks with the correct underlayment and expansion gaps. If you do those fundamentals well, the final bedroom floor will look clean and stay stable; if you skip them, the floor may lock at first but still separate or buckle as conditions change.
Frequently Asked Questions
What tools and materials do I need to replace LVP flooring in a bedroom?
You’ll typically need a utility knife, pull bar or pry bar, tapping block, spacers, and a rubber mallet for click-lock LVP planks. For subfloor prep, have a scraper, floor leveling compound (if needed), and a vacuum for dust removal. Also plan for underlayment (only if your LVP requires it), transition strips, and matching LVP trim or quarter round to finish edges. If you’re replacing only part of the bedroom, bring a spare plank or matching leftover box so color and wear pattern blend correctly.
How do I replace damaged or worn LVP planks without removing the whole floor?
For click-lock LVP, you can often remove planks by starting at the nearest seam and working your way toward the damaged area, using a pull bar to release the locking joints. If the plank is glued-down LVP, you may need to cut the damaged section out carefully with a utility knife or oscillating tool, then remove adhesive residue from the subfloor. After removing the damaged planks, inspect the underlayment and subfloor for moisture, dips, or debris, then reinstall replacement planks using the correct locking method or adhesive instructions. Finally, leave appropriate expansion gaps around the perimeter so the LVP can float properly in a bedroom’s temperature and humidity changes.
How do I prepare the subfloor before installing new LVP in a bedroom?
Start by removing the old flooring and thoroughly cleaning the subfloor so no dust, adhesive, or debris remains. Check for flatness—most LVP manufacturers require a specific tolerance (often about 1/8 inch over 6 feet)—and use floor leveling compound to fix low spots. Make sure the subfloor is dry and firm; plywood should be intact with no soft spots, and any concrete should be dry enough to avoid moisture issues. This preparation step is crucial for a long-lasting LVP replacement in bedrooms, where comfort and stability underfoot matter.
Why does my new LVP replacement look uneven or have gaps after installation?
Unevenness and visible gaps usually come from an out-of-flat subfloor, incorrect underlayment use, or planks being installed without proper expansion space. LVP floors “float” and need a small perimeter gap—then baseboards and trim can cover it—so it can expand and contract with bedroom temperature changes. Also verify plank locking compatibility and that replacement boards match the thickness and locking profile of the existing LVP. If you installed too tightly around walls or failed to tap planks fully into the locking seam, the floor can separate and leave gaps.
Which is better for bedroom LVP replacement: DIY or hiring a flooring installer?
DIY can be a good option if you have click-lock LVP, access to matching planks, and basic tools for careful removal and subfloor prep. Hiring a professional is often worth it if your bedroom has glued-down LVP, tricky transitions (doorways, closets, or hall connections), or significant subfloor repairs needed for leveling and moisture control. A pro installer can also help ensure correct underlayment selection, expansion gap placement, and seamless transitions for a cleaner finished look. If you want the replacement to blend well visually and perform reliably for years, consider the complexity of your specific LVP type and the condition of the bedroom subfloor.
📅 Last Updated: October 27, 2026 | Topic: How to replace LVP floors in a bedroom? | Content verified for accuracy and freshness.
References
- Vinyl flooring
- Asbestos | US EPA
- Asbestos – Overview | Occupational Safety and Health Administration
- https://www.epa.gov/lead/lead-based-paint-renovation-repair-and-painting-program
- https://www.armstrongflooring.com/resources/installation-guides.html
- MohawkFlooring
- https://scholar.google.com/scholar?q=how+to+replace+luxury+vinyl+plank+LVP+flooring+in+a+bedroom Google Scholar
- https://scholar.google.com/scholar?q=luxury+vinyl+plank+click+lock+floor+installation+guide+subfloor+preparation Google Scholar
- https://scholar.google.com/scholar?q=resilient+flooring+installation+guidelines+removal+of+existing+flooring+subfloor+prep Google Scholar