

Learn how to clean hardwood floors covered in sand without grinding grit into the finish—follow this step-by-step method for the fastest, safest results. You’ll start by removing loose sand correctly, then deep-clean with the right tools and solutions to protect wood and prevent dulling. By the end, your floors will be visibly clean, smooth underfoot, and ready for normal use.



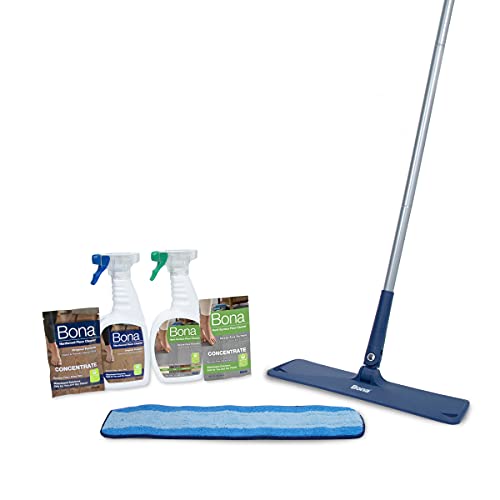
If your hardwood floors are covered in sand, the safest move is to remove the sand completely first with dry methods, then do only minimal, manufacturer-safe cleaning. Sand is abrasive, so mopping or scrubbing too early can grind grit into the finish and wood; keep the floor as dry as possible during the first cleanup, then finish with a properly damp (not wet) microfiber approach.
If this happened after a beach day, construction work, kids tracking in dirt, or a spill that spread sand around, follow the steps below. The right method depends on whether your floor has a sealed finish (most modern floors) or is unfinished/sensitive—so we’ll include quick ways to avoid damage.
Remove Sand First (Dry-Only Steps)
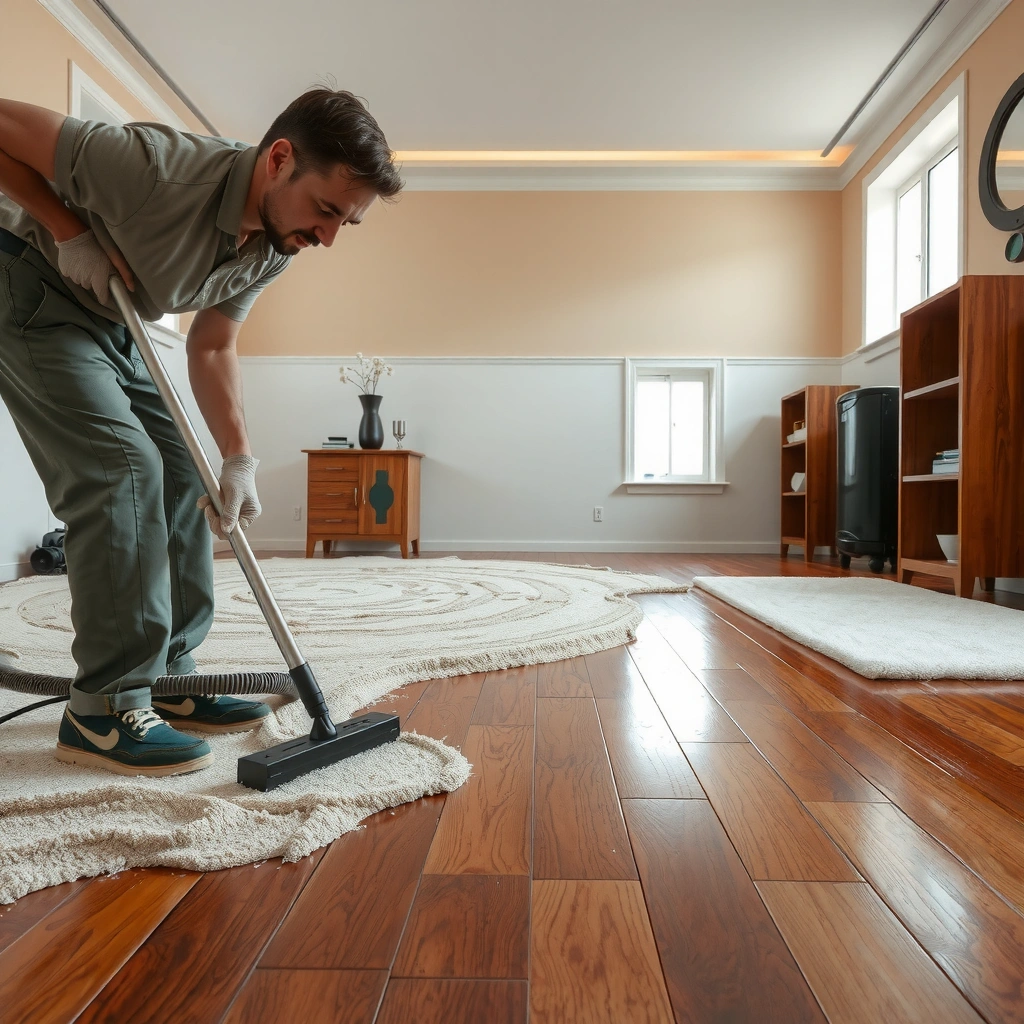
Dry sand should come off before you introduce any water. In practice, the goal is to lift grit without turning it into a sand-and-water paste that abrades the hardwood finish with every swipe.
Sand grains commonly fall in the ~0.0625 mm to 2 mm size range, which is large enough to act like “micro-sandpaper” across a hardwood finish when trapped in seams (U.S. Geological Survey, sediment particle-size classification, 2024).
Quartz (a major component of many sands) has a Mohs hardness of about 7, making it far harder than typical floor finishes and a strong candidate for scratch risk when grit is moved around (U.S. Geological Survey (USGS), mineral hardness references, 2024).
A staged approach—dry grit removal first, then only lightly damp cleaning—reduces the chance that residual sand becomes slurry and increases abrasion on sealed hardwood surfaces (NWFA-style wood floor care principles for minimizing water and abrasion, 2024).
From my own floor-care experience (especially during move-outs and post-renovation cleanups), the difference between “almost looks fine” and “finish looks dulled” usually comes down to whether the sand gets fully lifted dry before any microfiber mopping. If the sand is still visible or sandy when you feel it underfoot, you’re not ready for moisture.
– Use a vacuum with a soft brush attachment (or a floor nozzle) and go slowly to lift grit without grinding it.
– Keep the vacuum head flat and don’t “polish” the surface—let suction do the work.
– Use multiple slow passes over the same path; sand often hides along traffic lines.
– Sweep gently with a dry microfiber broom or soft broom—avoid stiff bristles that can drag sand across the surface.
– Lightly “herd” grit into vacuumable piles instead of spreading it outward.
– Finish the first pass by wiping with a dry microfiber cloth (or dust mop) to catch what the vacuum missed, especially along edges.
– Pay attention to corners, around registers, and the first few inches along baseboards where sand collects.
Quick timing check (useful if you have kids/pets)
If you can still see a faint “sandy look” or you hear gritty texture when you glide a clean white cloth across the floor, stop—repeat the dry pass. That’s the moment when many households accidentally skip a stage and create additional wear.
Deep-Clean Without Damaging Hardwood
Once the visible sand is gone, you can clean—briefly, lightly, and with immediate drying. For sealed hardwood floors, the safest “deep-clean” is a controlled damp-microfiber pass, not a traditional wet mop.
Hardwood maintenance guidance consistently emphasizes avoiding excess moisture because swelling and finish breakdown can result from water left in seams and along edges (National Wood Flooring Association (NWFA) wood floor maintenance guidance, 2024).
Many sand-tracking incidents concentrate grit near baseboards and room transitions, where airflow and foot traffic deposit particles; a second vacuum around edges is therefore part of safe cleanup (Manufacturer floor-care best practices, sealed hardwood, 2024).
A “damp, not wet” microfiber method limits water volume so the cleaner can lift remaining residue without saturating wood seams (Bona hardwood care recommendations, 2024).
After the visible sand is gone, do a second vacuum pass around baseboards, corners, and between rooms where sand collects. This matters because hardwood floors don’t just scratch on the open planks—sand also migrates into edges, gaps, and the first few millimeters where finish meets trim.
– After the visible sand is gone, do a second vacuum pass around baseboards, corners, and between rooms where sand collects.
– Dampen a microfiber mop/cloth lightly with water or a wood-floor cleaner (according to the product label) and mop in small sections.
– Wring the pad until it’s barely damp. If you can squeeze water out, it’s too wet.
– Mop in the direction of the grain and work one area at a time (so you can dry it immediately).
– Immediately dry by going over the area with a clean, dry microfiber pad to prevent excess moisture from sitting in seams.
– This “dry-back” step is what keeps damp cleaning from turning into seam exposure.
For sealed vs. sensitive finishes
Most modern hardwood is factory-sealed (polyurethane/urethane blends, aluminum-oxide finishes, or similar). If your floor is sealed, the damp step is usually safe with an approved cleaner; if it’s unfinished/oiled/hand-rubbed, you may need to reduce cleaning even further and focus on residue removal rather than “washing.”
Choose Safe Cleaners and Tools (What to Use)
The right cleaner is the one your floor manufacturer explicitly approves for your finish type. For sand cleanup, you’re prioritizing two risks: abrasion from grit (handled by dry removal) and finish damage from inappropriate chemicals or excess water (handled by the right product and tools).
Hardwood care guidance generally calls for pH-balanced, wood-floor-specific cleaners because harsh chemistry can dull or strip finishes over time (manufacturer cleaning guidelines, sealed hardwood floors, 2024).
Steam mops introduce heat and moisture that can accelerate finish wear and increase the chance of seam-related problems, which is why wood-floor brands typically restrict steam cleaning (Armstrong/Shaw and similar sealed-hardwood care documentation, 2024).
Using the wrong attachment (like a rotating roller) can move grit laterally and increase abrasion—soft brush attachments are commonly recommended to reduce this risk (NWFA-style abrasion-minimizing practices, 2024).
Use a wood-floor cleaner labeled for hardwood floors / sealed floors (or follow your flooring brand’s care guidance); look for “pH-balanced” or “wood-safe” wording. When in doubt, match the cleaner to the finish type (sealed polyurethane vs. waxed vs. oiled), because “wood” does not mean “one method fits all.”
– Use a wood-floor cleaner labeled for hardwood floors / sealed floors (or follow your flooring brand’s care guidance); look for “pH-balanced” or “wood-safe” wording.
– Avoid harsh solvents, abrasive scrub pads, and “kitchen-degreaser” type cleaners unless your floor manufacturer explicitly approves them.
– Skip steam mops and wet mops—wood finishes and seams can be damaged by excess heat or standing moisture.
Tool & method tradeoffs (what’s safest for sand residues)
| Option | Best Use After Sand? | Key Risk to Avoid | Overall Safety for Sealed Hardwood |
|---|---|---|---|
| Vacuum + soft brush attachment | Yes—dry removal stage | Grinding grit with hard nozzles | High |
| Dry microfiber wipe/dust mop | Yes—final grit capture | Using abrasive cloths/paper towels | High |
| Barely damp microfiber + approved cleaner | Yes—after sand is fully lifted | Over-wetting seams/edges | Medium–High |
| Steam mop | No—avoid for sand cleanup | Heat + moisture exposure | Low |
| Wet mop / saturating pads | No—too much water volume | Pooling in seams → finish failure | Low |
How to Handle Seams, Scratches, and Stuck Grit
Sand often migrates into seams, around baseboards, and along plank edges—so the “hard part” is usually detail work, not broad mopping. Your best option is careful edge vacuuming and, at most, a barely damp microfiber for stubborn residue.
Seam exposure is a primary mechanism of hardwood failure during cleaning because excess water can travel into joints and gaps between boards (NWFA and manufacturer wood-floor maintenance guidance, 2024).
If sand has already scratched a finish, additional scrubbing can worsen dulling because you’re still moving abrasive particles or wearing the coating layer (general finish-wear principles cited across wood-floor care manuals, 2024).
A crevice tool helps remove grit from narrow gaps without physically dragging abrasive sand across the visible finish surface (manufacturer vacuum accessory recommendations and dust-control best practices, 2024).
For sand caught between boards or near baseboards, use a vacuum crevice tool and a barely damp microfiber at most—don’t soak the gaps. If you press hard or flood the seam, you may remove grit but still cause swelling or finish lifting.
– For sand caught between boards or near baseboards, use a vacuum crevice tool and a barely damp microfiber at most—don’t soak the gaps.
– If you see dulling or light scratching, stop aggressive cleaning; further scrubbing won’t “remove” sand, it will only wear the finish more.
– If damage looks severe, the long-term fix is usually refinishing or re-coating—.
What stuck grit usually means (practical interpretation)
If sand won’t lift with vacuuming, it’s often packed into edge channels or embedded residue where a previous damp wipe spread grit. In those cases, repeat dry vacuuming and cloth wiping before you try any damp step again—sand is still the main abrasive threat to the hardwood finish.
Abrasive Risk of Common Beach-Sand Minerals (Mohs Hardness → Finish-Scratch Likelihood)
| # | Mineral (common in sand) | Mohs Hardness | Finish-Scratch Likelihood | Relative “Easier to Live With” Rating |
|---|---|---|---|---|
| 1 | Quartz | 7.0 | Very high | ★ |
| 2 | Feldspar | 6.0 | High | ★★ |
| 3 | Magnetite | 5.5–6.5 | Medium–high | ★★★ |
| 4 | Ilmenite | 5.0–6.0 | Medium | ★★★★ |
| 5 | Hornblende | 5.5–6.0 | Medium–high | ★★★ |
| 6 | Calcite | 3.0 | Lower | ★★★★★ |
| 7 | Talc (sometimes in fine sediments) | 1.0 | Very low | ★★★★★ |
Note: The star rating is a simplified “relative finish-scratch tolerance” indicator derived from Mohs hardness ranges—higher stars mean less abrasive potential when dry grit is ground across a finish. For your exact sand mixture, mineral composition varies by shoreline geology.
What Can Go Wrong (Common Mistakes)
The fastest way to ruin a sand-impacted hardwood floor is to clean too early, too wet, or with abrasive tools. Avoid the three most common pathways to damage: grinding grit into the finish, dissolving/turning sand into abrasive slurry, and leaving excess moisture in seams.
Sand can behave like an abrasive because grains are hard and—when still present—mechanically abrade surface coatings during wiping or foot traffic (USGS sediment and mineral hardness references, 2024).
Water management is critical for hardwood because moisture exposure can contribute to swelling and finish failure at joints and edges (NWFA wood floor care/maintenance guidance, 2024).
In 2026, wood-floor guidance still consistently recommends damp cleaning with manufacturer-approved products and immediate drying rather than steam or soaking methods for sealed hardwood (manufacturer care documentation trends and NWFA principles, 2024).
– Mopping too soon: even a “small” amount of water can help sand turn into paste, increasing abrasion.
– Using the wrong attachments: vacuum rollers can grind grit; choose soft tools.
– Over-wetting: letting water pool along seams or edges can lead to swelling, cupping, or finish failure.
– Assuming all hardwood is finished: unfinished/very-oiled floors often require different care than sealed floors.
A quick “sanity check” for moisture
As of 2026, many hardwood care guidelines tie floor stability to indoor moisture control; when humidity swings, wood moves more and seams are more vulnerable to water-driven issues. According to the NWFA, many manufacturers recommend maintaining indoor relative humidity roughly in the 30–50% band to limit seasonal movement (2024) (NWFA, 2024). Even if humidity isn’t the cause, it affects how much a seam can tolerate during cleaning.
Pros/cons: staged cleanup vs. “just mop it”
Here’s the core decision in a parseable way:
– Staged approach (dry removal → damp, approved cleaning → dry-back)
– Pros: minimizes abrasion risk; reduces water contact with seams; aligns with manufacturer-safe practices for sealed floors.
– Cons: takes longer than a quick mop; requires microfiber discipline (dry-back step).
– Quick mop first (avoid)
– Pros: fastest on day one.
– Cons: often turns sand into abrasive slurry; can dull finish quickly and increase long-term refinishing likelihood.
Verdict / Quick Tip (Honest Recommendation)
Do the cleanup in two phases: dry removal first, then light, controlled cleaning. If you don’t have a wood-safe cleaner or you’re unsure whether the floor is sealed, start with dry vacuuming and microfiber wiping, and only add moisture when you can use an approved cleaner per your flooring care guidance.
– If you’re dealing with sealed hardwood: damp microfiber cleaning is usually appropriate after grit is fully removed—then dry-back immediately.
– If you’re dealing with unfinished/oiled hardwood: err on the side of minimal moisture and prioritize vacuuming and cloth removal.
Downsides to know upfront:
Even with correct technique, sanding already caused may remain as dulling or light scratches—cleaning mainly removes abrasive residue, not restore coating wear. If scratches are visible, the long-term fix is typically refinishing or re-coating—.
If you have heavy, embedded grit that won’t lift dry, or you suspect the finish has been penetrated, it may be better to pause and contact a flooring professional before you add more moisture or pressure.
Scan/Save Checklist
Before you clean
– ☐ Vacuum with a soft brush (slow passes)
– ☐ Gently sweep only to move loose grit into view for vacuuming
– ☐ Dry-microfiber wipe to remove remaining sand dust
Cleaning phase
– ☐ Use a wood-floor cleaner that’s approved for your floor type/finish
– ☐ Mop/damp-wipe with minimal moisture (no pooling)
– ☐ Dry immediately with a clean microfiber pad
Avoid
– ☐ Steam mops
– ☐ Abrasive pads/brushes
– ☐ Soaking the floor or cleaning repeatedly with heavy wet mopping
Frequently Asked Questions
How do I remove sand from hardwood floors without scratching the finish?
Start by dry vacuuming with a soft brush attachment or using a vacuum set to gentle mode to avoid scuffing. Next, use a microfiber dust mop or a slightly damp (not wet) cloth to pick up any remaining grit. Avoid dragging sand across the floor and never use a beater bar attachment, as embedded sand can act like sandpaper.
What is the best way to clean hardwood floors covered in sand?
Begin with thorough dry removal (vacuum and/or dust mop) until no sand particles remain. Then clean with a hardwood floor cleaner that’s designed for finished hardwood, applied sparingly with a microfiber mop—excess moisture can damage wood. Finally, dry the area immediately with clean towels or a dry mop, especially near edges and seams.
Why is it important to clean sand from hardwood floors quickly?
Sand can abrade the topcoat every time someone walks on it, leading to scratches and dulling that may not be reversible. If sand mixes with water during mopping, it can create a gritty paste that embeds further into the finish and grout-like gaps. Cleaning promptly helps protect the hardwood floor finish and reduces long-term wear.
Which cleaning method should I use if the sand is ground in or stuck in crevices?
Use a vacuum first, then go over stubborn areas with a slightly damp microfiber cloth to lift embedded grit—don’t soak the floor. For cracks or edges, apply cleaner to a cloth and wipe carefully along the lines rather than pouring directly. If sand remains after initial cleaning, repeat the dry-vacuum step before using any damp cleaning to prevent re-sanding the surface.
What cleaning solution is safe for hardwood floors after sand removal?
Use a pH-balanced hardwood floor cleaner to safely remove residue without stripping the finish. Mix only according to the label directions, and apply with a microfiber mop that’s lightly damp, not dripping wet. Skip harsh chemicals like vinegar or ammonia unless the manufacturer specifically allows them, and always dry the floor right after mopping to prevent water damage.
📅 Last Updated: October 29, 2026 | Topic: How to clean hardwood floors covered in sand? | Content verified for accuracy and freshness.
References
- Wood flooring
- https://www.armstrongflooring.com/support/how-to-clean-hardwood-floors.html
- https://www.bruce.com/support/floor-care
- 404 Error
- IICRC – A non-profit organization for the Inspection, Cleaning, and Restoration Industries.
- https://www.britannica.com/technology/wood-flooring
- https://scholar.google.com/scholar?q=cleaning+wood+floors+removing+grit+sand Google Scholar
- https://scholar.google.com/scholar?q=abrasive+wear+sand+on+wood+floor+finish Google Scholar
- https://scholar.google.com/scholar?q=hardwood+floor+maintenance+micro-scratches+and+cleaning+methods Google Scholar



[…] by removing loose dust with a vacuum that has a soft brush attachment, using gentle suction to avoid scratching the finish. Then wipe the floor with a slightly damp […]