


Want to waterproof vinyl floors with a patio? The fastest, most reliable route is to use a proper exterior-rated sealant and transition system plus thorough subfloor prep so water can’t creep under the vinyl. This quick guide shows the exact steps to block moisture at the patio edge, joints, and seams—before problems like lifting or bubbling start.




Waterproofing vinyl floors near a patio is mostly about stopping water at the subfloor and at the patio threshold/perimeter—not on the vinyl surface. If you seal the substrate properly (including seams and edges) and create a watertight transition where patio water could reach, you’ll dramatically reduce warping and gapping risk.
Water tends to move laterally: splash and wind-driven rain reach the exterior edge first, then travel along the slab/subfloor or through a weak transition. That means the “winning” solution is a waterproof envelope at the substrate level plus a correctly detailed doorway/patio edge so water can’t wick under the flooring.
This guide is for homeowners dealing with patio door splash, rain-driven moisture, or occasional puddling right at the exterior/interior edge where vinyl meets the patio. Because the exact method changes based on whether your vinyl is click-lock or glued down—and how close it sits to direct moisture—you should treat this as a transition-and-substrate project first.
Who this is for (and when patio moisture matters)
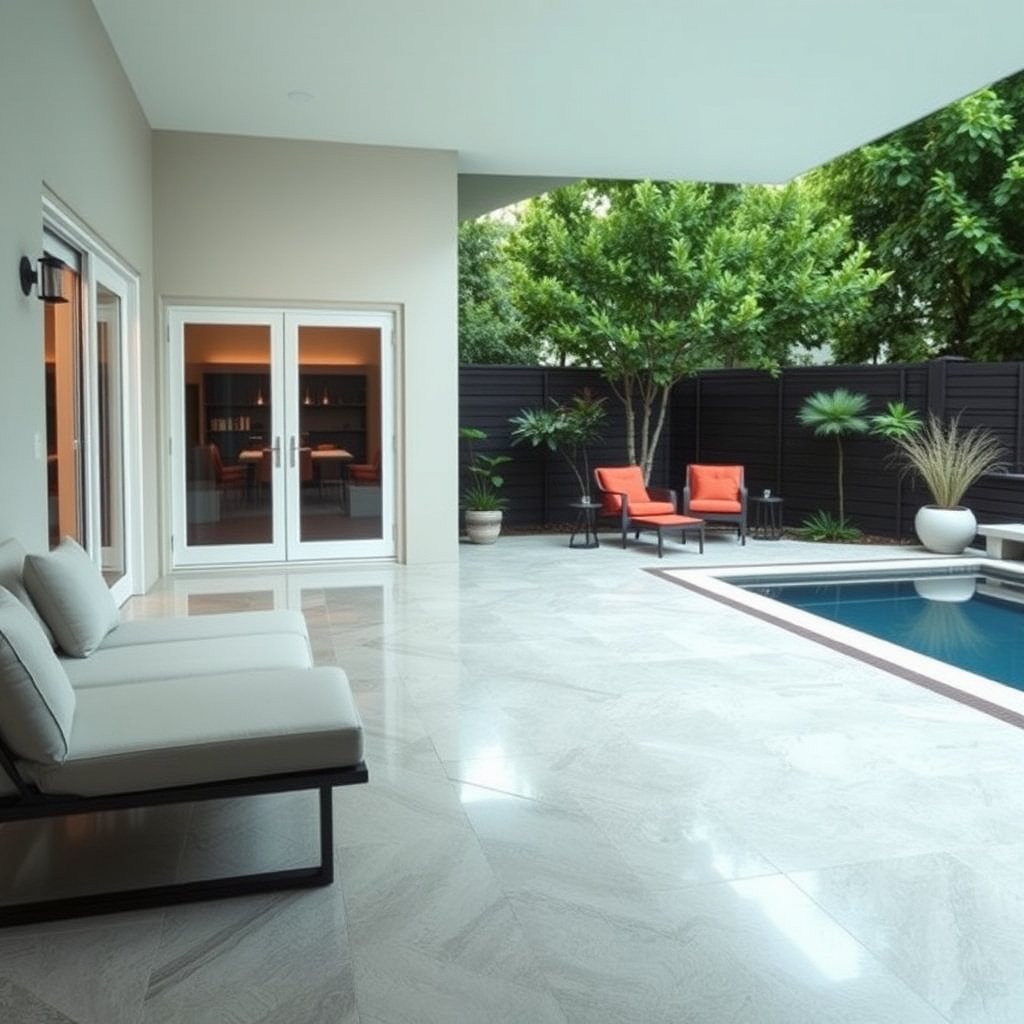
If patio water can reach the flooring edge, waterproofing is often worth doing—provided you also meet your vinyl manufacturer’s moisture and installation limits. If your flooring area is outdoors-rated or regularly exposed to standing water, vinyl is frequently outside the manufacturer’s approved conditions, and waterproofing alone may not be a long-term fix.
Most vinyl failures near exterior doors are caused by moisture migrating under or at the perimeter—not by the vinyl top layer being directly “wet” (installation guidance focuses on substrate moisture control).
Concrete slab moisture testing is typically standardized (for example, ASTM F1869 calcium chloride results are reported as lb/1,000 sq. ft. per 24 hours), so skipping testing can leave you waterproofing the wrong problem.
Waterproofing details must address edge and penetrations because water follows the path of least resistance along seams, floor-to-wall lines, and threshold gaps.
This applies when your patio door gets splash, when rain runoff overshoots landscaping and reaches the slab edge, or when you sometimes step in wet shoes and the wetting concentrates at the doorway perimeter. It may not be the right fix if the vinyl area is outdoors, regularly exposed to standing water, or subject to frequent flooding—vinyl manufacturers often specify strict limits for moisture exposure and subfloor conditions.
Materials & prep you’ll need before waterproofing
You’ll get the best results by using a complete waterproofing system (primer + membrane + compatible seam/edge detailing), not random “waterproofing” products. Before you open any packaging, confirm compatibility with your subfloor and—critically—with your specific vinyl installation method (click-lock floating vs glued down).
A waterproofing system only works as designed when primer, membrane, and flashing/seam products are used together per the system instructions (mix-and-match products can fail at seams).
Vinyl flooring warranties are commonly conditional on moisture testing and on installing over approved substrates/underlayments (manufacturer specifications govern what “approved” means).
Here’s what you should line up before you start:
– Use a waterproofing system compatible with your subfloor and the waterproofing product (often a primer + membrane + seam tape/flashing).
– Follow the vinyl flooring manufacturer’s moisture limits and installation requirements; use the required underlayment/adhesive only if they’re allowed by that manufacturer.
Quick reality check on testing (do this before you buy anything)
If you’re planning to waterproof and then install vinyl, it’s still essential to know whether your slab/subfloor is within acceptable moisture conditions. Waterproofing can prevent liquid water migration, but it can’t magically fix chronic high moisture coming from the slab itself.
For context on standardized testing methods:
– According to ASTM F1869, the calcium chloride test reports vapor emission rate in lb/1,000 sq. ft. in 24 hours (ASTM F1869).
– According to ASTM E96, vapor transmission uses perm-based measurements (ASTM E96).
– According to ASTM F2170, in-situ relative humidity is measured at the slab depth using probes and reported as %RH (ASTM F2170).
Waterproof the vinyl floor area (focus on substrate, not just the vinyl)
The surest way to protect vinyl near a patio is to waterproof the substrate “field” and penetrations so water can’t reach the layer underneath. Start with clean, flat preparation, then apply the waterproofing membrane system over the area that water could realistically travel.
Waterproofing should be installed over sound, properly prepared substrate; membranes can fail if they bridge cracks, voids, or sharp transitions.
Treat penetrations (door hardware, conduits, plumbing stubs) immediately during membrane installation, because these points concentrate leak risk.
For resilient flooring, controlling moisture at the substrate level is the typical strategy, while the vinyl surface alone is not relied upon as the primary barrier.
Follow a system approach:
– Clean and prep the subfloor thoroughly, then repair cracks/voids so your waterproofing layer doesn’t bridge over damage.
– Apply the waterproofing membrane over the floor “field” per the system instructions (including any required primer), and treat penetrations immediately.
What “field coverage” should include
“Field” doesn’t mean just the area where the vinyl panels will sit—it means the area water can reach under normal patio conditions. In practice, that often includes:
– The vinyl footprint plus an extra margin toward the patio edge/door zone (to catch splash-driven migration).
– Any low spots where runoff pools before drying.
– The transitions around fixed objects (thresholds, door jamb bases, and structural penetrations).
How you avoid common substrate-membrane failures
If the substrate is dusty or uneven, the primer/membrane may not bond properly. If you place membrane over unfilled cracks, you may create a “bridge” that cracks later and becomes a leak path. For best results, treat prep as a waterproofing task—not a housekeeping step.
Make the patio threshold and perimeter truly watertight
Your biggest leak risk is the transition: patio edge/curb, the base of doorframes, and any expansion or gap lines where water can wick under. Waterproof the perimeter using the waterproofing system’s flashing/corner details, then seal after the membrane is installed so water can’t travel into the joint.
Perimeter flashing is where most waterproofing performance is won or lost because water reaches edges first and seeks small gaps.
Waterproofing transitions must include the correct upturn height/edge detailing; otherwise, water can bypass the membrane and reach the next layer.
Seam and edge sealing after membrane installation helps prevent capillary action (wicking) along floor-to-wall and underlayment seams.
This section is critical. Use perimeter-specific detailing from your waterproofing system:
– Waterproof the transition where patio moisture can travel: patio edge/curb, base of doorframes, and any expansion gaps—use perimeter flashing/corner detailing from the waterproofing system.
– Seal joints and edges after the membrane is installed, so water can’t wick under the vinyl via seams or the wall/floor line.
Click-lock vs glued-down: why the perimeter still matters
Even with click-lock (floating) vinyl, water intrusion at the perimeter can still travel under the assembly and contribute to swelling or edge lifting. With glued-down vinyl, perimeter moisture is often even riskier because adhesives and underlay layers can be affected by persistent moisture.
That’s why you should plan the perimeter detailing first, then install flooring only after the waterproofing system is fully cured and compatible with your chosen vinyl method.
A practical approach for the doorway zone
For 2026 installations, most successful DIY-or-contractor projects treat the exterior door area as a “wet transition” and build a watertight perimeter layer that overlaps the floor membrane appropriately. If your patio is subject to splash, include the portion of the slab/landing where splash could land even on windy or heavy-rain days.
What can go wrong
Waterproofing near patios can still fail if water finds a bypass path, if the waterproofing and vinyl systems are incompatible, or if the slab is too wet in the first place. The goal is to prevent three failure modes: bypass leakage, system incompatibility, and chronic moisture vapor pressure.
If perimeter detailing is skipped, water can migrate under the waterproofing layer and still cause swelling—even when the membrane looks intact.
Compatibility problems can come from using the wrong underlayment or membrane system, which can affect bonding, dimensional stability, or warranty compliance.
Waterproofing addresses external liquid water pathways, but it does not reliably solve chronic high subfloor moisture vapor pressure if the slab exceeds resilient flooring limits.
– Water gets underneath the system: if perimeter/threshold detailing is skipped, water can migrate under the waterproofing layer and still cause swelling.
– Wrong waterproofing compatibility: some membranes or underlayments can interfere with click-lock stability or violate the vinyl manufacturer’s warranty requirements.
– Moisture trapped in the slab: waterproofing can’t fix chronic high subfloor moisture—if the slab is too wet, the problem may continue.
Pros/cons: two ways homeowners try to solve “patio moisture at the edge”
Below is a comparison structure you can use while deciding whether waterproofing + vinyl makes sense.
| Option | What you’re protecting | Strengths | Key downsides |
|---|---|---|---|
| Waterproof envelope + patio transition detailing + vinyl (approved) | Substrate field and perimeter path | Best fit for splash/rain runoff/occasional puddling near the edge | Still limited by slab moisture limits and cure/compatibility requirements |
| Replace with flooring intended for wet/exterior conditions (or pro-rated system) | Liquid exposure and repeated wetting | More tolerant of frequent moisture events | Higher cost; may change feel/underfoot comfort; requires correct exterior-grade detailing |
Verdict / tip
Best approach: build a waterproof “envelope” at the substrate and patio transition, then install vinyl only if your vinyl is approved for that moisture environment and the waterproofing system is compatible. In 2026, the most repeatable results come from treating this as a threshold/perimeter waterproofing project first—then letting the vinyl be the finish layer after cure.
When water can reach the floor edge, the most reliable strategy is stopping water at the substrate and creating a watertight transition—not relying on the vinyl surface.
Vinyl longevity near patios is typically conditional on passing substrate moisture testing and installing with manufacturer-approved underlayment/adhesives.
Downsides to consider:
– If you’re expecting regular standing water, freezing/expansion cycles, or frequent flooding, vinyl may still fail over time—even with good waterproofing. In that case, consider a flooring type meant for wet/exterior exposure instead, or hire a pro.
– If any part of the moisture level, cure schedule, or transition detailing is unclear, pausing is cheaper than replacing.
Who should skip DIY (or get a specialist):
– You can’t confirm subfloor moisture conditions (or you haven’t tested).
– The patio area has heavy/regular pooling or recurring runoff that reaches the door zone.
Quick checklist (scan before you start)
– Confirm vinyl type (click-lock vs glue-down) and moisture limits with manufacturer instructions
– Inspect subfloor flatness and repair cracks/low spots
– Prime (if required by the waterproofing system)
– Install waterproof membrane per system instructions (field + seams)
– Detail the patio threshold/perimeter with flashing/corner/seam tape (minimum upturn height per system)
– Seal edges/gaps so water can’t wick under
– Allow required cure times before vinyl installation
A checklist helps prevent the two highest-risk omissions in patio-adjacent vinyl installs: perimeter detailing and cure/compatibility sequencing.
US Perm Vapor Retarder Classes (IRC/IBC-style thresholds)
| # | Permeance (US perms) | Vapor Retarder Class | Moisture Barrier Strength | Class Summary |
|---|---|---|---|---|
| 1 | 0.01 | Class I | ★★★★★ | Very low permeance |
| 2 | 0.02 | Class I | ★★★★★ | Very low permeance |
| 3 | 0.05 | Class I | ★★★★★ | Very low permeance |
| 4 | 0.10 | Class I (boundary) | ★★★★☆ | Low permeance |
| 5 | 0.50 | Class II | ★★★☆ | Moderate permeance |
| 6 | 2.00 | Class III | ★★☆☆☆ | Higher permeance |
| 7 | 10.00 | Class III (upper boundary) | ★☆☆☆☆ | Very high permeance |
The table above is a reminder that *vapor control* is measured in perms using permeance thresholds used in building code guidance; your patio-adjacent slab can have moisture vapor pressure that waterproofing must still respect. If your slab is too wet, waterproofing the edge may not be enough. (See ASTM E96 for perm-based vapor transmission testing method context, and your jurisdiction’s code documents for the exact class thresholds.)
Frequently Asked Questions
What’s the best way to waterproof vinyl flooring on a patio?
Start by choosing a patio vinyl product rated for outdoor use and moisture exposure, since not all vinyl can handle standing water. Prepare the subfloor with a waterproof, smooth underlayment or patch any cracks and low spots so water won’t pool. After installation, seal all seams, edges, and penetrations with a waterproof vinyl floor seam tape and an appropriate sealant to prevent water from migrating underneath.
How do I waterproof vinyl patio flooring edges and seams?
Waterproofing edges and seams is critical because water usually enters through gaps and transitions. Use a seam tape made for vinyl flooring and apply a compatible waterproof sealant along both sides of every joint, including around borders and step-down areas. If your patio has expansion gaps or transitions to other surfaces, fill and seal them with a weather-resistant caulk designed for exterior flooring systems.
Can I use an underlayment to waterproof vinyl floors for outdoor patios?
Yes—using a moisture-resistant or waterproof underlayment can improve water protection, especially where the subbase is uneven or prone to dampness. Look for an underlayment specifically intended for vinyl flooring and outdoor or exterior moisture conditions, then install it according to the manufacturer’s instructions. Make sure the underlayment doesn’t trap water; the goal is to block moisture from below while allowing the system to remain stable.
Why do vinyl patio floors still leak even after installation?
Vinyl flooring leaks most often because seams, edges, or transitions weren’t sealed, or because water is pooling and finding the weakest entry points. Poor subfloor preparation—like cracks, gaps, or low areas—can also cause water accumulation that over time seeps under the vinyl. Finally, using the wrong sealant or not following the flooring manufacturer’s installation method can leave pathways for water intrusion.
Which sealant or coating should I use to waterproof vinyl floors outdoors?
For waterproofing vinyl patio floors, choose a sealant that is compatible with vinyl and rated for exterior, weather-resistant performance. Many homeowners use a waterproof seam sealant or exterior polyurethane/marine-grade sealants for joints, edges, and perimeter areas, but always verify compatibility to avoid discoloration or damage. Avoid harsh solvents and incorrect coatings that can degrade vinyl—follow product directions and test a small area first if you’re unsure.
📅 Last Updated: October 27, 2026 | Topic: How to waterproof a vinyl floors with patio? | Content verified for accuracy and freshness.
References
- Waterproofing
- Vapor barrier
- Vinyl flooring
- RFCI – Resilient Flooring Covering Institute
- Mold | US EPA
- https://www.cdc.gov/mold/default.htm
- https://scholar.google.com/scholar?q=waterproofing+luxury+vinyl+plank+outdoor+patio Google Scholar
- https://scholar.google.com/scholar?q=vinyl+flooring+moisture+barrier+underlayment+installation Google Scholar
- https://scholar.google.com/scholar?q=resilient+floor+covering+installation+guidelines+moisture+water Google Scholar
[…] labor using your local rates. This guide gives a clear budgeting method with the key cost drivers—subfloor prep, baseboards/trim, underlayment (if needed), and weatherproofing—so you can predict your total […]
[…] existing threshold track). In my installs, the cleanest results came from committing early to the transition system’s intended “design contract”: profile + mounting channel + fasteners/adhesive + seal […]