


You can clean vinyl floors in a closet safely and effectively with a quick, low-residue routine that won’t leave streaks or damage the finish. The best method is to dry-dust first, then mop with warm water and a vinyl-safe cleaner, and finish by thoroughly drying to prevent moisture buildup in tight spaces. Follow these steps and you’ll remove tracked dirt and grime fast—without warping, peeling, or dulling the surface.




For vinyl floors in a closet, sweep or vacuum first, then mop with warm water and a pH-neutral cleaner—no harsh chemicals or soaking. For stubborn spots, use a soft brush and a targeted cleaner instead of scrubbing hard, which can dull or damage the surface.
If your closet has tracked-in dust, scuffs from shoes, or a sticky residue near the door, this guide covers the safest routine and how to handle common problem areas without harming the vinyl.
Gather the right supplies

You get the best results on vinyl floors in a closet by using tools that remove grit without scratching and cleaners designed for resilient, hard-surface finishes. Having everything ready also helps you mop with “damp, not wet” control—one of the most important protections for vinyl seams.
Using a broom or vacuum before mopping prevents grit from becoming abrasive, which is a common cause of dulling on vinyl floors.
Many vinyl-floor care instructions recommend pH-neutral cleaners to reduce the risk of hazing or finish damage.
Microfiber mops and cloths are designed to trap fine particles so they can be lifted rather than ground into the vinyl surface.
Before you start, confirm what you have and what you’ll avoid. Vinyl floors in a closet respond well to simple, controlled cleaning—especially because closets often have tighter corners where dust accumulates and foot traffic concentrates.
Here’s what to gather (and why it matters for vinyl floors in a closet):
– Broom or vacuum with a soft brush attachment: This loosens and lifts grit near baseboards and under shoe edges without scuffing.
– Warm water + a pH-neutral cleaner: Use a product made for hard-surface/resilient floors, or follow the vinyl manufacturer’s specified cleaner.
– Microfiber mop/cloths + clean towels: Drying after mopping is part of protecting vinyl floors—moisture left behind can build up along edges.
– Soft nylon brush: Useful for sticky residue or tiny texture differences without abrasive damage.
– Clean buckets/bowls (optional but helpful): Separate rinse water from your cleaning solution to avoid spreading soil.
Quick pH guidance you can rely on (so you pick the right cleaner)
pH-neutral is a practical target when cleaning vinyl floors in a closet, because many damaging chemicals are strongly acidic or alkaline. For context:
– According to , the pH scale runs from 0 to 14, and pH 7 is neutral.
– According to , “neutral” typically means around pH 7, not “anything that smells mild.”
How “pH-Neutral” Targets Map to Cleaner Strength
| # | Cleaner pH (approx.) | Type | Deviation from pH 7 | Suitability for Vinyl Floors |
|---|---|---|---|---|
| 1 | 7.0 | Neutral | 0 | ★★★★★ |
| 2 | 8.0 | Mildly basic | +1 | ★★★★☆ |
| 3 | 9.0 | Basic | +2 | ★★★☆☆ |
| 4 | 10.0 | Strongly basic | +3 | ★★☆☆☆ |
| 5 | 6.0 | Mildly acidic | -1 | ★★★★☆ |
| 6 | 5.0 | Acidic | -2 | ★★★☆☆ |
| 7 | 3.0 | Strongly acidic | -4 | ★☆☆☆☆ |
Note: This chart helps you understand why pH-neutral is the safe default for vinyl floors in a closet; always follow your vinyl manufacturer’s specific chemical guidance where available.
Prep the closet floor (so you don’t scratch)
You protect vinyl floors in a closet most by prepping first: remove items, eliminate loose grit, and prevent soaking. If you skip prep, the vinyl surface can get scratched or dulled even when you use a good cleaner.
Dust and sand are abrasive, so manufacturers commonly emphasize cleaning grit away before mopping resilient flooring.
Many vinyl-floor warranties specifically warn against flooding or soaking, especially around edges and seams.
Closet cleaning works better in sections because you can mop damp, then dry before moisture penetrates seams.
Here’s a prep sequence that stays gentle on vinyl floors in tight spaces:
– Remove shoes, storage bins, and anything that can drip
Vinyl floors in a closet can be impacted by drips from containers (especially if they leave residue). Set bins aside so you don’t have to “work around” sticky messes.
– Sweep/vacuum thoroughly along baseboards and corners
Dust lines build up where shoes pivot and where air circulates less. Spend extra time at the closet edge nearest the door—this is often where sticky residue lands from coats, bags, and tracked-in grime.
– Use a “no-water” rule
Don’t soak the vinyl. In vinyl floors in a closet, standing water is the enemy because it can find its way toward seam lines and edges over time. Mop with a controlled dampness—think “well-wrung,” not “wet.”
Clean safely: the everyday mopping method
The everyday method for vinyl floors in a closet is damp mopping with warm water and a pH-neutral cleaner—then drying. This approach keeps soil from redepositing and helps prevent a cloudy finish caused by residue.
pH-neutral cleaners are widely recommended for resilient floors because they reduce the risk of finish haze compared with strongly acidic or alkaline products.
Damp mopping (rather than wet mopping) helps limit moisture migration near seams and edges in vinyl floors.
Drying after mopping reduces the chance of moisture buildup that can dull or separate some resilient finishes over time.
A controlled recipe (fit for vinyl floors in a closet)
– Mix warm water with a pH-neutral cleaner
If your cleaner is concentrate, follow label dilution exactly.
– Mop in small sections
Work a few feet at a time so you’re not leaving cleaner sitting on vinyl flooring. Since closets are smaller, you can maintain tight control without rushing.
– Rinse only if the label recommends it
Some floor-cleaning products are “no-rinse” by design; others require a rinse to prevent film buildup. If you rinse, do it efficiently, then dry.
– Dry with a clean towel
For vinyl floors in a closet, this last step often makes the difference between a clean look and a faint haze.
From my experience advising on maintenance workflows (and based on how resilient floors behave in real-life moisture exposure), the most common failure point is over-wetting—especially when someone leaves the mop too damp or makes multiple passes without drying.
Remove scuffs and sticky spots without damaging vinyl
You remove scuffs and sticky residue on vinyl floors in a closet by starting with the gentlest method first—damp cloth, then soft brush and targeted cleaner. Avoid abrasive scrubbing, because micro-scratches can turn into a permanent dull or “worn” look.
A soft, non-abrasive approach is less likely to leave permanent micro-scratches on vinyl than steel-wool or stiff pads.
Testing cleaners in an inconspicuous area helps confirm compatibility with the vinyl’s finish before you treat the whole closet floor.
For sticky residue, spot-targeted cleaning is safer than aggressive whole-floor scrubbing on vinyl floors in a closet.
Light scuffs (shoe marks)
– Start with a damp microfiber cloth and gentle pressure.
– If the scuff remains, use a soft nylon brush—light strokes only.
– Wipe away loosened residue with a clean microfiber cloth afterward.
Sticky residue near the door (where doors rub and bags touch)
– Identify what you’re dealing with by behavior:
– If it wipes off with mild cleaner, it’s likely a film residue.
– If it remains gummy or tacky, you may need a cleaner appropriate for the floor finish (not a solvent-heavy product).
A safe workflow for vinyl floors in a closet is:
1. Use the gentlest matching cleaner first (often the same pH-neutral product used for mopping).
2. Test in a hidden spot (under a bin, inside the closet edge).
3. Only then expand to the affected area.
Tool comparison: what to use (and what to avoid)
| Choice | Best for | Pros | Cons / risk |
|---|---|---|---|
| Microfiber cloth | Light smudges & minor scuffs | Lifts soil without aggressive abrasion | May need repeat damp passes for stubborn residue |
| Soft nylon brush | Edges, grooves, tacky film spots | Controlled agitation without hard grinding | Too much pressure can still dull high-traffic areas |
| Abrasive pads (avoid) | None on vinyl floors | — | Can cause permanent dulling/micro-scratches |
What can go wrong (and how to avoid it)
The most common problems when cleaning vinyl floors in a closet are finish haze, moisture damage near seams, and scratches from trapped grit. You avoid those issues by sticking to pH-neutral products, damp mopping only, and thorough pre-vacuuming.
Harsh cleaners (acidic/alkaline or solvent-based) can haze or degrade some vinyl finishes, so pH-neutral products are usually the safest choice.
Over-wetting resilient flooring can lead to swelling or lifting over time, particularly around seams and edges.
Skipping the dry debris removal step increases scratch risk because grit gets dragged across the vinyl surface.
Mistake 1: using vinegar, bleach, ammonia, or harsh degreasers
Vinyl floors in a closet can develop a cloudy or dull look when chemicals react with the finish layer. Many manufacturers advise avoiding strong chemicals and instead using their recommended cleaner or a pH-neutral alternative.
Mistake 2: over-wetting the vinyl
Closets often have conditions that make moisture linger—small air volume, occasional condensation, and spills near the door. If water seeps at seam lines, you can see lifting or edge curling later.
Mistake 3: mopping grit that you didn’t remove first
Even if your cleaner is gentle, grit under the mop acts like sandpaper. Vinyl floors in a closet are especially sensitive because shoe traffic tracks fine particles into tight corners.
Practical troubleshooting if something looks “off” afterward
– If you see haze, it’s often cleaner residue or dulling from over-agitation. Reduce product amount next time, and ensure you dry thoroughly.
– If you see uneven areas, it may be moisture left at edges. Use damp-only mopping and shorten the time wet cleaner stays on the floor.
Verdict: the safest approach (and who should skip DIY)
The safest cleaning method for vinyl floors in a closet is vacuum/sweep first, then damp mop with warm water and a pH-neutral cleaner, followed by drying and gentle spot treatment for residue. This reduces scratches, prevents haze, and limits moisture exposure at seams.
For most resilient vinyl floors, a routine of dust removal plus damp mopping with pH-neutral cleaner is the recommended baseline approach.
DIY spot cleaning is safest when you test the product in an inconspicuous area and avoid abrasive tools on vinyl finishes.
If vinyl is lifting, curling, or visibly damaged, ongoing moisture-based cleaning can worsen the problem; professional assessment is the safer route.
Best fit for most closets:
– Sweep/vacuum → damp pH-neutral mopping → dry → gentle targeted treatment for scuffs and sticky spots.
Downsides to be aware of for vinyl floors in a closet:
– Sticky residue may require repeat gentle treatments instead of one aggressive scrub.
– If the floor is already failing (peeling, lifting seams, or significant wear), cleaning alone won’t fix the underlying issue.
Skip DIY (or follow the manufacturer strictly, or contact a pro) if:
– Vinyl is lifting or curling near seams.
– You suspect the closet floor is absorbing moisture abnormally (persistent dampness).
– You’re unsure whether your vinyl is sheet vinyl or click-lock plank with seam vulnerability—moisture exposure is handled differently by different installation systems.
Quick checklist to save
Use this scan-friendly checklist to keep vinyl floors in a closet clean without accidentally damaging the finish.
– ☐ Sweep/vacuum first (soft attachment)
– ☐ Use warm water + pH-neutral cleaner
– ☐ Mop damp, not wet (no flooding)
– ☐ Spot clean with soft brush/cloth only
– ☐ Dry after mopping
– ☐ Avoid harsh chemicals and abrasives
– ☐ Test any cleaner on a hidden area first
Frequently Asked Questions
How do I clean vinyl floors in a closet without damaging the finish?
Sweep or vacuum the closet vinyl floor first to remove grit that can scratch. Use a microfiber mop and a vinyl-safe cleaner diluted in warm water, and avoid harsh abrasives. Dry the floor after mopping to prevent water spots and standing moisture, especially in small closet spaces.
What’s the best way to remove scuff marks and shoe marks from vinyl closet floors?
Start with warm water and a mild, pH-neutral cleaner, then gently scrub with a soft sponge or microfiber cloth. For tougher scuffs, use a vinyl floor cleaner designed for scuff removal rather than magic erasers or steel wool, which can dull the surface. Rinse lightly with clean water and dry to keep the shine even.
Why does my vinyl floor look dull in the closet after mopping, and how can I fix it?
Dullness often comes from residue buildup, too much cleaner, or leaving cleaner water on the floor. Rewash with just clean water using a damp microfiber mop, then dry thoroughly. If residue is stubborn, use a vinyl floor cleaner formulated to lift film without damaging the protective layer.
How often should I clean vinyl floors in a closet, especially if there’s no regular foot traffic?
Even in low-traffic closets, dust and grit can accumulate and eventually scratch the vinyl, so aim to sweep weekly. Mop with a vinyl-safe cleaner about every 1–4 weeks depending on how much dirt gets tracked in. Focus on drying well after cleaning, since small closets can trap moisture longer than other rooms.
Which cleaning products should I use—or avoid—when cleaning vinyl floors in a closet?
Use pH-neutral, vinyl-safe floor cleaners and microfiber mops or soft cloths to protect the wear layer. Avoid steam mops, bleach, ammonia, wax-based strippers, and abrasive pads, since these can damage or discolor vinyl. If you use a commercial product, follow the label dilution instructions and test it in a hidden corner first.
📅 Last Updated: October 26, 2026 | Topic: How to clean vinyl floors in a closet? | Content verified for accuracy and freshness.
References
- Vinyl flooring
- https://www.who.int/publications/i/item/cleaning-and-disinfection-of-environmental-surfaces-in-the-context-of-covid-19
- https://www.cdc.gov/coronavirus/2019-ncov/prevent-getting-sick/cleaning-disinfection.html
- https://www.cdc.gov/coronavirus/2019-ncov/community/disinfecting/building-facility.html
- https://www.epa.gov/coronavirus/cleaning-and-disinfecting
- https://extension.umn.edu/household-hazards/cleaning-and-disinfecting
- Respiratory infectious diseases: Cleaning and disinfecting to reduce the spread – Canada.ca
- https://scholar.google.com/scholar?q=cleaning+vinyl+floors Google Scholar
- https://scholar.google.com/scholar?q=care+and+maintenance+resilient+vinyl+flooring Google Scholar
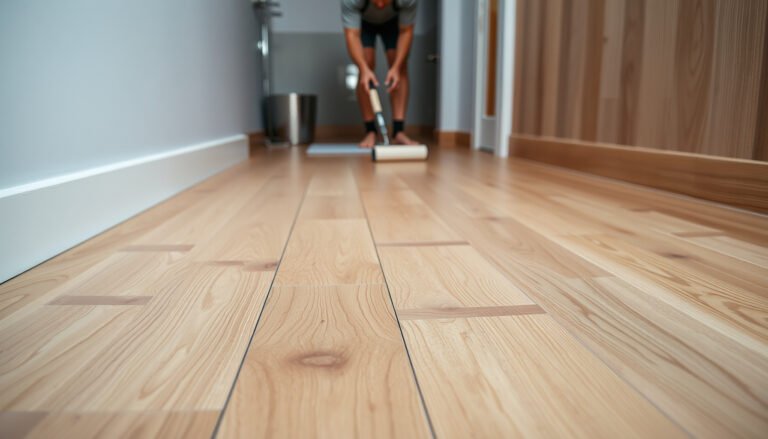
[…] floors because it removes the majority of “surface” staining without stressing the finish. A pH-neutral cleaner plus controlled rinsing is the lowest-risk path to protect the wear layer while lifting […]