


Remove stains from vinyl floors in a laundry room using the fastest, safest method: the right cleaner matched to the stain type. This guide tells you exactly what to use, how long to let it sit, and how to avoid dulling or damaging your vinyl finish. You’ll get stain removal steps that work on common laundry-room marks—without guesswork or harsh abrasives.


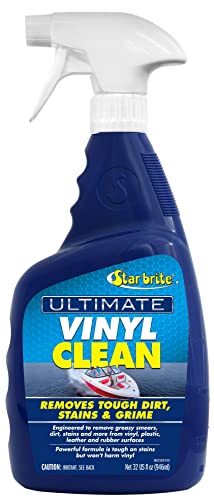

If you want vinyl laundry-room stains gone, start with the gentlest cleaner that matches the stain, and always avoid harsh abrasives or strong solvents. In most cases, you can lift fresh spots with warm water plus a pH-neutral dish or floor cleaner; for set-in marks, you’ll need a careful spot-treatment and a lot of patience. As of 2026, this “blot, rinse, and dry fast” approach remains the safest way to protect the finish while still getting real results in high-moisture laundry areas.
This is for anyone dealing with scuffs, detergent/bleach spills, grime halos, or rust-type spots on vinyl flooring (sheet vinyl or vinyl plank/vinyl tile) specifically in a laundry area where water, detergent, and metal hardware are common.
Identify the stain type and your vinyl finish

If you identify what the stain “is,” you can pick the right cleaner and avoid making the spot spread or set deeper. Start by observing how the mark behaves on contact—then confirm your vinyl’s sensitivity by spot-testing before you commit.
Most vinyl-floor care guidance emphasizes matching the cleaning method to the stain source and avoiding strong chemicals when you don’t know what you’re treating.
pH matters because acidity/alkalinity can affect vinyl finishes; a pH difference of 1 unit corresponds to about a 10× change in hydrogen-ion activity.
– Look for the “behavior” of the stain: does it wipe away like dirt, smear like dye/ink, or stay as a shadow/spot? A shadow that doesn’t lift with mild cleaner often indicates something has reacted with or stained the surface layer rather than just sitting on top. In laundry rooms, scuffs and detergent film usually behave differently than rust or dye transfer, so this quick “wipe test” can save time—and protect the finish.
– Check what’s nearby (rust from appliances, bleach marks near sinks, dye from clothing, oil from dryer sheets, etc.) so you choose the right cleaner. If you see rust-like speckling around metal feet or a “bronze freckles” pattern near the dryer/washing machine base, treat it as a rust/oxidation issue rather than general grime. If the mark is sharply lighter or white-ish and sits where a bleach splash likely occurred, treat it as chemical discoloration rather than ordinary staining.
– Treat based on your vinyl type/finish (some finishes tolerate certain cleaners better than others)—if you don’t know, spot-test first in a hidden area. As of late 2026, many manufacturers still recommend using a manufacturer-approved cleaner and doing a small hidden test when the floor type/finish is unknown. If you bought the home recently and don’t have the original care sheet, your safest path is to start neutral and only escalate carefully.
Quick decision signals (so you don’t guess)
If the stain:
– Wipes away → likely residue/dirt; start with warm water + pH-neutral cleaner.
– Smears → likely dye/ink; you’ll want water-first blotting and minimal mechanical action.
– Stays as a “halo” shadow → likely residue left behind or a more reactive stain (rust or bleach-related change).
Start with safe, gentle cleaning (before stronger stuff)
If you start gently, you’ll remove most laundry-room staining without dulling the vinyl. For fresh spots, warm water and a pH-neutral cleaner—applied with blotting and followed by a thorough rinse and quick drying—are usually enough.
Leaving behind cleaner residue can create a “cleaning halo” on vinyl, so rinsing and drying promptly are part of effective stain removal.
Microfiber or soft cloth cleaning reduces the risk of surface scratching compared with abrasive scrub pads on resilient vinyl floors.
– Clear loose debris first, then use a microfiber or soft cloth—don’t drag grit across the surface. Laundry rooms collect tiny abrasive particles (sand, detergent powder granules, lint). If you push that debris around during stain removal, you can turn a small stain into a larger dull patch.
– Mix a mild, pH-neutral cleaner with warm water, then blot the stain (don’t scrub aggressively). Blotting lifts dissolved soil and reduces friction on the finish. Scrubbing can grind residue into the pores/microtexture of sheet vinyl or the top wear layer of vinyl plank/vinyl tile.
– Rinse with clean water and dry right away, because left-behind residue can create a dull ring or “cleaning halo.” Think of this as the final “reset.” If you don’t rinse, the cleaner chemistry may dry into a visible film that looks like the stain returned.
Target common laundry-room stains (match cleaner to stain)
If you match the cleaner chemistry to the stain source, you’ll get faster lift and fewer permanent changes. In a laundry room, the most common culprits are detergent film, oily residue (from dryer sheets and hands/cloth transfer), dye transfer, and bleach-related discoloration.
Detergent and laundry-water marks are often surfactant/fabric-finish residues; warm water plus a mild pH-neutral cleaner typically lifts them when followed by rinsing.
Grease/oily residues repel water and can leave a slippery film—mild dish soap solutions can emulsify oils so they rinse away more cleanly.
– Detergent or laundry-water marks: Use warm water + mild dish/floor cleaner, blot repeatedly, and rinse thoroughly. Start with low dwell time—keep the surface visibly wet only briefly (just enough to loosen residue), then rinse. If detergent film has dried before you treat it, plan on multiple short rounds rather than one aggressive scrub.
– Grease/oily residue (often from dryer-related buildup or hands/cloth transfer): Wipe with a grease-cutting, mild dish soap solution; follow with a water rinse to remove slippery film. Oily residues can attract lint and make stains look bigger than they are. After rinsing, dry completely so the finish doesn’t look dull or “frosted.”
– Dye transfer (colored clothing spots): Work slowly—blot with clean water first, then use only a gentle cleaner and re-blot until transfer lifts (avoid anything that can spread dye). Dye is one of the easiest to accidentally smear across vinyl. Use fresh portions of cloth frequently so you’re not dragging pigment back across the floor.
Pros/cons: what “gentle” usually means on vinyl
- Best for most laundry stains
- pH-neutral cleaner + warm water + blotting + thorough rinse + fast drying.
- Trade-off
- You may need multiple short treatments for set-in detergent film or slow-moving dye transfer.
- Risk to avoid
- Abrasive pads or strong solvents can dull the wear layer and make the “cleaned” area more noticeable than the original mark.
Remove stubborn stains without damaging vinyl
If the spot won’t lift, use controlled escalation: more dwell time (brief), more blot cycles, and more rinsing—without switching to harsh chemistry or scrubbing harder. For rust-like and bleach-related issues, be especially cautious because some stains are surface reactions, not removable grime.
A repeated soak-and-blot routine is often safer than scrubbing when dealing with set-in marks on vinyl because it limits mechanical abrasion on the finish.
Rust removers can be harsher than you expect; always follow vinyl-manufacturer guidance and spot-test because some products can discolor finishes.
– For set-in grime or “shadowing”: Try a repeated soak-and-blot approach using the mild cleaner (leave it on briefly, then blot; don’t let it dry on the floor). Set-in grime often needs time to loosen, but letting cleaner dry can create residue halos. Keep treatments short, then rinse and dry before deciding whether to repeat.
– For residue that won’t rinse clean: Use the same gentle cleaner again, then do extra rinsing—drying residue on vinyl can make stains look permanent. This is a common laundry-room pattern: the original spill is gone, but the residue remains and “reappears” after drying. If the cleaned area looks worse after it dries, go back to rinse-first, not scrub-first.
– For rust-like spots: Use caution—rust removal products can be harsh. If you don’t have the vinyl manufacturer’s guidance, use a slow, manufacturer-approved method or . Rust can cause discoloration that behaves like an oxidation stain; aggressive attempts may etch or haze the wear layer.
A chemistry reality check (why escalation must be cautious)
Rust and bleach damage are not “dirt.” They can involve chemical changes on or near the wear layer. That’s why gentle, pH-neutral methods usually work for detergent/dye residue but may not fully correct chemical etching or oxidized shadows.
What can go wrong (and what to avoid)
If you want to prevent permanent damage, avoid the cleaning tactics that vinyl floors hate: abrasive friction, harsh solvents, and “leave it to soak” practices that dry residue into rings. Many laundry-room stains come from chemistry (bleach/rust/dye), and the wrong treatment can widen or deepen the problem.
Abrasive pads and “scrub hard” tactics can dull or scratch vinyl, making scuffs and cleaned areas more visible than before.
Bleach, ammonia, and strong solvents can discolor vinyl or disrupt finishes, especially when the floor type/finish is older or unknown.
– Abrasive pads, melamine sponges, and “scrub hard” tactics can dull or scratch vinyl—marks can become more noticeable. Even when the stain seems to lift, the finish texture may change, leaving the treated area shinier or duller under laundry-room lighting.
– Bleach/ammonia/strong solvents can discolor vinyl, weaken finishes, or worsen stains—especially on sheet vinyl or older planks. Household bleach is commonly sodium hypochlorite, and it’s strongly alkaline; per CDC guidance, many household bleach products are typically in the 5–6% sodium hypochlorite range (year depends on product labeling and CDC updates).
– Heat and steam can cause warping or finish damage on some vinyl floors; stick to cool-to-warm water and gentle pressure. Laundry rooms already have moisture; adding heat increases risk at seams and around transitions.
– Not spot-testing: even “safe” cleaners can react differently with your specific vinyl finish. A small test tells you whether the cleaner dulls the sheen, lightens pigment, or leaves a residue halo.
Verdict: the safest path (and who should skip DIY)
Start with mild, pH-neutral cleaning and blot-rinse-dry cycles—this is the best balance of effectiveness and protection for vinyl finishes. If the stain is tied to bleach damage, deep rust etching, or chemical reaction, DIY results can be limited and might permanently change the surface—.
If your vinyl manufacturer explicitly bans certain cleaners or stain removers, follow that first. And if the stain looks like it “etched” the surface (not just sitting on top), skip aggressive treatments and get professional advice.
Typical pH of Common Laundry-Room Cleaners (Used for Stain Triage)
| # | Cleaner/Agent (Typical Form) | Typical pH Range | Best Fit on Vinyl* | Vinyl-Finish Safety* |
|---|---|---|---|---|
| 1 | pH-neutral dish soap solution (diluted) | 7.0–9.0 | Detergent/grease residue | ★★★★★ |
| 2 | Baking soda slurry (non-scrubby application) | 8.1–8.3 | Light grime halos | ★★★★☆ |
| 3 | Oxygen-based cleaner (percarbonate-type) | 9.0–10.5 | Organic discoloration (spot) | ★★★☆☆ |
| 4 | 3% hydrogen peroxide (common disinfecting strength) | 3.0–4.5 | Some dye-like staining (test first) | ★★☆☆☆ |
| 5 | White vinegar (typical ~5% acetic acid) | 2.2–3.0 | Usually avoid on unknown finishes | ★☆☆☆☆ |
| 6 | Household bleach (sodium hypochlorite) | 11.0–12.5 | Do not use unless manufacturer allows | ☆☆☆☆☆ |
| 7 | Household ammonia (diluted solutions) | 11.0–12.5 | Avoid on vinyl finishes | ☆☆☆☆☆ |
*Table is a pH-based triage aid for stain removal planning on vinyl. Always spot-test and verify with your floor manufacturer’s cleaning/chemical-compatibility guidance, because pH alone doesn’t account for abrasives, solvents, dyes, or finish chemistry.
Quick stain-removal checklist (save this)
| Stain you see | First step to try | Avoid |
|---|---|---|
| Dirt/grime haze | Warm water + pH-neutral cleaner, blot, rinse, dry | Scrubbing with abrasive pads |
| Detergent/water marks | Blot gently, rinse thoroughly, dry fast | Letting cleaner residue dry |
| Greasy/oily transfer | Mild dish soap solution, blot, then rinse well | Harsh degreasers without manufacturer approval |
| Dye transfer from clothes | Water-first blotting, then gentle cleaner in small repeats | Solvents that can spread dye |
| Rust-like spot | Only manufacturer-approved rust method (spot-test first) | Bleach, unknown “rust removers,” aggressive rubbing |
Checklist
– [ ] Clear debris (no grit)
– [ ] Spot-test any cleaner in a hidden spot
– [ ] Blot, don’t scrub hard
– [ ] Rinse with clean water
– [ ] Dry the area immediately
– [ ] Escalate only if the vinyl manufacturer allows it
FAQ
– Can I use bleach to remove stains on vinyl floors in a laundry room?
It depends on your vinyl finish, but bleach commonly risks discoloration—check your manufacturer’s care instructions first.
– Will vinegar remove vinyl floor stains?
Vinegar is acidic and may not be recommended for all vinyl finishes; use only what your floor manufacturer says is safe.
– What’s the safest way to remove rust stains from vinyl flooring?
Use the method your vinyl manufacturer approves for rust removal and always spot-test.
– Why does my vinyl floor have a dull ring after cleaning?
Usually leftover cleaner residue, uneven rinsing, or finish disruption from scrubbing—next time, rinse more thoroughly and dry quickly.
Sources:
The fastest route to clean laundry-room vinyl is still the same in 2026: identify the stain type, start with pH-neutral blot-rinse-dry cleaning, and only escalate in small, controlled steps—because on vinyl, finish preservation matters as much as stain removal. When a spot looks chemically “etched” (especially from bleach or rust), pause DIY and follow manufacturer guidance or professional assessment to avoid making the damage permanent.
Frequently Asked Questions
What is the safest way to remove stains from vinyl floors in a laundry room?
Start by blotting (not scrubbing) the stain with a clean cloth and warm water to lift surface grime. Use a pH-neutral cleaner or a mild dish soap solution on a soft mop or sponge, then rinse with clean water to prevent residue. Avoid abrasive pads and harsh chemicals like bleach or ammonia unless you test them in an inconspicuous spot first, since vinyl flooring can dull or discolor.
How can I remove oil, grease, or detergent stains from vinyl flooring?
For oily or greasy spots, apply a small amount of degreasing dish soap (or a vinyl-safe floor cleaner) directly to the stain and gently work it in with a soft cloth. Let it sit for 5–10 minutes, then wipe clean and rinse the area with water. If the stain persists, repeat once and consider a vinyl-safe cleaner formulated for kitchen/laundry messes rather than using strong solvents.
Which cleaners work best for laundry-room stains on vinyl floors?
The best options for most vinyl floor stains are warm water, pH-neutral cleaners, and gentle detergents like dish soap. For stubborn discoloration, use an enzyme-based cleaner (for organic stains) or a cleaner specifically labeled safe for vinyl flooring. Always follow the label directions, use soft tools, and rinse thoroughly so the cleaner doesn’t leave a film that attracts more dirt.
How do I get rid of rust or hard-water spots on vinyl flooring?
Rust and mineral deposits can be tricky, so test a small area first with a vinyl-safe remover that targets rust or scale. Apply the product according to instructions, gently rub with a soft sponge, and rinse completely with water. If you can’t find a vinyl-rated rust remover, try a mild vinegar-water solution cautiously in small sections, because strong acids can damage certain vinyl finishes.
Why do vinyl laundry-room stains come back, and how can I prevent them?
Stains often return when residue from detergents, cleaning chemicals, or hard-water minerals remains on the surface and traps new dirt. Rinse with clean water after cleaning and dry the area if it’s frequently damp. For prevention, wipe up spills quickly, place mats near the washer/dryer, and use gentle pH-neutral cleaners as part of routine vinyl floor care.
📅 Last Updated: October 26, 2026 | Topic: How to remove stains from vinyl floors in a laundry room? | Content verified for accuracy and freshness.
References
- https://www.epa.gov/mold/mold-cleanup-guidance
- https://www.cdc.gov/coronavirus/2019-ncov/community/disinfecting-building-facility.html
- https://www.armstrongflooring.com/resilient/en-us/support/care-maintenance.html
- Home – Tarkett Commercial
- Search | The American Cleaning Institute (ACI)
- https://scholar.google.com/scholar?q=vinyl+floor+stain+removal Google Scholar
- https://scholar.google.com/scholar?q=resilient+flooring+cleaning+guidelines+stains+bleach Google Scholar
- https://scholar.google.com/scholar?q=sheet+vinyl+floor+care+stain+removal Google Scholar
[…] vinyl floors in a closet, sweep or vacuum first, then mop with warm water and a pH-neutral cleaner—no harsh chemicals or soaking. For stubborn spots, use a soft brush and a targeted cleaner […]
[…] or vacuum first, then damp-mop vinyl floors using a pH-neutral cleaner (or your manufacturer’s exact product instructions) and dry promptly. The biggest […]