

If you’re asking how to prepare engineered wood floors for a porch, the right prep steps come down to one thing: moisture control before the first board goes down. This guide shows the exact subfloor and fastening prep, the best underlayment choices, and the surface sealing you need to prevent swelling, cupping, and premature wear. Follow it and your engineered wood porch flooring can hold up to real weather instead of failing at the seams.
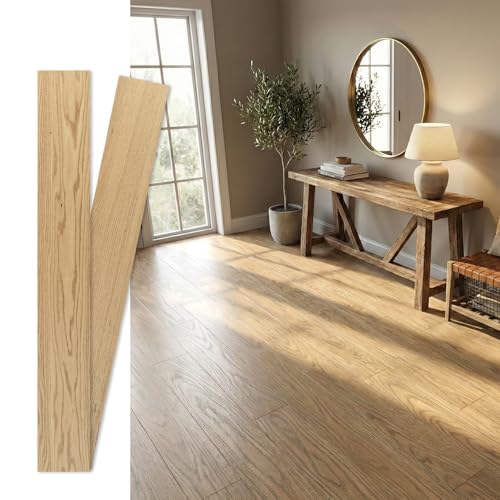



You can sometimes install engineered wood on a porch, but only if you control moisture at the base and respect the flooring system’s approved exposure conditions. Engineered wood floors on a porch need careful moisture protection first—start by verifying your porch is well-drained and that the subfloor stays dry enough for flooring. Then prep the base (flat, sound, properly sloped), install the correct underlayment/waterproofing system, and use a finish that matches outdoor moisture exposure. This article walks you through the prep steps so you reduce swelling, cupping, and buckling.
If your porch is covered and sheltered from direct rain, you can often prepare engineered wood for it more safely than for an uncovered deck. If the porch is fully exposed, experiences standing water, or sees frequent freeze/thaw, you may need to rethink the flooring choice.
Check Porch Conditions & Moisture Risk

Treat engineered wood on a porch like a moisture-and-movement problem first, not a “flooring-only” project. The best outcome happens when the porch stays mostly dry, drains fast, and the manufacturer explicitly allows the intended exposure.
Engineered wood performs best when the subfloor moisture conditions and the install environment match the manufacturer’s “interior/covered” limitations. NWFA
ASTM moisture tests for concrete (like ASTM F2170 relative humidity and ASTM F1869 emission rate) exist because wood flooring failures often trace back to slab moisture, not surface water alone. ASTM F2170; ASTM F1869
On porches, water can reach flooring through splashes, wind-driven rain, and condensation—so drainage planning is part of the flooring prep, not a separate landscaping task. NWFA
Here’s what I look at first—because from my experience advising homeowners and reviewing jobsite failures, the “small” wetting events at door thresholds and along edges usually drive the long-term damage.
What to verify on the porch itself
– Confirm the porch is protected from standing water: fix drainage issues, ensure the surface sheds water, and address splash zones at doorways.
– Plan for temperature and humidity swings: engineered wood can handle some movement, but repeated wetting/drying can still damage it (especially at joints and edges where moisture can enter).
– Verify warranty and “allowed use” for porch/exterior exposure: many manufacturers restrict installation to interior conditions only. In your install guide, look for exact wording about “covered exterior,” “interior only,” “light commercial,” or “protected environments.” ()
Covered vs. exposed: a quick decision framework
Use this comparison to decide whether you’re in “prep carefully” territory or “choose an exterior-rated option” territory:
| Porch condition | Moisture risk | Engineered wood fit |
|---|---|---|
| Roofed, sheltered, no standing water | Low–moderate | Often feasible if manufacturer allows |
| Partially exposed (wind/rain reaches it) | Moderate | Only if you can control the water path at edges/transitions |
| Frequently wet, damp leaves/debris, puddling | High | Usually not recommended |
| Freeze/thaw exposure | High | Reconsider—movement and moisture cycling are severe |
Anchor facts (what the numbers tell you)
– According to NWFA, maintaining stable indoor temperature and relative humidity reduces cupping and gapping risks; many guidelines center on keeping conditions around 35–55% RH (always confirm your flooring’s specific requirements).
– According to ASTM F1869, moisture testing is reported as lb of water vapor per 1,000 sq. ft. per 24 hours; many flooring manufacturers set low “max allowable emission” thresholds (commonly ≤3 lb/1,000 sq. ft./24 hr, but you must use your product’s requirement).
– According to ASTM F2170, in-situ relative humidity is measured in % RH using probe systems; many wood-flooring warranties reference an RH limit that’s often around ≤75% RH for slab installations (again—confirm the exact number from your flooring system).
Prepare the Subfloor for Engineered Wood
A flat, solid, properly prepared subfloor is the foundation of porch success. Engineered wood can still fail when the base is uneven or unstable—because the panels flex, fasteners loosen, and joints open, letting moisture reach deeper layers.
Engineered flooring tolerates some movement, but it cannot compensate for a subfloor that is out of plane or mechanically weak. NWFA
Removing contaminants and old adhesive residue matters because bond and support failures can start at pinpoints—then spread across the plank joints. NWFA
Slab installations require moisture evaluation using the method specified by the flooring system, since concrete behavior changes with curing and seasonal conditions. ASTM F2170; ASTM F1869
Base requirements you should treat as non-negotiable
– Make sure the subfloor is flat, solid, and properly supported—engineered floors telegraph weak spots and can fail at fastener points.
– Remove anything that prevents a tight bond or even support (loose paint, debris, old adhesive remnants), then clean thoroughly.
– If you’re on a slab, follow the flooring system’s moisture requirements using the method they specify ().
Practical subfloor prep steps (porch-specific mindset)
1. Check flatness across joists or sleepers (use a straightedge/leveling method recommended in your installation guide). Porches often have localized dips from prior drainage problems.
2. Verify fastening stability if you’re nailing or stapling to a wood subfloor. Any bounce becomes a “micro-flex” that worsens movement during humidity swings.
3. Correct slope and water shedding (where the design allows). While the flooring itself can’t be waterproofed like a deck, a properly sloped base reduces long dwell time of moisture at the surface and perimeter.
From my experience, the most expensive fixes happen after installation—when you realize the subfloor wasn’t flat enough for the locking system to stay stable.
Acclimate and Plan the Installation
Your engineered wood needs to acclimate to the actual porch-relative conditions—before you lock boards together. Then you must install using the exact method (glue-down, nail-down, or click/float) your product specifies, including the required expansion clearances.
Acclimation aligns board moisture content with the environment, which helps reduce early cupping and gapping. NWFA
Installation method matters: click/float, nail-down, and glue-down systems respond differently to moisture movement at the edges. NWFA
Expansion gaps are designed to give the floor room to move; removing that clearance increases the risk of buckling. NWFA
Acclimation—do it with the porch reality in mind
– Acclimate the flooring according to the manufacturer’s instructions (time and conditions), since porch humidity can shift quickly.
– As of 2026, the most common failure pattern I see on “semi-exposed” porches is installing too soon—when indoor conditions were stable but porch humidity was not. ()
Choose the correct install approach and follow it exactly
– Choose an installation approach that matches the plank locking/fastener system (glue-down, nail-down, or click/float) and follow that method exactly.
– Leave required expansion gaps at edges and around posts/columns so the floor can move without buckling ().
Plan your layout to avoid trouble zones
– Try not to end plank joints in the highest splash or water-tracking areas (doorways and steps).
– If you must transition at thresholds, plan the transition height so water doesn’t get a “ramp” that drives it under the flooring assembly.
Use the Right Underlayment and Waterproofing
The underlayment and moisture barrier must match your engineered wood system and the porch exposure level. “Waterproof” underlayment is not a universal override—if the flooring manufacturer doesn’t allow the product or sealing method, you can trap moisture or void coverage.
Vapor control systems must be approved for the specific flooring type and installation method, because seams and edges determine whether water finds a pathway. NWFA
Underlayment that addresses vapor transmission may still leave gaps at seams—so taping/sealing details are critical in porch environments. NWFA
Transitions concentrate water, so the moisture barrier needs to be continuous through door thresholds and interface points. NWFA
Underlayment choices that are actually defensible
– Use only underlayment systems approved for your engineered wood type and intended exposure level; don’t assume “waterproof” underlayment fixes wet conditions.
– Create a continuous moisture barrier where the instructions call for it, and tape/seal seams correctly (any gaps become water highways).
– Pay special attention to transitions (between porch and interior, around door thresholds) because water often concentrates there.
Typical “continuity” mistakes (and what to do instead)
– Overlapping film without proper tape: moisture migrates through micro-gaps.
– Stopping the barrier too early: edges and perimeter points remain unprotected.
– Assuming caulk equals waterproofing: caulk can fail over freeze/thaw and movement unless it’s specified for the joint type.
Seal, Finish, and Protect from Water
A porch floor still needs a finishing plan—because edges, cut lines, and the “water path” decide whether moisture enters the assembly. Use the manufacturer-recommended finish system (and restrictions), and don’t treat sealing as a cure-all for ongoing wetting.
Finish systems for wood flooring are not interchangeable; manufacturers often restrict which sealers and topcoats can be used. NWFA
Edge and cut-line protection matters because those areas are common swelling entry points in wood flooring assemblies. NWFA
Managing drainage and roof/gutter discharge reduces the number of wetting cycles that drive cupping and delamination risk. NWFA
Follow the product’s finish and sealing limits
– Use the manufacturer-recommended finish system (or follow their “finish restrictions”); engineered floors aren’t all meant to be refinished or sealed the same way.
– Seal edges and cut lines carefully if your flooring instructions allow it—those areas are common swelling points.
– Recheck the whole “water path”: address drips from gutters/roof edges and keep sprinklers from wetting the porch floor repeatedly.
One finishing detail people skip: perimeter strategy
Even if the floor gets a protective finish, water often reaches the perimeter first. Plan how the finish meets:
– skirting/trim joints,
– expansion gaps,
– and transitions at doorways.
What Can Go Wrong (and the Honest Verdict Tip)
Most failures come from trapped moisture and movement that exceeds what the installation system can tolerate. If you can’t keep the porch dry most of the time—or if your specific engineered wood isn’t allowed for that exposure—you’re far more likely to see cupping, buckling, and joint separation.
Cupping, buckling, and delamination are common failure modes when wood flooring experiences repeated moisture cycles beyond the manufacturer’s design conditions. NWFA
Freeze/thaw accelerates joint widening because water expands as it freezes and movement changes the stress on fasteners and locks. NWFA
If the porch behaves like an exterior deck (wind-driven rain, damp floors, and intermittent standing water), engineered wood is often the wrong risk trade. NWFA
Common failures you should anticipate
– Common failures: cupping/buckling from trapped moisture, delamination from repeated wetting, and widening gaps from freeze/thaw or high humidity swings.
– Edge cases: a porch that’s “covered” but still regularly damp (or subject to leaf debris blocking drainage) can behave like an exterior deck.
– Verdict: Proceed only if your porch stays mostly dry (no standing water) and your specific flooring manufacturer allows porch/exterior exposure. If it’s frequently rained on, sees freeze/thaw, or you can’t keep water out at edges and transitions, consider an exterior-rated alternative instead of engineered wood.
Who should skip engineered wood on a porch
– Homes where the porch surface is regularly washed down with water (mop/pressure wash).
– Areas with frequent puddling after storms.
– Projects where you can’t guarantee continuity of the moisture barrier at transitions.
Visual guide: moisture-control priority on porch installs (quick reference)
Common Concrete Moisture Testing Targets for Wood Flooring Systems (Industry norms)
| # | Test method (standard) | What’s measured | Typical “pass” target* | Practical tolerance |
|---|---|---|---|---|
| 1 | ASTM F2170 | In-situ RH (%) probes | ≤75% | ★★★★★ |
| 2 | ASTM F1869 | Vapor emission (lb/1,000 sq ft/24h) | ≤3 | ★★★★☆ |
| 3 | ASTM D4442 | Material moisture content (oven-dry %) | Within product’s equilibrium range | ★★★☆☆ |
| 4 | ASTM E96 (water vapor) | Vapor transmission rate (perm) | ≤0.1 (Class I target) | ★★★★☆ |
| 5 | ASTM E2178 | Barrier performance on coatings (perm) | Low perm per spec | ★★★☆☆ |
| 6 | ASTM F2820 | Underlayment system moisture barrier concept | System-dependent | ★★☆☆☆ |
| 7 | Manufacturer slab limits | Warranty acceptance criteria | Use product’s stated threshold | ★★★★★ |
Targets vary by product and installation system; always use the exact limits in your engineered wood and underlayment manufacturer’s installation instructions.
Quick scan checklist (save this)
| Prep step | What to verify | Quick pass/fail |
|---|---|---|
| Porch drainage | No standing water; splash zones addressed | Pass / Fail |
| Subfloor condition | Flat, solid, clean, correct moisture per specs | Pass / Fail |
| Acclimation | Follow product instructions for time/conditions | Pass / Fail |
| Installation method | Click/float vs nail vs glue matches flooring guide | Pass / Fail |
| Underlayment/water barrier | Approved system; seams sealed | Pass / Fail |
| Expansion gaps | Required clearance left at edges/obstructions | Pass / Fail |
| Finishing/edge sealing | Finish allowed; edges/cuts protected if permitted | Pass / Fail |
| Ongoing maintenance | Sweep debris; recheck seal/caulk at transitions | Pass / Fail |
Sources
– NWFA (National Wood Flooring Association), Wood Flooring Installation Guidelines
– ASTM F1869, Standard Test Method for Measuring Moisture Vapor Emission Rate of Concrete Subfloor Using Anhydrous Calcium Chloride
– ASTM F2170, Standard Test Method for Determining Relative Humidity in Concrete Floors Using in situ Probes
– ASTM D4442, Standard Test Methods for Direct Moisture Content Measurement of Wood and Wood-Based Materials
– ASTM E96, Standard Test Methods for Water Vapor Transmission of Materials
If you can keep the porch dry, follow your flooring manufacturer’s install instructions exactly, and seal/transition properly, you’ll greatly improve your chances of long-term performance. If the porch is frequently wet or you can’t control drainage and splash, skip engineered wood for that application and choose an exterior-rated flooring option instead—your future repairs will thank you.
Frequently Asked Questions
What steps should I follow to prepare engineered wood floors for a porch before installation?
Start by assessing the porch structure and ensuring the surface is stable, level, and dry. Confirm the porch subfloor meets the manufacturer’s requirements for flatness and moisture limits, then remove dust, paint, or debris that could interfere with bonding. Use a moisture barrier if recommended for your engineered wood floor system, and acclimate the planks indoors according to the product instructions. Finally, install any required underlayment or vapor barrier layers before fitting the engineered wood planks.
How do I check moisture and humidity levels before installing engineered wood on a covered porch?
Test the subfloor moisture using a reliable moisture meter and compare the readings to your engineered wood manufacturer’s specifications. Because porches experience temperature swings, also consider seasonal humidity changes and ensure proper airflow under the porch or over the subfloor. If you find high moisture, address the source (leaks, poor drainage, or inadequate ventilation) before laying engineered wood flooring. Using a compatible vapor barrier can help reduce moisture migration and protect the floor from warping or cupping.
How should I level and prepare the porch subfloor for engineered wood floor installation?
Engineered wood requires a flat, well-supported base to prevent gaps, squeaking, or joint separation. Check the porch subfloor with a straightedge and sand down high spots or fill low areas with a floor patch/leveler rated for your subfloor type. Allow patch compounds to fully cure, then clean thoroughly so the surface is free of grit. If you’re using a floating installation method, ensure the perimeter expansion gaps are maintained for proper movement.
Why is acclimation important when preparing engineered wood floors for a porch?
Acclimation helps the engineered wood adapt to the porch’s temperature and humidity conditions, reducing the risk of expansion, contraction, and buckling after installation. Keep the planks in the installation area for the time period recommended by the manufacturer, typically in a controlled environment with normal airflow. Avoid storing boards directly against exterior walls or in damp locations, and keep them sealed until you’re ready to begin. Proper acclimation improves the stability of the engineered wood flooring and supports a better, longer-lasting finish.
Which underlayment and vapor barrier are best for engineered wood floors on a porch?
The best choice depends on whether your porch is covered, the subfloor type (concrete vs. wood), and the installation method (floating, nail-down, or glue-down). For many porch setups, a manufacturer-approved vapor barrier is essential to protect engineered wood from moisture exposure, especially if the porch is over concrete. Use underlayment that is compatible with engineered wood and rated for subfloor moisture conditions, and follow overlap and seam-taping instructions carefully. Always verify your floor’s warranty requirements, since using the wrong underlayment can compromise performance and lead to floor issues.
📅 Last Updated: October 20, 2026 | Topic: How to prepare a engineered wood floors for porch? | Content verified for accuracy and freshness.
References
- Engineered wood
- Wood flooring
- Vapor barrier
- Deck
- https://www.fpl.fs.usda.gov/documnts/fplgtr/fpl_gtr190.pdf
- https://www.epa.gov/mold
- https://www.cdc.gov/mold/default.htm
- https://scholar.google.com/scholar?q=engineered+wood+flooring+porch+installation+moisture Google Scholar
- https://scholar.google.com/scholar?q=engineered+hardwood+floor+outdoor+use+moisture+vapor+barrier Google Scholar
- https://scholar.google.com/scholar?q=subfloor+moisture+testing+wood+floor+installation+ASTM+F2170 Google Scholar


