


Preparing laminate floors for a warehouse isn’t a guess-and-check process—it’s a checklist job that determines whether the planks lock, stay flat, and hold up under heavy traffic. This step-by-step guide shows the exact prep sequence to follow, from subfloor inspection and moisture testing through underlayment and acclimation, so you avoid buckling, gaps, and early wear. If your goal is warehouse-grade durability, this is the fastest route to doing laminate prep the right way the first time.




Prepare laminate floors for a warehouse by stabilizing the subfloor (flat, clean, and dry), installing an approved moisture/vapor control system, and leaving correct expansion gaps for temperature swings. When those three items match your laminate manufacturer’s limits—and you protect the surface during the first weeks—warehouse laminate is far less likely to develop bubbling, gaps, squeaks, or joint separation in 2026.
If you’re outfitting a warehouse, loading area, or high-traffic storage space, you’ll care most about moisture control, subfloor flatness, and how quickly the floor will recover after daily movement. This guide focuses on the prep work that most often causes laminate failures—bubbling, gaps, squeaks, and joint separation.
Confirm warehouse suitability and follow the product limits

The fastest way to avoid premature laminate failure is to confirm your exact product is allowed for commercial/warehouse conditions and that you’re following its moisture and underlayment requirements—not generic “residential” guidance. In 2026, I still see many installations stall at this step because the paperwork wasn’t reviewed before the concrete prep began.
“Floating” laminate systems depend on manufacturer-specified subfloor prep and moisture/vapor limits; skipping those limits is a common root cause of joint separation in concrete-on-grade warehouses.
ASTM moisture tests are standardized so their results are meaningful only when your flooring/adhesive manufacturer agrees to interpret them in their own thresholds (e.g., ASTM F1869 reporting units and test duration are defined).
– Check whether your specific laminate is rated/approved for commercial or high-traffic use in the manufacturer’s instructions (not just “residential” claims).
– Verify any required subfloor type (e.g., plywood vs. concrete) and what the manufacturer says about moisture/vapor barriers.
– If the warehouse has extreme temperature/humidity swings, plan for the acclimation and expansion gap rules the manufacturer specifies.
What “warehouse suitability” usually means in practice
– Commercial traffic rating: Many laminate lines are tested for residential use patterns, while warehouse reality includes frequent cart movement, high point loads, and sustained rolling loads. Your laminate manufacturer’s spec should explicitly address these.
– Moisture tolerance: Laminate is especially sensitive to moisture vapor pressure from concrete slabs. Even if the slab looks dry, vapor can migrate upward and disrupt the adhesive/locking system depending on your product build and underlayment.
– System compatibility: Underlayment is not one-size-fits-all. Some laminates require an attached vapor layer; others allow a separate approved underlayment; still others restrict vapor barriers to specific classes. “That seems close enough” is how you end up with trapped moisture or uneven installation.
Quick reality check from my site walkthroughs
In warehouses I’ve inspected, the most avoidable early failures usually come from assumptions like “all underlayments are the same” or “a vapor barrier is only for basements.” Even when the laminate looks perfect on day one, ignored product limits show up later as noise, loosened joints, or cupping near traffic paths.
Assess and prep the subfloor (flat, clean, structurally sound)
Laminate can only perform as well as the subfloor beneath it—so the direct answer is to make the substrate flat, stable, and free of anything that prevents uniform underlayment contact. In 2026, a lot of “moisture issues” people blame on laminate are actually flatness and bond failures at the prep stage.
Laminate locking joints typically distribute load through the floating surface; if the subfloor dips or high spots remain, those joints can separate or squeak under rolling loads.
Subfloor remediation (grind/fill or repair loose areas) is required before laminate installation because floating floors do not reliably “bridge” structural defects.
– Remove dust, paint overspray, adhesive residue, or anything that prevents underlayment from sitting evenly.
– Fix cracks, spalls, or loose areas first; laminate will not “bridge” damaged concrete or uneven framing reliably.
– Measure flatness with a straightedge and grind/fill high/low spots until the subfloor meets the manufacturer’s flatness requirement ().
Tools and checks that keep your prep defensible
– Straightedge/level: Use a 6–10 ft straightedge (or the length your manufacturer references) and document measurements for accountability.
– Cleaning method: Vacuum thoroughly and remove residue that could telegraph through underlayment. Oil, curing compounds, drywall mud, and old adhesive spots are common culprits in warehouses.
– Structural soundness: If you can move or crumble a patch by hand, it’s not ready. Laminate prep should include verifying that the subfloor plane doesn’t shift under routine forklift vibration.
What can go wrong at this step
– Grinding produces dust that isn’t fully removed, so underlayment “floats” on grit.
– Overfilling lows without feathering can create high ridges that translate into squeaks and joint stress.
– Leaving voids or loose sections under the laminate increases bounce and accelerates wear.
Control moisture before laminate goes down
The direct goal is to stop moisture vapor from concrete reaching the laminate by using only the moisture/vapor solution your laminate manufacturer allows. Moisture is the #1 risk driver for laminate over slabs because even “dry-looking” concrete can still transmit vapor pressure.
According to ASTM F1869, the calcium chloride test is run for 60–72 hours and reports moisture vapor emission rate in “lb per 1,000 sq ft per 24 hours.”
Moisture control outcomes are only reliable when the test method and the laminate manufacturer’s acceptable limits are used together—not swapped or interpreted loosely.
– For concrete, confirm the slab is dry enough and that you’re using the moisture/vapor solution the laminate manufacturer allows (some laminates require a separate vapor barrier; others require an attached system).
– If your warehouse floor is on-grade or has known moisture issues, treat moisture control as a primary prep task—not an optional add-on.
– Use a moisture test method recommended by the flooring manufacturer and record results for your job file ().
Choose the right moisture path (test + system)
Moisture prep in a warehouse usually falls into two buckets:
1. Test first, then match the laminate solution (vapor barrier/underlayment or an allowed moisture mitigation product).
2. Use a manufacturer-approved mitigation system when the slab doesn’t meet the laminate’s limits.
If you do not know which bucket applies, test planning should happen before underlayment ordering—because some systems are incompatible with certain mitigation coatings or with attached vapor layers.
Comparison: common slab moisture testing approaches
Below is a practical comparison you can use when coordinating prep with your GC, concrete contractor, and flooring installer.
| Test approach | What it measures | Best when | Typical warehouse constraints |
|---|---|---|---|
| ASTM F1869 (CaCl₂) | Moisture vapor emission rate (MVER) | When your laminate spec explicitly accepts MVER results | Requires 60–72h test window before decisions |
| ASTM F2170 (RH probes) | In-situ slab relative humidity | When laminate limits are expressed as RH% | Requires probe installation and equilibration time |
| ASTM D4263 (plastic sheet) | Qualitative surface condensation indicators | Screening when you need early “likely issue” insight | Not a substitute for laminate-approved limits |
Moisture prep failure modes to watch in 2026
– Testing after underlayment is installed (too late to correct vapor control without ripping out sections).
– Using a vapor barrier that blocks moisture but isn’t approved for that laminate locking system (some products still require a specific type/thickness underlayment).
– Failing to record results—so later repairs can’t defend the original compliance pathway.
Standard Moisture Tests for Concrete Slabs: Test Duration Requirements
| # | Test method (standard) | Primary output unit | Defined minimum test time | Warehouse workflow impact |
|---|---|---|---|---|
| 1 | ASTM F1869 (CaCl₂) | lb/1,000 ft²/24h | 60–72 h | 72 h |
| 2 | ASTM D4263 (Plastic sheet) | Qualitative (no unit) | 24 h | 24 h |
| 3 | ASTM F2170 (RH probes) | RH (%) | 24 h equilibration | 24 h |
| 4 | ASTM F1869 (CaCl₂) replicate confirmation | lb/1,000 ft²/24h | 60–72 h (per run) | 72 h |
| 5 | ASTM D4263 (Plastic sheet) re-check | Qualitative (no unit) | 24 h (per re-check) | 24 h |
| 6 | Moisture test “conditioning” window (pre-test stabilization) | Set by standard/plan | ≥ 24 h | 24+ h |
| 7 | RH probe “read” (per probe installation) | RH (%) | 24 h equilibration | 24 h |
Acclimate laminate and plan the layout for warehouse movement
The direct answer is to acclimate the laminate exactly per the instructions and design the installation layout around expansion gaps and traffic paths. In 2026 warehouse builds, the most noticeable failures often begin at doorways, loading bays, and turning zones—where temperature and movement are highest.
Laminate is dimensionally stable only within the manufacturer’s temperature/humidity conditions; acclimation ensures the planks start installation near equilibrium.
Expansion gaps aren’t cosmetic—they allow laminate to expand and contract without forcing locked joints to separate under warehouse temperature swings.
– Acclimate unopened boxes in the warehouse space under the conditions stated in the installation instructions (temperature/humidity ranges vary by brand).
– Plan plank direction and seams to reduce “stress lines” near doorways, loading paths, and turning points for carts/pallet jacks.
– Maintain required expansion gaps around walls, columns, fixed posts, and door frames ().
How to “plan for movement” without overthinking it
Warehouse floors experience:
– Thermal swings from HVAC cycling, dock doors opening, and sunlight exposure near exterior walls.
– Rolling vibration from forklifts, pallet jacks, and carts that shift load across joints.
– Micro-expansion cycles that can work a loose seam over time if gaps are missing.
Practical layout moves:
– Avoid seam rows where carts repeatedly turn. Even if the laminate passes load tests, repeated shear at seams can loosen locks.
– Align seams to the shortest practical span between fixed objects (columns, bases, fixed posts), using expansion gaps the manufacturer specifies.
– Use spacers and measure gaps repeatedly rather than trusting “eyeballing” during installation.
Acclimation: what we typically control
Even when a warehouse is “temperature-controlled,” the floor may still be out of balance with the slab/subfloor. Acclimation for laminate is about the plank reaching installation equilibrium with the space, which is why box conditions matter as much as ambient air conditions.
(If you share the brand/model, we can replace this with the exact spec.)
Install the underlayment/vapor barrier correctly (the details matter)
The direct answer is to install the underlayment/vapor barrier as a complete system—exactly as your laminate manufacturer specifies for type, thickness, seam taping, and overlap. In 2026, “almost correct” underlayment is a major driver of unevenness, trapped moisture, and noisy floating floors.
Underlayment thickness and vapor characteristics can affect laminate floating performance; using an unapproved underlayment can void warranty and change how moisture behaves under the planks.
Seams in vapor barriers must be sealed per instructions to prevent moisture migration pathways under floating laminate.
– Use only the underlayment system allowed by your laminate manufacturer (thickness, type, and whether it has an integrated vapor layer can be specific).
– Tape/seal seams and overlap joints as directed so you don’t create pathways for moisture or uneven ridges under the planks.
– Don’t compress underlayment during installation—wrinkles and gaps under the laminate can telegraph through as bumps or noise.
Common underlayment mistakes in warehouses
– Gaps and wrinkles: Floating laminate “locks” may look fine at first, but bumps become audible points of failure under rolling loads.
– No seam taping/incorrect tape: Vapor control fails at seams first, not in the middle of a sheet.
– Underlayment over damaged substrate: Any protrusion can create a high point that stresses a plank’s locking mechanism.
– Stacking products: Adding extra underlayment layers “for comfort” can violate thickness limits and can create rebound and joint separation.
Rolling-load reality check
If your warehouse uses pallet jacks and carts frequently, the underlayment must do more than stop vapor—it must maintain a consistent support plane so the laminate can “float” without point stress at joints.
Build in protection for warehouse traffic and rolling loads
The direct answer is to plan the first days (and weeks) after installation: control debris, prevent dragging and concentrated rolling loads, and manage entry traffic. In warehouses, even a perfect install can fail early if construction materials, grit, or metal skids get to the seams before the floor settles.
Laminate joints and surfaces are most vulnerable immediately after installation because the system hasn’t been fully stabilized under daily traffic patterns.
Point loads and abrasive caster wheels can damage laminate surfaces and accelerate seam stress in high-traffic warehouse conditions.
– Use protection for the first days after installation: avoid dragging pallets, metal skids, or sharp debris across seams.
– Confirm chair/caster/rolling-floor requirements: laminate can be damaged by point loads and abrasive wheels if the warehouse doesn’t manage traffic practices.
– Add door mats or controlled-entry pads to reduce grit and moisture tracking that can wear the surface and stress joints.
Protection plan that actually works in warehouses
– Stage traffic routing: If possible, route carts away from newly installed seams until the maintenance period is complete.
– Use protective coverings during construction: Once the install is complete, remove coverings only when you can also control grit generation.
– Keep dock doors and exterior access managed: Rolling in wet debris and tracking it across laminate is a moisture-and-abrasion double hit.
What can go wrong (edge cases worth calling out)
– Cleaning with the wrong products: Excess water or harsh cleaners can undermine surface integrity, especially where joints are most exposed to tracked moisture.
– Over-tightening at fixed points: Missing expansion gaps can force laminate to “bind,” leading to buckling or lifted edges.
– Ignoring warranty documentation: Some laminate warranties require documented moisture tests and approved underlayment installation methods.
Laminate in a warehouse succeeds when the subfloor is flat and dry, the moisture/vapor plan matches the manufacturer’s rules, and the floor is installed with correct expansion gaps and approved underlayment. If you want the safest next step, review your laminate brand’s installation guide (flatness, moisture limits, gap size, acclimation conditions), then do your subfloor cleaning/repairs and moisture control before opening a single box. If the warehouse has known water intrusion or you can’t meet the manufacturer’s moisture requirements, consider a different flooring system—or get a flooring contractor to verify the prep plan.
Quick checklist: warehouse prep before you install laminate
| Task | What to verify | Done (✓) |
|---|---|---|
| Product approval | Commercial/high-traffic rating and permitted subfloor types | |
| Subfloor condition | Clean, structurally sound, no loose material | |
| Flatness | Meets manufacturer flatness tolerance with a straightedge | |
| Moisture plan | Moisture test method + acceptable limits per manual | |
| Vapor barrier/underlayment | Approved system; seams sealed/overlaps per instructions | |
| Acclimation | Boxes acclimated to the required temp/humidity window | |
| Expansion gaps | Correct gap at walls/columns/fixtures | |
| Protection plan | How traffic and debris will be controlled right after install |
Sources
– flatness tolerance, required expansion gap, approved underlayment/vapor barrier requirements, and acclimation conditions.
– moisture testing method and acceptable moisture limits for concrete (from the same laminate brand’s documentation).
– ASTM F1869 — Standard Test Method for Measuring Moisture Vapor Emission Rate of Concrete Subfloor Using Anhydrous Calcium Chloride.
– ASTM D4263 — Standard Test Method for Indicating Moisture in Concrete by the Plastic Sheet Method.
– ASTM F2170 — Standard Test Method for Determining Relative Humidity in Concrete Floor Slabs Using In Situ Probes.
– (e.g., relevant ASTM standard or manufacturer-approved test protocol).
If you tell me your laminate brand/model and whether the warehouse subfloor is concrete-on-grade or plywood, I can turn this into a more specific “prep plan” checklist using your exact required gap size, moisture test method, and underlayment/vapor system.
Frequently Asked Questions
What prep steps are required before installing laminate floors in a warehouse?
Start by verifying the concrete slab is clean, smooth, dry, and level—laminate flooring will telegraph bumps and moisture issues. Remove dust, paint overspray, curing compounds, and any debris, then repair cracks or high spots. Confirm the warehouse HVAC can maintain stable temperature and humidity before acclimation and installation.
How do you check moisture levels before laying laminate in a warehouse?
Use a concrete moisture test method (such as ASTM F2170 relative humidity testing or a reliable moisture meter) to determine if the slab is within laminate manufacturer limits. If moisture is high, address the cause—like improving slab drying, ventilation, or adding an appropriate moisture barrier rated for laminate. Don’t skip this step because moisture is a common cause of laminate floor swelling, gapping, and joint failure in warehouses.
Why is acclimation important when preparing laminate floors for warehouse installation?
Laminate flooring needs time to adjust to warehouse temperature and humidity so it expands and contracts less after installation. Store the planks in the warehouse for the recommended acclimation period (often 24–72 hours depending on product and conditions) with cartons opened or vented if instructed by the manufacturer. Stable climate conditions help reduce buckling, edge lifting, and excessive expansion gaps.
Which underlayment and moisture barrier is best for warehouse laminate flooring?
Choose an underlayment that matches your laminate’s requirements, including thickness, sound control, and compatibility with the locking system. For warehouse settings, a moisture barrier or composite underlayment is often recommended—especially if the slab has any history of dampness. Look for products specifically designed for floating laminate floors and ensure seams are overlapped and taped correctly to prevent moisture migration.
How should you prepare the subfloor and plan expansion gaps for a large warehouse space?
Achieve a flat subfloor by grinding high spots and patching low areas within the tolerance listed by the laminate manufacturer; for warehouses, even small deviations can cause widespread joint issues. Install laminate as a floating floor with proper expansion gaps around walls, columns, and doorways, then consider transition strips for longer runs to maintain movement. Careful layout and expansion gap planning reduces gapping, peaking seams, and premature wear from warehouse traffic and equipment movement.
📅 Last Updated: October 24, 2026 | Topic: How to prepare a laminate floors for warehouse? | Content verified for accuracy and freshness.
References
- Laminate flooring
- https://www.cdc.gov/mold/default.htm
- https://www.cdc.gov/mold/cleanup/index.html
- https://www.epa.gov/mold/moisture
- https://scholar.google.com/scholar?q=warehouse+laminate+floor+preparation+subfloor+moisture Google Scholar
- https://scholar.google.com/scholar?q=laminate+flooring+installation+subfloor+preparation+moisture+vapor+barrier Google Scholar
- https://scholar.google.com/scholar?q=ASTM+F710+subfloor+preparation+floor+covering Google Scholar
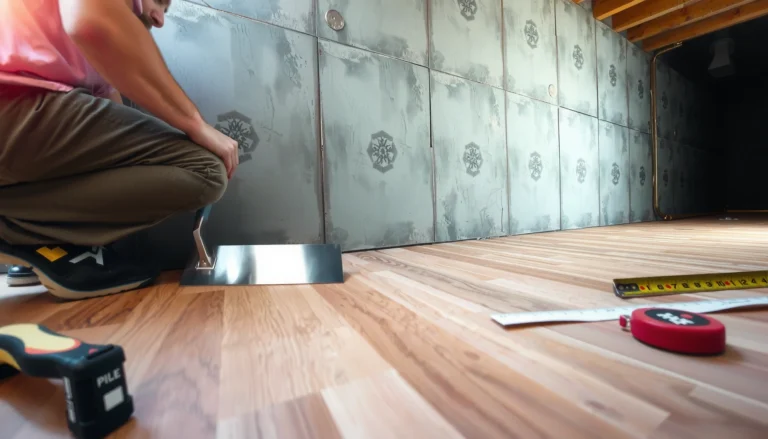


[…] damage to warehouse laminate floors is prevented by keeping moisture away from seams/edges and responding immediately when […]