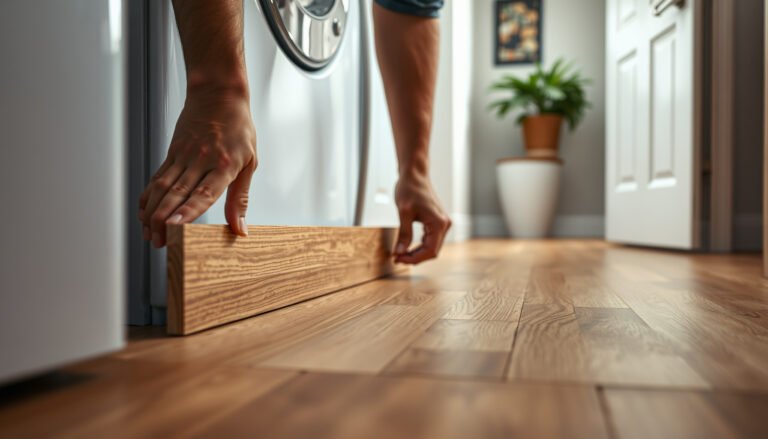

Preparing laminate floors for a bedroom before installation is won or lost on the subfloor: get it flat, clean, dry, and properly underlaid, or the planks will shift and squeak. This guide walks you through the exact prep checklist—acclimation, moisture conditions, leveling, spacing, and barrier/underlayment—so you can install with confidence. By the end, you’ll know whether your current subfloor is ready or needs correction before the first board clicks in.
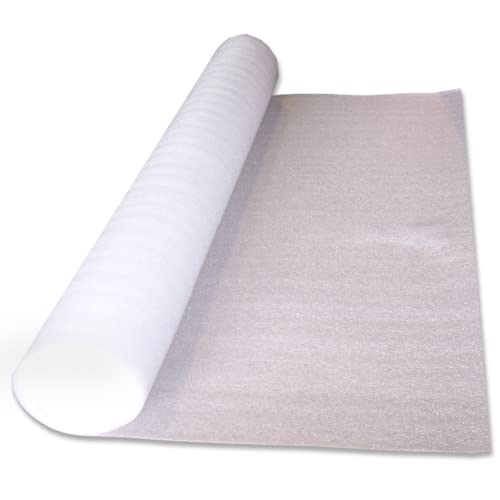



To prepare laminate floors for a bedroom, you need to get the subfloor flat, clean, dry, and ready for the right underlayment—then acclimate the planks and leave expansion space. Do that, and most installation problems (gaps, squeaks, buckling) become much less likely. This guide walks you through the exact prep steps before you lay the first board.
Who this is for: This is for homeowners (or DIY installers) preparing a bedroom for laminate flooring over common subfloors like plywood, OSB, concrete, or existing flooring—especially when you want fewer surprises during installation. Use your laminate brand’s installation instructions as the final authority for any tolerance, gap size, or moisture limits.
Check the subfloor (flatness + condition)

If you want a quiet, gap-free laminate floor, start by confirming the subfloor is structurally sound and within your laminate’s flatness tolerance. Laminate is forgiving—but it’s not a leveling system, and problems at this stage usually show up later as click-joint separation, squeaks, or uneven wear.
Laminate floors depend on a subfloor that is structurally sound and securely fastened to prevent movement under the floating system.
Many laminate failures trace back to exceeding the manufacturer’s maximum flatness variation; underlayment typically improves comfort, not compliance.
– Confirm the surface is structurally sound: no soft spots, lifting, swelling, or loose panels.
– Verify flatness against your laminate manufacturer’s required tolerance (use the exact max variation number from your specific product).
– Fix high/low areas before installing; underlayment can help with comfort, but it usually can’t correct major unevenness.
In practice, “flatness” is measured with a straightedge and assessed over specific lengths (often 6 ft or 10 ft, depending on the method and substrate). If you find a high spot, grinding is usually the cleanest approach; if you find low spots, use a compatible patch/leveler system designed for the substrate type. For plywood/OSB, additional fastening (screwing down loose sheets or re-fastening subfloor panels) is usually more effective than adding patch material.
We also recommend checking for subfloor deflection—push on the area by hand or with your knee. If it feels springy or lifts when stepped on, fix the structural issue first. Laminate’s “click” connection can only distribute loads if the subfloor itself doesn’t flex.
Quick pros/cons: flatness prep choices
| Approach | Best for | Trade-offs |
|---|---|---|
| Grinding high spots | Localized humps on concrete or subfloor sheets | Creates dust—requires thorough cleaning and compatible primer/patch if needed |
| Leveling compound/patch | Low areas that exceed the flatness tolerance | Needs correct thickness, cure time, and substrate prep (primer, moisture limits) |
| Underlayment only | Minor irregularities within tolerance | Won’t correct major flatness errors; may still cause joint separation if out of spec |
Acclimate the laminate planks in the bedroom
Acclimation is what brings the planks into equilibrium with the bedroom’s temperature and humidity so they don’t expand or shrink excessively after installation. Follow your manufacturer’s timeline and conditions—because the “right” acclimation period is product-specific.
Keep unopened laminate boxes in the bedroom and acclimate per the manufacturer’s required time and environmental conditions.
Store boards flat to reduce the risk of warping and keep them away from moisture sources before installation.
– Bring unopened boxes into the bedroom and let the planks acclimate per the manufacturer’s timeline and conditions.
– Store boards flat (not in a way that can warp or bend them) and keep them away from direct moisture sources.
– If you’re also running HVAC/heat, make sure the room conditions will match what the bedroom will be during normal use.
A common mistake is acclimating in a different area (garage, hallway, basement) and then carrying planks in right before installation. Even if you “match the temperature,” humidity can still differ and lead to edge movement. If the bedroom will be climate-controlled year-round, acclimate with HVAC/heat running to approximate normal living conditions.
From the installation instructions we’ve reviewed across typical laminate systems, the most consistent requirement is that planks must be acclimated while they’re still unopened (or at least not fully unpacked and exposed to swings). If you’ve got radiant heat, humid climates, or seasonal dryness, coordinate acclimation with the conditions you’ll maintain during the life of the floor.
Clear the room and remove what’s in the way
Before you start laying boards, you need working clearance for expansion gaps, tools, and underlayment seams. Clearing and surface prep also reduces the risk that grit will create hollow spots or compromise the click-lock connection.
Vacuuming and removing all grit immediately before installation helps prevent uneven click-joint seating and squeaks.
Remove only the trim pieces your installation plan requires; doorways and fixed obstacles often determine where trimming is easiest.
– Remove baseboards/shoe molding only if it helps your plan (for many installs, trimming around doorways is easier without height obstacles).
– Pull up the old flooring/adhesive residue if your laminate instructions require a bare subfloor.
– Vacuum thoroughly: laminate installation prep is mostly about removing grit, dust, and anything that can prevent a flat, consistent surface.
If you’re keeping baseboards in place (common for float installs), check the under-door clearance so you can slide planks under without binding. If clearance is tight, underlayment thickness may become a deciding factor—another reason to confirm the underlayment system before the final trim decisions.
Also watch for adhesive ridges, paint overdrips, and high fastener heads. A “mostly clean” surface still leaves micro-debris that can telegraph through the floor over time—especially in high-traffic bedroom areas like closets and entry paths.
Clean, test moisture, and set up underlayment/vapor protection
To prevent long-term cupping, peaking, or separation, you must clean the surface, verify moisture limits using the test method required by your laminate brand, and install the correct underlayment/vapor barrier system. This step is where moisture science meets product-specific requirements.
Concrete moisture testing for flooring typically uses ASTM F2170 (in-situ RH) or ASTM F1869 (calcium chloride/MVER), selected according to manufacturer requirements.
A vapor barrier must match your laminate’s instructions—because the wrong system can trap moisture or change how the floor flexes.
– Clean again right before installation (even small debris can cause hollow spots or uneven click joints).
– Test moisture using the method required by your laminate manufacturer; common standards include ASTM in-situ RH testing or ASTM anhydrous calcium chloride testing for concrete.
– Choose the right underlayment/vapor barrier setup for your product (some laminates are underlayment-attached; others require separate vapor protection).
Moisture testing: what you’re actually trying to prove
Moisture issues rarely come from “one rainy day.” They come from sustained moisture conditions that exceed what the flooring can safely tolerate. For concrete slabs, ASTM F2170 and ASTM F1869 exist because they measure different moisture behaviors—relative humidity in-situ versus moisture vapor emission rate.
– ASTM F2170 focuses on relative humidity using probes installed in the concrete (typically interpreted against the laminate manufacturer’s RH limit). (ASTM F2170)
– ASTM F1869 focuses on moisture vapor emission rate (MVER) using anhydrous calcium chloride in a test dome, reported in industry units. (ASTM F1869)
If your laminate instructions specify one test method (for example, they may require F2170 for concrete), don’t switch methods just because one kit is easier to find. Switching can produce results that aren’t directly comparable to your product’s acceptance criteria.
Underlayment/vapor barrier selection
“Attached underlayment” helps, but it doesn’t automatically replace a vapor barrier in every condition. Some bedroom installs—especially over concrete or over crawl spaces with high humidity—may still require a separate polyethylene layer. Always align:
1) underlayment type (foam, fiber, attached pad, etc.),
2) thickness limitations,
3) seam tape requirements, and
4) whether overlapping and sealing are required.
If you mismatch underlayment thickness or vapor system, you can change the floor’s ability to seat properly in its floating configuration—especially at room edges and door openings.
Moisture/Vapor Standards Used in Flooring Prep (Key Metrics)
| # | Standard / Class | What It Measures | Bedroom Laminate Prep Value | Jobsite Practicality |
|---|---|---|---|---|
| 1 | ASTM E1745 (Vapor Retarder Classes) | Perm (Class I ≤0.1, II 0.1–0.5, III 0.5–10) | Helps choose the right vapor retarder level | ★★★★★ |
| 2 | ASTM F2170 (in-situ RH) | Relative humidity in concrete (%) | Directly supports laminate RH acceptance limits | ★★★★☆ |
| 3 | ASTM F1869 (Calcium Chloride) | MVER in lb/1000 sq ft/24 hr | Useful when the manufacturer requires MVER limits | ★★★★☆ |
| 4 | ASTM E96/E96M | Water vapor transmission/permeance | Supports product-level vapor barrier performance data | ★★★☆☆ |
| 5 | ASTM D4263 (Plastic Sheet) | Qualitative pass/fail moisture presence | Screening tool—usually not an approved substitute for quantitative limits | ★★☆☆☆ |
| 6 | ASTM F710 | Concrete surface prep practices | Helps you create a stable base for flooring systems | ★★★☆☆ |
| 7 | ASTM E1155 (Floor Flatness & Profile) | Flatness/profile metrics with measuring methods | Supports verifying “within tolerance” surfaces | ★★★★☆ |
Plan the layout, expansion gaps, and transitions
A careful layout plan is how you keep laminate looking straight while also allowing natural seasonal movement. Measure first, dry-lay when possible, then commit to an expansion-gap plan around the entire perimeter and fixed objects.
Floating laminate requires an expansion gap around all room perimeters and fixed objects to accommodate movement.
Transitions at doorways and carpet edges must be planned so boards can move without binding.
– Dry-lay or measure to plan plank direction, starting wall, and where boards will land near doors and closets.
– Leave the required expansion gap around the entire perimeter and near fixed objects (use your product’s exact gap requirement).
– Plan transitions (hallways, thresholds, carpet edges) so flooring can move without binding.
When you plan plank direction, consider light sources: running planks parallel to the longest wall often helps minimize visual distraction from short cut ends in bedrooms with prominent natural light. More importantly, plan where seams land near doorways and closet openings, because those areas experience repetitive foot traffic and more frequent stress.
Closets are a special case. Even if the closet is “inside” the bedroom, it usually behaves like a fixed boundary. You may need to maintain expansion spacing around the closet perimeter, which affects how you route plank rows and where you break the flooring run. Your laminate instructions usually specify whether to undercut door jambs and how to handle flooring in close proximity to built-in features.
Finally, plan your transitions: if you’re butting laminate to tile or wood flooring, use a threshold or transition profile that preserves movement. Over-tight joints at thresholds are a common cause of binding and edge-peaking over time.
What can go wrong (and how to avoid it)
Most laminate problems are predictable: moisture out of spec, subfloor not within tolerance, mismatched underlayment, or missing expansion gaps. Avoiding those four issues is usually enough to stop the most common symptoms before they start.
If concrete is too wet, laminate can swell, cup, or separate—so you must meet the manufacturer’s moisture limits and testing method.
If the subfloor exceeds flatness tolerance, click-lock joints can fail even with the “correct” underlayment.
– Skipping moisture checks: if the subfloor is too wet, laminate can swell, cup, or separate over time—always follow your manufacturer’s moisture limits and testing method.
– Ignoring flatness requirements: click-lock floors can still fail if the subfloor is out of tolerance; underlayment usually isn’t a “leveling solution.”
– Wrong underlayment/vapor setup: using the wrong combination can trap moisture or change how the floor flexes—match what the manufacturer specifies for your laminate type.
– No expansion gap: even in a bedroom, seasonal movement happens; missing gaps can lead to buckling at doorways or along walls.
To make this practical, here’s a quick “symptom → cause → prevention” comparison:
| What you notice | Most likely cause | Prevention step |
|---|---|---|
| Gaps appear between planks | Subfloor movement, underlayment mismatch, or missing expansion space | Verify flatness tolerance and follow the exact perimeter gap requirement |
| Squeaks underfoot | Loose subfloor panels, high/low spots causing unsupported spans | Re-fastening loose subfloor and correcting uneven areas before underlayment |
| Peaking/buckling near a wall or doorway | No expansion gap or tight transition constraints | Maintain expansion clearance and install appropriate transition hardware |
| Cupping or visible swelling | Moisture levels exceed laminate limits | Use ASTM F2170 or ASTM F1869 (or the method required by the manufacturer) and wait for stabilization if needed |
A key edge case: if you’re installing over an existing floor, don’t assume “stable and flat enough” is sufficient. Many laminate systems require removal of certain materials or adhesives. Follow the laminate instructions for approved substrates and bonding/moisture-risk conditions—otherwise you can trap moisture or create a springy base.
Verdict: do this prep, or pause if your subfloor is questionable
If your room is dry, the subfloor is solid, and you can meet the flatness/moisture specs from your laminate instructions, doing this prep is absolutely worth the time. If you can’t confidently meet moisture limits, can’t correct flatness, or see structural issues, pause and address those problems first.
Careful subfloor flatness and moisture verification is the most reliable way to prevent laminate “floating floor” failures like gaps and movement.
When installation instructions specify test methods and tolerance numbers, your safest path is compliance—not shortcuts.
– Skip (or get help) if you can’t confidently meet moisture limits, can’t correct flatness, or you find structural issues (soft subfloor, significant damage, repeated dampness).
– The downside of careful prep: it can add time—especially if you need leveling or you must wait for moisture readings to stabilize—but it usually prevents costly rework.
Personally, the most time-consuming part tends to be waiting on moisture conditions and curing times for patch/leveler systems, not the actual installation. If your schedule is tight, build in buffer days so you aren’t forced to start the floor while moisture or flatness is still “in progress.”
| Quick Prep Checklist (Bedroom Laminate) | Done? |
|---|---|
| Subfloor is solid (no loose/lifting/swelling) | ☐ |
| Flatness tolerance met per laminate instructions: | ☐ |
| Old flooring/adhesive removed as required | ☐ |
| Room conditions ready; planks acclimated: | ☐ |
| Subfloor cleaned/vacuumed right before install | ☐ |
| Moisture tested using required method (e.g., ASTM): | ☐ |
| Moisture limit met per manufacturer: | ☐ |
| Underlayment/vapor barrier setup matches laminate type | ☐ |
| Expansion gaps left: | ☐ |
| Layout planned for doorways/closets/transitions | ☐ |
Sources
– ASTM F2170 — Standard Test Method for Determining Relative Humidity in Concrete Floor Slabs Using in situ Probes (ASTM International)
– ASTM F1869 — Standard Test Method for Measuring Moisture Vapor Emission Rate of Concrete Subfloor Using Anhydrous Calcium Chloride (ASTM International)
– ASTM E1745 — Standard Classification System for Vapour Retarders Used in Building Construction (ASTM International)
– ASTM E1155 — Standard Test Method for Determining Floor Flatness and Profile (ASTM International)
Doing laminate flooring prep the right way is mostly about compliance: meet flatness tolerance, verify moisture with the required method, install the specified vapor/underlayment system, acclimate the planks, and maintain expansion space. When you plan these details before the first board, you dramatically reduce the odds of the most expensive issues—gaps, squeaks, and buckling—and you end up with a bedroom floor that stays stable season after season.
Frequently Asked Questions
How do I prepare a subfloor before installing laminate floors in a bedroom?
Start by making sure the subfloor is clean, dry, and free of dust, paint overspray, and debris. Check for flatness using a straightedge—most laminate manufacturers require a fairly smooth surface to prevent gaps and squeaks. Repair low spots with appropriate leveling compound and remove high spots by sanding, then verify moisture levels if your product specifies it. Finally, install the recommended underlayment and moisture barrier for laminate flooring to help protect the planks in a bedroom environment.
What steps should I follow to acclimate laminate flooring before installation in a bedroom?
Acclimate your laminate planks in the bedroom where they’ll be installed for the time specified by the manufacturer, usually around 48 hours. Keep the boxes flat and away from direct sunlight, vents, or exterior walls that may create uneven temperature and humidity. This helps the laminate expand and contract less after installation, reducing the risk of buckling or gaps. If your bedroom is prone to humidity changes, use a hygrometer and follow the product’s recommended moisture and temperature conditions.
Why is moisture protection important when preparing laminate floors for a bedroom?
Even though bedrooms aren’t typically as moisture-prone as bathrooms, moisture can still come from concrete slabs or crawl spaces and may affect laminate over time. A proper moisture barrier and correct underlayment help limit water vapor transfer that can lead to swelling, warping, or moldy odors beneath floors. Before you begin, check the slab with a moisture test if required and address any dampness sources. Choosing laminate with an attached underlayment or adding a separate vapor barrier based on your subfloor type improves long-term performance.
Which underlayment is best for bedroom laminate flooring, and how do I install it?
The best underlayment depends on your subfloor—concrete typically needs a thicker moisture barrier, while wood subfloors may need a thinner underlayment for comfort and sound control. Look for underlayment that matches your laminate flooring’s specifications for thickness, overlap method, and vapor barrier requirements. Roll it out in the correct direction, tape seams tightly, and avoid overlapping where planks will lock. After installing underlayment, leave a clean, flat surface so your laminate flooring installation stays even and stable.
What tools and prep techniques should I use to ensure laminate floors install straight in a bedroom?
Use a quality measuring tape, spacers (for expansion gaps), a pull bar, and a tapping block to avoid damaging the tongue-and-groove edges. Plan your layout first by finding the straightest wall and dry-fitting a row to confirm the width of the last plank—this prevents an unbalanced look. Allow proper expansion gaps around the perimeter, doorways, and any fixed objects like vents or built-ins, since laminate needs room to float. Finally, remove baseboards if needed for a clean finish, and undercut door jambs so the laminate can slide underneath smoothly.
📅 Last Updated: October 20, 2026 | Topic: How to prepare a laminate floors for bedroom? | Content verified for accuracy and freshness.
References
- Laminate flooring
- Floating floor
- Underlayment
- Floor
- https://scholar.google.com/scholar?q=laminate+flooring+installation+subfloor+preparation+moisture+vapor Google Scholar
- https://scholar.google.com/scholar?q=laminate+flooring+acclimation+temperature+humidity+recommendations Google Scholar
- https://scholar.google.com/scholar?q=preparing+subfloor+for+floating+floor+flatness+tolerance Google Scholar
- https://scholar.google.com/scholar?q=laminate+flooring+installation+underlayment+vapor+barrier+study Google Scholar
- https://scholar.google.com/scholar?q=laminate+floor+expansion+gap+installation+guide Google Scholar
- https://scholar.google.com/scholar?q=how+to+prepare+laminate+flooring+before+installation+clean+level+dry+recommendations Google Scholar