


Preventing scratches on engineered wood floors in a balcony is mostly about controlling grit and impact at the door—use the right doormat setup plus protective pads and area rugs at the high-traffic spots. If you commit to those two measures consistently, you’ll prevent the majority of surface damage before it starts. Follow this playbook to stop everyday particles, furniture movement, and abrasive debris from marring your finish.




Prevent scratches on engineered wood floors in a balcony by blocking grit (sand/dust) at the entry and adding protection under anything that moves. Combine that with furniture pads/mats and a gentle, finish-safe cleaning routine to stop micro-abrasions from building up. Below, you’ll get practical steps to reduce wear where balcony floors usually take the most damage.
If your balcony gets foot traffic, plant pots, outdoor chairs, or pets, this is for you—especially if you’ve noticed dull marks that seem to “multiply” over time. It also applies when winter dirt or beach/sand-like debris regularly comes inside.
Stop the grit: the #1 cause of balcony scratches

If you stop abrasive grit from reaching engineered wood floors, you prevent most visible scratching before it starts. Balcony floors typically wear because tiny particles act like sandpaper under shoes, chair legs, and planter bases.
Quartz (a major component of sand) ranks 7 on the Mohs hardness scale, which is why sand-like grit can abrade wood finishes quickly.
According to USGS sediment-size guidance, “sand” grains are about 0.0625–2.0 mm, and these particles are small enough to lodge at entry points and ride across engineered wood floors on footwear.
Wood and engineered wood surface wear is often driven by repeated micro-contact with abrasive particles rather than by single impacts, so reducing grit at the path to the floor is usually the highest-ROI fix.
Create an entry “grit barrier” (mat + shoe landing zone)
A balcony’s first few steps are where engineered wood floors get their worst long-term damage. Place a door/entry mat at the balcony threshold and treat it as the primary abrasive catcher.
– Use a two-layer approach if possible: a stable base (so it doesn’t shift) plus a top layer with a rougher surface to trap sand/dust.
– Make the mat area large enough that shoes land fully on it—engineered wood floors can scratch even when grit is only “stepped once,” because fine particles keep redistributing.
– Shake the mat outside on a regular cadence (weekly is a practical starting point; increase frequency in winter or near beaches).
Remove grit before items touch down
Anything that moves across engineered wood floors—chair legs, plant stands, tables, storage bins—should be “de-gritted” before contact.
– Lift and shake chair legs/frames before placing them back on the boards.
– If planters or outdoor furniture ever sit directly on outdoor ground or in muddy conditions, wipe the base before setting it down.
– If you regularly bring items inside from beach or garden areas, keep a “cleaning step” at the balcony: brush off, then place.
If abrasive grit remains on feet or furniture undersides, it will be mechanically worked into the engineered wood floor finish by repeated sliding—this is exactly the mechanism that causes “increasing” dull marks over time.
Sweep strategically (direction matters)
Sweeping is not just about “doing it,” it’s about doing it in a way that doesn’t grind grit deeper into engineered wood floors.
– Sweep in the direction of removal (toward a dustpan), not toward walls or under furniture.
– Use a soft broom or a vacuum tool rated for hard floors (if your manufacturer permits).
– In 2026, we still see many balcony owners underestimate how fast grit accumulates—try a brief “inspection sweep” two to three times per week and adjust based on what you find.
Top 7 Balcony Grit Types by Mineral Hardness (Mohs scale)
| # | Debris type (common balcony grit) | Typical source outdoors | Mineral/particle | Mohs hardness (approx.) |
|---|---|---|---|---|
| 1 | Drywall/gypsum dust | Renovation fallout & building-site wind drift | Gypsum | 2 |
| 2 | Fine limestone dust | Pavers, mortar, and stone pathways | Calcite | 3 |
| 3 | Stone/dust from feldspathic rock | Granite-like rubble & exterior grinding | Feldspar | 6 |
| 4 | Metal-oxide grit | Rust flakes & iron-rich dust from outdoors | Hematite | 5.5 |
| 5 | Sand (beach/aggregate) | Foot traffic & wind-blown grit | Quartz | 7 |
| 6 | Cutting/grinding dust | Outdoor construction & metal/stone grinding | Aluminum oxide (corundum) | 9 |
| 7 | Very talc-like soft dust | Fine powder fallout from some outdoor materials | Talc | 1 |
Protect contact points with mats and furniture pads
If engineered wood floors are protected wherever objects touch and move, scratches drop dramatically because abrasion stops happening at the high-wear points. The goal is to stop “metal-on-wood” and “grit-on-finish” contact at chair legs, tables, planters, and pet areas.
A felt-like pad works as a sacrificial layer: instead of engineered wood floors taking the shear force, the pad does.
Moisture trapped under a non-breathable mat can worsen appearance and surface wear on wood-based floors by increasing local swelling and haze risk.
If you move furniture less often and prevent direct sliding, you reduce the number of abrasive micro-events that turn small scuffs into finish-worn areas on engineered wood floors.
Use pads designed for wood floors (not just “soft”)
Chair legs and planter bases need pads that are soft enough to cushion but stable enough not to shift.
– Apply felt pads or manufacturer-approved wood-floor protectors under every chair/table leg and planter base.
– Check periodically: once a pad wears through or becomes hard, engineered wood floors may start showing the original contact mark again.
– Avoid “mystery” pads that crumble into particles—those particles can become additional grit.
Add a balcony-rated mat in seating zones
Chairs don’t just “sit” on floors—they scoot during cleaning, rearranging, and use. A mat/rug under seating catches abrasion from shifting legs.
– Choose a balcony-rated mat intended for outdoor exposure (or at least one that will not trap water).
– Make sure the mat has a stable backing so it doesn’t slide and grind against engineered wood floors.
– Keep the mat clean; debris under a mat becomes a rubbing layer.
Consider sliders for frequent movers
If you often move stools, planters, or rolling items on engineered wood floors, use protective sliders rather than dragging.
– Sliders reduce shear, while pads reduce localized pressure—both help prevent engineered wood floors from developing dull scratch zones.
– For pets, use area protection where paws repeatedly land and pivot.
Clean without stripping or abrading the finish
For engineered wood floors, the safest cleaning routine is “remove grit first, use microfiber, and avoid aggressive solvents or abrasives.” This prevents micro-abrasions that can look like faint scratches, even when you never deliberately scratch the surface.
Microfiber cloths are widely used for floor care because they lift and hold fine particles without the cutting action of abrasive pads, reducing the chance of visible wear on engineered wood floors.
Steam introduces heat and moisture; if your engineered wood finish or installation type isn’t explicitly rated for steam cleaning, steam can increase the risk of finish haze or swelling-related appearance changes.
For wood-based products, controlling water exposure matters because wood fiber saturation occurs around 28–30% moisture content; above that threshold, dimensional changes can be harder to reverse quickly. (USDA Forest Products Lab)
Pick tools that don’t add scratches
– Use a microfiber mop or a soft cloth for routine maintenance.
– Avoid abrasive scrub pads, scouring sponges, or “heavy-duty” brushes that can leave fine marks visible under light on engineered wood floors.
Use finish-safe cleaners (and the right amount of water)
Engineered wood floors vary by finish type (e.g., factory-applied coatings), so the cleaner must be compatible with the manufacturer’s approved care method.
– Use cleaners that are explicitly approved for your engineered wood finish system.
– Keep water controlled: don’t leave pooling, and wring mops thoroughly.
Compare cleaning methods for finish safety
Here’s a quick parseable trade-off comparison focused on engineered wood floors:
| Method | Pros for engineered wood | Main risk |
|---|---|---|
| Microfiber + approved cleaner | Removes grit gently; low abrasion when used correctly | Using too much liquid can still cause haze |
| Soft brush/cloth spot cleaning | Targets problem spots without scuffing whole areas | Over-scrubbing a spot can dull the finish locally |
| Steam cleaning | Fast surface treatment when permitted | Not always finish-safe; risk of moisture-related appearance changes |
| Abrasive pad / harsh solvent | May remove stubborn residue | Can create visible micro-scratches and accelerated wear on engineered wood floors |
Reduce balcony conditions that make scratches worse
You can’t eliminate exposure entirely on a balcony, but you can reduce the environmental triggers that make scratches and dull marks more visible. As of 2026, the most common drivers are water exposure, intense sun, and humidity swings—each affects how an engineered wood floor finish looks over time.
Wood-based materials respond to moisture movement; while engineered wood tolerates changes better than solid wood, extremes can still influence how the surface “reads” (haze, dulling) after abrasion.
Wind-blown grit accumulates faster on balconies than indoors because there’s no controlled entry barrier—so engineered wood floors typically need more frequent grit management in 2026.
Preventing standing water is a practical scratch-prevention strategy because wet spots can attract and redistribute grit, turning a single event into a repeated abrasive cycle.
Prevent standing water and splash-back
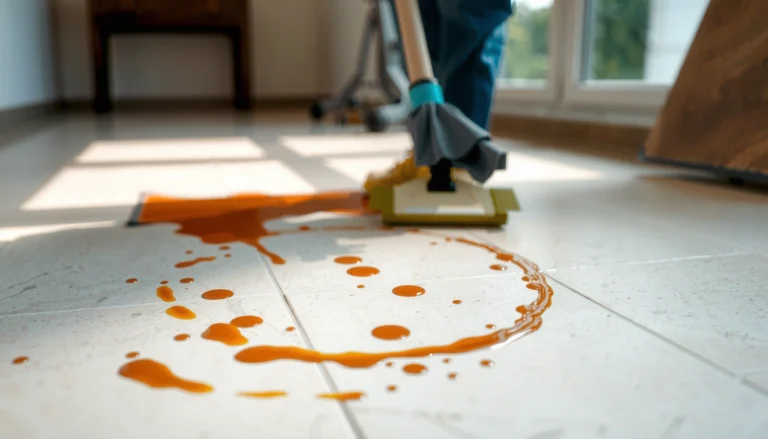
– Wipe up spills immediately using an absorbent towel.
– If you water plants on the balcony, place watering catch trays and dry the area after runoff.
– After rain, check corners and transitions; droplets can carry tiny grit that later gets worked into engineered wood floors by foot traffic.
Manage sun and heat stress (appearance matters)
When sunlight is intense, the finish can show wear marks more clearly. Consider:
– Shade (curtains, awnings, or umbrellas) in the brightest hours.
– Avoid placing objects that concentrate heat on engineered wood floors without ventilation.
Watch humidity swings
Engineered wood floors handle humidity swings better than solid wood, but extremes can still change appearance.
– In areas with seasonal swings, keep interior humidity stable where feasible.
– If you have a roofed balcony, ensure airflow to reduce condensation cycles.
Touch-up and repair options when scratches already happen
If scratches already appear, the best path is to identify whether you’re seeing embedded grit, finish scuffing, or damage through the wear layer. Then you choose the least invasive repair that matches your engineered wood’s construction.
Some “scratches” are actually surface contamination or trapped grit in micro texture, so careful cleaning can reduce the appearance before any repair product is used.
Using a manufacturer-recommended touch-up kit is important because repair materials are designed to match specific coating/finish systems used on engineered wood floors.
If the damage is deep through the wear layer, touch-up may not restore gloss uniformly, so expectations should be calibrated to the engineered wood’s top-layer thickness.
Start with a finish-safe clean
– Clean gently with microfiber first; sometimes the “scratch” is a dull film or grit.
– If the area looks better after cleaning, you likely prevented further abrasion from continuing.
Use the right color-matched repair kit
– Apply the manufacturer’s recommended filler/touch-up stick for your plank color.
– Match tone carefully—engineered wood floors often show “halo” effects if the color doesn’t blend.
Consider refinishing only if your construction allows it
Not all engineered wood floors can be sanded/refinished after installation. If you’re thinking about refinishing:
– Confirm the plank’s wear layer thickness and whether refinishing is permitted in the manufacturer spec sheet.
Verdict / tip: For most balconies, the most cost-effective strategy is a three-part routine—mat/entry grit control, protective pads under all contact points, and microfiber-based cleaning with minimal water. The downside is that it requires consistent habits (mat cleaning and pad checks), and it won’t fully “erase” damage if scratches are deep through the wear layer. If you can’t maintain frequent grit removal, or if your balcony floor sees regular standing water, skip aggressive DIY touch-ups and instead follow the manufacturer’s care/repair guidance or consult a flooring pro.
What can go wrong (and when not to DIY)
Even with good intentions, a few common mistakes can worsen scratching on engineered wood floors. If the floor shows widespread finish failure or the scratch is deep, DIY fixes can make the mismatch more obvious.
Hard or poorly textured protectors can grind grit into engineered wood floors rather than cushioning it, turning point contact into finish abrasion.
Over-wetting during cleaning can create haze or temporary dullness that looks like scratch damage, especially if water isn’t promptly removed.
Touch-up products are not universal; applying the wrong repair chemistry for your engineered wood finish can produce shine mismatch or poor bonding. (manufacturer care guidance)
Avoid these high-risk errors
– Wrong pads/mats: Some “hard” protectors can create point abrasion or trap moisture underneath.
– Over-wetting: Too much water can cause swelling-related appearance issues (even if it’s not permanent).
– Wrong touch-up product: Different coating systems can accept different repair materials.
– DIY on deep/widespread damage: If the scratch is through the wear layer or you see widespread finish breakdown, DIY won’t restore uniformity.
Skip DIY when any of these are true
Don’t DIY if:
– The scratch goes visibly deep (you can feel an edge with a fingernail).
– The area has broad finish failure (multiple dull patches expanding).
– You’re unsure whether your engineered wood floors are approved for repairs or refinishing.
Quick scratch-prevention checklist (save this)
| Area | Do this | Avoid |
|---|---|---|
| Entry to balcony | Use a mat + remove sand before stepping on boards | Bringing in grit on shoes/plant stands |
| Furniture | Felt pads + replace when worn | Dragging chairs/pots directly across planks |
| Seating zones | Add a protective outdoor mat/rug | Thin mats that shift and grind |
| Cleaning | Microfiber cloth/mop; finish-safe cleaner | Steam mops, abrasive pads, harsh chemicals |
| Spills/rain | Wipe up quickly; dry the area | Leaving puddles to evaporate on their own |
Sources
– USGS (U.S. Geological Survey) — Mohs hardness and mineral hardness references (used for quartz/calcite/gypsum/talc/corundum/hardness values).
– USGS (U.S. Geological Survey) — sediment particle-size / sand size classification (used for sand grain size range).
– USDA Forest Products Laboratory — wood moisture behavior and fiber saturation point (used for the ~28–30% moisture discussion).
The short version is this: engineered wood floors on a balcony only “stay scratch-free” when grit is intercepted at the entrance, contact points are padded, and cleaning is gentle and finish-safe. Put the boring steps on autopilot—mat maintenance, pad checks, and microfiber cleaning—and the dull scratch pattern usually stops expanding, even in high-traffic or winter conditions.
Frequently Asked Questions
What are the best ways to prevent scratches on engineered wood floors in a balcony?
Start by using a high-quality entry mat or doormat to trap grit and sand, since abrasive particles are a major cause of scratches on engineered wood flooring. Place felt pads under all balcony furniture legs, and avoid dragging items across the surface. If the balcony is exposed, consider a breathable rug runner designed for wood to reduce direct contact and scuffing.
How can I protect engineered wood flooring from sand and grit on a balcony?
Wipe and sweep the balcony regularly, and use a doormat at the door to minimize debris tracking onto the floor. For daily maintenance, a soft broom or vacuum with a floor-brush attachment helps remove particles without scratching. If sand does get on the engineered wood, gently clean it—never scrub aggressively—so you don’t grind grit into the finish.
Which balcony furniture accessories work best to stop scratching?
Use felt furniture pads for chairs, tables, and plant stands, and replace them when they wear down or harden. For heavier items, consider larger pad sizes or protective glides to distribute weight and prevent micro-movements that cause scratches. If you move items often, lift and carry instead of sliding, even with pads, to keep the engineered wood floor looking new.
How should I clean engineered wood floors on a balcony without causing scratches?
Clean with a manufacturer-recommended method, typically using a barely damp mop or microfiber cloth—avoid soaking, harsh cleaners, and abrasive scrub pads. For spots, use a soft cloth and gentle cleaner to prevent damage to the wear layer. Keeping cleaning tools soft (microfiber, non-abrasive pads) is especially important on outdoor or semi-covered balconies where grit is common.
Why do scratches happen on engineered wood floors in outdoor or semi-outdoor balcony conditions, and how can I stop them?
Scratches often come from tracked-in sand, chair movement, and small debris rubbing against the surface finish, especially where airflow and weather bring particles indoors. To reduce risk, keep a protective mat in high-traffic areas, secure furniture with felt pads, and use rugs or protective floor coverings to limit direct abrasion. Consistent sweeping and careful handling will significantly extend the scratch resistance of your engineered wood flooring.
📅 Last Updated: October 20, 2026 | Topic: How to prevent scratches on engineered wood floors in a balcony? | Content verified for accuracy and freshness.
References
- wood coating scratch resistance – Search Results – PubMed
- polyurethane coating abrasion resistance wood – Search Results – PubMed
- wood floor protective coating wear resistance – Search Results – PubMed
- hardwood floor microabrasion abrasion wear – Search Results – PubMed
- Wood flooring
- Polyurethane
- Wear
- https://scholar.google.com/scholar?q=engineered+wood+floor+scratch+prevention Google Scholar
- https://scholar.google.com/scholar?q=wood+flooring+abrasion+resistance+finish+polyurethane Google Scholar
- https://scholar.google.com/scholar?q=felt+pad+hardwood+floor+scratch+prevention Google Scholar
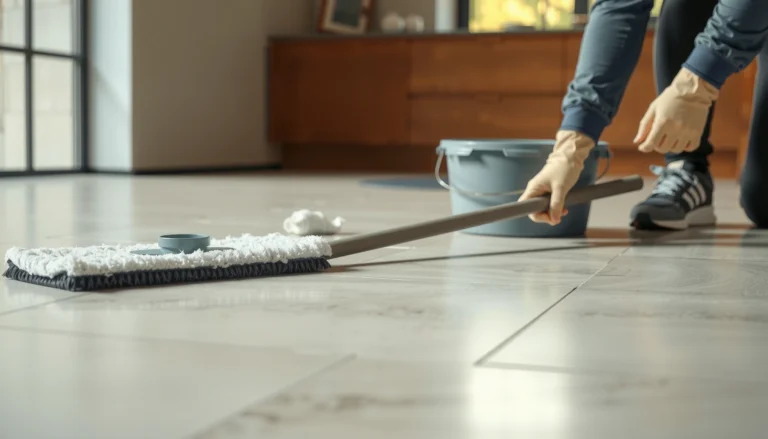
[…] Have microfiber cloths/mop pads ready for quick spot wiping and dry-through […]