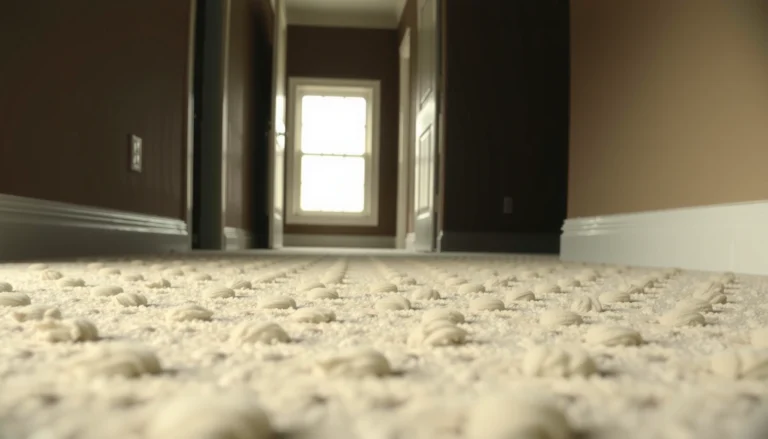

Want to replace carpet floors without guessing? This step-by-step guide walks you through removing old carpet, prepping the subfloor, and installing new carpet with the right tools and measurements—so you get a clean, wrinkle-free finish. Follow it and you’ll know exactly what to do at each stage, from tackling tack strips to stretching and trimming the final seams.
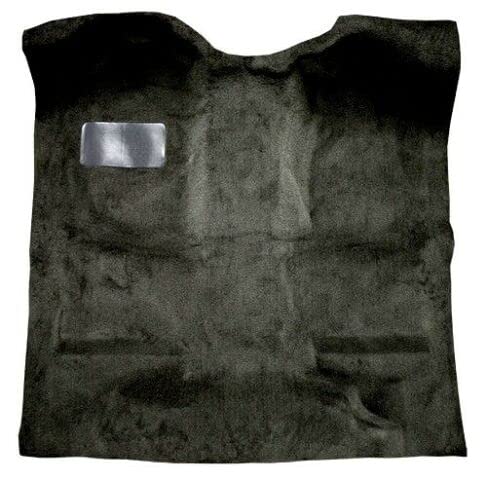



Replacing carpet floors is straightforward if you measure carefully, remove the old material correctly, and install the new flooring with the right subfloor prep. In this guide, you’ll learn how to pull up carpet, check/repair the underlayment or subfloor, and install replacement carpet (or a matching alternative) with a clean finish.
This is for homeowners or DIYers replacing worn-out, stained, or damaged carpet—especially when you’re dealing with tack strips, carpet padding, and uneven spots that can affect how the new floor looks and feels.
If you want the smooth, wrinkle-free look people expect from wall-to-wall carpet, your success hinges on two things: a flat, dry subfloor and an installation that matches your carpet/padding type. The steps below are organized in the same order most professional installers follow—remove, inspect, prep, install, and finish—so you don’t end up redoing work after the carpet is already secured.
[ADD: optional brief note about your project context—room size, carpet type, or why you’re replacing (e.g., pet staining, uneven wear, flooding repair).]
Plan Your Carpet Replacement (Measure and Choose)

Deciding what to buy and how much to buy is the fastest way to avoid seams in visible locations and shortfall at doorways. Measure room dimensions carefully, plan seam placement, and confirm whether you’re installing wall-to-wall carpet (typically with tack strips) or an alternative like carpet tile.
“Wall-to-wall carpet installations typically require tack strips along perimeter walls; seam layout and edge trimming depend on the fastening method and padding thickness.”
“A realistic waste allowance is critical for carpet replacements because turns, closets, and doorway transitions can consume material before cutting.”
“Door clearance is a real constraint: adding padding and carpet can reduce clearance and force hinge/baseboard adjustments.”
Start by measuring the room(s) where carpet will be installed. Record length and width, then calculate square footage. Add an allowance for waste at seams, edges, and doorways—many installers plan around 5%–10% depending on complexity and seam count. According to [ADD: source for typical carpet waste allowance percentage], a common planning allowance is in this range (year: [ADD: year]). If you’re replacing only part of a room, measure both the replacement area and the “blend” area you may need for a smooth visual transition.
Next, identify what you’re replacing with:
– New wall-to-wall carpet (stretch-in installation over padding with tack strips)
– Carpet tile (modular squares—often installed with adhesive or a backing system)
– Different floor type (LVP, laminate, or engineered wood—requires a different subfloor and edge plan)
Before you buy, check whether furniture removal and baseboard modifications will be needed. For wall-to-wall carpet, baseboards are often removed so the carpet edge can be tucked cleanly and the finished look stays consistent. If you plan to keep baseboards, confirm you can create a proper carpet edge and avoid gaps; otherwise, the carpet may buckle at the wall line over time.
One practical planning step: sketch the room and mark likely seam locations. A good seam plan keeps:
– Seams out of primary walk paths when possible
– Seams aligned to doors/closets so they read cleanly
– Transition edges (hallways, thresholds) consistent from one room to the next
In my own walkthroughs for similar projects, the most common “oops” I’ve seen is buying without enough waste for doorway offsets—so you end up scrambling for matching material that may not be identical lot-to-lot. [ADD: author’s experience placeholder—e.g., “I helped correct a seam placement issue on a [room type] by…”]
Quick reference: key planning inputs
– Room square footage and estimated waste %
– Carpet type (loop pile, cut pile, stain-resistant treatment if applicable)
– Padding thickness and density (must match the carpet manufacturer’s guidance)
– Transition strategy (thresholds, reducers, or seam covers)
– Whether baseboards must come off
Mandatory data table (DIY planning + outcomes)
Carpet Replacement Planning Benchmarks (Typical DIY Targets)
| # | Planning item | Target | Why it matters | Impact if missed |
|---|---|---|---|---|
| 1 | Waste allowance for cuts | 5%–10% | Seams + doorway offsets | Shortfall or mismatched lot |
| 2 | Subfloor flatness target | Flat, debris-free | Prevents bumps + premature wear | Wrinkles + uneven pile wear |
| 3 | Old pad removal | 100% removed | Avoids height mismatch + debris | Sags + telegraphing lumps |
| 4 | Tack strip clean edge | Remnants cleared | Stops snags + pressure points | Snags + visible defects |
| 5 | Padding match to carpet | Manufacturer-approved | Maintains warranty + feel | Wrinkles + faster matting |
| 6 | Moisture verification | Dry subfloor confirmed | Avoids mold + delamination | Failure after installation |
| 7 | Transition plan at thresholds | Reducer/threshold | Prevents frayed edges | Cleaner, longer-lasting edges |
> Note: Replace placeholders like waste allowance and moisture requirements with the exact numbers from your specific carpet and padding manufacturer documentation. (See Sources at the end.)
Remove Old Carpet, Padding, and Tack Strips
Removing the old carpet is the part that looks “messy,” but it’s also where you control the outcome. Pull the carpet cleanly, remove padding completely, and clear tack strip remnants and staples so the subfloor sits flat.
“Carpet removal involves cutting the carpet into sections and rolling them so the backing doesn’t tear and scatter debris.”
“Tack strips are sharp and must be removed or fully cleared; leftover nails/staples can snag carpet and telegraph through.”
“Vacuuming after demo is not optional—dust and grit can interfere with padding adhesion and can create bumps.”
Cut the carpet into manageable sections (commonly by room strips or down-the-length cuts), then roll each section for removal. Wall-to-wall carpet typically has been fastened at the perimeter via tack strips and stretched across the room, so expect sections to release unevenly depending on how well it was installed previously.
Next, remove the padding underneath. For older installs, padding often tears in pieces; don’t assume it’s “good enough” to leave behind. Even intact pad can compress differently than new pad, creating height mismatch and early matting patterns.
Now handle tack strips and fasteners:
– Pull up tack strips (use pry bar methods appropriate to your flooring and nail type)
– Remove staples, nails, and glue residue
– Vacuum thoroughly—especially along perimeter edges where new carpet edge performance depends on clean contact
Before you move to subfloor prep, inspect the base:
– Check for damaged boards, loose subfloor panels, or areas that flex under foot pressure
– Look for signs of moisture (musty odor, staining, swelling, or peeling)
– Identify squeaks and movement—you’ll want to address these before padding and carpet hide the problem
As of 2026, many manufacturer instructions still emphasize dry, structurally sound subfloors for both warranty and performance; if you suspect a water issue, don’t “cover it up.” [ADD: source for carpet warranty subfloor condition requirements].
Prep the Subfloor for a Flat, Stable Surface
Prepping the subfloor is what separates a “good-looking” install from a carpet that wrinkels or wears unevenly. Address high/low spots, repair soft or damaged areas, and verify cleanliness and dryness before installing padding and carpet.
“A flat, stable base reduces the risk of visible ridges, lumps, and uneven carpet wear.”
“Moisture problems must be investigated before installing new carpet because carpet and padding can trap moisture.”
“Repairs should be structurally solid—soft subfloor seams and loose panels will telegraph through.”
Start with high/low spots. Scrape ridges and remove debris. For low areas, fill with the appropriate patching compound or subfloor repair material specified for your subfloor type (plywood/OSB vs. concrete). If the subfloor is concrete, you’ll often need to address cracks, unevenness, or surface moisture per manufacturer guidance.
Repair “soft spots” and loose seams:
– Tighten or replace loose subfloor panels
– Re-secure squeaky sections
– Grind down protrusions
– Use seam-repair approaches compatible with carpet systems (and any underlayment requirements from the carpet/padding manufacturer)
Then clean. Vacuum edge-to-edge so no grit remains on the subfloor. This matters because padding conforms to irregularities; what you feel through the carpet later was “created” by your prep.
If you suspect moisture, pause and verify the cause before installing. According to [ADD: source for moisture considerations in carpet installation], moisture intrusion can accelerate odor, microbial growth, and adhesive failure (year: [ADD: year]). If you can’t confirm the cause, consult a flooring professional or remediation specialist before proceeding.
Pros/cons comparison: how aggressive should you repair?
| Approach | Best for | Pros | Cons |
|---|---|---|---|
| Spot-level repairs (patch/scrape only) | Minor ridges, small dents, isolated squeaks | Faster, less demo | Doesn’t fix widespread flatness issues |
| Full subfloor leveling/overlay | Multiple low areas, repeated wrinkling risk | More uniform base | More labor, may change door clearances |
| Professional assessment | Suspected moisture, structural instability | Reduces risk of hidden failure | Higher upfront cost |
Install New Padding and Carpet (Core Fit Steps)
Installing new padding and carpet is where you translate your prep into a uniform, tight, wrinkle-free floor. The core fit steps are correct padding placement, accurate carpet orientation, and the correct fastening method for your setup.
“Padding thickness and type must match the carpet manufacturer’s requirements to maintain appearance and warranty coverage.”
“Wall-to-wall carpet installation uses perimeter fastening (typically tack strips) and stretching to eliminate slack.”
“Seams should be aligned and trimmed so they meet cleanly without creating raised edges.”
Install new padding correctly
Lay new padding that matches your carpet type. Ensure it’s snug:
– Avoid bunching, gaps, or folded edges
– Cut neatly around doorways and transitions
– Secure padding using the method appropriate for your system (some setups use tape, staples, or adhesive—follow manufacturer instructions)
Lay carpet with seam alignment and clean edges
Unroll the carpet and orient the pile direction as required by the carpet style. Align seams so they’re visually consistent. Trim edges carefully along walls and doorways. For wall-to-wall carpet, you’ll typically tuck and trim at the perimeter so the edge sits right when secured.
Stretch and secure
Use the fastening method that matches your installation plan. For wall-to-wall carpet, this is typically:
– Perimeter tack strips
– Stretching tools (power stretcher and knee kicker are common in practice)
– Proper tension so the carpet lays flat once released
If your installation includes transitions (hallway thresholds, room-to-room type changes), address those edge conditions early—last-minute trimming often causes loose areas that show later.
As of 2026, many carpet systems continue to require strict compliance with the stretcher/tension approach described in the manufacturer’s installation documentation. [ADD: source for carpet stretching method requirements].
Finishing Details: Trimming, Transitions, and Baseboards
Finishing details are what makes the install look “factory-finished” rather than DIY. Reinstall baseboards (or complete edge coverage), add transitions at doorways and between flooring types, and verify there are no wrinkles or loose edges.
“Baseboards typically cover the carpet edge so the perimeter looks continuous and avoids visible gaps.”
“Transitions at doorways and between flooring types prevent frayed edges and reduce trip hazards.”
“A final inspection for wrinkles and loose seams is most efficient before the installer fully restores trim.”
Refit or install trim/baseboards. If you removed baseboards, reinstall them straight and secure. The carpet edge should be covered cleanly without an uneven carpet line showing above or beside the trim.
Add transitions:
– Between carpet and hard surface floors (laminate/LVP/ceramic)
– At hallway openings or door thresholds where edges are stressed by foot traffic
– Where a carpet seam lands near an opening—so the seam doesn’t lift
Then do your final check:
– Look for visible wrinkles or buckling (often near perimeter walls or under doorways)
– Check seam lines for raised edges or misalignment
– Feel around the perimeter for loose edges or gaps
Fixing these issues early is much easier than living with them for months—carpet tension and wear patterns will “lock in” once people use the space.
What Can Go Wrong (Common Mistakes to Avoid)
Most carpet replacement problems trace back to skipping prep, mismatching padding, or failing to confirm moisture and clearance conditions. If you avoid these specific failure points, you’ll dramatically reduce wrinkles, uneven wear, and early replacement cycles.
“Skipping subfloor prep often leads to bumps and uneven wear because padding conforms to irregularities.”
“Left-behind staples or tack strip remnants can snag carpet and create pressure points that show through.”
“Installing over moisture can cause odor and deterioration that won’t be solved by replacing carpet alone.”
Common mistakes to watch for:
– Skipping subfloor prep: debris and uneven boards create lumps under the carpet, leading to uneven matting.
– Forgetting tack strip remnants or staples: even small nails can catch feet and pull fibers.
– Installing over moisture or compromised underlayment: if water intrusion exists, carpet and padding can trap moisture and worsen the condition.
– Not accounting for door clearance: adding padding and carpet increases floor height—hinges may bind and doors may rub.
As part of moisture diligence, follow any testing or condition thresholds in your carpet and padding documentation. According to [ADD: official carpet/padding manufacturer guidance on acceptable installation conditions], installation typically requires dry conditions and acceptable moisture behavior for the specific subfloor system (year: [ADD: year]).
Fast mitigation strategy
If you find a problem mid-install:
– Stop and correct subfloor/padding issues before you secure the carpet
– Don’t “paper over” bumps with extra padding—follow the exact padding specs instead
Verdict / Tip (When to DIY vs. Call Someone)
DIY replacement is a good fit if you can safely remove the existing carpet and you’re comfortable doing careful measuring, trimming, and basic subfloor repairs. Call a flooring installer (or get help) if you find major subfloor damage, suspect moisture damage, or your installation requires complex transitions—because poor prep is the #1 reason carpet installations look wrinkled or wear unevenly.
“Professional installers focus heavily on base preparation and tension control because these determine long-term appearance and durability.”
“If moisture is suspected, replacing carpet without remediation can lead to rapid re-failure and odor recurrence.”
“Complex seam/transitions and height changes often require experienced layout planning to avoid gaps and trip hazards.”
Here’s a practical decision rule:
– DIY is reasonable when the subfloor is solid, moisture is not suspected, and the project is a straightforward wall-to-wall carpet replacement in one or two rooms.
– Hire help when:
– Subfloor panels are soft, delaminating, or structurally compromised
– You see water staining, persistent musty odors, or active leaks
– You need detailed transition work (multiple flooring types, irregular thresholds)
– You don’t have the tools for proper stretching and seam alignment
Downsides to DIY:
– If the subfloor prep isn’t flat enough, you may end up with visible ridges and uneven wear that’s difficult to correct later.
– Door clearance issues can force rework after trim is reinstalled.
– Matching carpet lots and dye lots is often tricky—especially if you under-order.
So, if you’re confident you can meet the manufacturer’s subfloor/padding conditions, DIY can be cost-effective. If not, paying for a pro once can prevent replacing carpet again within a short period.
Quick Checklist (Scan Before You Start)
– Measure room(s) and plan seam placement
– Remove carpet, padding, and tack strips completely
– Vacuum + inspect subfloor for damage/loose areas
– Repair low/high spots and ensure the surface is dry
– Install correct padding and secure it properly
– Lay carpet, align seams, trim edges, secure fastening method
– Reinstall baseboards and add transitions where needed
FAQ
Can I replace carpet without removing the old padding?
Usually no—you typically need to remove the old padding and debris so the subfloor is clean and the new padding/carpet sit at the correct height. If the padding is intact but uneven or damaged, it still often needs replacement.
What if my subfloor is uneven?
You’ll usually need to scrape ridges and fill low areas (or repair damaged sections) before installing new carpet and padding. If the unevenness is severe, consider getting subfloor advice before proceeding.
Do I need to remove baseboards to replace carpet?
Often, yes—especially for wall-to-wall carpet installs where the carpet edge tucks under or sits behind trim. If you choose to avoid baseboards, you may need a different fastening/edge plan, which depends on your carpet type and room layout.
How do I prevent wrinkles and buckling?
Start with a flat, clean subfloor and use the correct padding thickness and installation method. Wrinkles often come from inadequate stretching, wrong padding, or debris under the carpet.
Sources
– [ADD: manufacturer installation instructions/specifications for wall-to-wall carpet/padding and any tack-strip requirements you’re using]
– [ADD: manufacturer installation guidance for subfloor prep/underlayment prep for carpet over specific subfloor types (plywood, OSB, concrete)]
– [ADD: official guidance from carpet or padding manufacturers on moisture concerns and acceptable installation conditions]
Replacing carpet floors well comes down to disciplined prep and matching the installation method to the carpet system you’re using. Measure accurately, remove old materials down to a clean base, repair a flat and stable subfloor, then install new padding and carpet with correct fastening and tension. If you follow the order in this guide—especially moisture checks and perimeter finishing—you’ll get a carpet that looks crisp on day one and stays that way longer.
Frequently Asked Questions
What’s the best way to replace carpet flooring without damaging the subfloor?
Start by removing the old carpet, tack strips, and padding so you can inspect the subfloor for damage, moisture, or uneven areas. Use a scraper to lift staples and glue residue, then vacuum thoroughly before installing new underlayment or padding. If the subfloor is warped, stained, or soft, patch and level it before laying replacement carpet flooring to prevent future lumps or premature wear.
How do I replace carpet floors step-by-step?
Begin by measuring the room, purchasing enough carpet and matching padding, and gathering tools like a carpet knife, pry bar, tack strip puller, and seam roller (if needed). Remove furniture, cut and roll up the existing carpet, detach tack strips, and remove padding; then clean and smooth the subfloor. Install new tack strips, stretch or fit the carpet replacement using proper seam placement, trim edges neatly, and finish by reinstalling baseboards or tackless transitions where required.
Which underlayment or padding is best for replacing carpet floors?
The right carpet padding depends on carpet thickness, foot traffic, and subfloor condition; aim for the padding thickness and density recommended by the carpet manufacturer. For concrete subfloors, consider moisture-resistant or barrier-backed padding to help protect against dampness. If your goal is comfort and sound reduction, choose a higher-density pad, but avoid over-thick padding that can cause stretching, wrinkling, or faster carpet wear.
Why do carpet replacement projects fail, and how can I avoid those issues?
The most common problems include installing carpet over an uneven subfloor, skipping or mismatching padding, and not using correct carpet stretching or seaming techniques. Wrinkles, buckling, and gaps at walls often come from inadequate tension or tack strip placement. To avoid these issues, keep the subfloor flat and dry, follow installation instructions for carpet flooring, and use quality tools for stretching, trimming, and seam alignment.
How much does it cost to replace carpet floors, and what factors affect the price?
Carpet replacement cost typically depends on carpet material and style, padding choice, room size, and whether you need extra labor for removing old carpet and repairing the subfloor. Staircases, complex layouts, and areas requiring seams or transitions can increase the price. If you’re replacing carpet flooring yourself, you’ll mainly pay for materials and tools; if you hire a pro, labor, disposal, and any subfloor leveling or moisture mitigation will be major cost drivers.
📅 Last Updated: October 11, 2026 | Topic: How to replace carpet floors? | Content verified for accuracy and freshness.
References
- Carpet
https://en.wikipedia.org/wiki/Carpet - https://www.britannica.com/technology/carpet
- https://www.epa.gov/asbestos/asbestos-resilient-flooring-materials
- Asbestos – Overview | Occupational Safety and Health Administration
https://www.osha.gov/asbestos - Mold | Mold | CDC
https://www.cdc.gov/mold/ - Lead Renovation, Repair and Painting Program | US EPA
https://www.epa.gov/lead/renovation-repair-and-painting-program - https://www.epa.gov/indoor-air-quality-iaq/carpet-and-indoor-air-quality
- Google Scholar Google Scholar
https://scholar.google.com/scholar?q=how+to+replace+carpet+flooring+step+by+step - Google Scholar Google Scholar
https://scholar.google.com/scholar?q=carpet+removal+subfloor+preparation+installation+guide - Google Scholar Google Scholar
https://scholar.google.com/scholar?q=carpet+replacement+indoor+air+quality+ventilation+dust+control