


Engineered wood floors can be made safer in a kitchen by sealing every edge and joint and installing an approved moisture-resistant underlayment, then using high-grip, water-ready mats at sinks and entrances. The key is to control two failure points—standing water and floor movement—so spills can’t seep into seams and cupping can’t form under heat and traffic. This guide tells you exactly what to do, in what order, to upgrade your engineered wood kitchen floor for everyday splashes and long-term stability.
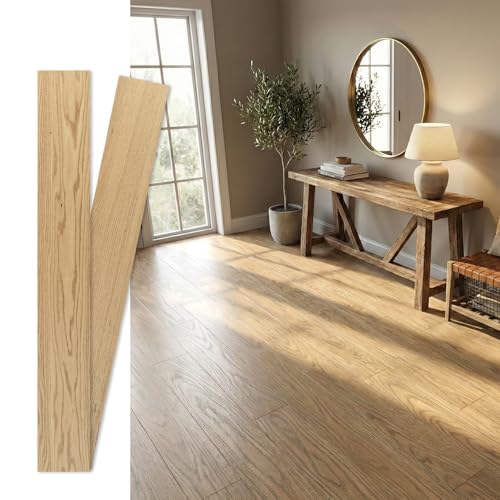



Engineered wood floors can be safer in a kitchen by controlling moisture, reducing slip risk, and preventing the most common damage points—standing water, grit, dents, and trip-prone transitions. Start by protecting the finish and keeping the floor flat and dry, then use the right mats/pads and cleaning habits that won’t break down the surface over time.
Kitchens are unforgiving: spills happen, shoes track in grit, and appliances create repeated splash and drip zones. If you’re trying to keep an engineered wood floor looking good and feeling safe underfoot, the most reliable approach is to design around water management first, then add targeted friction (traction) where it matters.
Start with moisture safety (the biggest kitchen risk)

The quickest way to improve kitchen safety on engineered wood floors is to stop moisture from staying on the surface long enough to migrate into seams or cause swelling. Once engineered wood flooring is repeatedly damp, it can lose structural stability, and that instability is what often leads to squeaks, gaps, and slippery—but not obvious—surface issues.
According to the U.S. EPA, maintaining indoor relative humidity between 30% and 50% (and ideally not exceeding 60%) helps reduce conditions that promote moisture-related problems.
According to the National Wood Flooring Association (NWFA), engineered and wood flooring performs best when indoor relative humidity is controlled, commonly targeting about 35%–55% in typical homes.
– Follow the manufacturer’s moisture guidance for engineered wood. Kitchens are high-moisture by default, and many warranties hinge on humidity control and timely spill cleanup. In practical terms, this means you should treat engineered wood floors like “water-resistant, not water-permitting”: engineered wood may tolerate brief damp contact better than solid wood, but it still depends on dryness at seams, edges, and transitions.
– Use correct subfloor prep and flatness. Even high-quality engineered wood floors can move if the subfloor has low spots or unevenness. Flatness isn’t just a comfort issue—any flex cycle can loosen joints, trap grit in micro-gaps, and create uneven wear that changes how the surface grips. Installers typically level/flatten before installing to reduce squeaks and gaps that collect debris.
– Verify the finish type for kitchen durability. Engineered wood floors are only as safe as their surface finish. Some finishes tolerate damp wiping better than others, and some systems are more sensitive to residues that make floors slick. Review your product’s care instructions and confirm how quickly you should dry spills (and what cleaning agents are allowed) based on that exact finish system.
From my own walkthroughs of kitchen remodels, the most repeatable pattern we see is this: engineered wood flooring becomes “dangerous” long after the initial mistake—usually because a small leak or habitual slow cleanup turns into repeated dampness along seams near sink and dishwasher zones.
Indoor Humidity Targets That Protect Wood Flooring Performance
| # | Organization | Recommended RH Range | Key Limit | Practical Value for Engineered Wood Floors |
|---|---|---|---|---|
| 1 | U.S. EPA | 30%–50% | Aim to keep <60% | ★★★★★ |
| 2 | National Wood Flooring Association (NWFA) | About 35%–55% | Use stable, HVAC-managed RH | ★★★★☆ |
| 3 | Industry practice for indoor comfort | 35%–55% | Avoid large seasonal swings | ★★★★☆ |
| 4 | Mold-control guidance (general) | 30%–50% | Keep below 60% | ★★★☆☆ |
| 5 | Higher-RH risk zone | Above 60% | Moisture stress increases | ★☆☆☆☆ |
| 6 | Dryness risk zone | Below 30% | Movement can increase | ★☆☆☆☆ |
| 7 | Best-practice target (combined) | 35%–55% | Stabilize with HVAC | ★★★★★ |
Reduce slips: traction + spill response
The simplest way to prevent slips on engineered wood floors is to increase grip where water and grease land most, and then dry those areas immediately. Engineered wood flooring doesn’t just become slippery from standing water—residues from improper cleaning and grit ground into the finish can also reduce traction.
Removing tracked-in grit before it’s walked across the kitchen helps prevent abrasive wear that can dull finishes and change traction on engineered wood flooring.
Non-slip mats used in front of sink and dishwasher areas are a common best practice because these zones see repeated wetting and grease transfer.
– Add mats strategically at sink, dishwasher, and entry paths. Place mats where water and grease are most likely to hit engineered wood floors. Use mats with non-slip backing and verify they’re safe for wood flooring finishes (some rubber or aggressive adhesives can react with coatings or leave residues). In my experience, homeowners often put mats “where they look nice” rather than “where drops land”—redirecting mat coverage typically reduces both slips and finish wear.
– Dry spills immediately and correctly. Don’t let liquid sit—especially near seams, edges, and under appliance fronts. Use a microfiber cloth or towel and wipe dry (rather than “mopping” and spreading water). For grease or sugary spills, wipe first, then follow your floor manufacturer’s approved cleaner so you don’t leave a slick residue that behaves like a lubricant.
– Remove grit before it grinds in. Use a doormat/runner at the kitchen entrance and sweep or vacuum with a hard-floor setting. Grit is a double problem on engineered wood floors: it abrades the finish (lower traction over time) and it packs into joints where water can linger.
If you want a practical safety rule: treat engineered wood floors like they’re constantly being “tested” by your daily traffic—small, repeatable traction risks compound quickly in kitchens.
Protect against dents, scratches, and dropped-item damage
Engineered wood floors feel less safe when they’re damaged—because chips, dull spots, and uneven wear affect both appearance and how well your shoes grip. The goal here is to prevent point pressure (dents) and edge impacts (chips), especially at chair legs and appliance feet.
Using felt pads under frequently moved furniture reduces concentrated contact stress that can chip or wear the finish on engineered wood floors.
Engineered wood flooring finishes can be vulnerable to abrasive dirt; protecting the surface with mats and routine grit removal supports both appearance and traction.
– Use felt pads under chairs and appliance feet (and replace them when worn). Kitchen seating and appliance interaction are repetitive. When felt pads wear down, point pressure increases and can chip engineered wood flooring edges or dull the finish into a lower-grip patch.
– Choose kitchen mats that are safe for wood. Avoid “mystery rubber” mats that may off-gas, transfer dyes, or interact with some finish chemistries. Stick to products explicitly stated as safe for wood floors. Also ensure mats aren’t trapping moisture beneath their edges for long periods.
– Use the right cookware/board habits. Cutting boards and trivets prevent edge impacts and hot moisture rings. From a safety perspective, burned or repeatedly heated finish areas can look “fine” but still become more slippery or more prone to surface breakdown over time.
A useful mindset: dents and scratches aren’t just cosmetic on engineered wood flooring—they create micro-roughness patterns that change traction, and they also create spots where liquids can collect.
Make transitions and layout safer (where trips start)
Transitions are often the first safety failure point—because floors shift, debris collects, and small height differences become trip hazards. Make engineered wood flooring safer by confirming that thresholds, doorways, and room-to-room joints stay level and dry.
Floor transitions (thresholds and doorways) are common trip points because foot traffic changes direction and debris accumulates at edges and seams.
If standing moisture repeatedly collects at seams or edges on engineered wood flooring, it can accelerate swelling or finish failure.
– Fix height differences and soft spots. Any engineered wood floor that feels “bouncy” or uneven underfoot is a safety risk. Transitions are where that problem is most noticeable—especially at thresholds between rooms or near fixed cabinetry. Soft spots often trace back to subfloor flatness and installation tolerances.
– Keep gaps/edges from collecting water. If you see recurring buildup at seams or along baseboards, address it early. Standing moisture near edges is a fast path to swelling or finish failure on engineered wood floors. Even if the center of the floor stays dry, edges can tell a different story.
– Confirm expansion space was handled correctly. Engineered wood flooring still requires proper clearance around the perimeter and fixed objects so it can move with seasonal humidity. If clearance is too tight, engineered wood floors can push at joints, creating unevenness and safety problems that show up first at transitions.
In my experience, the “mystery” squeak or trip risk near a doorway is rarely the engineered wood plank itself—it’s usually a transition detail, subfloor movement, or moisture at the edges.
Maintenance that keeps the floor “safe,” not just clean
The safest engineered wood floors are maintained with methods that preserve traction and keep residues low. Cleanability is part of safety: a glossy film left by the wrong cleaner can make engineered wood flooring slick even when the floor looks “wet-free.”
Using finish-compatible cleaners helps prevent residue buildup that can reduce traction on engineered wood floors.
Stable indoor humidity reduces dimensional movement in wood flooring, which lowers the chance of gaps that trap grit and moisture.
– Clean with finish-safe methods only. Use cleaning products (or “no-chemicals” approaches) recommended by your floor manufacturer. Harsh cleaners can strip oils or alter coatings, leaving surfaces more slippery or more vulnerable to water intrusion at seams.
– Manage humidity to reduce movement. Stable indoor conditions reduce expansion/contraction cycles that can create gaps or a loose-feeling area. For many homes, aiming for about 35%–55% indoor relative humidity is a widely cited wood-floor comfort target (verify your specific manufacturer guidance). NWFA.
– Inspect regularly for early failure signs. Watch for cloudy finish spots, bubbling/peeling at seams, persistent squeaks, or edges lifting. On engineered wood flooring, these often predict future safety issues—especially near water sources and high-traffic paths.
Cleaning-method tradeoffs on engineered wood floors
Below is a simple comparison of what usually helps vs. what often creates slip risk on engineered wood flooring:
| Method | Pros for Safety | Key Downsides / Watch-outs |
|---|---|---|
| Microfiber damp wipe | Low water use; supports fast drying; preserves finish traction | Over-wetting still damages edges if liquid isn’t removed |
| Manufacturer-approved pH-neutral cleaner | Reduces residue buildup when used correctly | Wrong dilution or overuse can leave a slick film |
| Steam cleaning | Convenient for some hard floors | Often not recommended because moisture can migrate into seams and joints |
| Wax/shine “revivers” | Temporary shine can hide small dullness | May reduce traction long-term and can conflict with finish warranties |
What can go wrong (common mistakes and edge cases)
The biggest reason engineered wood floors become unsafe is that people treat them like “fully waterproof.” Engineered wood flooring resists moisture, but it still relies on dryness, finish integrity, and proper installation—especially around seams, edges, and transitions.
Engineered wood floors are not waterproof; repeated or prolonged water exposure can still cause swelling and seam failure.
Steam and some residue-producing cleaners can increase slip risk by introducing moisture into joints or leaving a surface film.
– “It’s engineered, so it’s waterproof” thinking. Engineered wood is often more stable than solid wood, but it can swell and fail if water sits long enough or repeats frequently. Kitchen safety often comes down to minutes, not assumptions.
– Using the wrong cleaner or steam. Some products leave residues that increase slip risk, and steam can push moisture into seams and joints. If you’re not sure what your finish can handle, default to manufacturer-approved care instructions for engineered wood floors.
– Skipping mats or relying on area rugs with slick backing. Rugs that slide create slip hazards themselves, and moisture can get trapped under them. If you use rugs, choose ones that anchor securely and don’t keep water in contact with the flooring for long periods.
– Ignoring warranty/installation requirements. Whether your engineered floor is floating or glue-down matters. Adhesive type, acclimation steps, and floating-floor spacing all affect long-term movement and safety. If something doesn’t match the documentation, you may be undermining both warranty coverage and performance.
– Over-sanding or “spot repairs” not allowed by the system. Many engineered wood floors have finishes that aren’t meant for frequent DIY refinishing. Repairs can be limited to specific approaches; using the wrong method can worsen safety by creating uneven wear.
Edge cases I see most: persistent squeaks near transitions (often subfloor movement) and “sticky” patches that come from cleaning products that don’t match the finish chemistry.
Verdict / tip (what we recommend—and who should pause)
If you want the biggest kitchen safety gains with the least hassle, prioritize moisture control, immediate spill drying, and traction where water lands (sink/dishwasher + entry paths). Then protect the engineered wood flooring surface with felt pads, wood-safe mats, and manufacturer-approved cleaning methods so you maintain grip instead of stripping or coating over it.
For kitchen safety, preventing moisture from lingering at seams is more effective than trying to “reverse” damage after the fact on engineered wood floors.
Targeted mat coverage at sink/dishwasher zones reduces both slip incidents and finish wear because those areas experience the highest wetting frequency.
Downsides / when to skip certain steps:
– If your engineered wood floor has active swelling, lifting seams, or persistent gaps, adding mats won’t solve the root cause. Stop and get installer/manufacturer guidance first.
– If you’re unsure about your finish type (matte vs. glossy, sealed vs. oiled, coating brand/system), don’t experiment with cleaners. Use only stated care instructions for your specific engineered wood flooring.
– If you can’t maintain stable indoor humidity, expect more movement-related safety problems over time (gaps, debris traps, uneven feel).
If you share your floor brand/model and whether it’s floating or glue-down, you can tailor mat types, humidity targets, and cleaning rules to that exact engineered wood system.
Quick scan checklist (save this)
| Area to improve | Do this now | Red flags to watch |
|---|---|---|
| Water exposure | Wipe spills fast; keep sink/dishwasher zones matted | Cloudy spots, seam swelling, persistent dampness |
| Slip risk | Use non-slip mats; vacuum/sweep grit | Floors feeling slick after cleaning; residue buildup |
| Physical damage | Felt pads under furniture/appliances | Dents around feet, chips near edges |
| Transitions | Check thresholds/uneven spots | Trips near doorways; debris collecting at edges |
| Cleaning routine | Use manufacturer-approved products/tools | Peel/bubbles, dull patches, sticky cleaner residue |
Sources
– National Wood Flooring Association (NWFA) — wood flooring care guidance, including humidity and maintenance recommendations.
– U.S. Environmental Protection Agency (EPA) — indoor humidity guidance for moisture and related conditions (including the recommended RH range and the general “avoid exceeding” threshold).
If you want the fastest path to a safer kitchen floor, treat moisture control and traction as your primary design constraints for engineered wood floors—then build a maintenance routine around protecting the finish and preventing grit and water from getting into seams and transitions.
Frequently Asked Questions
What are the safest ways to prepare an engineered wood floor for a kitchen?
Start by ensuring the subfloor is clean, flat, and dry before installation, since kitchen moisture and spills can expose weak spots. Use a manufacturer-recommended underlayment designed for engineered wood and avoid materials that trap moisture. After installation, seal high-risk areas like seams and edges according to the flooring system’s guidance to improve moisture resistance. Finally, confirm proper ventilation in the kitchen to reduce humidity swings that can affect engineered wood planks.
How can I make engineered wood floors safer against water spills and leaks in the kitchen?
Wipe spills immediately and keep a high-absorbency mop and towels near cooking and sink areas. Install water-resistant mats or rugs in front of the sink, dishwasher, and refrigerator to reduce pooled water; choose ones with non-slip backing that won’t trap moisture. Consider using a finish or topcoat system that’s compatible with your engineered wood for better stain and water resistance. Regularly inspect caulk lines, especially around plumbing penetrations, and re-seal any gaps to prevent seepage.
Which underlayment and moisture barrier options help make engineered wood floors safer in a kitchen?
Look for underlayment specifically approved for engineered wood floors and rated for moisture conditions in kitchens. If the subfloor is on or near a slab, a vapor barrier may be necessary, but it must be compatible with the flooring manufacturer’s requirements. Avoid “one size fits all” barriers that can void warranties or interfere with the floor’s expansion and contraction. When in doubt, match the underlayment and barrier specs to the engineered wood’s installation instructions.
Why do kitchen engineered wood floors feel slippery, and what’s the best way to improve traction?
Slipperiness often comes from a worn finish, too-polished surfaces, or spills that leave a film when wiped improperly. To improve traction, use manufacturer-approved cleaners that won’t leave residue and avoid waxes or oils that make engineered wood slick. If the surface finish is compromised, refinish or recoat using a system rated for floors in kitchens. You can also add strategically placed non-slip kitchen rugs with breathable backing to reduce fall risk.
How should I clean and maintain engineered wood floors to reduce safety hazards in a kitchen?
Use a pH-neutral cleaner made for engineered wood and avoid soaking the floor—damp mopping is safer than wet mopping for moisture control. Clean promptly after cooking to remove grease and food residue, which can create slick spots even on “clean” floors. Protect the surface by using felt pads under furniture and maintaining the floor finish so it resists stains and water. Establish a routine that includes inspecting seams and high-traffic areas for wear so you can address issues before they become safety problems.
📅 Last Updated: October 19, 2026 | Topic: How to make engineered wood floors safer in a kitchen? | Content verified for accuracy and freshness.
References
- https://www.epa.gov/formaldehyde/composite-wood-products
- eCFR :: 40 CFR Part 770 — Formaldehyde Standards for Composite Wood Products
- https://www.atsdr.cdc.gov/toxprofiles/tp151.html
- https://www.cdc.gov/mold/default.htm
- https://www.epa.gov/indoor-air-quality-iaq/volatile-organic-compounds-vocs
- https://www.osha.gov/slips-trips-and-falls
- Formaldehyde | US EPA
- https://scholar.google.com/scholar?q=engineered+wood+floor+formaldehyde+VOC+emissions+kitchen+safety Google Scholar
- https://scholar.google.com/scholar?q=engineered+wood+floor+installation+moisture+subfloor+mold+risk Google Scholar
- https://scholar.google.com/scholar?q=wood+floor+slip+resistance+cleaning+kitchen+injury+prevention Google Scholar
[…] better than solid hardwood, but it’s still not meant to be submerged or installed in areas with standing water. To reduce risk, keep the room ventilated (use a fan), address leaks quickly, and follow proper […]
[…] should come first because the wrong “fix” can’t compensate for damaged edges, moisture, or floor movement. In most dining rooms, the fastest wins are removing uneven edges that catch toes and identifying […]