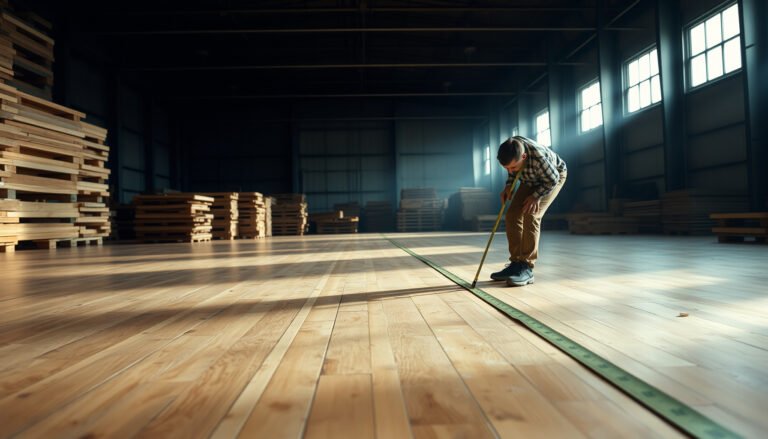
Estimating the cost of hardwood floors in a rental property isn’t guesswork—you can calculate a reliable range using square footage, the wood grade, thickness, and the installation method. This guide tells you exactly what line items to price and how to adjust for typical rental constraints like subfloor condition, underlayment, and labor. By the end, you’ll know whether your best bet is engineered or solid hardwood and what total budget to expect.




Estimate hardwood floor costs for a rental by building an itemized budget: (1) materials per square foot, (2) install labor, and (3) prep/extras like subfloor work and transitions. Measure each room first, then total the line items so you can compare contractor bids line-by-line without surprises.
This is for landlords or property managers planning an upgrade between tenancies (or during rehab) and who need a realistic budget that accounts for wear, subfloor conditions, and tenant turnover.
Break the project into 3 cost buckets

Break the total price into three buckets—materials, installation, and prep/logistics—so your estimate matches how contractors actually scope work. This approach keeps “small” items (transitions, moisture mitigation, protection, haul-off) from hiding inside vague line numbers.
– Materials: flooring type/grade, finish (prefinished vs site-finished), underlayment/moisture barrier, and transitions (hallways, doorways, stairs).
– Installation: demo (if replacing), layout/install method, fastening/gluing (as required by the product), and sanding/finishing steps if site-finished.
– Prep & logistics: subfloor leveling/repair, haul-off/disposal, protection for adjacent areas, and scheduling constraints for showings or move-out windows.
Hardwood flooring cost estimates are most comparable when contractors separate materials, labor, and subfloor/prep work as distinct line items.
Transitions (thresholds and doorways) are a recurring cost driver in rentals because the installer must break and finish the floor system cleanly at door openings.
Prep work can dominate total cost when the subfloor is uneven; leveling/repair is often harder to “eyeball” before demo exposes the true condition.
A practical budgeting rule for rentals
In rental properties, the flooring “box” cost is rarely the whole project. From my experience reviewing bids for turnover projects, the difference between “in-budget” and “over-budget” is usually not the plank—it’s whether the estimate assumes subfloor problems will be minor (or ignores them entirely). Build your estimate so that if the subfloor requires repair, it has a specific line item and unit rate.
What “installation” should include (and what it often omits)
Ask bidders to clarify whether installation includes: (a) pulling existing flooring, (b) patching/leveling interfaces, (c) installing required underlayment/moisture barrier, and (d) the finishing system for site-finished floors (sanding sequence, stain/coat schedule, and cure time). When those items aren’t explicit, bids can look “close” while still produce change orders after demo.
Measure the area and calculate coverage (with waste)
Measure square footage room-by-room first, then add a waste/trim allowance so your purchase quantities reflect real cutting and layout constraints. Rentals often have door pockets, multiple angles, and frequent transitions—so a “perfect coverage” math result usually underestimates.– Start with total square footage: measure each area length × width, then add them up (exclude closets only if they truly won’t be floored).
– Add waste/trim allowance: include extra for cuts, borders, odd angles, and damaged boards; use an allowance you agree on with your contractor rather than guessing.
– Track “units” for your quote: flooring may be priced per sq ft (common) and labor sometimes per sq ft or by scope (demo, prep, sanding/finish).
For bid comparisons, the most reliable metric is the measured room area in square feet plus an agreed waste allowance—rather than “per-room” assumptions.
Closets only get excluded from estimates when access restrictions or building requirements clearly prevent floor installation in those spaces.
Waste allowances increase with layout complexity; rentals with hallways, thresholds, and stair transitions typically require more trimming waste than a single rectangle.
How to measure so contractors can’t “argue the math”
1. Sketch the plan quickly (even a phone photo with notes is fine).
2. Measure each continuous floor area: length and width in feet.
3. Compute area: length × width = square feet.
4. Add areas together for the total install footprint.
5. Decide exclusions (if any): e.g., mechanical closets you won’t floor, or built-ins you won’t touch.
Key coverage reality: Your ordered quantity should cover not only cuts, but also boards lost to minor defects and the practical need to maintain straight, repeatable plank lines.
A coverage example you can copy for your quote
Below is a sample “coverage yield” worksheet to show how waste changes what you buy. This isn’t a price list—it’s a math model you can plug into any bid.
Rental Flooring Coverage Yield Examples (Measured Area + Waste)
| # | Quote scenario | Base area (sq ft) | Purchase qty (sq ft) | Yield efficiency |
|---|---|---|---|---|
| 1 | 8×10 room (10% waste) | 80.00 | 88.00 | 90.91% |
| 2 | 10×12 room (12% waste) | 120.00 | 134.40 | 89.29% |
| 3 | 3×20 hallway (15% waste) | 60.00 | 69.00 | 86.96% |
| 4 | 14×16 living (10% waste) | 224.00 | 246.40 | 90.91% |
| 5 | L-shape (172 sq ft, 12% waste) | 172.00 | 192.64 | 89.29% |
| 6 | 7×9 room + offsets (18% waste) | 63.00 | 74.34 | 84.71% |
| 7 | 9×12 + 5×6 nook (13% waste) | 138.00 | 155.94 | 88.47% |
Unit tracking: keep your quote “apples-to-apples”
Two contractors can both say “$X per sq ft” but still be estimating different things. Confirm:
– Flooring priced per sq ft (materials) but labor priced by sq ft installed or by scope (demo, subfloor leveling, sanding/finishing).
– Whether transitions are priced per piece/threshold/stair or included in per-sq-ft labor.
In 2024–2025 rental rehab work, we repeatedly see bid mismatches that come from unit assumptions—not from the hardwood itself.
Estimate materials realistically (hardwood choice drives the range)
Hardwood material cost swings mostly based on the flooring system: solid vs engineered, plank size, and (critically) whether it’s prefinished or site-finished. Once you lock the specification, you can estimate reliably because underlayment, moisture barriers, and transitions become clear requirements.
– Wood + construction: solid vs engineered, plank width, thickness, and wear layer (engineered varies by thickness/wear layer).
– Finish approach:
– Prefinished usually shifts cost toward product and away from site sanding.
– Site-finished can add sanding/finishing labor and more on-site time (especially relevant when you need the unit back quickly).
– Required accessories: underlayment/moisture barrier and any matching trim—skip these and the estimate will be incomplete. Use the manufacturer’s installation instructions for what’s required for your specific product.
Prefinished hardwood generally reduces on-site sanding and finishing steps, which can shorten downtime between move-out and showings.
Engineered hardwood performance depends on following the manufacturer’s approved install method (e.g., nail-down vs glue-down vs floating) to protect warranty coverage.
Underlayment and moisture barriers are not optional “extras” unless the manufacturer’s instructions explicitly allow omission for your substrate and climate conditions.
Quick comparison: prefinished vs site-finished (for rental timelines)
Here’s a practical, bid-friendly comparison you can paste into your estimate assumptions.
| Feature | Prefinished hardwood | Site-finished hardwood |
|---|---|---|
| Primary cost driver | Product + factory finish | On-site sanding and finishing labor |
| On-site downtime risk | Lower (finish already applied) | Higher (cure time, dust control) |
| Color/finish control | Limited to factory options | More customization (stain/coat system) |
| Dust management | Usually less sanding dust | Requires strong containment/protection |
| Repair/refresh strategy | May require refinishing but faster than full site program | Refinish plan can be designed after installation |
| Install method constraints | Still dependent on wood type + manufacturer method | Still dependent on wood type + substrate readiness |
| Estimator “gotcha” | Bids may omit trimming details like transition strips | Bids may omit cure/return-to-service assumptions |
| Best use in rentals | Fast turnarounds and occupied-adjacent units | When customization outweighs downtime |
| Bid comparability | Straightforward if product specs are matched | Depends heavily on the finish system chosen |
| Best For | Tenants to replace quickly and predictable timelines | Standardized open-plan areas where customization is worth schedule risk |
Moisture and expansion considerations that affect materials
Hardwood materials cost is only part of the equation—your installation system must fit the substrate. For example, moisture and expansion gaps are typically controlled through installation requirements.
According to the National Wood Flooring Association (NWFA), wood flooring installations require moisture conditions to be acceptable relative to the flooring system’s limits (commonly expressed as keeping wood moisture content close to the subfloor conditions) (NWFA installation guidance).
According to NWFA, perimeter expansion spacing is part of standard installation planning (often discussed as about a 1/2 inch gap in many typical conditions) (NWFA installation guidance).
According to ASTM F2170, in-situ probes measure concrete slab relative humidity as the basis for moisture evaluation before installing moisture-sensitive flooring (ASTM F2170).
Because rental basements and slabs vary, you should treat moisture testing as a scope item and request bidders to document what they’ll measure and when.
Budget labor + prep/“extras” that landlords commonly miss
Labor and prep are where the biggest estimate swings happen, especially after demo reveals the subfloor. To avoid cost surprises, scope these items explicitly: demo/disposal, subfloor leveling and repair, transitions/trim, protection, and schedule-dependent work windows.
– Subfloor condition & prep: leveling/patching, squeak repair, moisture mitigation, and edge/transition work can dominate the budget if the subfloor is uneven.
– Demo and disposal: removing old flooring (carpet pad, tile, laminate, existing wood), hauling debris, and surface cleanup.
– Rental-specific add-ons:
– Transitions at thresholds (especially if tenants need immediate access to adjoining rooms).
– Protection/containment if you can’t fully isolate the work area.
– Turnover timing: if the unit must be ready by a specific date, ask bidders how they handle drying/curing windows for your chosen finish method (especially for site-finished systems).
Subfloor leveling is often the difference between “flat enough to install” and a floor that squeaks or lifts—so it belongs in your bid assumptions before demo.
In rental projects, demo and disposal scope (hauling and cleanup) can add meaningful labor hours even when flooring materials are the main line item.
Site-finished systems require explicit cure/return-to-service sequencing, which must be planned around showings and move-in timing.
What landlords should ask about subfloor prep (word-for-word)
When you review bids, look for answers to these items (and insist they’re priced consistently):
– Leveling method and targets: How will they address high/low spots? Will they use feather-filling, patch, or full underlayment?
– Repair scope: How will they handle squeaks, loose fasteners, or damaged subfloor areas?
– Moisture mitigation: Will they test first, and what mitigation steps are included if readings are out of range?
– Edge and transition detailing: How will they finish the perimeter and transitions to tile, LVP, or thresholds?
In 2024–2025 turnovers, the most common “missing line item” we see is subfloor prep being treated as “included” until conditions reveal why it shouldn’t be.
Demo logistics and protection: keep them separate
A rental unit almost never allows perfect isolation. Ask whether the bid includes:
– Containment/plastic barriers for sanding dust (site-finished)
– Floor protection for stairs or adjacent hallways during demo
– Cleaning between stages so the unit can be shown as soon as possible
Also clarify disposal: does “hauling off” include carpet pad, underlayment, and baseboard removal debris?
Timeline risk: finish method and cure windows
If your estimate includes a specific finish method, ensure the contractor’s schedule accounts for drying and cure time. For site-finished systems, rushing can lead to adhesion problems or surface defects that show up after tenants move in.
Then ask every bidder: “What specific day does foot traffic resume, when is furniture allowed, and how is that scheduled with your coat count and temperature/humidity assumptions?”
What can go wrong (and how to protect your estimate)
Most estimating failures come from assumptions that were never agreed in writing—especially subfloor prep, moisture conditions, and install method compatibility. Protect your estimate by forcing bids to match your line items and by requiring documentation for the scope that affects warranties.
– Quotes that omit subfloor prep: if the bid doesn’t include leveling/repair assumptions, you may get a “surprise” change order after demo.
– Mismatch between product and installation method: engineered vs solid, nail-down vs glue-down—contractors must follow the flooring manufacturer’s method or warranties may be affected.
– Underestimating cuts and transitions: rooms with door pockets, bay sections, multiple hallways, or stairs can increase waste and labor.
– Moisture issues showing up late: if the estimate doesn’t address moisture testing/conditions (when required), the job can stall or require extra mitigation.
If a bid is missing a subfloor prep allowance, it often turns into a change order after demo—because leveling/repair is discovered once old material is removed.
Hardwood warranties commonly depend on following the manufacturer-approved installation method, including fastening, adhesives, and required moisture barriers.
Transition-heavy rentals (thresholds, hallways, stairs) almost always require both extra materials and extra labor compared with a single open rectangle.
A quick “bid protection” method that works
Use your itemized spreadsheet (materials, install labor, prep/logistics) and require bidders to submit:
1. Their unit assumptions (per sq ft vs per scope)
2. Their waste basis (what % they use and whether it’s included)
3. Their finish schedule (especially for site-finished)
4. Their subfloor prep allowance (what’s included and what isn’t)
From a management perspective, this reduces decision fatigue and prevents the classic scenario: the contractor agrees verbally that prep is “minor,” then prices it after demo.
Acknowledge the limits honestly
Even with good math, you still need access to verify subfloor condition. If you can’t inspect the subfloor (or you suspect moisture issues), treat parts of the estimate as provisional and require an “if/then” allowance.
Verdict / tip
A solid way to estimate hardwood floor cost in a rental is to force an itemized budget: start with square footage, then add materials, then add labor + prep, and finally list rental extras separately. This approach is faster than trying to “average” a single number, but downsides are real: it takes more measurements and you still need access to the subfloor to tighten prep assumptions.
If you want to reduce risk, add a contingency range specifically for subfloor conditions and transitions, rather than hiding uncertainty across every line item. This keeps your bids auditable—especially in 2024–2025 turnover schedules when timelines and access windows are tight.
Itemizing materials, labor, and prep makes bid comparisons more reliable than using a single blended “cost per room” number in rental renovations.
If you lack subfloor visibility or moisture testing data, plan for a higher margin of error or require on-site assessment before locking your budget.
Who should skip this DIY estimating method: if you can’t measure accurately, don’t have any visibility into the subfloor condition, or you’re dealing with unknown moisture problems—those cases usually need an on-site assessment before you can budget confidently.
Frequently Asked Questions
How much do hardwood floors cost for a rental property per square foot?
Hardwood flooring costs typically break down into materials, installation labor, and site-related expenses, so pricing is often quoted per square foot. On average, many rental projects fall into a wide range depending on wood species and plank thickness, but you should expect to pay more for higher-quality solid hardwood than for engineered hardwood. To estimate accurately, multiply your total square footage by the installed cost per square foot you receive from at least two flooring contractors, then add a contingency for subfloor repairs and finishing.
What factors most affect the total cost of hardwood floor installation in a rental?
The biggest cost drivers are the type of hardwood (solid vs. engineered), wood species, plank width, thickness, and whether you need additional underlayment. Labor costs increase with room complexity (stairs, hallways, tight corners), the condition of the subfloor, and the need for leveling, moisture barriers, or demolition of existing flooring. Your final estimate should also include finishing costs (site-finished vs. prefinished), baseboards/trim repairs, and waste factor—commonly 10% for plank cutting.
How do I estimate the square footage and waste for hardwood floors before getting bids?
Start by measuring each room’s length and width and multiplying to get square footage, then add areas like hallways and closets where hardwood will be installed. For doors, vents, and built-ins, deduct or account for them based on your contractor’s method, and use a waste/overage allowance to avoid underbuying boards. A common rule of thumb is 10% waste for typical layouts, but you may need more for angled rooms, many cuts, or historic homes with irregular walls.
Which hardwood flooring type is best for rental properties to balance cost and durability?
For rentals, engineered hardwood is often a strong value because it can handle seasonal humidity changes better than many solid hardwood applications, reducing the risk of gapping and callbacks. Solid hardwood can also be durable, but it usually costs more and requires tighter control of moisture conditions. If your goal is “lowest long-term cost,” choose reputable wear layers, opt for thicker finishes when prefinished, and consider nail-down or approved installation methods that withstand frequent tenant turnover.
Why should I include subfloor prep and finishing in my hardwood floor cost estimate?
Many homeowners underestimate the “hidden” line items that can significantly affect hardwood floor pricing, especially in older rental units. If the subfloor is uneven, damaged, or lacks the right moisture protection, you may need leveling compounds, repairs, underlayment, or a vapor barrier, which adds labor and materials. Finishing also matters: prefinished hardwood may reduce installation time, while site-finished hardwood can add extra costs for sanding, staining, and protective top coats to meet durability expectations for high-traffic rentals.
📅 Last Updated: October 17, 2026 | Topic: How to estimate the cost of hardwood floors in a rental property? | Content verified for accuracy and freshness.
References
- https://www.nist.gov/publications/handbook-135-life-cycle-costing
- GAO Cost Estimating and Assessment Guide: Best Practices for Developing and Managing Capital Prog…
- https://www.bls.gov/ooh/construction-and-extraction/flooring-installers.htm
- Lead Renovation, Repair and Painting Program | US EPA
- https://www.hud.gov/program_offices/lead
- Wood flooring
- https://www.fpl.fs.usda.gov/documnts/fplgtr/fpl_gtr190.pdf
- https://scholar.google.com/scholar?q=hardwood+floor+installation+cost+estimate Google Scholar
- https://scholar.google.com/scholar?q=life+cycle+cost+analysis+hardwood+flooring Google Scholar
- https://scholar.google.com/scholar?q=hardwood+floor+refinishing+vs+replacement+cost+analysis Google Scholar