
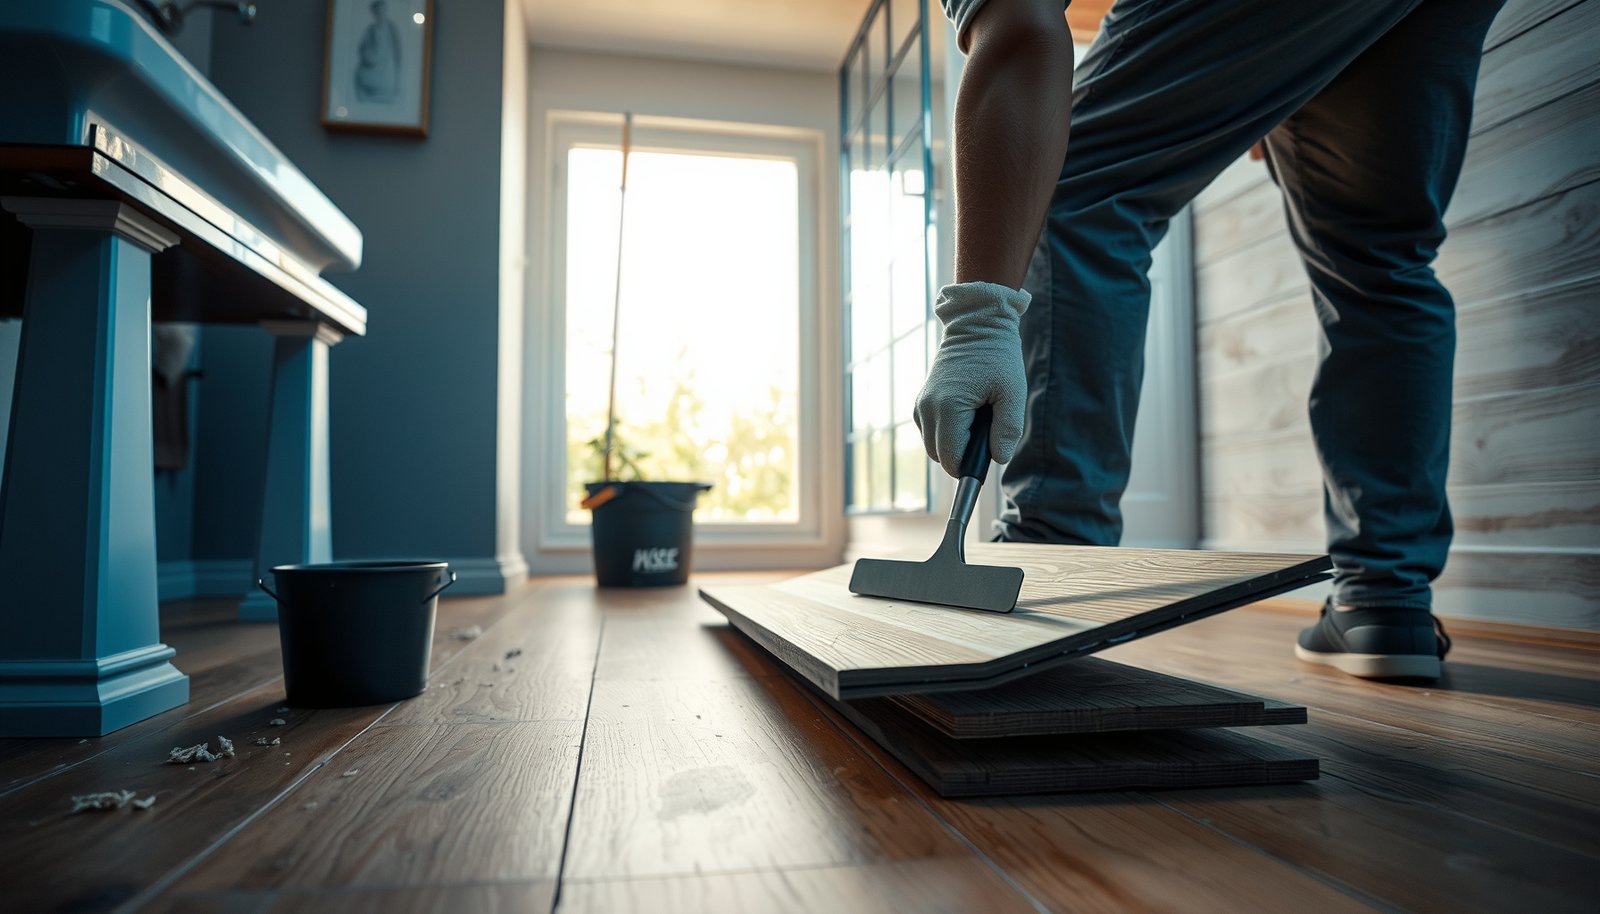

Removing engineered wood floors from a bathroom without damaging the subfloor is doable when you follow the right order of operations. This guide walks you through how to lift, loosen, and remove engineered planks safely around moisture-prone areas, with practical steps to prevent swelling, mold risk, and costly floor damage. If you want the fastest, safest way to get the bathroom flooring off and ready for what’s next, you’ll find it here.




To remove engineered wood floors from a bathroom safely, identify whether the planks are floating (click-lock), nailed, or glue-down, then start lifting from the easiest edge while protecting the subfloor and any moisture barrier. Because bathrooms create ongoing moisture exposure, careful removal and substrate inspection matter as much as the flooring itself.
If you’re replacing bathroom flooring, you’ll often be dealing with transitions, trim, and the bonding method to the subfloor. The steps below help you remove the planks with less damage—whether your boards lift in sections or require slower cutting and residue cleanup afterward.
Identify how your engineered wood is installed

The fastest way to avoid wrecking an engineered wood bathroom floor is to determine the install method first—click-lock, nail-down, or glue-down dictates the tools and the “right” lifting technique. Here’s how to confirm it before you pry anything up.
– Check whether the planks “float” (click-lock seams) or are fastened (nails) or bonded (adhesive/glue).
– Look near a heat vent, vent cover, or transition strip—manufacturers often specify the install method and what materials were used underneath.
– If you can’t tell, remove a small test area in a corner to confirm whether you’ll be prying up boards or removing adhesive residue.
Click-lock engineered wood is designed to separate at seams, so clean removal usually starts by working plank rows apart rather than prying up the wear layer.
Nailed and glue-down installations both require “fastener detection” or “adhesive management,” so assuming floating behavior is the quickest route to torn tongues and gouged subfloors.
Engineered Wood Bathroom Install Methods: Removal Outlook (Practical Guidance)
| # | Install method | Typical seam behavior | Common removal hazard | Expected plank reusability |
|---|---|---|---|---|
| 1 | Click-lock (floating) | Seams separate when pulled/angled correctly | Wear layer scuffing from wrong pry angle | ★★★★★ |
| 2 | Click-lock over foam pad | May shift easily once trim/transitions lift | Pad tearing and residue on subfloor | ★★★★☆ |
| 3 | Nail-down (through tongue/edge) | Boards resist lifting until fasteners are released | Tongue/edge damage near nails | ★★★☆☆ |
| 4 | Nail-down with underlayment | May lift in partial sections | Underlayment tearing during board removal | ★★☆☆☆ |
| 5 | Glue-down (full spread) | Seams may “break” but boards stay bonded | Adhesive residue and subfloor gouging | ★☆☆☆☆ |
| 6 | Glue-down (perimeter + rows) | Some areas release; others remain bonded | Patchwork scraping where bonds vary | ★☆☆☆☆ |
| 7 | Mixed method (transitions/areas) | One section lifts, another stays locked | Inconsistent cleanup and substrate prep | ★★☆☆☆ |
Bathroom prep: ventilation, protection, and safety
Your safest removal plan starts with controlling dust and exposure before you touch any tools—especially in older bathrooms where hidden lead paint or asbestos-containing materials may exist. Then you protect the fixtures and contain mess so the moisture barrier and subfloor don’t get contaminated.
– Ventilate the space and protect fixtures/walls with plastic sheeting or rosin paper, especially around the vanity, toilet area, and tub/shower edges.
– Use proper protection: safety glasses, gloves, and a respirator if you’ll be scraping adhesive or disturbing older subfloors. ()
– If your home is older, consider checking for lead/asbestos risk before demolition steps that create dust (particularly if you suspect old flooring products or underlayment). ()
OSHA’s Respiratory Protection standard (29 CFR 1910.134) requires that if you use a respirator for dust, you must have an appropriate fit-tested respirator and follow the program requirements.
If your bathroom is likely to include lead-based paint (common in pre-1978 homes), EPA’s Renovation, Repair and Painting (RRP) Rule is the key framework for dust-minimizing work practices.
A few concrete reasons to slow down here: removal work can generate fine particles from adhesive scraping, underlayment tearing, or mortar/patch scraping. Those particles can spread through HVAC if you don’t isolate the work area. According to OSHA’s lead standards (29 CFR 1910.1025), the lead PEL is 50 µg/m³ as an 8-hour TWA (2010). OSHA, 29 CFR 1910.1025 (Lead in Construction/General Industry)
Also, according to the U.S. EPA, the RRP Rule took effect in 2010 and applies to many renovations that disturb painted surfaces in pre-1978 housing and child-occupied facilities (2010). EPA, RRP Rule program materials
Replace the placeholders in the bullets with sources and practical PPE logic:
– PPE source to follow: OSHA Respiratory Protection Standard, 29 CFR 1910.134 (respirators for dust exposure).
– Local safety requirements source: EPA RRP Rule (lead-safe work practices), plus OSHA asbestos requirements if you suspect asbestos-containing material in older structures. (If you don’t know, treat it as unknown and get testing guidance before high-dust steps.)
Practical setup in a bathroom: run portable ventilation that exhausts outdoors, cover the toilet and vanity with plastic and tape seams, and use painter’s plastic to isolate the floor area. If you have to scrape glue-down engineered wood, use a HEPA vacuum alongside a containment plan—because bathroom demolition dust tends to cling to corners and baseboards.
Remove trim, transitions, and underlayment
Taking trim and transitions off first reduces blade damage, board edge breakage, and “mystery fasteners” near doorways. It also gives the planks the movement they need to separate without tearing.
– Take out baseboards/quarter round carefully so you can remove the flooring without ripping visible edges.
– Remove transition strips (doorways, hall thresholds) so the planks can move freely while you lift them.
– If there’s underlayment or a vapor barrier, pull it back only as far as needed—don’t destroy it more than necessary unless you’re replacing it too.
Before you pull engineered wood flooring, removing baseboards/quarter round prevents gouging the wall while it also exposes nail or screw edges that may otherwise “catch” a pry tool.
Transition strips are usually installed to allow flooring expansion and movement—removing them early reduces the chance that a stuck plank row fractures.
From a process standpoint, we treat trim removal as “access work.” Use a flat pry bar with a scrap block to distribute force, and number pieces if you plan to reinstall. For transitions, remove the screw heads first, then use a thin oscillating blade or a careful chisel behind the metal or wood strip. If the engineered wood bathroom flooring is glued, transitions sometimes cover sealed seams—cutting that perimeter line early helps you avoid pulling up chunks of underlayment.
If you find a moisture barrier (common in bathrooms), don’t rip it as a default. Instead, cut it back cleanly around the floor perimeter and folds so you can either re-use it (if compatible and intact) or replace it as part of the full moisture control system.
Lift and remove the planks (click, nail, or glue)
The safest removal technique depends on how your engineered wood is attached—so work from seams for click-lock, release fasteners for nail-down, and cut bond lines for glue-down. Once you match the technique to the install type, removal becomes more predictable and far less damaging to the subfloor.
– Click-lock (floating): Start at a corner and separate plank rows gradually; use a tapping block and pull at the seam rather than forcing up the top layer.
– Nail-down: Locate fasteners as you go (often along tongues/edges), then remove boards section-by-section to avoid tearing the top wear layer.
– Glue-down: Cut along the plank seams and lift carefully; expect adhesive residue on the subfloor, so you’ll likely need scraping and surface cleaning before installing anything new.
For click-lock engineered wood, pulling and separating at the seam direction is less likely to delaminate the engineered top layer than prying up from above.
For glue-down engineered wood, cutting along seams first reduces the amount of adhesive you drag across the subfloor, which lowers the risk of gouges that can telegraph through new floors.
Click-lock (floating): start at a corner nearest a transition, vent cover, or where the floor meets trim that you already removed. Use a tapping block (not bare hammer) to encourage the seam to release. As rows lift, keep them flat and support them so you don’t crack tongues.
Nail-down: use a thin pry bar and move along the row edge as you locate fasteners. If you feel “rock solid resistance,” stop and find the nail line—forcing can split the engineered wood boards. Removing in smaller sections also keeps you from bending boards into a permanent arc, which makes cleanup and reinstallation (if planned) harder.
Glue-down: expect that the engineered wood bathroom floor is effectively “bonded” to the substrate. Use a utility knife or oscillating tool to score along plank seams until you can lift a seam edge. Then lift slowly and cut bond lines ahead of the tool. After removal, adhesive residue is normal; your goal becomes: clean enough for new flooring adhesion and flat enough for the installation system.
Deal with subfloor damage and moisture barrier
Once the planks are out, the job becomes substrate inspection—because bathrooms can create swelling and hidden delamination even when the surface looked intact. If you skip this step, the new engineered wood floor may fail early (bubbles, joint separation, squeaks, or unevenness).
– Inspect the subfloor for swelling, soft spots, or delamination—bathrooms are higher moisture risk even if the floor “looks fine.”
– Remove remaining adhesive or leveling compound residue only as far as needed to get a flat, clean surface for repairs ().
– If you discover you must replace underlayment or moisture barrier materials, treat it as part of the flooring system—new flooring may fail if the moisture control layer is wrong.
Engineered wood bathroom floors still perform like a moisture-sensitive system—checking for swelling/soft spots helps you catch moisture damage before it turns into surface failure.
New flooring needs the correct substrate condition: if you leave ridges or uneven adhesive, the “flatness problem” can transfer into the new install.
Two substrate targets that matter in bathrooms:
1) Flatness: According to NWFA installation moisture/flatness guidance, subfloors should be flat within 3/16 inch over a 10-foot span for wood flooring installations. National Wood Flooring Association (NWFA) wood flooring installation guidance
2) Moisture stability: Engineered wood still requires a stable moisture environment; bathroom subfloors should not be allowed to remain damp during prep and installation. NWFA moisture control guidance
Adhesive/residue compatibility notes (replace the placeholder):
– Avoid aggressive scraping that gouges OSB, plywood laminations, or the face of cement board. If you’re working on a surface finish that new flooring warranties reference (e.g., specific primers or smoothing compounds), follow the bonding system’s instructions rather than improvising.
– If you use adhesive removers, confirm they won’t leave contaminants that interfere with primers, thinset (if applicable), or smoothing compounds.
Moisture barrier reality check: if you remove or replace any moisture control layer, rebuild the system intentionally—don’t “patch around” a damaged area with mismatched materials. Bathroom failures often originate from an inconsistent vapor/moisture strategy, not the engineered wood planks themselves.
What can go wrong (and how to avoid it)
Most problems come from mismatched technique: prying where you should cut, or scraping too aggressively after glue-down removal. If you slow down when you feel resistance—and you treat moisture control as part of the build—you reduce rework significantly.
– Tearing the engineered top layer: Forcing pry tools under the wrong angle can lift the wear layer; reduce leverage and work seam-first.
– Leaving too much glue/cleaning residue: Even small ridges can telegraph through new flooring; plan for careful scrape/sand/clean steps. ()
– Moisture surprises in bathrooms: If the subfloor feels cool/damp or shows discoloration, stop and address the moisture issue before installing anything else.
– Breaking transitions or trim: Rushing around door jambs and cabinet toe-kicks often causes extra patching—remove these components deliberately.
Prying under the engineered wear layer can separate the lamination layers—working seam-first protects the top veneer from leverage damage.
Even when all planks come up, uneven adhesive ridges can create a “bounce” effect under new flooring, which can accelerate joint wear.
Here’s a practical comparison of common missteps and what they cost:
| Mistake | What you’ll notice | Likely outcome | Best prevention |
|---|---|---|---|
| Prying click-lock from the wrong angle | Tongues tear; seams won’t separate | More scrap boards; longer cleanup | Pull at seams with a tapping block; remove transitions first |
| Forcing nail-down boards before releasing fasteners | Board edge splits near nail line | Gouges and patch work on subfloor | Locate fasteners as you go; remove in short sections |
| Leaving adhesive “smears” and ridges | New floor feels uneven | Squeaks, gaps, early wear | Scrape/flatten to meet flatness specs before installing |
| Ignoring soft/cool subfloor areas | Substrate feels damp or spongy | New flooring fails; possible mold risk | Stop and correct moisture source before proceeding |
Adhesive residue and flatness: follow NWFA flatness requirements (again, often 3/16 inch over 10 feet) and use the new flooring system’s recommended smoothing/patch materials. NWFA wood flooring installation guidance
Moisture surprises are common in bathrooms—especially where previous plumbing leaks occurred behind toe-kicks, under vanity bases, or at shower perimeters. If you smell mildew, see darkened staining, or find soft subfloor spots, pause removal and address the moisture source (leak detection, drying, and if needed, replacement of affected materials).
Verdict: when DIY works, plus scan-friendly checklist
DIY removal can work well when you identify the install method early (especially click-lock) and you’re prepared for cleanup, scraping, and substrate repair afterward. You should call a pro when you hit widespread glue-down bonding, suspect widespread subfloor moisture damage, or need coordinated work around plumbing and tile transitions.
DIY is particularly reasonable if:
– You confirmed click-lock or a mostly nail-down pattern.
– You can isolate dust and manage bathroom containment.
– You’re willing to inspect flatness and moisture control details before installing new flooring.
Skip DIY (or at least consult a flooring contractor) when:
– You see large areas of soft/swollen substrate.
– You discover extensive glue-down residue requiring aggressive chemical/mechanical removal.
– You suspect asbestos/lead in older bathroom assemblies and you can’t verify materials safely.
Quick checklist (save this):
| Step | What to do | Why it matters |
|---|---|---|
| 1 | Identify click-lock vs nailed vs glue-down | Determines the removal tool/technique |
| 2 | Remove trim/transitions first | Prevents gouging and split boards |
| 3 | Start from the easiest edge/corner | Reduces damage to the top wear layer |
| 4 | Control adhesive removal (if glued) | Avoids uneven surface under new flooring |
| 5 | Inspect subfloor + moisture barrier | Bathroom moisture can ruin new installs fast |
| 6 | Clean/flatten before installing replacement | New flooring needs proper substrate condition |
The most reliable “DIY success” variable is matching the technique to the engineered wood install method, not using brute force.
If you can’t restore flatness and correct moisture control after removal, even great-looking engineered wood can fail because wood flooring systems depend on the substrate.
Frequently Asked Questions
What’s the safest way to remove engineered wood flooring from a bathroom without damaging the subfloor?
Start by protecting walls, fixtures, and nearby trim, then inspect the floor for moisture exposure, soft spots, or swelling. Since engineered wood can be installed with nails, staples, or glue, remove carefully by pulling boards at seams and avoiding pry-force that can gouge the subfloor. If there’s any sign of water damage, address the cause first and consider testing the subfloor’s flatness and moisture levels before continuing.
How do you remove engineered wood floor planks when they’re glued down in a bathroom?
Score and remove planks by loosening sections near seams or edges, using a heat gun to soften adhesive where appropriate without overheating the underlayment. Use a floor scraper to lift remaining glue, and work in small areas to prevent tearing the plywood subfloor. Expect a residue layer—clean it thoroughly with the right adhesive remover and scraping method, then vacuum well to prepare for new bathroom flooring.
Which tools do you need to remove engineered wood flooring in a wet-area bathroom?
Typically you’ll need a pry bar, oscillating multi-tool (great for cutting under trim and transitions), a floor scraper, utility knives, pliers, and a hammer. For glued installations, add an adhesive remover and/or heat gun to loosen bond lines, plus a shop vacuum for fine dust. If you’re dealing with nail- or staple-down planks, having a nail puller and a pry tool with a wide face helps reduce subfloor damage.
How do you remove underlayment and nail/staple remnants after taking up engineered wood bathroom floors?
After lifting the engineered wood planks, pull or scrape away underlayment, starting at seams so it doesn’t become trapped under board lips. Remove nails and staples with pliers, a cat’s paw, or a specialized staple remover, then sand or scrape any remaining high spots. Finish by vacuuming and checking the subfloor flatness, because uneven surfaces can cause new engineered wood to gap or fail—especially in a bathroom where humidity fluctuates.
Why is bathroom moisture control important before and after removing engineered wood floors?
Bathrooms expose engineered wood and subfloors to humidity, splashes, and steam, which can lead to swelling, mold risk, and adhesive failure. Before installing anything new, confirm the subfloor is dry, stable, and properly sealed, and fix leaks or ventilation issues first. After removal, dry the area thoroughly and evaluate whether the underlayment or subfloor needs replacement to prevent future engineered wood flooring problems.
📅 Last Updated: October 19, 2026 | Topic: How to remove engineered wood floors from a bathroom? | Content verified for accuracy and freshness.
References
- https://www.cdc.gov/mold/default.htm
- Mold | US EPA
- Lead Renovation, Repair and Painting Program | US EPA
- Lead – Overview | Occupational Safety and Health Administration
- https://www.cdc.gov/niosh/topics/wooddust/
- Engineered wood
- https://www.hud.gov/program_offices/healthy_homes/mold
- https://scholar.google.com/scholar?q=remove+engineered+wood+flooring+bathroom Google Scholar
- https://scholar.google.com/scholar?q=engineered+wood+flooring+removal+adhesive+subfloor+procedure Google Scholar
- https://scholar.google.com/scholar?q=wood+flooring+moisture+damage+bathroom+mold+remediation Google Scholar
[…] the bond line and subfloor prep become your primary defense; improper adhesive or an unapproved moisture barrier layer can negate the intended […]