


Replacing hardwood floors in a closet is a straightforward DIY job when you remove the old boards cleanly, prep the subfloor properly, and lock the new planks into place without gaps. This step-by-step guide shows you exactly what to do—from measuring and underlayment decisions to cutting around the closet frame and finishing for a smooth, durable surface. By the time you’re done, your closet floor will look seamless and hold up to daily wear.


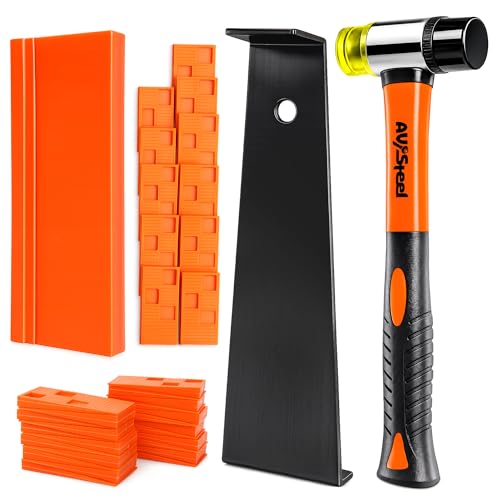

Replacing hardwood floors in a closet is mostly about careful prep: remove the old planks, get the subfloor flat and dry, then install matching hardwood using the correct method (nail-down, glue-down, or click-lock). Start by confirming your flooring type and the manufacturer’s installation requirements, because closet layouts (baseboards, door jambs, tight access) make shortcuts show up fast—especially in 2026 when more homeowners are matching existing flooring across remodels.
If your closet has existing hardwood and you’re swapping it for the same (or a close match) new material, this is for you. It’s especially relevant when space is tight, you can’t easily “float” the planks without dealing with trim and thresholds, or the subfloor looks uneven.
Plan the closet layout and choose the right materials

You’ll get the cleanest closet hardwood replacement by planning the plank direction and installation method before you remove a single board. The fastest way to avoid gaps, crooked seams, and height mismatches is to confirm your current flooring system and then mirror (or follow) the same system for the replacement boards.
Hardwood floors are installed differently depending on whether they are nail-down, glue-down, or floating/click-lock—choosing the wrong system is a common cause of movement and noise.
Closet floors are often visually “punished” because tight door openings and adjacent rooms expose seam lines and edge-spacing problems at close range.
Most manufacturers require the subfloor to be dry and properly prepared before installing hardwood, regardless of installation method.
Who this is for / when it applies: This is for homeowners and small contractors replacing hardwood in closets where trim, door jambs, or thresholds limit how freely you can work. It’s also the right approach when you’re matching existing flooring and want the perimeter to look intentional, not patched.
What to verify first (so the closet replacement actually matches)
The goal in a hardwood closet floor replacement is not just “new boards”—it’s a system match: plank type, thickness, subfloor condition, and installation method.
– Identify what you currently have (nail-down, glue-down, or floating/click-lock) so you match the right installation approach.
Look for nail holes along the tongues/edges (nail-down), adhesive residue on the underside (glue-down), or an attached underlayment pad/locking profile (click-lock/floating). If you can access a corner seam, compare plank edge construction.
– Use the closet size to plan plank direction and transitions (especially near the doorway and any adjacent flooring).
In tight closets, plank direction affects how many cuts you’ll make around jambs and whether the “end joints” land in the least visible areas.
– Gather the right parts for the installation method—fasteners/adhesives where needed, plus matching trim pieces for the finish.
Don’t assume you can reuse old baseboards. If you remove trim cleanly, you can—if it survives. If not, new trim is usually cheaper than living with a misaligned edge.
Materials choice that matters in closets (where dents happen)
Closets see concentrated foot traffic from stepping in to grab items, plus occasional dropped objects (shoes, hangers, bags). That’s why species hardness and finish durability are practical planning details, not “cosmetic-only” decisions.
Janka Hardness of Popular Flooring Woods (lbf) vs White Oak (1360 lbf)
| # | Wood species | Janka hardness (lbf) | Relative vs white oak | Hardness direction |
|---|---|---|---|---|
| 1 | White oak | 1360 | 0% | Baseline |
| 2 | Red oak | 1290 | -5.1% | Softer |
| 3 | Maple | 1450 | +6.6% | Harder |
| 4 | Hickory | 1825 | +34.2% | Harder |
| 5 | Walnut | 1010 | -25.7% | Softer |
| 6 | Cherry | 950 | -30.1% | Softer |
| 7 | Teak | 3225 | +137.5% | Harder |
Remove the old hardwood safely
The surest way to keep your closet hardwood replacement from turning into a wall-to-wall project is to remove the old floor and protect the subfloor while you do it. Plan on trim removal where needed, then deconstruct plank-by-plank instead of prying randomly.
Removing baseboards/trim first usually prevents damaging door jambs and creates a cleaner edge-spacing plan for the new hardwood.
Careful removal helps stop debris from becoming embedded under new flooring, which can create “high spots” and lift.
Vacuuming after scraping is critical because dust and old adhesive can prevent new planks from sitting flat.
Closet-specific demolition tactics that matter
In a closet, you can’t always swing big tools. That’s why a controlled sequence matters in hardwood closet floor replacement.
– Remove baseboards/trim as needed (and label pieces) so you can slide planks correctly and avoid leaving awkward edges.
Use painter’s tape to label inside/outside face and which wall it belongs to. If you plan to reuse trim, avoid bending it.
– Pull old boards and underlayment/staples carefully to keep the subfloor from turning into a “bump map.”
Staples and nails should be fully removed or driven flush; otherwise, your new hardwood closet floor replacement can telegraph those points as ridges.
– Scrape and vacuum thoroughly so dust and debris don’t prevent new flooring from sitting flat.
Sweep first, then vacuum with a shop vac—especially in corners where debris hides. Finish with a quick hand pass (gloved) across the surface to feel for debris.
Moisture reality check while you’re already open
Once the floor is exposed, look for discoloration, swelling, or a “tacky” subfloor surface. Those signs point to a cause you must address before installing new hardwood closet floor replacement, not just replace the plank layer.
– If you see dark spotting or active softness, stop and investigate moisture intrusion (leaks, humidity, plumbing issues).
– If it’s dry but uneven, you can move into subfloor prep.
Prep the subfloor for new hardwood
Your new closet floor will only look right if the subfloor is dry, solid, and flat—planks can’t compensate for structural or flatness problems. In hardwood closet floor replacement projects, subfloor prep is where most “mystery squeaks” and seam gaps are born.
Wood flooring installations depend on subfloor flatness; manufacturers commonly reference tolerances on the order of 3/16 inch over 10 feet.
NWFA installation guidance emphasizes dry subfloors and correct moisture conditions as prerequisites for dimensional stability.
Replacing damaged subfloor sections before installing new hardwood is typically easier than repairing squeaks and gaps after the planks are fastened or bonded.
Check moisture, soundness, and flatness (in that order)
Hardwood closet floor replacement should begin with measurements, not guesses.
1. Check for moisture issues, soft spots, and wobble; replace damaged subfloor sections before you install anything new.
Push-test the surface and check edges around the closet doorway where water or door-swing wear can concentrate.
2. Repair and flatten the surface—most closet floor problems come from uneven subfloors, not the planks themselves.
Use a straightedge and mark high/low areas. A common flatness reference is 3/16 inch over 10 feet (or 1/8 inch over 6 feet) depending on flooring system and manufacturer language. National Wood Flooring Association (NWFA), Installation Guidelines
3. Follow the hardwood manufacturer’s requirements for subfloor condition/flatness and any required underlayment (if your flooring system calls for it).
Click-lock/floating systems often reference a specific underlayment type and thickness to manage minor imperfections—still within flatness limits.
Moisture numbers you can anchor to (so you don’t “install into trouble”)
Hardwood is dimensionally stable only when it’s in equilibrium with its environment. Current humidity and subfloor moisture drive expansion and contraction.
– Moisture equilibrium target: many installation instructions keep hardwood within the wood’s recommended range—often ~6–9% moisture content for typical indoor conditions, with the critical point being that the flooring and subfloor are close to each other. NWFA Installation Guidelines
– Flatness tolerances: again, commonly referenced around 3/16 inch over 10 feet (and sometimes 1/8 inch over 6 feet). NWFA Installation Guidelines
– Acclimation timeline: most products specify acclimation in the installation space (often at least 48 hours, sometimes longer) so planks reach room conditions before fastening. Hardwood flooring manufacturer installation instructions (system-specific)
Practical note: If you can’t measure moisture and the closet has any history of leaks or humidity swings, add that uncertainty into your decision. Hardwood closet floor replacement can “fail early” even when installation looks correct.
Install the new hardwood planks
Install matching hardwood by following the manufacturer’s starting-row plan and using the exact system rules for nail-down, glue-down, or click-lock. In a closet, that means careful edge-spacing control and precise cuts around jambs—because there’s nowhere to hide mistakes.
Starting-row placement and required spacing at walls/jambs are part of the manufacturer’s installation system, not optional “nice-to-haves.”
For nail-down hardwood, the specified fastener spacing and nailing angle are essential to prevent looseness and noise.
For glue-down hardwood, adhesive choice and trowel/spread method must match the product instructions to achieve proper bond strength.
Choose your installation workflow (nail-down vs glue-down vs click-lock)
Use the right approach for your hardwood closet floor replacement so the floor can move (or stay locked) correctly.
| Feature | Nail-down | Glue-down | Click-lock / floating |
|---|---|---|---|
| Primary attachment | Nails/staples into subfloor | Adhesive bond to subfloor | Plank-to-plank locking (floating) |
| Underlayment | Often not required (system-specific) | Often not used (unless specified) | Frequently required if specified |
| Subfloor flatness sensitivity | High (fasteners can’t “fix” dips) | High (bond needs full contact) | Very high (locks transmit unevenness) |
| Edge spacing rules | Maintain required gaps per manual | Maintain required gaps per manual | Gap is critical for expansion |
| Repairability | Often possible by removing rows | Often harder (adhesive residue) | Typically easier by unlocking |
| Closet accessibility | Tool clearance needed near walls | Adhesive working time matters | Generally easiest in tight spaces |
| Common failure mode | Squeaks/loose boards if subfloor is wrong | Weak bond if trowel/adhesive is wrong | Movement if gaps or underlayment are wrong |
| Moisture risk sensitivity | Moderate to high (subfloor dryness still key) | High (bond performance depends on dryness) | Moderate (still requires correct vapor/underlayment) |
| Best installation “timing” | Follow fastener pattern closely | Work within adhesive open time | Keep consistent locking pressure |
| Cut quality requirement | High (edge rows must seat flat) | High (contact and seams matter) | High (locks must fully engage) |
| Best For | Solid subfloor + longer board stability needs | Situations needing full bonding (per manufacturer) | Tight closets + easier plank replacement if system allows |
Follow the correct plank installation sequence
– Start with the manufacturer-approved layout: orientation, starting row position, and how to maintain required spacing at walls/jambs.
In hardwood closet floor replacement, this is where you lock in the visual alignment near the doorway.
– Install according to your flooring type:
– Nail-down: use the specified nailing/stapling pattern and fastener type.
– Glue-down: use the specified adhesive and proper spread method.
– Click-lock/floating: install with the recommended underlayment (if required) and locking sequence.
– Cut cleanly for closet corners and door openings; dry-fit pieces before committing adhesive/fasteners.
Dry-fitting matters more in closets because edge cuts can be “close” while still being wrong.
One practical constraint: In some closets, door jamb clearance limits hammering or cutting at certain angles. If you can’t work safely without damaging trim, plan on removing more trim or using smaller tools (or bring in a flooring installer).
Finish, reinstall trim, and handle door thresholds
Your finishing step is what hides expansion gaps and protects the perimeter of your new hardwood closet floor replacement. Reinstall trim correctly and address thresholds so the floor height transition is smooth and the door doesn’t bind.
Baseboards and shoe molding typically cover perimeter expansion space while still allowing the hardwood to move as designed.
Threshold details control both appearance and performance—misalignment can cause scraping and premature wear at the seam.
Finishing steps are part of warranty compliance; changing methods or skipping required cure times can void coverage.
– Reinstall baseboards/trim to cover expansion/edge spacing and create a clean perimeter finish.
Don’t compress the floor with trim; let the system’s spacing rules remain true under the molding.
– Address the doorway/threshold carefully so the height matches adjacent flooring and the door doesn’t bind.
Check door clearance after the floor is in place, not before. If you’re transitioning to carpet, tile, laminate, or another wood floor, match heights using the correct reducer/transition profile.
– Finalize the surface per the flooring type (and avoid overworking steps that could void the manufacturer’s warranty).
If adhesives were used, respect the cure time. If a finish was applied (varies by product), follow the coating system’s specific schedule.
What can go wrong (and when to call a pro)
Most issues in a hardwood closet floor replacement come from skipping measurements: subfloor flatness, moisture, and correct installation method. If you miss those checkpoints, the symptoms usually appear quickly—gaps, squeaks, or boards that start to move.
Uneven subfloors commonly show up as gaps or squeaks because the flooring system can’t seat fully across low spots.
Using the wrong installation mindset—fastening expectations for floating floors or expansion expectations for nail-down systems—can undermine long-term stability.
Moisture problems (even minor ones) can lead to cupping/crowning later if the source isn’t corrected before installation.
Common failure points to watch for
– Uneven subfloor: you’ll often see gaps, squeaks, or boards popping loose—fixing this is harder after the new floor is down.
– Wrong installation method: installing nail-down flooring with the “floating” mindset (or vice versa) can lead to movement, noise, and long-term failure.
– Moisture or subfloor damage: if you suspect a moisture problem, replacing boards without resolving the cause can cause cupping/crowning later.
– Tight closet access: if you can’t remove trim or maneuver tools safely, a pro may be the fastest way to avoid damaging walls/jambs.
Pros/cons tradeoff in plain terms (hardwood closet floor replacement):
– DIY tends to be worth it when: the closet is small, the subfloor is solid, and you can follow the manufacturer’s spacing/fastener/adhesive rules precisely.
– DIY becomes risky when: you uncover widespread subfloor deterioration, recurring moisture, or you can’t verify whether your existing floor is nail-down vs glue-down vs floating.
Verdict / tip: when this is DIY-friendly (and when it isn’t)
Hardwood closet floor replacement is often DIY-friendly when the subfloor is already dry and flat enough, the closet is compact, and you can work within the manufacturer’s instructions for your exact system. The project becomes a “pro call” when prep surprises show up behind trim—especially subfloor softening, widespread flatness failure, or ongoing moisture signals.
If you can’t verify subfloor flatness and moisture conditions before installation, the risk of post-install movement (gaps/squeaks) increases significantly.
Manufacturer-specific installation requirements (fasteners, adhesives, underlayment, and spacing) are the core warranty compliance items for hardwood closet floor replacement.
If your closet is small, the subfloor is solid, and you can work to the manufacturer’s instructions for your specific hardwood type, replacing closet hardwood is often a manageable DIY project. The biggest downside is prep: if the subfloor is out of flat, damp, or damaged behind trim, you may end up redoing work.
Skip DIY and consider a flooring installer if you find widespread subfloor deterioration, ongoing moisture concerns, or you’re not sure whether your existing floor is nail-down vs glue-down vs floating.
DIY vs Pro: quick decision table
| Criteria | DIY hardwood closet floor replacement | Pro installation |
|---|---|---|
| Subfloor moisture diagnosis | May be guesswork without testing tools | More likely to test and identify the source |
| Flatness correction capability | Limited if you need large-area leveling repairs | Better equipped for leveling/underlayment strategy |
| Correct system selection | Risk if existing type isn’t confirmed | More likely to match method to product system requirements |
| Trim removal in tight closets | Higher chance of jamb/baseboard damage | More controlled access and finish detailing |
| Door threshold/clearance | Easy to under-check after floor height changes | More likely to set transitions and clearance correctly first time |
| Adhesive open time & bonding rules | Can slip if workflow is slow or uneven | More consistent spread/application and timing |
| Fastener pattern accuracy (nail-down) | Can drift with tool handling in corners | More consistent nailing/stapling placement |
| Warranty compliance | Higher risk if steps/underlayment/spacing differ from manual | More likely to document and follow system requirements |
| Time and workspace downtime | Often longer due to learning curve and access constraints | More predictable scheduling and faster mobilization |
| Repair after mistakes | May require rework if errors show after installation | More likely to correct efficiently within known constraints |
| Verdict | DIY when subfloor is solid/flat and you can match the installation system. | Choose a pro when moisture/flatness issues or uncertainty about floor type is likely. |
Final checklist (scan/save)
| Step | Quick check |
|---|---|
| Confirm flooring type | Nail-down vs glue-down vs click-lock |
| Plan layout | Plank direction + doorway/transition points |
| Remove trim (if needed) | Baseboards/jambs out of the way |
| Demolition cleanup | Remove debris, staples, high spots |
| Subfloor prep | Dry, solid, and properly flattened |
| Install with correct system | Adhesive/fasteners/underlayment as required |
| Maintain edge spacing | Use manufacturer’s expansion guidance |
| Finish | Reinstall trim and address thresholds |
Frequently Asked Questions
What is the best way to replace hardwood floors in a closet without damaging surrounding flooring?
Start by protecting adjacent floors and walls with painter’s tape and cardboard, then remove the closet trim and any quarter-round carefully. Use a pry bar to lift old boards while minimizing vibration, and cut any boards that are nailed or glued to prevent tearing the subfloor. If the closet ties into existing hardwood, plan your layout so the new hardwood flooring ends align with a doorway or seam that’s easier to hide with transition molding.
How do I remove old hardwood flooring in a closet?
Begin by removing baseboards, shoe molding, and any thresholds, then pull up the existing hardwood boards section by section. If the boards are nailed, use a floor scraper and pry bar to loosen nails, and if they’re stapled, a nail puller helps prevent gouging the subfloor. Clean up old adhesive or underlayment, scrape off high spots, and vacuum thoroughly so your replacement hardwood flooring can sit flat and secure.
What type of subfloor prep is required before installing new hardwood in a closet?
Inspect the plywood or subfloor for water damage, soft spots, squeaks, and uneven areas, and repair anything compromised before you install new hardwood floors. Level low areas with a suitable floor patch and sand high spots so the surface is flat; hardwood that’s installed over dips or humps can develop gaps or squeaks. Make sure the subfloor is clean, dry, and properly acclimated, especially in closets where humidity can fluctuate.
Which hardwood flooring installation method works best for closet floors—nail-down, glue-down, or floating?
Nail-down hardwood is ideal when you have a solid, appropriate nailing surface and you want long-term stability, but it requires the right subfloor thickness and conditions. Glue-down installation can work when you need a tight bond, but it’s more sensitive to moisture and requires compatible adhesives. Floating engineered hardwood is often the easiest option for closets because it’s forgiving over minor subfloor irregularities, as long as you use the correct underlayment and follow manufacturer guidance.
How do I match new hardwood in a closet to existing floors for a seamless look?
Bring a sample of your existing hardwood to a flooring store to match species, color, plank width, and finish type, or use leftover boards if available. Choose the closest match in grade and undertone, then acclimate the new wood to the closet environment before installation to reduce expansion gaps. After installation, consider blending with stain and using a matching topcoat or finish system so the new closet hardwood flooring transitions naturally into the surrounding room.
📅 Last Updated: October 17, 2026 | Topic: How to replace hardwood floors in a closet? | Content verified for accuracy and freshness.
References
- Wood flooring
- https://www.fpl.fs.usda.gov/woodhandbook/
- Lead Renovation, Repair and Painting Program | US EPA
- Silica, Crystalline – Overview | Occupational Safety and Health Administration
- https://www.cdc.gov/niosh/topics/lead/default.html
- Silica and Worker Health | Silica | CDC
- NWFA | National Wood Flooring Association
- https://scholar.google.com/scholar?q=how+to+replace+hardwood+flooring+in+a+closet Google Scholar
- https://scholar.google.com/scholar?q=hardwood+floor+installation+guidelines+subfloor+moisture+expansion+gap Google Scholar
- https://scholar.google.com/scholar?q=hardwood+floor+replacement+sanding+lead+safe+renovation+silica+dust Google Scholar



[…] to remove hardwood floors from a closet without damage or wasted effort? This step-by-step guide walks you through the fastest, safest way to pry, cut, and lift the planks while keeping subfloor […]
[…] square footage pricing and adjusts for key variables like wood grade, plank thickness, finish type, subfloor prep, and layout waste. If you want the fastest, most reliable budget number, this guide shows exactly […]