
You can install kitchen floors without professional help, and this guide delivers the fastest DIY route that actually holds up—step by step. Follow these instructions to prep the subfloor correctly, choose the right materials for your kitchen, and lay your flooring with tight seams and a level finish. If you want a clear winner for DIY success, these steps tell you exactly how to do it.




If you want to install kitchen floors without professional help, the fastest path is choosing a DIY-friendly flooring type and then following a strict prep-and-install sequence: verify the subfloor, plan the layout, and execute the install exactly as the manufacturer specifies (especially moisture and expansion details). Most DIY failures come from skipping subfloor flatness/moisture checks or “making it fit” around fixed cabinetry instead of planning for proper edge clearances.
If you’re replacing tired kitchen flooring, finishing a remodel, or swapping materials in one room, this guide is for you—especially if you want to avoid labor costs while still getting a professional-looking result. It’s written to fit common DIY floor types and includes a sanity-check checklist you can run before you cut anything.
Pick the right kitchen flooring type for DIY
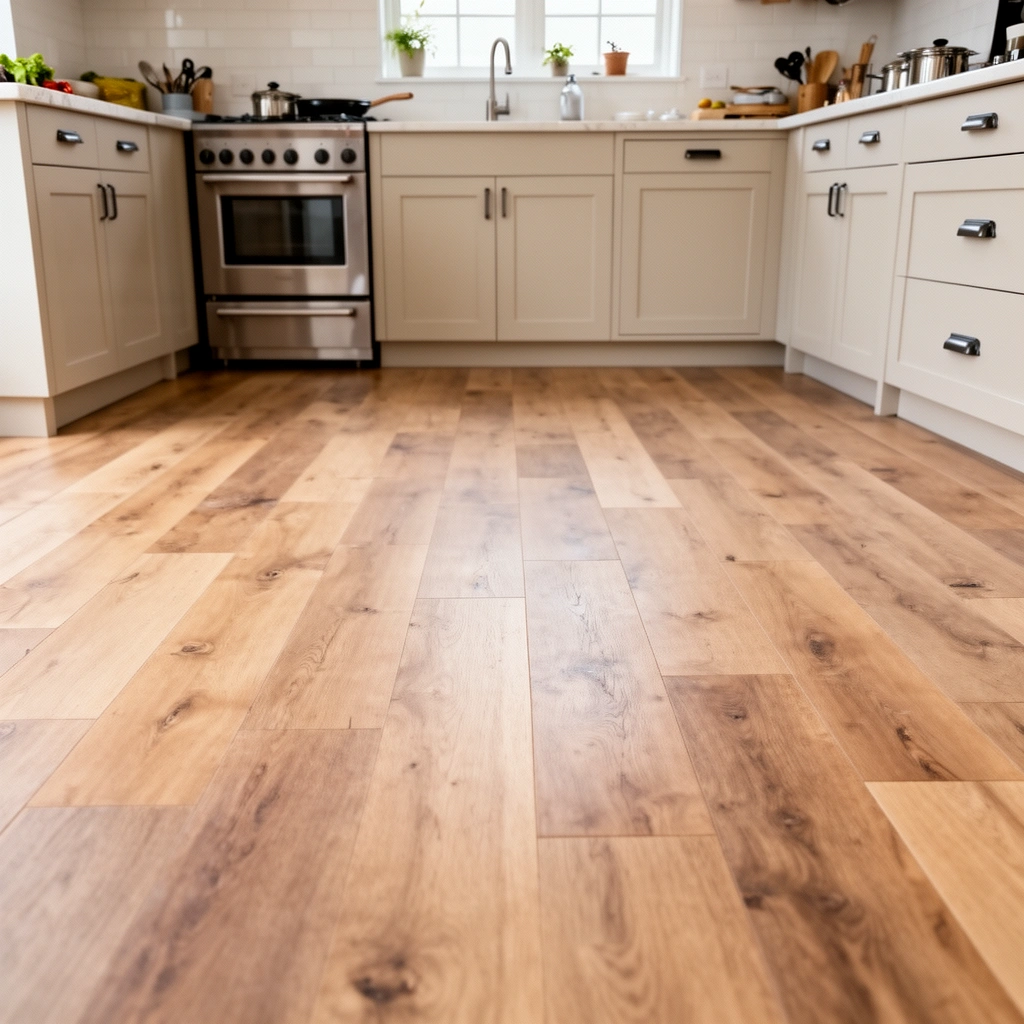
The best DIY kitchen flooring choice is the one that matches your subfloor condition and minimizes specialized prep—typically click-lock (floating) products or properly designed peel-and-stick/resilient options. Here’s the key: kitchens are high-traffic, spill-prone environments, so pick a flooring type that’s explicitly rated/approved for kitchens and stable under normal temperature swings.
A floating click-lock installation still requires a correctly prepared, sufficiently flat and solid subfloor; the click mechanism does not correct unevenness.
Many manufacturers treat kitchens as “wet-prone” risk zones because of spills and cleaning moisture, so they often require specific moisture/adhesive rules even for DIY-friendly products.
If your subfloor has persistent moisture or significant damage, the most DIY-capable flooring won’t fix the underlying cause of lifting or odor.
When choosing a DIY kitchen flooring installation method, match flooring behavior to your current conditions:
– Click-lock / floating-style (LVP/LVT, laminate-like systems): Usually the most DIY-friendly where allowed. They require expansion gaps and a flat underlayment/subfloor strategy (if the product calls for it).
– Peel-and-stick (resilient): Often DIY-friendly, but it’s unforgiving about surface cleanliness and flatness. Adhesion depends on consistent contact and correct surface profile.
– Glue-down resilient or engineered wood: More DIY-capable than people think, but you must follow adhesive, trowel/spread, dwell time, and open time rules exactly.
– Tile (mortar + grout): DIY is possible, but it’s a higher-skill install because it demands careful leveling, mixing, cure control, and spacing consistency.
What to double-check before you buy
– Kitchen rating / approval: Confirm the product is approved for kitchens and rolling loads (appliances can move and wheels can concentrate stress).
– Core stability & subfloor compatibility: Some flooring types demand underlayment systems or limit installation over certain existing surfaces.
– Your tool comfort level: Click-lock uses cutting and tapping techniques; tile needs more tools (notched trowel, spacers, wet saw practice, level checks).
According to ASTM F1869 (standard test method for moisture vapor emission rate), flooring acceptance limits are commonly expressed numerically (e.g., pounds per 1,000 sq. ft. per 24 hours), but the “pass” value depends on the specific flooring and adhesive system described in that product’s instructions. ASTM F1869
According to ASTM F2170 (standard test method for in-situ relative humidity), many floor systems reference a maximum in-slab RH % threshold. ASTM F2170
Prepare the subfloor like you mean it (it matters most)
The most important DIY work for a kitchen floor is subfloor prep: cleanliness, moisture risk control, and flatness. If you skip this, you’ll usually see the problems after installation—gaps, rocking, clicking sounds, and premature edge failure.
Most flooring manufacturers expect the subfloor to be clean, dry, structurally sound, and sufficiently flat; otherwise the finished kitchen floor can develop separation or movement.
Adhesive-based DIY installs fail most often when residue, dust, or unapproved surface coatings prevent proper bonding.
Planning transitions (doorways and adjacent floor height differences) prevents forced “fit” that can damage click-lock edges or create tile lippage.
For a successful DIY kitchen flooring installation, treat subfloor prep as a checklist—not a vibe:
1. Remove old debris and weak material
– Scrape off adhesive residue, paint overspray, drywall mud, and any loose fragments.
– If you’re over old flooring, follow the product’s surface requirements (some systems allow certain layers; many don’t).
2. Confirm moisture risk
– Kitchens see humidity and occasional water events. Use the method your flooring instructions specify (often calcium chloride / MVER for slab floors or in-situ RH testing).
– If moisture exceeds the product’s limits, remediation (not just flooring replacement) is the right path.
3. Check flatness and repair
– Use a straightedge to find high spots and low spots.
– Patch, grind, or shim based on what the manufacturer allows. Flatness requirements vary by product type; common industry tolerances for resilient installations are often expressed as 3/16 in over 10 ft in many specifications, but always verify with your specific flooring instructions. [ADD: cite the exact flatness tolerance from your flooring manufacturer’s Installation Instructions or a recognized industry standard referenced by them]
4. Plan transitions before you install
– Doorways, hallways, and adjacent rooms create height changes. Decide now whether you’ll use:
– a reducer/transition strip,
– an expansion-safe threshold strategy,
– or an engineered transition plan for tile edges.
Comparison: what subfloor issues look like later
– Low spots: click-lock may “bridge,” leading to squeaks and edge wear.
– High spots: prevent full contact, especially with glue-down/resilient.
– Loose subfloor: causes movement, which breaks bonds (adhesive) and damages joints (floating boards).
Measure, plan layout, and protect edges
The best DIY kitchen floor layout strategy is to plan seams/patterns to minimize awkward cuts at walls and obstructions—then protect the perimeter with correct expansion/edge clearances. This is where you prevent buckling, gapping, and visually uneven edges.
A straight reference line is the foundation of a clean first row; small alignment errors compound quickly in large kitchen spans.
Floating and many resilient products require perimeter expansion gaps so the floor can move with temperature and humidity changes.
In kitchens, fixed cabinetry and toe-kick areas often determine the smartest layout direction more than the room’s “center point” does.
Here’s a practical workflow for DIY kitchen flooring installation:
1. Measure the room accurately
– Measure length and width in multiple places (older homes often aren’t perfectly square).
– Identify the longest wall and the most visible direction from the main entry.
2. Map your layout
– Decide your visual direction first (usually along the longest sight line).
– For plank floors: plan to stagger end joints according to the product’s joint-offset rule (commonly “don’t make a short repeat,” but use the exact instruction).
– For tile: define your grid around the focal line and balance cut sizes so you don’t end up with tiny slivers at both ends.
3. Dry-fit and confirm obstruction strategy
– Dry-fit a few pieces to validate how you’ll handle:
– cabinet bases (you usually can’t “lift” under cabinets later),
– vent openings and floor registers,
– door casing and thresholds.
4. Protect edges and movement gaps
– Maintain the required expansion gap around perimeter and at rigid structures (like cabinet islands that meet the floor).
– Don’t “trim it tight” to make it look neat—most products specify gap widths for a reason (temperature-driven expansion).
Quick planning tips that reduce rework
– Start with the flattest wall for your first reference row where possible.
– Mark expansion zones directly on the subfloor with tape so you don’t accidentally fill them with spacer blocks, grout, or adhesive.
– Test-fit around toe-kicks with scrap pieces to confirm clearance before committing to full rows.
Install step-by-step (by common DIY methods)
The right DIY method depends on your flooring system: floating click-lock prioritizes alignment and expansion gaps, while glue-down/peel-and-stick prioritizes surface prep and correct adhesive/contact. Use this section as the decision map, then follow your exact manufacturer instructions step-by-step.
For click-lock installs, starting with a straight reference line and maintaining a required perimeter expansion gap are the two highest-impact success factors.
For glue-down or peel-and-stick resilient flooring, adhesive contact and correct spread/open time govern long-term bond performance.
For tile installs, consistent leveling and proper mortar/grout cure timelines prevent lippage, cracking, and adhesion failure.
Click-lock / floating-style (common DIY choice)
1. Set your straight reference line along the planned first row.
2. Stagger seams per product guidance (avoid repeating patterns that line up across multiple rows).
3. Maintain expansion gaps at every fixed boundary.
4. Underlayment strategy: use only what the product calls for (some click-lock systems require no underlayment or a specific type).
Common DIY pitfall: tapping/locking too aggressively can damage tongue-and-groove edges and create micro-gaps that show under kitchen lighting.
Peel-and-stick or glue-down
1. Validate surface condition: clean, dry, and free of residue—especially oils or dust from sanding/patching.
2. Do correct acclimation (if required): let the flooring reach room conditions as the instructions specify.
3. Apply adhesive/spread methods exactly:
– use the exact trowel/nozzle if glue-down,
– apply adhesive consistently if the flooring calls for it,
– for peel-and-stick, press/roll as directed (contact time matters).
4. Work in manageable sections: don’t spread adhesive farther than your schedule allows for open time.
Tile or mortar-based installs (if applicable)
1. Keep level and spacing consistent:
– use a level system or spacing method the tile installer recommends,
– verify flatness progressively (kitchens reveal even minor inconsistencies quickly).
2. Mind cure timelines:
– grout and mortar cure times vary by product and environmental conditions.
Pros/cons: DIY flooring method fit
| Method | Pros (why DIY works) | Cons (what to watch) | Best for |
|---|---|---|---|
| Click-lock / floating | Faster installation; no curing steps | Needs correct flatness + expansion gaps; can squeak if subfloor isn’t solid | Relatively flat subfloors and moderate DIY experience |
| Peel-and-stick | Minimal tools; quick placement | Adhesion is unforgiving; surface contamination can ruin bonding | Small kitchen areas with good prep access |
| Glue-down resilient | Strong hold when done correctly | Adhesive rules are strict (spread/open time) | DIYers comfortable following step timing |
| Tile (mortar/grout) | Durable and water-tolerant when sealed | Higher skill demands; cure control; mess/weight considerations | Larger remodels where you can manage the process |
What can go wrong (and how to avoid it)
The most common DIY kitchen floor problems come from subfloor defects, incorrect moisture/expansion handling, and layout shortcuts near fixed cabinetry and thresholds. If you want an installation that stays quiet and flat, these are the failure points to plan around.
When a kitchen floor rocks or squeaks, the cause is usually subfloor movement, insufficient flatness, or a missing/incorrect underlayment plan.
Trapped moisture is a frequent root cause of lifting and odor issues, so moisture limits from the flooring instructions should drive your go/no-go decision.
Most expansion-related failures come from installing too tight at the perimeter, not from the center of the room.
Here are the failure modes we see most often in DIY kitchen flooring installation projects (and how to prevent them):
1. Subfloor not level or not solid
– Symptoms: rocking, gaps, squeaks, or joint separation.
– Fix: repair flatness and address loose subfloor sections before installing.
2. Skipping moisture/flatness checks
– Kitchens get spills and cleaning moisture; trapped moisture can affect adhesives and underlayment materials.
– Prevent it: follow the specified moisture test method and compare results to manufacturer limits.
3. Wrong expansion gap or pinning the floor
– Symptoms: buckling, lifting, edge pressure against walls or cabinets.
– Prevent it: keep required perimeter and obstruction gaps; don’t drive fasteners through areas the system needs to float/move.
4. Cutting/fit mistakes near cabinets and doorways
– Cabinets are fixed. If you assume “we’ll make it work,” you often end up with uneven edges or improper clearances.
– Prevent it: plan around fixed structures; validate clearance with scrap test cuts.
5. Rushing acclimation (when required)
– Temperature and humidity changes affect materials’ dimensions.
– Prevent it: use the acclimation guidance in the product instructions.
Moisture & flatness targets: what you’re trying to prove
Common DIY-Install Acceptance Checks for Kitchen Floors (Moisture + Flatness)
| # | Check (what you measure) | Standard / Basis | Typical Acceptance Threshold* | DIY Impact Rating |
|---|---|---|---|---|
| 1 | Moisture vapor emission rate (slab) | ASTM F1869 | Often ≤ 3.0 lb/1,000 sq. ft./24 hr (varies by system) | ★★★★★★★ |
| 2 | In-slab relative humidity (slab) | ASTM F2170 | Often ≤ 75% RH (varies by adhesive/floor) | ★★★★★★★ |
| 3 | Subfloor flatness tolerance (overall) | Manufacturer guidance | Common spec: ~3/16 in over 10 ft (verify for your floor) | ★★★★★★☆ |
| 4 | Subfloor cleanliness (adhesion readiness) | Adhesive system instructions | No dust/residue; follow “surface prep” steps exactly | ★★★★★★☆ |
| 5 | Perimeter expansion gap (floating systems) | Product installation instructions | Often 1/4 in or similar (use the exact value given) | ★★★★★★★ |
| 6 | Adhesive open time adherence | Adhesive TDS / instructions | Install within manufacturer’s specified open time window | ★★★★★☆☆ |
| 7 | Grout/mortar cure time (tile systems) | Mortar + grout instructions | Follow cure schedule; no early traffic/water exposure | ★★★★☆★☆ |
Verdict: when DIY kitchen floor installs are worth it (and when to skip)
DIY is usually worth it if your kitchen subfloor is in decent shape, you can follow the flooring manufacturer’s installation steps precisely, and you’re comfortable spending time on layout and edge planning. The downside is that kitchen conditions expose weak prep quickly—moisture and temperature swings punish shortcuts—so if your subfloor moisture/flatness is uncertain, the “easy” DIY choice can become expensive rework.
DIY kitchen flooring installation makes the most sense when manufacturer instructions are clear and your subfloor passes the moisture/flatness requirements—especially for adhesive and floating systems.
If you have persistent moisture, significant subfloor damage, or major height-transition constraints, pro involvement (or subfloor-only help) often prevents recurring floor failure.
Following expansion gap and adhesive/open-time rules is a higher-value effort than trying to “perfect” looks before the structural details are correct.
If you decide to proceed with DIY kitchen flooring installation, prioritize:
1. Correct product choice for your subfloor (approved surfaces and method).
2. Subfloor prep and flatness (repair, grind, clean—no guessing).
3. Strict adherence to moisture, expansion, adhesive/mortar, and cure steps (use the exact values and timelines from your product docs).
Quick DIY checklist (scan before you start)
– [ ] Confirm your flooring type is approved for kitchens and your subfloor condition
– [ ] Check subfloor flatness and repair low/high spots
– [ ] Verify surface is clean, dry, and firmly attached
– [ ] Measure room and plan layout to avoid awkward edge cuts
– [ ] Set up reference line(s) for straight first row
– [ ] Maintain required expansion gaps around perimeter/obstructions
– [ ] Follow adhesive/mortar/grout and cure times exactly (per instructions)
– [ ] Re-check alignment and seam staggering as you install
FAQ
What’s the first thing I should check before installing kitchen floors myself?
Start with the subfloor: it needs to be clean, dry, solid, and sufficiently flat for the flooring type you chose. If you skip this, the finished kitchen floor can show gaps, squeaks, or movement.
Can I install kitchen flooring over existing flooring?
Sometimes, depending on the product’s installation requirements and surface condition. In many cases, manufacturers require removal of certain materials or specific prep steps—[ADD: check your flooring manufacturer’s “Subfloor Requirements” section].
How do I handle cabinets that are already installed?
Often you can’t pull cabinets, so you’ll plan your floor layout around them and handle door casings/transitions carefully. Some flooring installs also require trimming under-door clearance to maintain the correct fit—follow the product guidance.
Do I need to acclimate flooring before installation?
Many flooring manufacturers require acclimation under specific conditions; some don’t, depending on the material. Use [ADD: your product’s installation instructions] to confirm whether acclimation is required and for how long.
What’s the biggest DIY mistake?
For most DIY kitchen floor installations, inadequate subfloor prep or skipping required expansion/moisture steps. Those issues usually can’t be fully corrected after the flooring is installed.
Sources
– ASTM F1869 — Standard Test Method for Measuring Moisture Vapor Emission Rate of Concrete Subfloor Using Anhydrous Calcium Chloride
– ASTM F2170 — Standard Test Method for Determining Relative Humidity in Concrete Floor Slabs Using In Situ Probes
– [ADD: Manufacturer installation instructions for your exact flooring type—specifically sections on Subfloor Requirements, Expansion Gaps, Moisture/Acclimation, and Adhesive/Mortar/Cure Times]
– [ADD: Manufacturer technical data sheet (TDS) for the adhesive/mortar/grout you plan to use, if your flooring requires it]
– [ADD: Primary source for general subfloor levelness/flatness guidance referenced in the flooring instructions—e.g., the recognized industry standard the manufacturer cites]
A successful DIY kitchen flooring installation comes down to one idea: your floor can only perform as well as the system beneath it—subfloor stability, moisture safety, and correct movement allowances. If you choose a DIY-friendly flooring type, verify flatness/moisture, and follow the manufacturer’s install sequence, you can achieve a clean, durable result while keeping labor costs under control.
Frequently Asked Questions
How do I install kitchen floor tiles without hiring a professional?
Start by removing the existing flooring, cleaning the subfloor, and checking it’s level and dry. Choose a tile type that matches your DIY comfort level (ceramic/porcelain with thinset and grout is common for kitchen floors). Dry-lay a small section to plan layout and transitions, then spread thinset with the correct notched trowel, set tiles with spacers, and use grout and caulk at edges and around fixtures for a durable finish.
What’s the best way to prep a subfloor before installing new kitchen floors DIY?
Subfloor prep is the difference between a professional-looking floor and one that cracks or separates. Test for moisture, repair any uneven spots with patching compound, and scrape down high areas so the surface is flat and smooth. Use plywood underlayment if needed, prime porous surfaces, and vacuum thoroughly before installing any adhesive or underlayment for kitchen floors.
Which kitchen flooring type is easiest for DIY installation without help?
Many homeowners find click-lock laminate, luxury vinyl plank (LVP), and peel-and-stick vinyl among the easiest kitchen floor options because they often float over an underlayment or require minimal mortar work. If you want a water-resistant solution, LVP is popular for kitchens because it handles spills better than some wood-based products. For DIY, look for products with an included underlayment, clear installation instructions, and straightforward trim/transition pieces.
How can I install waterproof kitchen floors and protect against spills and moisture?
Use a waterproof flooring system and pay attention to details like seams, edges, and transitions where water sneaks in. For vinyl or laminate, follow the manufacturer’s guidance on subfloor flatness, underlayment, and whether to use seam sealer for a tighter barrier. Seal gaps at the perimeter with caulk, especially around cabinets, plumbing penetrations, and baseboards, and avoid installing over damp or untested subfloors.
Why do DIY kitchen floor installations fail, and how do I prevent common mistakes?
Most DIY failures come from poor subfloor prep, rushing layout, using the wrong adhesive or trowel size, or skipping expansion gaps. Kitchen floors also experience heavy traffic and temperature swings, so always acclimate materials (for products that require it) and maintain the recommended gap around walls and cabinets. Measure twice, start from a layout reference line, and double-check that tiles/planks stay aligned as you work to prevent lippage and uneven flooring.
📅 Last Updated: October 12, 2026 | Topic: How to install without professional help kitchen floors? | Content verified for accuracy and freshness.
References
- https://en.wikipedia.org/wiki/Laminate_flooring
- Vinyl flooring
https://en.wikipedia.org/wiki/Vinyl_flooring - Sheet vinyl flooring
https://en.wikipedia.org/wiki/Sheet_vinyl - https://en.wikipedia.org/wiki/Luxury_vinyl_tile
- https://en.wikipedia.org/wiki/Floor_tile
- https://en.wikipedia.org/wiki/Subfloor
- Underlayment
https://en.wikipedia.org/wiki/Underlayment - Google Scholar Google Scholar
https://scholar.google.com/scholar?q=DIY+laminate+floor+installation+instructions - Google Scholar Google Scholar
https://scholar.google.com/scholar?q=how+to+install+vinyl+plank+flooring+DIY+floating+floor - Google Scholar Google Scholar
https://scholar.google.com/scholar?q=ceramic+tile+floor+installation+DIY+thinset+subfloor+prep