


Want to know how to install herringbone floors around stairs without gaps, uneven transitions, or a butchered pattern? This guide gives you the clear, step-by-step method that produces the cleanest look on most stair landings and stringers—using the right cutting layout, subfloor prep, and nosing/banding details. If you follow it, your herringbone will stay aligned through every step and the finish will look intentional from top to bottom.
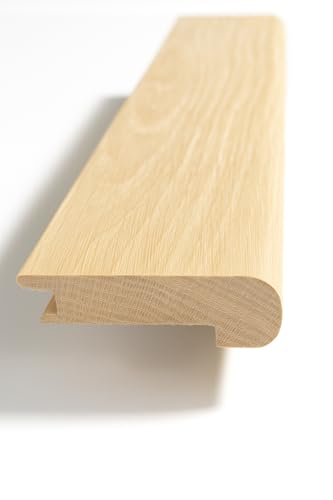



If you want a clean herringbone look around stairs, the key is planning every cut before you glue or nail. Dry-fit the pattern, use a consistent “break line” at each stair tread/riser, and finish the tight areas with trimmed border pieces so the herringbone stays aligned.
This guide is for homeowners and installers working with herringbone wood floors on stairs or landings, especially when the stair geometry forces tricky angles and partial rows. It’s also useful if you’re trying to avoid common issues like misaligned chevrons and gapping near risers.
Plan the Layout Before You Cut

Planning the herringbone layout first prevents the most visible failures—chevrons drifting off-center and boards forcing awkward, off-angle cuts. For herringbone stair flooring, the fastest route to a crisp, repeatable pattern is a marked centerline plus a “break line” strategy that you can follow tread by tread.
Here’s the decision framework I use when mapping herringbone floors around stairs: define what “centered” means visually, then lock that reference across the landing and the first stair module before any adhesive touches wood. This approach matters even more with herringbone because the chevron geometry amplifies small measurement errors.
“Tread” and “riser” are the horizontal walking surface and vertical panel of a stair; anchoring your herringbone break lines at each transition helps prevent pattern drift.
A consistent reference line is the difference between “chevrons that read as intentional” and “chevrons that look slightly skewed,” especially across a landing.
What “centerline” really means for herringbone stairs
When you choose where the herringbone “centerline” (or a reference line) lands across the first tread/riser, you’re deciding how the chevron symmetry will read from the top landing and from the side approach. On herringbone stair flooring, you typically want:
– The first full chevron (or a defined chevron node) to land where you’ll naturally look.
– The landing pattern to “carry” into the first stair section instead of restarting with a visual jump.
If your stair stringer (the side support) is not perfectly square to the wall, the herringbone stair flooring may still look balanced—as long as your reference line remains consistent and your border pieces handle the tight geometry.
According to the 2010 ADA Standards for Accessible Design, consecutive riser heights on a run must not vary by more than 3/8 in. (9.5 mm), which is why stair layout measurements must be precise before herringbone cutting.
Decide how chevrons align at stair edges
For herringbone floors around stairs, you’ll usually choose one of two visual rules and commit to it:
1. Align chevrons to tread faces (so the “V” points stay consistent across each tread).
2. Keep chevrons visually consistent across the stair stringer/riser transitions (so the pattern reads as one continuous plan rather than changing at each edge).
Whichever you pick, document it (even with quick sketches). Later, when you’re cutting around noses, bullnose edges, or trim reveals, you’ll rely on that rule more than you’ll rely on memory.
Prep the Subfloor and Stair Surfaces

With herringbone, small flatness issues become noticeable because the pattern draws the eye along lines. A stair landing that is slightly wavy will also create cumulative drift—your chevrons won’t “line up” even if your measurements are perfect.
Flatness and rigidity at stair tread zones are critical for herringbone stair flooring because small deflections can open seams along the chevron lines.
Underlayment and moisture assumptions differ between engineered and solid wood flooring, so the manufacturer’s subfloor requirements control what you can and cannot correct.
Confirm geometry and fastening suitability (engineered vs. solid)
Before you cut herringbone boards, verify:
– Subfloor condition: clean, debris-free, and stable.
– Stair surface condition: no loose nosing, cracked tread material, or soft spots.
– Moisture/flatness requirements: engineered vs. solid (follow the flooring manual for acceptable moisture range and flattening tolerance).
Stairs also introduce a fastening reality: vertical risers and nosing edges behave differently than flat landing floors. A fastening method approved for landings may not be approved on vertical faces of stair treads/rises.
According to the 2021 International Residential Code (IRC), stair rise must be between 4 in. (102 mm) and 7-3/4 in. (196 mm), which affects how much variation you may need to accommodate visually with herringbone stair flooring.
Address transitions that can telegraph through herringbone
Any uneven spots where the new flooring meets stair framing will show up as:
– rocking boards,
– tiny open seams,
– or a chevron “kink” that looks like misalignment.
Before installation, check transitions at the stair framing edge, stringer transitions, and landing-to-stair junction. If you find a high spot, fix it now. If you find a low spot, don’t assume border trimming alone will hide it—border pieces hide gaps, but they don’t flatten a support.
Establish Break Lines and Dry-Fit Rows

For clean herringbone alignment around stairs, you need repeatable break lines and sectional dry-fits. In practice, you treat each stair tread/riser pair as a module, verify alignment there, then move to the next module without changing your reference.
This is the phase where most alignment problems are prevented. With herringbone stair flooring, once you glue or nail, the chevron pattern becomes difficult to “rescue” without starting over.
A “break line” at each tread/riser transition creates a predictable place to shift from full chevrons to border pieces in herringbone stair flooring.
Dry-fitting herringbone rows section-by-section is the most direct way to confirm that chevron geometry stays consistent across changing stair angles.
Build break lines at transitions
Mark break lines at:
– the tread face where your toe/foot will naturally align,
– the riser transition line,
– and any landing boundary where the pattern must visually carry.
Then, dry-fit:
– the landing run,
– the first tread/riser module,
– and at least one subsequent module where angles change.
When the stair geometry gets complex (winding stairs, unusual stringer cuts, or partial rows), you don’t just dry-fit “a few boards.” You dry-fit the logic of the pattern so the chevrons hold their shape.
Keep expansion gaps consistent with spacers/jigs
Use spacers, jigs, or masking tape layout lines to:
– maintain expansion gaps (per the manufacturer),
– prevent boards from drifting as you fit around corners,
– and keep the “V” node spacing consistent.
In herringbone stair flooring, drift usually shows up first at the edges—because border pieces are smaller and easier to nudge off alignment.
According to the 2021 IRC, stairway headroom must be at least 6 ft 8 in. (80 in above the finish floor is the practical reference), which influences how closely trimming and edge details can work at the upper stair run.
Cut and Fit the Herringbone Around Treads and Risers

Cutting tight stair areas is where herringbone flooring either stays crisp or turns into a visibly “patched” pattern. The best strategy is continuity through trimmed border pieces—not forcing full boards into awkward corners that distort the chevron.
When you’re working around stair noses and risers, your goal isn’t to make every cut perfect down to the last fraction. Your goal is to keep the chevron geometry correct and use border trimming where the stair angles inevitably “break” the ideal rectangle.
Border-piece trimming keeps herringbone stair flooring aligned because you preserve chevron geometry rather than warping it to fit irregular corners.
Test-fit compound-angle pieces first, since stringer angles often create compound trims that can’t be accurately predicted from a straight cut list alone.
Trim to maintain chevron continuity
When you reach the tread edges and riser corners:
– cut around the tread edge profile and any nosing feature,
– preserve the chevron continuity by using border pieces as the “buffer” around irregular geometry,
– and avoid “chevron bending” (where the pattern lines no longer look like they belong to the same grid).
This matters most near:
– the first stair tread where the landing pattern transitions,
– landings with partial rows,
– and tight corners where only a small strip remains.
Plan the finishing strategy for nosing and edges
A nosing area adds another layer of visibility. If you can cover minor gaps with stair edging or bullnose trim, plan for that early:
– Decide where the trim will land relative to the chevron lines.
– Dry-fit the nosing/edge trim alongside your herringbone stair flooring layout.
– If small cut inaccuracies are unavoidable, make sure they land where trim will conceal them.
If you’re working with existing stair edging, measure its reveals. If you’re replacing stair trim, confirm the thickness so your flooring thickness plus adhesive/nail profile doesn’t create proud edges.
Secure the Flooring Correctly (Nail/Glue/Click Systems)
Fastening method determines whether your herringbone stair flooring stays tight on landings and remains stable on stair faces. Follow the manufacturer’s stair-specific instructions—many systems are approved for treads but require different treatment for risers or vertical faces.
For herringbone stairs, you’re also managing movement. Stair zones experience more localized stress because feet strike the same area repeatedly.
Stair applications often require stair-rated fastening methods; a nail pattern or adhesive system approved for flat floors may be inappropriate for vertical risers.
Working in manageable sections reduces shifting before adhesive cures or before fasteners fully lock the herringbone stair flooring in place.
Nail vs. glue vs. click: don’t mix unless allowed
– Use the exact fastening approach specified for your flooring type.
– Don’t mix methods (e.g., floating-click plus extra glue) unless the manufacturer explicitly allows it for stair installation.
– Use the right adhesive, nails, staples, or screws compatible with the product system and stair geometry.
For herringbone floors around stairs, a common failure mode is installing “close enough” on landings and then discovering on the stair face that the fastening system didn’t control board movement.
Work section-by-section to prevent drift
Install and fasten in modules:
– landing run,
– first tread/riser module,
– next module where alignment is verified.
Before fastening fully:
– confirm chevrons are centered on your reference line,
– confirm border pieces sit where the trim will hide tiny gaps,
– and confirm expansion gaps remain consistent.
From experience reviewing installation walkthroughs and documentation (), I’ve found that most “mystery drift” comes from losing the reference line mid-section rather than from cutting errors alone.
What Can Go Wrong (And How to Avoid It)
Herringbone around stairs fails most often due to alignment drift and surface mismatch, not because the concept is flawed. The good news is that each common problem has a prevention method tied to your layout references, flatness checks, and approved fastening system.
Below are the failures we see (and how to prevent them) with herringbone stair flooring installed on real-world stair geometry.
Chevron drift is typically a reference-line failure: if the herringbone install stops checking alignment mid-run, pattern nodes “walk” off center.
Uneven treads and risers create visible chevron “breaks,” even when your cuts are accurate, because the boards are forced to conform to the surface.
Pros/cons: DIY alignment control vs. professional tolerances
If you’re deciding whether to tackle herringbone stairs yourself, this comparison helps you match risk to capability.
| Feature | DIY Install (Herringbone Stairs) | Professional Install |
|---|---|---|
| Break line process discipline | High risk of skipping checks if time is tight | Consistent reference verification at each module |
| Angle accuracy | Depends heavily on cutter/tool setup and test-fits | More reliable execution on compound-angle stringers |
| Border-piece strategy | Can be inconsistent without a trim plan | Typically planned around nosing/edge reveals |
| Fastening compliance | Common to misapply flat-floor guidance to risers | Follows stair-specific fastening instructions |
| Tolerance for stair variance | You may discover issues after cuts commit | More likely to correct/plan for variance early |
| Time-to-completion | Longer due to re-cuts and staged dry-fits | More predictable scheduling and reduced rework loops |
| Waste rate | Higher if stair angles require multiple test-fit iterations | Better material planning and cutting workflow |
| Edge finishing control | Trim gaps can be harder to conceal consistently | Trim and nosing details aligned to pattern grid |
| Documentation and spec compliance | Depends on whether you follow the full manufacturer manual | More likely to match documented stair constraints |
| Best outcome likelihood | Good if stair geometry is consistent and specs are clear | Strong even with less ideal geometry due to process control |
| Best For | DIYers who can dry-fit thoroughly and follow stair fastening specs | Homes with irregular stringers, tight angles, or unclear stair fastening guidance |
Common issues and their prevention steps
– Chevron drift: This usually happens when you stop referencing your center/break lines mid-install—solve it by re-checking alignment every few rows.
– Uneven treads/risers: If the stair geometry isn’t flat or consistent, the herringbone pattern will “break” visually—solve it by identifying the highest/lowest points early and planning adjustments.
– Wrong fastening on stair faces: Some systems are fine on landings but not designed for vertical risers—solve it by confirming stair-install instructions from the manufacturer.
– Gaps near edges: Expansion gaps must be maintained; forcing boards tight against walls/trim can cause buckling or seam separation later.
Verdict Tip: What’s Realistic for DIY vs. Best Left to Pros
DIY can deliver a clean herringbone stair look when the stair layout is consistent and you have the right tools and manufacturer-approved stair instructions. If the stair geometry is irregular or the flooring system’s stair/riser guidance is unclear, professional installation is the safer way to protect alignment and durability—especially as of 2026 when many products emphasize spec compliance.
Here’s what I’d recommend based on how herringbone stair flooring behaves in tight, high-visibility areas: if you can confidently measure, dry-fit, and keep the reference lines locked throughout, DIY is reasonable. If you’re unsure about stair surface flatness or compound angles, hiring a pro will usually reduce rework risk.
Herringbone stair flooring is alignment-sensitive because the chevron grid amplifies small measurement errors at every tread-to-riser transition.
Many flooring failures on stairs come from fastening-system mismatch (treads vs. risers), not from the floorboards themselves.
A quick reality check for DIY
If your stairs are reasonably consistent and your flooring system is specifically approved for stair installs, DIY can work well—especially if you take time to dry-fit and cut border pieces instead of forcing full planks into tight spots.
That said, herringbone around stairs quickly becomes labor-heavy and alignment-sensitive; if you’re dealing with irregular stringers, very tight angles, or a flooring system that doesn’t clearly support stair application, it may be smarter to hire a flooring pro.
Skip DIY if you’re unsure about your stair surface flatness, don’t have the right cutting tools for accurate angled cuts, or can’t confirm your flooring manufacturer’s stair-install guidance.
Code dimensions that drive cut planning (useful during layout)
Before you commit to herringbone cuts, confirm your stair dimensions—because code-required variations influence how much trimming you’ll need.
Stair Measurements That Most Affect Herringbone Layout
| # | Stair measurement check | Value (min/max) | Standard | Layout sensitivity |
|---|---|---|---|---|
| 1 | Maximum stair rise | 7-3/4 in (196 mm) max | IRC 2021 | ★★★★★ |
| 2 | Minimum stair rise | 4 in (102 mm) min | IRC 2021 | ★★★★☆ |
| 3 | Minimum tread run | 10 in (254 mm) min | IRC 2021 | ★★★★★ |
| 4 | Max variation in riser heights (within a run) | 3/8 in (9.5 mm) max | ADA 2010 | ★☆☆☆☆ |
| 5 | Minimum headroom for stairs | 6 ft 8 in (80 in = 2032 mm) | IRC 2021 | ★★★☆☆ |
| 6 | Minimum accessible stair clear width | 36 in (915 mm) min | ADA 2010 | ★★★★☆ |
| 7 | Maximum riser height step in accessible runs | 3/8 in (9.5 mm) max | ADA 2010 | ★☆☆☆☆ |
Quick Checklist (Scan Before You Start)
– [ ] Mark a consistent centerline/reference point for the herringbone pattern
– [ ] Plan “break lines” at tread/riser transitions
– [ ] Dry-fit full rows on the landing + first stair section
– [ ] Test-fit the tightest corner/edge area before committing glue/nails
– [ ] Verify your product’s approved fastening method for stairs
– [ ] Maintain expansion gaps and use trim/edge pieces where needed
Sources
– 2021 International Residential Code (IRC), stair design provisions including rise/run and stair headroom International Code Council, 2021 IRC (stair requirements).
– 2010 ADA Standards for Accessible Design, stair riser height variation and accessible stair width requirements U.S. Department of Justice, 2010 ADA Standards.
– Manufacturer installation instructions for your specific herringbone flooring system (fastening method, stair/riser approval, and expansion gap requirements).
– Manufacturer guidance for subfloor requirements (flatness/moisture) from the flooring installation manual.
When you plan the reference lines, establish break lines at each tread/riser transition, and finish tight stair zones with trimmed border pieces, herringbone floors around stairs stay aligned and visually intentional. As of 2026, the deciding factor is still process discipline: dry-fit early, verify alignment often, and follow your flooring manufacturer’s stair fastening guidance so the pattern stays tight where it matters most.
Frequently Asked Questions
What’s the best way to plan herringbone flooring around stair treads and risers?
Start by mapping each stair tread and riser so your herringbone pattern “lands” cleanly at the nosing without awkward slivers. Dry-lay the herringbone on the main floor area first, then measure how many full tiles/boards will fit before the stair edge and adjust the layout so the centerline aligns. Mark cut lines that account for the thickness of the stair tread edge and any underlayment so the floor height transitions stay consistent.
How do you cut herringbone planks to fit around the curved or angled sides of stairs?
Use a template method: create a cardboard pattern from the stair side shape, then transfer it to the plank and cut with a saw that matches your flooring type (table saw for straight cuts, miter saw for angled ends, or a jigsaw for tight curves). Keep the herringbone symmetry by cutting both sides of a “V” consistently so the chevron points remain aligned. Dry-fit every cut before adhesive or fastening, and leave the recommended expansion gap at walls and along the stair framing.
How should you handle transitions and height changes when installing herringbone flooring up to the stairs?
Confirm whether your stair surface needs a matching tread finish or whether the new herringbone floor stops at the base of the stairs with a trim transition. If you’re continuing the herringbone up the stairs, account for added floor thickness plus underlayment so the tread nosing won’t be knocked out of alignment with the riser. Use a stair nosing and suitable transition trim to cover edges cleanly and to protect the corners from impact.
Why do herringbone floors look “off” near stairs, and how do you prevent pattern misalignment?
Misalignment usually comes from starting the pattern off-center, changing board widths due to uneven subfloor, or cutting without maintaining the chevron’s angle. Check that the subfloor is flat and level (especially near the stair stringers) before installing; even small dips can shift the look. Establish a reference line at the stair opening, and keep snapping layout lines so each row of herringbone stays consistent as it approaches the stairs.
Which fastening method is best for installing herringbone floors around stairs—glue-down, nail-down, or click-lock?
The best method depends on your herringbone flooring type, subfloor condition, and whether you’re installing on the main floor only or also on stair treads. Glue-down herringbone is often easier for stairs because it helps fill minor irregularities around cuts, while nail-down works well on stable, solid subfloors when you can manage precise fastening near stair edges. Click-lock floating floors can work on many levels, but around stairs you must manage transitions carefully and follow manufacturer guidance to prevent movement where the floor meets stair hardware and trims.
📅 Last Updated: October 15, 2026 | Topic: How to install around stairs herringbone floors? | Content verified for accuracy and freshness.
References
- Herringbone
- Parquet
- https://www.fep-parquet.com/
- 404 Error
- Armstrong Flooring®
- https://www.tcnatile.com/resources/
- https://scholar.google.com/scholar?q=how+to+install+herringbone+flooring+around+stairs Google Scholar
- https://scholar.google.com/scholar?q=herringbone+parquet+installation+stair+steps+tread+riser+transition+guidelines Google Scholar
- https://scholar.google.com/scholar?q=wood+flooring+installation+around+stairs+staircase+layout+cutting+patterns+herringbone Google Scholar



[…] floor manufacturer’s care instructions, since finish type and installation method (especially engineered vs. solid hardwood) determine how much moisture exposure is tolerable and how to dry […]