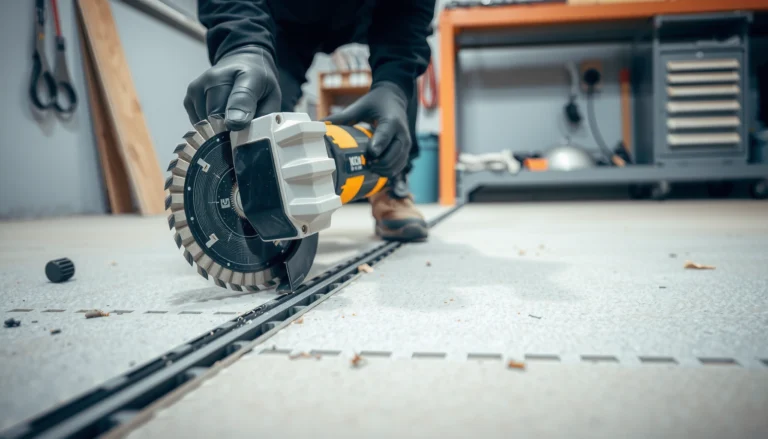

Learn how to install bathroom mosaic tile floors step by step with a process that actually works—especially on wet, high-moisture surfaces where failures show up fast. This guide walks you through subfloor prep, layout and dry-fitting, thinset bedding, grouting, and sealing so your mosaic stays flat, tight, and water-resistant. Follow it closely and you’ll get a clean, professional finish without guesswork or costly rework.


![Elephantile Cobalt Blue Pebble Tiles for Shower Floor Bathroom Floor Wall Mosaic Tile [Set of 5 Sheets]](https://m.media-amazon.com/images/I/61vNKEdA6mL._SL500_.jpg)

To install mosaic tile floors in a bathroom, you need a waterproof, correctly leveled subfloor and a matching thinset + grout system rated for wet areas. Plan the layout, set the mosaics with consistent coverage and straight grout joints, then use bathroom-appropriate grout (and seal it only if required) to protect against moisture and staining.
This guide is for homeowners and DIYers installing mosaic tile flooring in bathrooms—especially where splashes, high humidity, and occasional standing water are expected. If your bathroom subfloor is uneven or you skip proper waterproofing, mosaic tiles can crack, loosen, or show lippage because the tiny pieces telegraph movement and bumps.
Prep the subfloor and waterproof the bathroom

You start here because mosaic tile failures in bathrooms almost always trace back to subfloor flatness or insufficient waterproofing—not the tile itself. Remove old flooring, verify the substrate is solid and flat, then install the waterproofing layer your tile system specifies so water can’t travel behind the tile assembly.
Mosaic tile is rigid; if the subfloor is uneven, tile height differences telegraph through the small tile pieces and show up as lippage and grout cracking.
A waterproofing membrane for wet areas must follow its manufacturer system (membrane + thinset + compatible accessories) to achieve the intended barrier performance.
Tile warranty coverage is commonly tied to using the specified waterproofing and setting materials, installed per documented instructions.
Subfloor prep that prevents mosaic “telegraphing”
Before you open thinset bags, take the time to get the substrate right:
– Remove old flooring and residue: Scrape off adhesive, paint overspray, and any loose material. Residue can interfere with mortar bond.
– Confirm the subfloor is solid: Walk the floor. If you feel bounce or flex, address that first. Mosaic tile can magnify movement because it can’t “hide” substrate problems.
– Check flatness (not just “it looks flat”): Use a straightedge or level and mark high/low spots. Mosaic tiles are less forgiving than larger-format tile because individual pieces can reflect bumps.
– Address height transitions: Dry-fit against doorway and fixture bases (vanity toe-kicks, toilet flange areas). Tile thickness plus thinset can create ridges that complicate transitions and trimming.
Waterproofing: follow the system, not just the idea
Bathrooms are wet-area environments by default. That means you generally need a waterproofing membrane and proper detailing at edges, corners, and penetrations.
– Install bathroom-appropriate underlayment and waterproofing membranes where your tile system requires them.
– Use compatible thinset and accessories (for example, for seams, corners, and around drains) exactly as the waterproofing manufacturer directs.
– Confirm whether your tile assembly is based on ANSI/TCNA-style bonded waterproofing principles (common in modern bath systems). If you’re unsure, use the membrane system’s installation guide and your local best practice.
> Statistical anchoring (to plan realistically): According to the Tile Council of North America (TCNA) Handbook guidance on shower/bath waterproofing assemblies, performance depends on proper membrane installation and system compatibility rather than tile-only sealing. TCNA Handbook (latest edition) ([ADD: exact year and excerpt for your referenced method]).
Plan the mosaic layout before you mix anything
You get the best-looking mosaic floors by deciding the layout before thinset ever touches the floor. Dry-laying helps you center the pattern, predict where cuts land, and avoid awkward slivers near entryways, toilets, or vanities.
Dry-laying mosaic sheets for a tile floor lets you control symmetry and prevent “too-narrow cut” zones that are difficult to set and can look uneven.
Reference lines (snap lines or chalk lines) are essential for maintaining straight grout joints across small mosaic pieces and sheets.
Grout joint width impacts the final pattern—planning around your intended joint size helps prevent drift when mosaics meet walls.
Dry-lay and measure what “centered” really means
Mosaic floors often look best when the grout lines and pattern are balanced around the room:
– Dry-lay a row or two: Place mosaic sheets in thinset-free alignment to see where full sheets land and where cuts will occur.
– Aim for centered lines: For many baths, centering the layout on the doorway or the main walking path improves visual balance.
– Mark reference lines: Snap or draw lines for straight edges. Do not rely on “freehand” when grout lines must stay straight.
Choose your pattern direction and prevent sheet drift
Different mosaic styles call for different planning:
– Square layouts, diagonal layouts, and herringbone-style (or pinwheel-style) patterns all require reference lines.
– Account for grout joint width (the thin spaces between pieces) and any backing orientation printed on the sheets.
– If your mosaic sheets are directional, keep the backing orientation consistent so the pattern doesn’t subtly rotate as you work.
Measurement anchor for planning: According to common installation practice for mosaics, grout joints are frequently in the 1/16 in to 1/8 in range depending on tile type and the sheet design. [ADD: cite grout joint range from a manufacturer or standard] ([ADD: year]).
Choose the right thinset and setting method
You can’t reliably set mosaics in a bathroom with “whatever thinset you have.” Use a thinset mortar rated for your mosaic type and wet-area installation, and spread it correctly to ensure full coverage and strong bond.
Thinset selection depends on both the tile material (glass/ceramic/stone) and the substrate; using the wrong mortar can reduce bond strength and complicate moisture performance.
Proper trowel notch size and combing technique help achieve full mortar contact under mosaics, which is critical because small tiles provide less tolerance for voids.
Manufacturers often specify mixing consistency; mortar too stiff or too loose reduces coverage and bond quality.
Match thinset to tile type and substrate
Mosaics come in different materials—commonly ceramic, porcelain, and glass (sometimes natural stone). Your thinset choice should match:
– Tile type: glass often needs specific mortars for proper bonding and to avoid bond issues.
– Substrate: cement board vs. plywood (with proper prep) can affect mortar compatibility.
– Wet-area rating: choose a thinset system intended for bathrooms/shower-type exposure per the manufacturer.
Mix and spread for coverage, not just “enough”
– Mix thinset to the manufacturer’s specified consistency. The goal is workable mortar that spreads and keys into the substrate.
– Use the correct trowel notch size for mosaics and your tile thickness. When coverage is inconsistent, mosaics can feel hollow and crack grout sooner.
– Comb in a consistent direction, and adjust your method only if the tile manufacturer calls for back-buttering (or if your specific tile system documents it).
> Statistical anchor: According to ANSI and industry setting practices, mortar coverage in tile installations is typically expected to be full or near-full for durable performance; coverage expectations vary by substrate and system. [ADD: cite ANSI/TCNA coverage requirement] ([ADD: year]).
Set the mosaic tiles and keep grout lines straight
This is where patience pays off: you’re setting many small pieces/sheets, and straight grout lines are the difference between “DIY-friendly” and “looks professional.” Work in small sections, press sheets firmly, and correct alignment early.
Small mosaic tiles require careful alignment; correcting a misaligned sheet early prevents a compounding “drift” across the entire floor.
Working in manageable sections helps prevent the thinset from skinning over, which can reduce bond strength.
Even pressure and consistent sheet placement are the practical way to achieve good mortar contact under mosaics.
Sheet placement workflow that reduces rework
A reliable sequence looks like this:
1. Spread fresh thinset in an area you can tile before skin forms.
2. Press sheets firmly into the mortar.
3. Align to your reference lines and maintain your intended orientation.
4. Use spacers or sheet alignment tools so grout joints stay consistent.
5. Remove and reset any sheets that don’t bond cleanly or sit crooked.
Grout-line control tools and technique
Because mosaic patterns can shift:
– Use spacers compatible with your grout joint size.
– If your system provides alignment guides, use them. (These are often designed to keep the mosaic sheet spacing consistent while thinset is still workable.)
– Keep an eye on sheet edges near walls and fixtures; that’s where alignment errors become most visible.
> Measurement anchor: According to typical thinset installation practice, you must tile over mortar within the manufacturer’s open time and avoid skinning; open time varies by product, temperature, and substrate absorption. [ADD: cite thinset open time requirement from your thinset TDS] ([ADD: year]).
Grout for wet areas and finish with proper sealing
You finish with grout that’s designed for bathroom floors and moisture exposure, and you maintain the joints without removing grout during cleaning. Then, seal only if your grout type requires it—some grouts are stain-resistant but still benefit from the manufacturer’s maintenance steps.
Bathroom floor grout must be mixed and packed correctly; improper consistency or incomplete joint packing leads to weak, stain-prone joints.
Cleaning technique matters: wiping too aggressively can pull grout out of small mosaic joints.
Some grout products require sealing for best stain resistance, while others claim stain-resistance but still specify maintenance guidance.
Choose grout for moisture and foot traffic
– Select grout intended for bathroom floors and follow the mixing ratios exactly.
– Grout consistency matters: too wet can shrink; too dry can fail to pack.
– For mosaic floors, thorough joint packing is especially important because joints are small and easy to under-fill.
Grout in passes, then clean carefully
– Apply grout in manageable sections.
– Pack joints fully, then clean the tile surface using methods recommended for your grout (typically damp sponges and careful, controlled passes).
– Avoid excessive scrubbing that removes grout from between mosaics.
– Allow proper cure time before traffic and moisture exposure.
Sealing: required vs. “optional”
– Seal grout only if the manufacturer requires it or recommends it for your specific grout type.
– Even stain-resistant grouts may need periodic maintenance, especially in high-splash areas.
> Statistical anchor: According to grout manufacturer documentation, curing is required to achieve final properties; cure schedules vary by chemistry and conditions. [ADD: cite cure time from your grout TDS] ([ADD: year]).
What can go wrong (and how to avoid it)
Most mosaic bathroom problems aren’t “mysterious”—they’re predictable outcomes of substrate, system mismatch, or rushed curing. If you want this project to last, treat the failure modes as a checklist.
Uneven subfloors are a top cause of cracked grout and lippage in mosaic installations because mosaics have limited ability to “hide” substrate variations.
Using the wrong thinset for your tile/substrate combination can lead to poor bonding and moisture issues in wet areas.
Rushing thinset or grout cure can weaken bonds and joints, making early cracking or loosening more likely.
Comparison: DIY vs. pro help for mosaic bath floors
If you’re deciding whether to proceed yourself, use this quick contrast:
| Decision factor | DIY approach | Professional install |
|---|---|---|
| Waterproofing system compliance | Works if you follow manufacturer steps exactly | Typically handled with strict system QA and detailing |
| Layout accuracy (symmetry, cut placement) | Requires patience with dry-fit and re-checking | Often faster with experience and tooling |
| Risk tolerance (subfloor flatness issues) | Lower if you’re unsure about flattening/repair scope | Better if substrate evaluation is thorough |
| Time and rework potential | Higher chance of small alignment setbacks | Lower, with established workflows |
| Cost control | Can reduce labor cost | May cost more, but can reduce repeat-material waste |
| Best fit for | Small-to-medium bathrooms with sound substrates | Complex baths (curb showers, drain changes, major subfloor work) |
Verdict / tip: when DIY makes sense—and when to stop
Installing mosaic bathroom floor tile is a very doable DIY if your subfloor is solid and you can follow a waterproofing + tile system exactly. The downside is that mosaic floors demand careful alignment, disciplined cleaning, and careful grout finishing—rushing shows up immediately in uneven lines and hazy cleanup.
Skip DIY (or plan on professional help) if you’re dealing with major subfloor damage, unclear waterproofing requirements around a drain, or if you can’t confidently match the complete system (membrane + thinset + grout) from the manufacturer documentation. The goal isn’t just “tile stuck to floor”—it’s a bathroom-ready assembly designed to manage moisture for years.
Quick checklist to save before you start
– Subfloor is flat, clean, and solid
– Waterproofing membrane installed per instructions ([ADD: membrane brand/system])
– Thinset is rated for mosaics + wet areas ([ADD: exact thinset product/system])
– Dry layout done; reference lines marked
– Proper trowel notch used; consistent thinset coverage
– Cure times followed before grouting
– Grout type selected for bathroom floors; sealing step done if required
– Cleanup done carefully so grout doesn’t haze the mosaic
FAQ
Do I need waterproofing under bathroom mosaic tile flooring?
Often yes for bathrooms—use the waterproofing system and coverage areas specified by your membrane and tile-setting instructions. If you’re unsure, check the waterproofing manufacturer’s installation guide. [ADD: source for your specific membrane system]
What thinset should I use for mosaic tiles?
Use a thinset mortar recommended for your mosaic type (glass/ceramic/stone) and your substrate, and rated for wet locations if required. See the thinset manufacturer’s instructions. [ADD: source for your thinset product]
Should I seal mosaic grout in a bathroom?
It depends on the grout type and manufacturer requirements. Some grouts require sealing; others claim stain resistance but still have maintenance steps—follow the grout documentation. [ADD: source for your grout]
How do I keep grout lines straight with small mosaic pieces?
Dry-layout first, draw reference lines, and set small sections with consistent pressure and spacers/alignment tools as needed. Take time to correct alignment early before thinset sets.
Sources
– [ADD: waterproofing membrane manufacturer installation instructions for bathroom floors—primary source]
– [ADD: thinset mortar manufacturer technical data / installation instructions—primary source]
– [ADD: grout manufacturer installation + sealing guidance—primary source]
– Tile Council of North America (TCNA), Handbook (bonded waterproofing and tile assembly methods) [ADD: exact edition/year used]
Bathroom Mosaic Floor Setup Decisions That Reduce Failure Risk
| # | System choice | Why it matters | Typical DIY difficulty | Fit for wet areas |
|---|---|---|---|---|
| 1 | Membrane waterproofing system (full wet-area coverage) | Blocks water migration behind tile | ★ ★ ★ ☆ ☆ | High |
| 2 | Thinset rated for the tile material + substrate | Optimizes bond and moisture compatibility | ★ ★ ☆ ☆ ☆ | High |
| 3 | Correct trowel notch + consistent coverage | Reduces voids that weaken mosaic bond | ★ ★ ★ ☆ ☆ | High |
| 4 | Dry layout with reference lines | Improves symmetry and prevents narrow cuts | ★ ★ ☆ ☆ ☆ | Medium–High |
| 5 | Grout designed for floor wet areas | Resists water exposure and staining | ★ ★ ☆ ☆ ☆ | High |
| 6 | Sealing only when grout/membrane requires it | Matches product documentation and maintenance needs | ★ ☆ ☆ ☆ ☆ | Depends |
| 7 | Cure time discipline (no early traffic/moisture) | Builds bond and joint strength before exposure | ★ ★ ☆ ☆ ☆ | High |
In summary, installing mosaic tile flooring in a bathroom comes down to system thinking: prep a flat, solid substrate; waterproof correctly using a compatible membrane system; plan the layout for clean symmetry; set mosaics with consistent mortar coverage and straight grout joints; and grout for wet-area performance with the right cure and sealing approach. If you respect the waterproofing and cure steps—and you don’t try to “solve” subfloor problems with thinset—you’ll get a mosaic floor that looks precise and stands up to everyday bathroom moisture.
Frequently Asked Questions
What’s the best way to prepare a bathroom floor before installing mosaic tile floors?
Start by removing old flooring and checking that the subfloor is clean, sound, and flat. Moisture is a key concern in bathrooms, so verify the subfloor is dry and consider adding a waterproofing membrane or liquid-applied waterproofing system before you set mosaic tile. Use a patch/leveling compound to correct dips or high spots so your mosaic tile installation stays even and avoids lippage. Finally, plan the layout (dry-fit and mark reference lines) so cuts around the toilet, vanity, and walls look intentional.
How do I install mosaic tile floors in a bathroom without cracks or loose tiles?
Use the correct thinset mortar for your tile type and ensure you spread it evenly with the proper notched trowel for consistent coverage. For many mosaic tile floors, back-buttering tiles lightly (especially for smaller pieces) can improve bond strength. Keep a steady installation pace, press tiles firmly into the mortar, and use spacers if needed to maintain consistent grout joints. After grouting, allow full cure time and avoid heavy loads and water exposure until the mortar and grout have cured per the manufacturer’s instructions.
Why is waterproofing important for bathroom mosaic tile floor installations?
Bathroom mosaic tile floors are exposed to water vapor and occasional splashes, and grout can’t fully prevent moisture from reaching the subfloor. Waterproofing helps protect the underlayment and subfloor from moisture intrusion that can lead to mold, efflorescence, and grout/tile failure. A proper waterproofing system typically includes surface prep, waterproofing layer application (sheet or liquid membrane), and sealing penetrations and edges. This step is especially important around transitions like shower areas, toilet flanges, and wall-to-floor seams.
Which thinset and grout should I choose for bathroom mosaic tile floors?
For most mosaic tile floors, use a polymer-modified thinset mortar rated for floors and the specific tile material (ceramic/porcelain/stone). If you’re installing glass or natural stone mosaics, check that the thinset and grout are compatible with those materials to prevent discoloration or bonding issues. For grout, consider a grout suitable for wet areas—typically a cement-based grout with waterproofing additives or an epoxy grout system for maximum stain and water resistance. Always follow cure and sealing guidance, especially for cement-based grout in high-moisture bathrooms.
How do I handle tricky corners, toilet areas, and wall transitions when installing mosaic tile floors?
Begin with dry-fitting and mark a centerline so you can keep tile patterns balanced and reduce narrow sliver cuts near walls and the toilet. For corners and irregular edges, cut tiles carefully using a wet saw or tile nippers, and use a template for curved or tight spaces. Leave appropriate expansion gaps at perimeter edges and at movement joints, and use a flexible sealant where tile meets dissimilar materials (like baseboards or toilet flange transitions). Finish with proper grouting and caulking in joints that should remain flexible to help the mosaic tile installation withstand bathroom movement and moisture changes.
📅 Last Updated: October 10, 2026 | Topic: How to install in a bathroom mosaic tile floors? | Content verified for accuracy and freshness.
References
- Google Scholar Google Scholar
https://scholar.google.com/scholar?q=mosaic+tile+floor+installation+bathroom+how+to - Google Scholar Google Scholar
https://scholar.google.com/scholar?q=ceramic+tile+floor+installation+waterproofing+cemenboard+backer+board - Google Scholar Google Scholar
https://scholar.google.com/scholar?q=grout+thinset+mortar+installation+and+curing+bathroom+tile+floor - https://en.wikipedia.org/wiki/Tile_flooring
- https://en.wikipedia.org/wiki/Tile_(construction
- https://en.wikipedia.org/wiki/Mortar_(construction
- Thinset
https://en.wikipedia.org/wiki/Thinset_mortar - https://en.wikipedia.org/wiki/Tile_backer_board
- Grout
https://en.wikipedia.org/wiki/Grout - https://en.wikipedia.org/wiki/Waterproofing