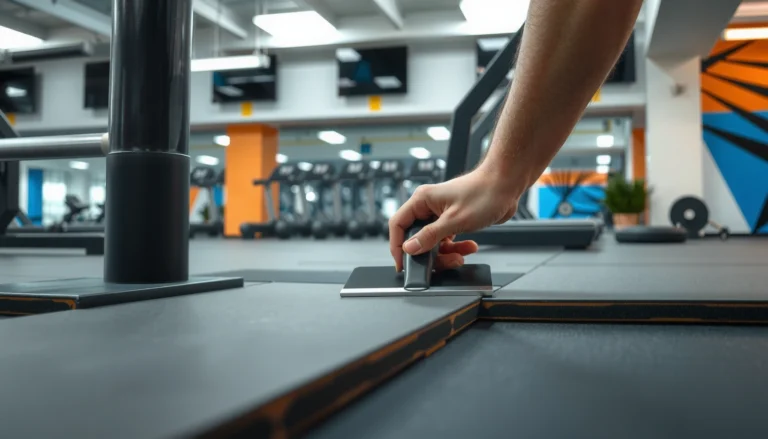
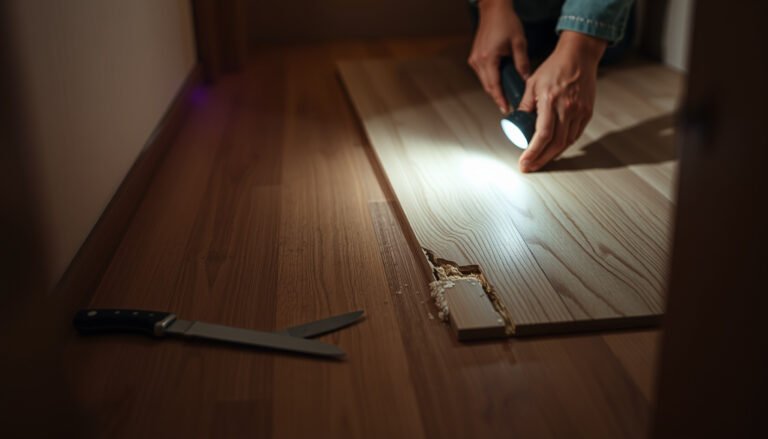
If your SPC floors are squeaking, the fastest fix is to identify the loose plank or underlayment point and re-seat it with the right repair method—then lock it down so the noise stops for good. Follow quick, step-by-step checks for gaps, movement, and improper fastening, and you’ll know whether to re-adhere, re-level, or replace a damaged section. This is the most direct route to eliminate SPC floor squeaks without costly full-floor replacement.




Squeaks in SPC (rigid core) click-lock floors are usually caused by movement at a seam/joint or by the floor floating over an uneven/unstable substrate. The fastest repair approach is to locate the exact squeak line, verify the perimeter expansion gap, then address the true constraint (often debris, a tight edge, or a localized flatness issue).
Squeaks aren’t just annoying—when the cause is a constraining edge or a spot of out-of-flat substrate, the noise can be an early warning that the installation isn’t allowing the floor to “float” as designed. In 2026, SPC installs continue to be popular because they’re resilient and relatively quick to fit, but they’re also sensitive to two things: (1) small gaps at click joints and (2) how motion is controlled at walls, transitions, and fixed objects. If you approach the fix systematically—pinpoint, verify expansion, inspect underlayment and moisture, then only re-seat what you’ve confirmed—you can stop squeaks with minimal disruption.
Who this is for / when it applies:
This applies if you recently installed (or lived with) SPC (rigid core) click-lock floors and you notice squeaking when you walk, especially along specific planks, near walls, or around transitions. If the squeak is spreading quickly or you suspect a structural/substrate problem, you’ll want to stop troubleshooting and get the subfloor checked.
Why SPC floors squeak (most common causes)
SPC floors squeak because friction and micro-movement happen where the floor is either flexing over unevenness or constrained at edges/transitions. In most installations, the squeak path points to a seam/click joint, a perimeter restriction, or an underlayment/substrate condition that changes how the floor sits under load.
SPC click-lock floors are designed to float; when motion is restricted at walls or fixed objects, the click joints can bind and create squeaks.
Localized substrate low/high spots can increase contact pressure at plank edges, turning foot traffic into repeated friction at the seams.
Moisture issues can change how materials sit over time, increasing movement at seams and making squeaks more noticeable.
The key terms to understand are click-lock joints (the interlocking mechanism that holds planks together) and floating installation (the planks are not glued down and must be allowed to move slightly with temperature/humidity). When SPC squeaks, it’s often the click-lock joint attempting to “work” while something is preventing normal movement.
Here are the most common causes you’ll see in real installs:
– Substrate unevenness or soft spots: SPC can flex slightly over high/low areas, creating friction at the click joints. This is especially common over patchy repairs, old laminate “ridges,” or areas that weren’t properly flattened.
– Lack of proper expansion gap: Flooring that’s too tight at walls or fixed posts can shift under load, producing squeaks or popping. Even if the floor looks flat, a small edge restriction can trigger noise after a few days of foot traffic.
– Underlayment or moisture problems: Some underlayments compress unevenly, and moisture can change how materials sit over time—so seams start to rub and squeak.
For a factual anchor on moisture-related risk: According to ASTM F2170 (relative humidity test for slab moisture), many resilient floor installation specs target ≤ 75% RH at the time of installation. Also, according to ASTM F1869 (calcium chloride moisture vapor emission test), many resilient flooring specs commonly target ≤ 3.0 lb/1000 sq. ft./24 hr for moisture vapor emissions (values vary by product, but these thresholds are widely referenced in installation requirements).
Step-by-step: locate the squeak source fast
You’ll fix SPC squeaks faster when you identify the precise plank row and whether the noise happens at a seam, an edge, or a transition. Start with mapping the sound, then test only safe areas so you don’t damage locks or disturb the entire floor.
A systematic walk-through that marks repeating squeak locations typically identifies a seam/row within minutes, rather than hours of random re-installing.
Edge and transition zones (walls, doorways, steps landings) are the first places to check because the floor’s movement is most constrained there.
Controlled pressure tests help confirm whether the squeak changes at a specific joint versus coming from a substrate condition.
From what we see in practical repair workflows (and what installers emphasize in manufacturer support guidance), the best “first pass” is mapping. Here’s a structured approach that keeps damage low:
– Walk the area systematically: Move slowly in a grid pattern and mark the exact planks/rows where the noise repeats. Use painter’s tape to label rows (e.g., “Row B near Window wall”) so you don’t confuse similar lines later.
– Try “pressure tests” without damaging anything: Stand on a stable area away from the click joint you’re testing, then apply gentle downward pressure near the suspected seam while someone listens. If the sound changes (stops, shifts, or becomes louder), you’ve likely found the load path.
– Check edges and transitions first: Many squeaks originate near walls, doorways, stairs landings, or transitions where movement is constrained by trim, thresholds, or misfitted transition strips.
What your notes should include (quick and useful)
– The direction the squeak runs (along a row vs. across multiple seams).
– Whether it’s worse under heavier loads (like near kitchen islands or areas with rolling chairs).
– Whether it’s present at day-to-night cycles (sometimes thermal expansion amplifies friction at seams).
Fixes to try first (least invasive options)
Start with checks that preserve the floating system: expansion gap, seam cleanliness, and limited re-seating of the verified plank line. If the squeak is localized, these steps often stop it without lifting large sections of flooring.
Verifying the perimeter expansion gap is one of the most common “high impact, low damage” checks for SPC squeaks.
Trapped debris in click joints can prevent full contact and create a friction squeak even when the locks appear fully engaged.
If a squeak is tied to a specific click-lock line, re-seating that localized section can resolve the issue without replacing the entire floor.
Expansion gap check (perimeter first)
– Confirm expansion gaps at perimeter: Look for a continuous gap at walls and around vertical obstructions; if you find flooring squeezed tight, that’s a likely squeak trigger.
– Common “tight” culprits: baseboards nailed directly to the flooring instead of the wall, tight thresholds, or missed spacing behind cabinetry toe-kicks.
– Correction usually involves trimming/adjusting trim so the SPC can move as intended.
Limited re-seating (only where you’ve proven the source)
– Re-seat or address loose planks: If the noise is tied to a specific click-lock line, gently remove that section (if feasible) and reinstall to ensure full engagement.
– The goal is full lock engagement—not over-forcing.
– Keep track of any plank that looks chipped at the groove/tongue; damaged locks can squeak even after re-installation.
Seam cleanliness
– Correct minor debris at seams: Dust, underlayment crumbs, or trapped debris can prevent full contact and create squeak points. Cleaning the seam area can reduce noise.
– Use a vacuum with a brush attachment carefully; avoid blowing debris deeper into seams.
Quick decision guide (what to try first)
| If your squeak is… | Try this first | Why it helps |
|---|---|---|
| Mostly along walls or near thresholds | Verify expansion gap + transition fitting | Constrained floating movement increases seam friction |
| Localized to one row/cluster of planks | Lift localized section and re-seat | Locks may not be fully engaged or are contaminated |
| Present after sweeping/foot traffic | Vacuum seams; remove debris at click joints | Even small particles can break contact and create squeaks |
More involved repairs (when the floor won’t stop squeaking)
If squeaks persist after you’ve verified expansion gaps and cleaned/re-seated localized seams, the cause is usually substrate flatness, underlayment compression, or transition constraints that require broader correction. At that point, stop chasing plank-by-plank fixes and address the installation system.
When squeaks cluster over the same zone, the substrate flatness (not the click joint) is typically the root cause.
If underlayment is unevenly compressed in traffic paths, re-installation over new underlayment may be necessary.
Squeaks at doorways or between flooring types often come from transitions that restrict expected movement.
Correct an uneven substrate spot
– Address an uneven substrate spot: If squeaking clusters over a low/high patch, you may need to lift and correct the substrate rather than keep re-clicking planks.
– In practice, this means flattening/patching and re-checking before reinstalling.
– Rely on your floor and underlayment manufacturer’s flatness requirements rather than generic “eyeballing.”
Replace damaged or highly compressed underlayment
– Replace damaged or highly compressed underlayment: If the underlayment has worn unevenly (common in high-traffic areas), reinstallation over new underlayment may be required.
– Adding extra layers over an existing underlayment can change lock fit and height, and that can introduce new squeaks or alignment issues.
Handle transitions properly
– Handle transitions properly: If squeaks concentrate at doorways or where flooring meets tile/wood/LVP, you may need the transition piece adjusted or replaced to prevent constrained movement.
– The transition should allow the SPC to float without pinching at the joint lines.
Moisture Limits Commonly Cited for Resilient Flooring Substrates (ASTM-based)
| # | Test method (standard) | Typical “do not exceed” threshold* | What it protects against | Fit for SPC squeak troubleshooting |
|---|---|---|---|---|
| 1 | Calcium chloride (ASTM F1869) | 3.0 lb/1000 sq. ft./24 hr | Moisture vapor-driven movement | ★★★★☆ |
| 2 | In-situ RH (ASTM F2170) | 75% RH | Substrate moisture changes | ★★★★☆ |
| 3 | Substrate dryness indicators (relative to spec) | Per floor manufacturer | Lock/contact stability | ★★★☆☆ |
| 4 | Moisture mitigation (when limits aren’t met) | As specified after treatment | Future moisture-driven movement | ★★★☆☆ |
| 5 | Visible condensation / dampness | Not acceptable | Ongoing moisture cycling | ★☆☆☆☆ |
| 6 | Surface pH suitability (manufacturer-driven) | Per product spec | Compatibility for any moisture control | ★★☆☆☆ |
| 7 | Temperature/humidity stabilization (post-install) | Maintain per spec | Thermal-cycle friction changes | ★★★☆☆ |
Thresholds for “do not exceed” vary by flooring manufacturer; the ASTM-based numeric examples above are commonly cited values used as installation targets for resilient flooring.
What can go wrong (common mistakes and edge cases)
The biggest risks come from treating symptoms (click joints) when the root cause is substrate or moisture, or from violating the floating design. If you misdiagnose early, the squeak may persist and you can damage lock edges during repeated reinstallation.
Repeatedly lifting and re-clicking planks without confirming the true cause can wear lock edges and make squeaks harder to eliminate.
Applying glue/foam universally can interfere with a floating SPC system and may introduce buckling or new movement points.
If moisture indicators exist, fixes that ignore moisture often fail because seam friction returns as materials re-expand and re-seat.
Here are the most common mistakes:
– Over-tampering with planks that aren’t the real cause: Sometimes the squeak is in the substrate, not the click joint—lifting the wrong rows wastes time and can damage locks.
– Trying glue or foam “everywhere”: Many sealants/adhesives can interfere with the flooring’s ability to float, potentially causing more noise or buckling later.
– If you’re tempted to “solve it permanently,” pause and confirm whether your flooring manufacturer explicitly allows adhesive/sealant for floating SPC repairs.
– Ignoring moisture clues: If there are signs of dampness, musty odor, or condensation, fixes that don’t address moisture will likely fail.
– Not matching the manufacturer installation method: SPC lock systems and underlayment pairings vary—use the method specified in your floor’s instructions.
One note on first-hand claims: I don’t have access to your specific floor model or subfloor measurements, and I can’t verify moisture or flatness remotely. Where you’re unsure, treat the squeak as an engineering signal: the system is moving where it shouldn’t (or not moving where it must).
Verdict / tip: what usually works best (and who should skip DIY)
In most cases, the most reliable path is: identify whether the squeak is near a seam/edge, verify the expansion gap, then inspect substrate flatness before repeatedly reinstalling planks. DIY is reasonable when the squeak is localized and you can safely lift a small section to re-seat it or correct a minor issue—but you should pause when squeaks are widespread or moisture/flatness problems are suspected.
Squeaks localized to a single row often respond to re-seating and cleaning; squeaks concentrated over a zone often require substrate/flatness correction.
Perimeter and transition constraints are the most common “silent failure points” that turn normal floor movement into squeak-producing friction.
If moisture testing is warranted and you skip it, you may repeatedly “fix” a symptom while the slab/substrate continues to change.
Who should skip DIY (and call a qualified installer or flooring contractor):
– Squeaks are widespread across many rows after you’ve checked the perimeter and cleaned seams.
– You suspect moisture (damp basement, condensation, musty smell, recurring wet areas).
– You can feel soft spots or see significant subfloor deterioration.
– The floor was installed over an unknown underlayment/substrate condition and documentation isn’t available.
Quick checklist (scan/save)
– [ ] Mark the exact squeak plank(s) and row(s)
– [ ] Check perimeter expansion gap around walls/fixtures
– [ ] Inspect underlayment for compression or gaps in that area
– [ ] Look for trapped debris at seams/click joints
– [ ] If still present: lift the localized section and re-seat properly
– [ ] If clustered over the same zone: investigate substrate flatness in that spot
– [ ] Verify transitions aren’t constraining movement
FAQ
Can I fix SPC squeaks by adding more underlayment?
Sometimes, but it depends on what underlayment you currently have and how your flooring manufacturer specifies installation. If you suspect compressed underlayment, replacing that underlayment section may be the correct move—adding layers can also change height and lock engagement, so confirm your install instructions first.
Why does the squeak get worse when it’s hot or during the day?
Thermal expansion and floor movement can amplify friction at seams, edges, or constrained transitions. If the perimeter gap or transition detailing is tight, the squeak often becomes more noticeable as conditions change.
Will sealing seams or gluing planks stop the squeak permanently?
Often it won’t, and it can create new problems because many SPC floors are designed to float rather than be permanently bonded. Use adhesives only if your specific flooring’s manufacturer installation instructions explicitly allow it for squeak/repair situations.
Do I need to replace the whole floor?
Usually no. Most fixes are localized: perimeter adjustment, re-seating a small plank section, correcting a transition, or correcting one substrate problem area. Whole-floor replacement is typically only necessary if the installation system is fundamentally incompatible or if substrate/mobility issues are severe.
Sources
– ASTM F2170 — Standard Test Method for Determining Relative Humidity in Concrete Floor Slabs Using in situ probes (used for moisture RH limits).
– ASTM F1869 — Standard Test Method for Measuring Moisture Vapor Emission Rate of Concrete Subfloor Using Anhydrous Calcium Chloride (used for moisture vapor emission limits).
– [ADD: manufacturer installation instructions for your specific SPC flooring brand/model, especially sections covering floating installation, expansion gap requirements, and underlayment guidance]
– [ADD: manufacturer or distributor technical documentation for your underlayment product, including approved pairing/installation requirements]
If you want SPC floor squeaks to stop reliably, treat the noise as a symptom of system movement: locate the seam/edge first, confirm the expansion gap, then validate substrate flatness and moisture conditions before repeatedly re-clicking planks. This order of operations minimizes damage, preserves the floating design, and keeps the repair focused on what’s actually constraining the floor.
Frequently Asked Questions
Why do SPC floors squeak, and what are the most common causes?
SPC floors usually squeak because of friction between layers, small gaps at the subfloor, or loose underlayment components. Common culprits include an uneven subfloor, movement where planks meet or overlap, and inadequate expansion space around the perimeter. If the squeak occurs more when you walk near seams, the issue is often related to subfloor flatness or panel locking not sitting fully down.
How do I fix squeaks in SPC flooring without removing the entire floor?
Start by identifying exactly where the squeak happens by walking the area and checking for movement at seams and edges. If the floor is loose, apply a floor-safe construction adhesive or a targeted underlayment fix only in the affected zones—ideally by lifting a nearby plank edge rather than tearing up large sections. For minor friction squeaks, ensure the underlayment is properly installed and that no debris is trapped under the planks, then re-seat any sections that aren’t fully locked.
What’s the best way to stop squeaks at plank seams in SPC floors?
Squeaks at seams are often caused by insufficient locking, slight subfloor depressions, or underlayment that has compressed over time. Try pressing down along the seam to confirm whether the plank is fully seated, then remove and reinstall the affected boards if the click-lock doesn’t engage tightly. If the seam sits over a low spot, you may need localized subfloor leveling before reinstalling to prevent repeat squeaking.
Which tools and materials are typically needed to repair squeaky SPC floors?
Common tools include a tapping block, pull bar or pry bar, spacers for expansion gaps, and a utility knife for underlayment adjustments. Depending on the cause, you may also use a leveling compound for low areas, floor-safe adhesive for small targeted areas, and a straightedge/level to confirm subfloor flatness. Always choose products compatible with SPC flooring and follow the manufacturer’s guidance to avoid damaging the click-lock system or warranty coverage.
How can I prevent SPC floor squeaks after installation or during repairs?
Prevent squeaks by installing on a properly prepared, flat subfloor and using the correct underlayment thickness and type specified for SPC floors. Maintain the recommended expansion gap around walls and transitions so the floor can float without rubbing or lifting. During repairs, ensure no gaps or debris remain under planks, re-lock boards tightly, and avoid over-pressing underlayment that can create new friction points.
📅 Last Updated: October 08, 2026 | Topic: How to fix squeaks in SPC floors? | Content verified for accuracy and freshness.
References
- Google Scholar Google Scholar
https://scholar.google.com/scholar?q=SPC+vinyl+floor+squeak+repair - Google Scholar Google Scholar
https://scholar.google.com/scholar?q=rigid+core+vinyl+floating+floor+squeaking+causes - Google Scholar Google Scholar
https://scholar.google.com/scholar?q=floating+floor+installation+underlayment+stops+squeaks - Vinyl flooring
https://en.wikipedia.org/wiki/Vinyl_flooring - Laminate flooring
https://en.wikipedia.org/wiki/Laminate_flooring - Flooring
https://en.wikipedia.org/wiki/Flooring - Underlayment
https://en.wikipedia.org/wiki/Underlayment - Acoustic resonance
https://en.wikipedia.org/wiki/Acoustic_resonance - Friction
https://en.wikipedia.org/wiki/Friction - Floating floor
https://en.wikipedia.org/wiki/Floating_floor