
Installing LVP floors in a basement is a straightforward DIY project if—and only if—you control moisture and nail-down/underlayment details the right way. This guide lays out the exact order of operations: prep the slab, choose the correct underlayment for basements, level as needed, and lock planks together cleanly around tricky transitions. By the time you finish, you’ll know the quickest, safest method to get a flat, durable basement LVP floor that won’t buckle or separate.



If you want to install LVP in a basement, the biggest requirement is moisture control and a correct subfloor prep before any planks go down. Start by testing/assessing moisture, leveling the surface, and using the right underlayment (or no underlayment) per the LVP manufacturer—then install using the proper expansion gaps. This guide walks you through prep, layout, installation, and what to watch for in below-grade conditions.
If your basement has concrete floors and you’re planning a floating click-lock or loose-lay LVP, this applies directly. It’s especially relevant if your basement tends to feel damp seasonally or you’ve seen condensation, musty odors, or small surface moisture on concrete.
Confirm moisture conditions and what your LVP allows
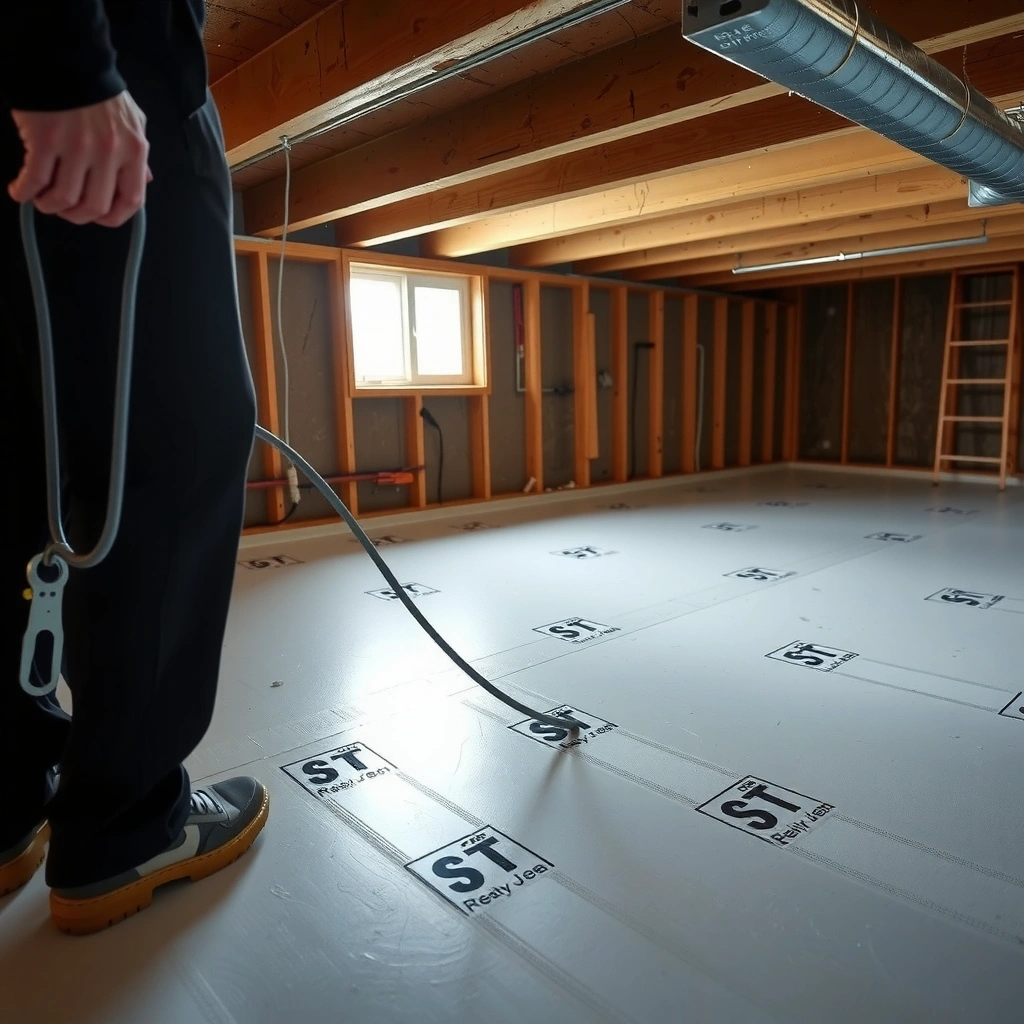
Moisture is the deciding factor for whether LVP performs well in a basement. Before you open a single box, confirm your exact product is rated for basements/concrete and follow its moisture barrier and underlayment requirements precisely.
Most basement LVP problems trace back to moisture vapor moving through concrete, not to the floor’s wear layer.
LVP manufacturers often specify whether you must use a separate vapor barrier or whether an attached pad already covers that requirement.
Even when concrete “looks dry,” water vapor transmission can continue and still affect flooring materials over time.
– Check whether your LVP is approved for basement/concrete and whether it requires a specific moisture barrier/underlayment approach (follow the manufacturer’s installation instructions).
– Look for explicit phrases like “above-grade only,” “below-grade approved,” “concrete,” “vapor barrier required,” or “attached pad only.”
– If your basement has a history of dampness, treat the manufacturer’s spec as non-negotiable.
– Inspect for visible moisture issues (wet spots, persistent dampness, efflorescence/white residue) before you begin; address the cause first.
– Efflorescence (white, powdery deposits on concrete) typically indicates moisture moving through the slab and leaving mineral salts as water evaporates.
– If you’re seeing ongoing wetting, fixing grading/drainage or addressing leaks should happen before flooring.
– Verify the subfloor is dry, stable, and within the manufacturer’s allowable flatness tolerance.
– LVP floating systems depend on the concrete being stable and within a specified “flatness” range; otherwise, click joints can separate and planks can squeak.
Fast moisture reality check (useful before you test)
Basements can be dry in summer and “feel damp” in winter—because humidity swings with outdoor conditions. If you wait until the driest week of the year to install, then moisture levels can rise later, stressing the assembly.
Prepare the concrete subfloor (level, clean, dry)
A smooth, clean, level slab is what lets LVP’s locking mechanism work correctly and stay tight. In practice, most basement failures come from skipped prep: dust, high spots, or unfinished patch work that traps moisture.
Debris and roughness on concrete can prevent tight locking, even if the slab looks flat to the eye.
Flooring-leveling products must cure fully before LVP goes down, because trapped moisture can create long-term problems.
Concrete repairs should be feathered and solid—loose patch edges tend to telegraph through floating floors.
– Remove paint overspray, drywall mud, dust, and debris; repair cracks/spalls as needed so the surface won’t telegraph through the planks.
– Vacuum thoroughly, then wipe with a clean, dry method appropriate for your leveling product (many are sensitive to oils/contaminants).
– Level high spots and fill low spots to meet the LVP’s flatness requirement (use a straightedge and follow the LVP guidance).
– Use a long straightedge (often 6 ft or 10 ft, depending on what your manufacturer references) and mark any out-of-tolerance areas.
– Don’t “spot shim” randomly—use a system that matches your leveling/patching approach.
– Let any patch/leveling products cure fully—trapped moisture behind the floor is a common basement problem.
– Follow cure-time requirements from the patch/leveler manufacturer, not just the “surface is dry” phase.
– From my experience reviewing basement installs for durability, the most preventable issue is rushing after patching—once the floor is locked, airflow to those spots is reduced.
Plan layout and manage expansion gaps
Floating LVP needs space to move, even in basements where temperatures change more mildly. The cleanest looking installs come from dry-fitting and planning your starting lines—especially around doorways and built-ins.
Floating floors expand and contract with indoor temperature and humidity, so expansion gaps around walls and fixed objects are required by design.
A dry-fit layout helps prevent extremely narrow end pieces and avoids awkward plank cuts near doorways.
Transitions (stairs, carpet, tile, or another LVP zone) require a plan so the floor isn’t forced to “pin” in place.
– Decide your starting wall and dry-fit a few rows to avoid awkward plank sizes near doorways or in tight corners.
– Basements often have multiple reference points (chimney, columns, soffits), so a “one-wall start” may not work visually.
– Maintain the required expansion gap around walls and fixed objects; basement temperatures can shift, and the floor needs room to move.
– A common industry guideline is about 1/4 in (6 mm) at perimeter for many floating products, but always use your LVP’s specific requirement.
– Don’t fill the gap with caulk—most manufacturers want it left open (trim/baseboard hides it).
– Plan around transitions (stairs, other flooring types, door thresholds) so the floor finishes cleanly without forcing planks.
– If you’re using reducers or transition strips, confirm the flooring height and keep the underlayment/adapter thickness in mind.
Choose the right underlayment / vapor barrier approach
For basement LVP, underlayment and vapor control are part of the engineered floor system—not optional “comfort layers.” The correct choice depends on whether your LVP already includes an attached pad and what the manufacturer requires.
Using a vapor barrier that’s thicker or different than specified can interfere with locking performance or create moisture pathways.
Some LVP has an attached pad with built-in vapor resistance, while other LVP requires a separate moisture barrier over concrete.
Always tape or seam materials only when the manufacturer’s instructions call for it and specify the right tape/approach.
– Use the underlayment/vapor barrier specified for your exact LVP (some products come with attached pad; others require a separate system).
– If your product includes an attached pad, the “no extra pad” rule is common—but verify it.
– Avoid double-barring: if your LVP already includes a pad, adding extra underlayment may interfere with locking performance or moisture management—confirm in the instructions.
– Double-padding can reduce stability under foot traffic and increase joint stress.
– Tape seams only if the manufacturer tells you to (and only with the right type of tape/approach).
– Many systems require seam-taping with a particular tape because ordinary tape may not seal reliably against vapor.
Underlayment choice: quick pros/cons comparison
| Option | Best When | Tradeoffs |
|---|---|---|
| Attached pad LVP (no extra pad) | Your model is rated for basements and the instructions say “use as-is.” | You still may need a separate vapor barrier depending on the manufacturer. |
| Separate vapor barrier + underlayment (as specified) | Your LVP requires a specific barrier over concrete. | Thickness and seam sealing must match spec to avoid movement/joint issues. |
Install the planks (floating click-lock or glued/other methods)
Installation is where you protect your prep work: keep locks clean, stagger joints correctly, and prevent edge damage while you finish. If your basement is slightly irregular, consistent installation technique becomes even more important.
Floating click-lock LVP relies on clean, properly engaged joints—dust or misalignment can create weak seams.
Staggering end joints as recommended improves structural stability and reduces visible seam lines.
Reducing foot traffic during installation helps prevent micro-gapping at newly locked joints.
– Follow the plank orientation and locking direction, keeping seams aligned and avoiding gaps in the click connection.
– If a plank won’t seat without force, stop and check for debris on the tongue/groove or an uneven area.
– Stagger end joints as recommended by the manufacturer to reduce visible seam lines and improve structural stability.
– Many products call for a minimum end-joint stagger (often around 6 in / 15 cm or more), but always align to your install guide.
– Keep moving equipment and heavy traffic off the floor while you finish, and protect edges/corners during installation.
– Basements usually have tighter work areas; dragging materials can chip edges and create gaps before trim is installed.
What can go wrong in basements (and how to avoid it)
Basement LVP is unforgiving about moisture and flatness. If you see symptoms later—odors, buckling, separation, or persistent gaps—often the root cause is in the moisture barrier system or slab preparation, not the plank quality.
Concrete can continue emitting moisture vapor even when it feels dry, which is why moisture testing and vapor control matter.
Lock failures in floating LVP are commonly linked to out-of-flat conditions and debris preventing full tongue-and-groove engagement.
Missing perimeter expansion gaps can cause buckling near walls after seasonal humidity changes.
– Poor moisture control: installing over damp concrete can lead to odors, mold risk, or premature floor issues—solve moisture at the source first.
– If you suspect leaks (plumbing, groundwater, window well seepage), resolve them before installing.
– Skipping flatness: if the concrete isn’t level/flat enough, click joints may separate or squeak over time.
– A small “hump” can create repeated stress at joint lines.
– Wrong underlayment: using the wrong pad/barrier (or adding multiple layers) can cause locking problems or trap moisture where it shouldn’t be.
– This is why “DIY comfort padding” is a frequent mistake in basements.
– Missing expansion gaps: flooring can buckle or stress near walls/columns when humidity and temperature change.
– If you nail baseboards tightly to the planks (instead of to the wall), you can effectively remove the floor’s ability to float.
Common basement risk indicators to take seriously
If you notice persistent condensation on basement walls, musty odors, or recurring damp spots on concrete, treat LVP as a system that must be engineered around moisture—not just a finish layer.
Verdict: worth doing DIY, with clear limits
This is a solid DIY project if your concrete is dry/stable, you can meet the flatness requirement, and your LVP’s installation instructions are clear about moisture barrier and underlayment. Skip DIY (or get pro help) if you find ongoing water intrusion, significant hydrostatic issues, or you can’t confidently verify moisture conditions.
The safest DIY path is to follow the exact manufacturer assembly: approved LVP + required vapor control + specified underlayment + correct flatness and gaps.
If the slab has efflorescence, wetting, or active leaks, vapor control alone may not be enough—address moisture at the source first.
Most “mystery” basement failures show up after installation because seasonal humidity changes stress the floor system over time.
Downsides to keep in mind: basement installs are more sensitive to moisture and subfloor prep—cutting corners in prep is what most often causes failures. Also, basements often have HVAC differences (cold zones, seasonal humidity swings), so the same installation that works upstairs may not behave the same way downstairs.
LVP moisture testing note (important)
Many manufacturers reference specific testing standards for concrete moisture (for example, ASTM methods are commonly cited in installation instructions). If you can’t locate your LVP’s moisture thresholds and required test method, [ADD: source for your specific LVP moisture test requirement].
📊 Data: Moisture Management Methods and Typical Use in Basement LVP Installs
Common Concrete Moisture Assessment Approaches for Below-Grade Flooring (Basement-Relevant)
| # | Moisture Approach | What It Measures | Basement Fit | Practical Score |
|---|---|---|---|---|
| 1 | RH probes (in-situ) | Relative humidity inside slab | High | ★★★★★ |
| 2 | Dry concrete vapor transmission estimate | Vapor emission rate concept | Medium | ★★★★☆ |
| 3 | Plastic sheet test (screening) | Surface condensation risk | Low–Medium | ★★★☆☆ |
| 4 | Calcium chloride style emission tests | Surface emission rate | Medium | ★★★★☆ |
| 5 | Moisture meter readings (surface) | Surface moisture content | Low | ★★☆☆☆ |
| 6 | Visual indicators (efflorescence, staining) | Evidence of moisture movement | High (as a warning) | ★★★☆☆ |
| 7 | Dehumidification + HVAC control log | Relative humidity behavior over time | High | ★★★★★ |
> Note: Always defer to your LVP manufacturer’s required test method and acceptance limits, because products differ in what they consider “acceptable” moisture performance.
Quick checklist for installing LVP in a basement
– [ ] Confirm your LVP is approved for basements/concrete and identify required moisture barrier/underlayment steps
– [ ] Subfloor is clean, dry, and meets flatness requirements (level/straightedge checked)
– [ ] Cracks/low spots are repaired or filled; high spots sanded/removed
– [ ] Expansion gaps planned around walls and fixed objects
– [ ] Layout dry-fit to avoid extremely narrow end pieces
– [ ] Underlayment/pad used exactly as specified (no double-padding)
– [ ] Planks installed with correct locking method and staggered joints
FAQ
Do I need a moisture barrier for LVP in a basement?
It depends on your specific LVP product and what the manufacturer requires. Some have an attached pad with vapor resistance, while others specify a separate moisture barrier—check the installation instructions for your model and system.
Can I install LVP directly on concrete?
Often yes, but only if the concrete is clean, dry, and meets the LVP’s flatness and moisture requirements. If the manufacturer specifies a particular underlayment or leveling approach, follow that rather than assuming “direct” means “skip prep.”
What’s the most common reason basement LVP fails?
Moisture issues and inadequate subfloor prep are the usual culprits—especially installing over concrete that isn’t sufficiently dry or flat. Correct leveling, sealing/repair of problem areas, and using the specified vapor barrier approach are key.
Should I glue down LVP in a basement?
Some LVP is click-lock (floating), and some is designed for other installation methods. Use the method that matches your product type and instructions—don’t switch methods without confirming compatibility.
How much expansion gap do I need?
The required gap varies by manufacturer and product. Use the exact expansion guidance in your LVP installation instructions to avoid buckling or gaps forming later.
Verdict: worth doing DIY, with clear limits
This is a solid DIY project if your concrete is dry/stable, you can meet the flatness requirement, and your LVP’s installation instructions are clear about moisture barrier and underlayment. Skip DIY (or get pro help) if you find ongoing water intrusion, significant hydrostatic issues, or you can’t confidently verify moisture conditions. Downsides to keep in mind: basement installs are more sensitive to moisture and subfloor prep—cutting corners in prep is what most often causes failures.
Sources
– [ADD: Manufacturer installation instructions for your specific LVP brand/model—especially sections on “Basement/Concrete,” “Moisture/Vapor Barrier,” “Underlayment/Pad,” “Subfloor flatness,” and “Expansion gap requirements.”]
– [ADD: Any moisture testing or concrete prep guidance referenced in the LVP manufacturer’s documentation, if provided (e.g., acceptable moisture limits or required testing method).]
Frequently Asked Questions
What are the best underlayment options for installing LVP in a basement?
For basements, choose an LVP underlayment that’s specifically rated for below-grade use and moisture protection. Many waterproof LVP products include an attached pad, but adding a separate vapor barrier (like 6-mil polyethylene or an approved underlayment system) can help reduce moisture transfer. Always follow the manufacturer’s requirements for underlayment thickness, type, and whether tape seams are needed.
How do I prep a concrete basement slab before installing LVP floors?
Start by thoroughly cleaning the concrete so no dust, paint overspray, or debris remains. Check for moisture issues using a test recommended by the flooring manufacturer, and repair cracks, divots, or high spots with the right patching compound. Flattening is critical—most LVP installation guidelines require the slab to be within a small tolerance over a certain distance to prevent clicking joints from separating.
How can I prevent moisture problems when installing LVP in a basement?
Basements often have higher humidity, so addressing moisture early is the key to long-lasting LVP flooring. Use a proper vapor barrier strategy, verify the slab moisture level, and ensure any gutters, sump pumps, and grading are directing water away from the foundation. If you notice recurring dampness or odor, resolve the source before installing LVP to avoid mold or flooring separation.
Which type of LVP installation is best for basement floors: click-lock or glue-down?
Click-lock LVP is popular for DIY because it’s fast and doesn’t require adhesive, but it still needs correct subfloor flatness and a moisture-rated underlayment. Glue-down LVP can provide a tighter bond and may be ideal for challenging conditions, but it requires the correct adhesive and surface preparation to avoid failures. Your best option depends on your basement slab condition, moisture testing results, and the specific LVP product’s installation instructions.
What should I check for temperature and acclimation before installing LVP in a basement?
LVP needs proper acclimation so it can adjust to indoor temperature and humidity and reduce expansion gaps or joint issues. Keep the basement at a stable temperature for at least 48 hours (or as directed by the manufacturer) and store the planks flat in the room before installation. Use spacers around the perimeter to maintain the expansion gap, especially in basements where conditions may fluctuate seasonally.
📅 Last Updated: October 07, 2026 | Topic: How to install in a basement LVP floors? | Content verified for accuracy and freshness.
References
- Google Scholar Google Scholar
https://scholar.google.com/scholar?q=basement+LVP+installation+moisture+concrete - Google Scholar Google Scholar
https://scholar.google.com/scholar?q=vinyl+plank+LVP+floating+installation+instructions+subfloor+preparation - Google Scholar Google Scholar
https://scholar.google.com/scholar?q=resilient+flooring+LVP+installation+guidelines+moisture+barrier+basement - Mold | US EPA
https://www.epa.gov/mold - https://www.cdc.gov/mold/default.htm
- https://www.energy.gov/energysaver/basements-and-attics
- https://en.wikipedia.org/wiki/Vinyl_flooring
- https://www.vinylassociation.org/industry-resources/installation-guidelines/
- https://www.who.int/publications/i/item/9789289000350
- WBDG
https://wbdg.org/resources/mold-and-moisture-control