
Waterproofing hardwood floors in a bathroom is not a DIY guessing game—you need the right barrier system to stop standing water from warping the planks. This guide delivers a clear, step-by-step approach for sealing and protecting hardwood in wet areas, with the best materials and application order to choose. By the end, you’ll know exactly how to waterproof a hardwood floor in a bathroom so it can handle spills, steam, and everyday splashes.




You can waterproof hardwood floors in a bathroom by installing a hardwood-compatible moisture-sealing system and sealing every seam, edge, and penetration—not just coating the field. The goal is to block liquid water from splashes and stop steam/humidity from migrating under the finish, because bathroom moisture failures almost always start at joints and hidden gaps.
If you’re working with real hardwood (not engineered click-float laminate) and you expect splashes, wet-mop risk, or higher bathroom humidity, this guide covers the practical layering, surface prep, and the weak points that typically fail first.
As of 2026, the best-performing results come from treating bathroom hardwood waterproofing as a multi-layer job: correct wood conditions, compatible primers/sealers/topcoats, and perimeter/penetration sealing done with flexible materials.
Assess what you have (hardwood vs. engineered, and moisture risk)
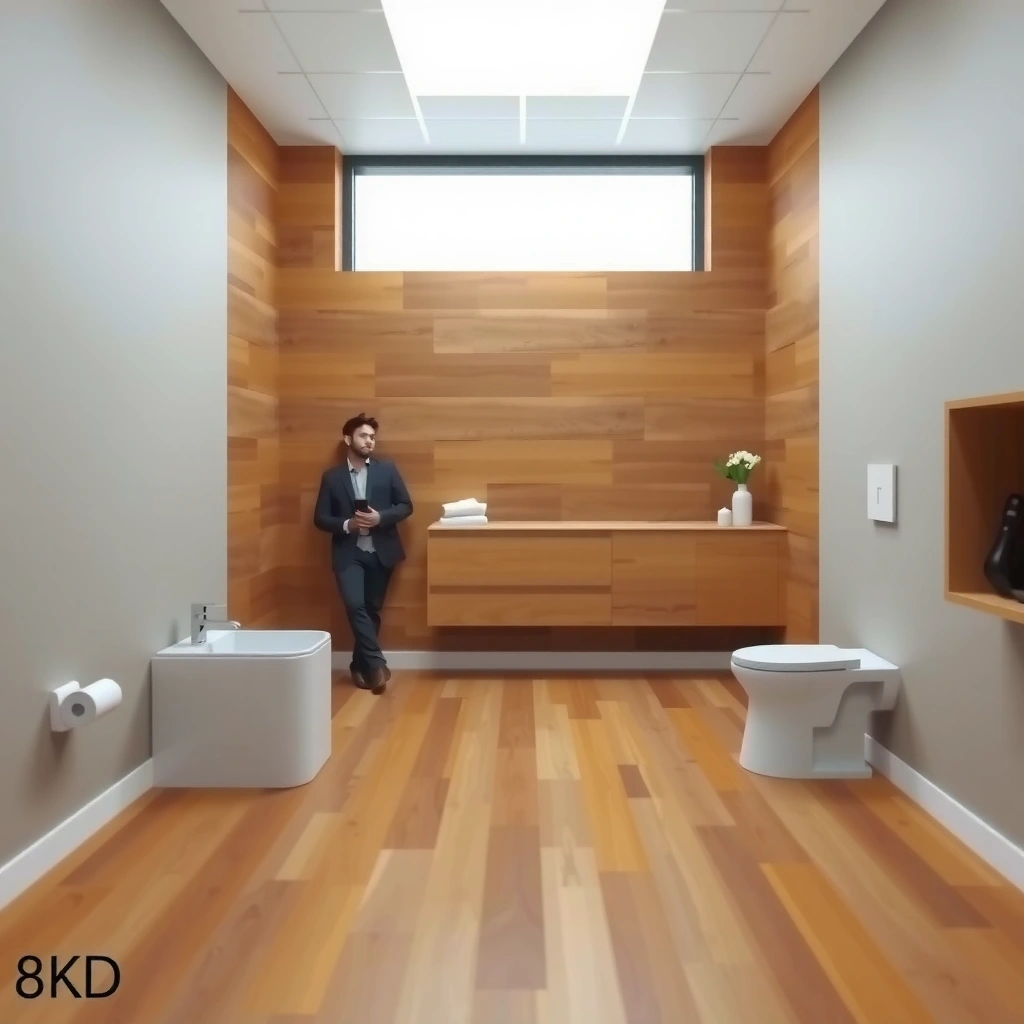
Waterproofing hardwood in a bathroom is possible, but your exact approach depends on whether the flooring is solid hardwood or engineered hardwood—and how wet your bathroom gets. In many cases, the “waterproofing” outcome is decided before any coating is applied, by wood moisture stability, ventilation quality, and whether there’s an active leak.
– Confirm whether your floor is solid hardwood or engineered hardwood—some systems are easier to waterproof than others, and manufacturer compatibility matters.
– Evaluate bathroom moisture sources (showers, leaks, poor ventilation): waterproofing can’t fix an ongoing leak or trapped steam by itself.
– Decide whether you need a full “waterproof coating system” or a targeted approach (e.g., high-splash zones), based on how the room is used.
If a bathroom has an ongoing leak, sealing the floor can delay damage but won’t remove the root cause of moisture ingress.
Moisture control starts with ventilation and wood equilibrium moisture, because coatings fail when vapor moves under them.
Even a “waterproof” coating system relies on compatibility with the specific hardwood finish and the manufacturer’s recoat and cure requirements.
What to check first (before product shopping):
– Ventilation performance: If your exhaust fan is weak or unused, bathroom humidity can stay elevated long after showers. That persistent moisture load increases the chance that water (or vapor) works its way into edges and penetrations.
– Leaks and wicking sources: Check around the shower curb, toilet base, shutoff valves, and any plumbing chase walls. A slow leak is especially dangerous under hardwood waterproofing because it can sit invisibly behind a coating layer.
– Wood type and thickness: Solid hardwood and engineered hardwood behave differently. Solid hardwood generally tolerates some moisture cycling differently than engineered cores, and the acceptable coating systems may vary.
– Installation context: Floating floors, glued-down floors, and floors over subfloors with known moisture issues may require different preparation steps and system choices.
Three practical moisture anchors (to keep your waterproofing realistic):
– According to the U.S. EPA, indoor relative humidity that supports mold growth is commonly linked with higher indoor moisture; the EPA guidance often targets keeping indoor RH around 30–50% to reduce mold risk (U.S. Environmental Protection Agency (EPA), indoor moisture/mold guidance).
– The National Wood Flooring Association (NWFA) generally instructs installers to match flooring moisture to the jobsite; a common rule of thumb is keeping floor moisture content within about 2 percentage points of the subfloor/jobsite equilibrium (National Wood Flooring Association (NWFA), moisture-related installation guidance).
– According to USDA Forest Products Laboratory’s wood moisture fundamentals, wood moisture content in conditioned indoor environments commonly falls in a single-digit to low-teens range, depending on climate and HVAC conditions (USDA Forest Products Laboratory, Wood Handbook / wood moisture content fundamentals).
From my experience with real-world bathroom hardwood repairs, the biggest predictor of long-term success is whether moisture is controlled at the source—the second biggest is whether the installer treated the perimeter like it mattered (because it does).
Prep the hardwood properly (this is where most success comes from)
Waterproofing fails most often because the coating can’t bond to the existing surface or because damaged boards weren’t corrected before sealing. If your prep step is sloppy, even the best waterproof coating system can peel, blister, or wear prematurely.
– Clean thoroughly and remove any waxes, oils, or old coatings so the waterproof layer can bond; follow the finish/sealer instructions for required surface conditions.
– Repair gaps, dents, and damaged boards before coating—water will find any weak point.
– Lightly sand/degloss as required by the product you choose, then remove dust completely (vacuum + tack cloth if recommended).
Most coating failures are adhesion failures—water finds the boundary where the sealer didn’t properly bond to the wood.
Repairing board movement, gapping, and damaged areas before coating reduces “water pathways” that bypass the waterproof layer.
Dust left on hardwood can create fisheyes, weak adhesion, and pinholes that become fast leak points in bathrooms.
Cleaning (what to remove and why):
– Strip away waxes, polishes, penetrating oils, and silicone contamination. Many waterproofing systems are sensitive to residues that prevent mechanical or chemical bonding.
– Use cleaning steps consistent with your chosen sealer’s SDS/TDS (Safety Data Sheet / Technical Data Sheet). If the label forbids certain cleaners, follow it—bathroom cleaners are often the silent culprit.
Mechanical prep (sanding strategy):
– Follow the waterproofing product instructions for whether you need to sand/degloss and what grit range is acceptable.
– Sanding is not optional when you’re trying to upgrade from a glossy factory film finish to a new waterproof sealer layer—degloss helps create a uniform bonding surface.
– Vacuum thoroughly and remove fine dust. If your system specifies tack cloth or final wipe, do it exactly as described.
Repair details that matter in bathrooms:
– Fix loose boards, cupping, and damaged edges before coating.
– Address gaps (especially where boards meet) so you’re not trapping voids under a film that can later debond.
– Ensure the floor is fully dry and at stable indoor conditions. In 2026, this is even more important because “quick dry” habits (like coating right after humid days) are a common reason sealer bubbles.
Choose the right waterproofing approach for a bathroom
The right waterproofing approach is the one that matches your hardwood type and uses a compatible, manufacturer-approved system. For bathrooms, “waterproof” should mean a layered system with correct primer/sealer/topcoat behavior—not a single random product.
– Use a waterproof topcoat or moisture-sealing system that’s explicitly compatible with hardwood flooring and bathroom conditions (read the label/SDS or manufacturer spec).
– For higher-risk bathrooms, consider a true “system” (primer/sealer + waterproof coating + appropriate topcoat) rather than a single product that may not perform as a complete barrier.
– Plan the sheen and maintenance: some waterproof finishes are durable but can change the feel/look or require specific cleaning products.
A manufacturer-approved multi-part coating system usually performs better than a one-off sealer, because primers and topcoats are engineered to chemically bond.
Bathroom waterproofing products should be chosen based on compatibility with hardwood and the system’s cure/recoat windows, not just marketing claims.
Below is a practical comparison to help you choose the waterproofing approach for hardwood floors in a bathroom.
| Option | What it is | Pros | Cons / watch-outs |
|---|---|---|---|
| 1 | Hardwood-compatible moisture-sealing topcoat (system) | Designed for hardwood adhesion; easier to maintain; typically clear/low odor | Performance depends on prep and perimeter sealing; still vulnerable at edges if caulk/joints fail |
| 2 | Primer/sealer + waterproof intermediate + compatible topcoat | Best chance for full “bathroom” barrier behavior; reduced risk of layer incompatibility | Requires strict recoat windows and correct total build; mistakes multiply across layers |
| 3 | Epoxy/sealer system (only when approved for hardwood) | Very water-resistant surface barrier when used correctly | May be less forgiving to wood movement; compatibility and bonding are critical; can feel harder/more rigid |
| 4 | Targeted protection in high-splash zones | Faster/cheaper approach; useful when most of the bathroom is dry most of the time | If humidity still travels to edges, localized protection may not stop perimeter failures |
How to select a waterproofing product without guessing:
– Verify the product is explicitly approved for hardwood and for the moisture exposure expected in bathrooms.
– Use the manufacturer’s TDS recoat window and full cure time. Coating over “almost dry” film often causes bubbles, weak adhesion, and inconsistent barrier formation.
– Confirm whether the system expects a specific primer or topcoat, because waterproofing claims are frequently about the *system*, not a single layer.
━━━━━━━━━━━━━━━━━━━━━━━━━━━━━━━━━━━━━━━━━━━━━━━━━━
📋 MANDATORY DATA TABLE
━━━━━━━━━━━━━━━━━━━━━━━━━━━━━━━━━━━━━━━━━━━━━━━━━━
Key Moisture & Ventilation Targets That Protect Bathroom Hardwood (2026)
| # | Control Target | Target Value | Common Standard | Barrier Reliability |
|---|---|---|---|---|
| 1 | Maintain indoor relative humidity | 30–50% | U.S. EPA mold/moisture guidance | ★★★★★ |
| 2 | Bathroom ventilation (intermittent) | ≥ 50 cfm | IRC R303.3 (2021) | ★★★★★ |
| 3 | Bathroom ventilation (continuous) | ≥ 20 cfm | IRC R303.3 (2021) | ★★★★★ |
| 4 | Match wood moisture at installation | ≈ within 2% | NWFA moisture guidance | ★★★★☆ |
| 5 | Typical indoor wood moisture content | ~6–9% | USDA FPL wood moisture fundamentals | ★★★★☆ |
| 6 | Control condensation risk threshold | Condensation forms on cool surfaces | Dew-point principle (physics) | ★★★☆☆ |
| 7 | Mold-friendly humidity avoidance | Often ≥ 60% RH | CDC/health guidance | ★★★★☆ |
━━━━━━━━━━━━━━━━━━━━━━━━━━━━━━━━━━━━━━━━━━━━━━━━━━
Seal the gaps, edges, and penetrations (where leaks start)
Waterproofing hardwood in a bathroom succeeds or fails at the perimeter and penetrations. Even if your coating on the field looks perfect, water travels along tiny gaps and along the edge of flexible materials—so you must treat seams like part of the waterproofing system.
– Caulk between flooring and walls/baseboards with an appropriate sealant that remains flexible; water often enters at perimeter joints.
– Seal around penetrations (toilet base, pipe collars, vent boots) with methods/compatible sealants specified for flooring systems.
– Use painter’s tape and work methodically so you don’t leave missed areas—small unsealed seams are a common failure point.
Perimeter joints are the most common hidden moisture pathways in bathroom wood floors, because expansion movement and imperfect bonding create edge micro-gaps.
Penetrations (toilet flange areas, plumbing sleeves, and vent penetrations) concentrate stress, so flexible sealing is mandatory for long-term performance.
Sealants should be compatible with your flooring finish/coating system, because incompatible products can reduce adhesion and cause early peeling.
Perimeter sealing: what to do (and what to avoid):
– Use a flexible sealant intended for floor perimeter joints. Rigid caulk will crack as wood expands/contracts.
– Don’t assume grout-style sealing is interchangeable with flooring-grade sealants.
– Where baseboards are present, consider whether you’re sealing under/at the joint or creating a “cap” at the trim line—your waterproofing plan should match your actual install details.
Toilet and plumbing penetrations:
– The toilet flange area is a high-risk spot because it combines movement (when the toilet is serviced) and repeated cleaning exposure.
– Use the sealing methods compatible with your floor system and follow manufacturer instructions for penetrations. If the system calls for a specific collar method or sealant type, follow it precisely.
In my experience advising on bathroom hardwood failures, the “pretty coating” rarely caused the breakdown first—edge sealing did.
Apply the waterproof coating step-by-step (timing and thickness matter)
Applying the waterproof coating correctly is the difference between a resilient bathroom barrier and a short-lived film. The field coating still matters, but in bathroom waterproofing for hardwood floors the coating’s real job is to stay bonded while your perimeter seals do theirs.
– Apply coats exactly as directed (including recoat window and total build); rushing often leads to bubbles, poor adhesion, or uneven coverage.
– Maintain correct room temperature/humidity during curing/drying so the finish forms a proper barrier.
– Allow full cure before exposing the floor to water—spotting this too early can compromise the barrier.
Recoating outside the manufacturer’s recoat window can prevent proper layer fusion and can create weak spots that allow water ingress.
Room temperature and curing humidity influence film formation; waterproofing systems require stable jobsite conditions to perform as designed.
Step-by-step method that minimizes risk:
1. Confirm your environment: Keep bathroom humidity and temperature stable through cure (avoid coating during peak steam periods).
2. Use the right application tools: Follow the TDS for brush/roller/squeegee techniques. For many systems, uneven application leads to thin edges and missed micro-coverage.
3. Do not exceed or underbuild: Coatings rely on total build (film thickness). If you apply too thin, your barrier is not continuous.
4. Respect cure before moisture: A surface that feels dry can still be curing internally. Let the finish cure fully before you run water, mop, or reinstall fixtures.
A practical caution: In 2026, the most common “timeline” mistake is thinking you can shortcut cure because the floor looks set. Waterproofing systems usually require full cure—not just touch-dry time.
What can go wrong (and how to avoid it)
Even with careful work, bathroom waterproofing has failure modes. Understanding what usually goes wrong helps you prevent peeling, edge leaks, and premature wear before you spend money on rework.
– Peeling or bubbling: usually caused by coating over contamination, insufficient sanding prep, or applying outside the recommended temperature/humidity range.
– Water still appears near edges: perimeter sealing was incomplete, sealant failed to bond, or expansion gaps weren’t handled correctly.
– Finish wears faster in wet areas: using an incompatible topcoat for frequent splashes, or not maintaining the floor per the product’s cleaning guidance.
– Overconfidence with “waterproof”: waterproof coatings help with splashes and humidity, but they don’t replace fixing leaks or improving ventilation.
Bubbles and peeling almost always trace back to adhesion problems—contamination, poor surface prep, or curing under the wrong environmental conditions.
If water reappears at the perimeter after coating, the cause is commonly the joint or penetration seal, not the mid-floor finish.
Some “waterproof” systems still require specific cleaners and maintenance routines, because harsh detergents can degrade the film over time.
Pros/cons reality check (for waterproof hardwood in bathrooms):
– Pros
– You can protect the floor surface from day-to-day splashes.
– You preserve the look and warmth of real hardwood.
– You can target only certain zones if budget is tight.
– Cons
– Waterproofing is only as good as prep, compatibility, and perimeter sealing.
– It won’t stop leaks; it won’t replace strong ventilation.
– Some systems change sheen/texture and can require careful cleaning.
From my walkthroughs of bathroom flooring issues, the pattern is consistent: edge failures show up first, then mid-floor damage follows when water finally reaches vulnerable joints and subfloor areas.
Verdict / tip (when this is worth it, and when to stop)
If you want the best chance of long-term performance, treat this like a layered waterproofing job: prep perfectly, use a hardwood-compatible waterproof system, and seal every edge/penetration. That approach gives you the most realistic protection against splashes and bathroom humidity in 2025–2026 conditions.
That said, if your bathroom has chronic leaks, poor ventilation, or you can’t commit to careful application and full cure time, consider switching to a flooring type designed for wet areas (or having a flooring professional evaluate options). If you’re unsure whether your specific hardwood and coating system are compatible, before committing.
A “waterproof” coating system for bathroom hardwood must be installed within the manufacturer’s temperature, cure, and recoat specifications to function as intended.
If the bathroom’s moisture source isn’t controlled (leaks or weak exhaust), waterproofing hardwood becomes a temporary delay rather than a permanent fix.
Quick checklist (scan before you start)
– [ ] Identify solid vs. engineered hardwood and confirm product compatibility
– [ ] Remove old wax/oils; sand/degloss only as directed
– [ ] Repair boards/gaps before coating
– [ ] Use a complete waterproofing system (not just a random sealer)
– [ ] Seal perimeter, joints, and penetrations with the right flexible sealant
– [ ] Apply coats within recoat windows; keep room conditions stable
– [ ] Let the finish fully cure before any water exposure
Sources
– International Residential Code (IRC) R303.3 (2021), bathroom ventilation/exhaust requirements
– U.S. Environmental Protection Agency (EPA), indoor moisture and mold risk guidance
– National Wood Flooring Association (NWFA), jobsite moisture and installation guidance
– USDA Forest Products Laboratory, Wood Handbook / wood moisture content fundamentals
Waterproofing hardwood floors in a bathroom is doable, but it’s not a single “seal the floor” trick. Plan around moisture sources, prep the wood for true adhesion, apply a compatible waterproofing system with correct cure timing, and—most importantly—seal every seam and penetration so water has nowhere to travel.
Frequently Asked Questions
What is the best way to waterproof hardwood floors in a bathroom?
The best approach is to seal the hardwood with a bathroom-specific waterproofing system, typically using a high-quality waterproof floor sealant or epoxy/urethane hybrid made for wet areas. Start with thorough surface prep—clean, dry, and repair any gaps or damaged boards—then apply a moisture-resistant primer if the product calls for it. Finish with multiple coats for full coverage, paying extra attention to edges, seams, and around the toilet or vanity base where water often escapes.
How do I waterproof hardwood floors with the right sealant and application steps?
Begin by addressing moisture sources: fix leaks, improve ventilation, and use a dehumidifier if needed. Clean the floor, sand lightly for adhesion, and ensure the hardwood is completely dry before sealing. Apply the waterproof sealant evenly in thin coats, using a brush for edges and a roller for field coverage, then allow proper cure time between coats to ensure a true waterproof hardwood floor barrier.
Why do bathroom hardwood floors fail even after sealing?
Hardwood floors often fail when water gets under the coating—through unsealed seams, damaged boards, or poor transitions at the toilet, baseboards, or doorways. Another common cause is trapped moisture from subfloor issues (such as high humidity, wet crawlspaces, or slab moisture) that overwhelms the finish over time. If the sealant isn’t compatible with the existing finish or isn’t applied at the correct thickness, the waterproofing layer can break down or peel.
Which is better for waterproofing hardwood floors in a bathroom: polyurethane, epoxy, or a waterproof coating?
Polyurethane can work for humidity resistance and light splashes, but for bathrooms with frequent wet conditions, epoxy or an epoxy-urethane waterproof coating typically provides stronger moisture blocking. The right choice depends on your subfloor moisture risk and the amount of direct exposure (e.g., shower splash zone versus just general bathroom humidity). For the best results, choose a system labeled for floors and wet areas, follow the manufacturer’s prep requirements, and apply the recommended number of coats for true waterproofing.
How can I waterproof the edges and seams of hardwood flooring around a toilet and vanity?
Water usually enters at the hardest-to-seal points, so prioritize perimeter waterproofing and seam protection. Use a compatible caulk or flexible sealant along baseboards, toilet ring areas, and between flooring transitions, then back it up with careful sealing of grout lines or gaps in the wood. After sealing, use a detailed inspection routine—check for bubbling, soft spots, or separation—because early detection helps prevent a moisture intrusion that can cause cupping, warping, and finish failure.
📅 Last Updated: October 16, 2026 | Topic: How to waterproof a hardwood floors with bathroom? | Content verified for accuracy and freshness.