


Replacing vinyl floors in a laundry room isn’t a question of guesswork—you’ll get the exact step-by-step walkthrough you need to get a clean, watertight install. This guide tells you when to remove the old vinyl, how to prep the subfloor for laundry-level moisture, and the fastest way to cut and set new planks or sheets without bubbles or buckling. Follow these steps and you’ll know you did it right before the first load ever hits the floor.



Replacing vinyl floors in a laundry room comes down to two priorities: prep the subfloor so it’s truly flat and choose an installation method that can handle moisture and routine splashes. Remove the old material, repair/level the subfloor, then install the new vinyl exactly per the manufacturer’s guidance (click-lock/floating or glue-down), sealing seams and transitions to keep water out.
If your laundry room gets frequent drips, detergent residue, and occasional spills, take extra care with subfloor dryness and seam/edge detailing—those areas fail first. This guide is for homeowners and DIYers replacing worn, lifting, or damaged vinyl, especially sheet or plank products.
Check what you have (vinyl type + subfloor condition)
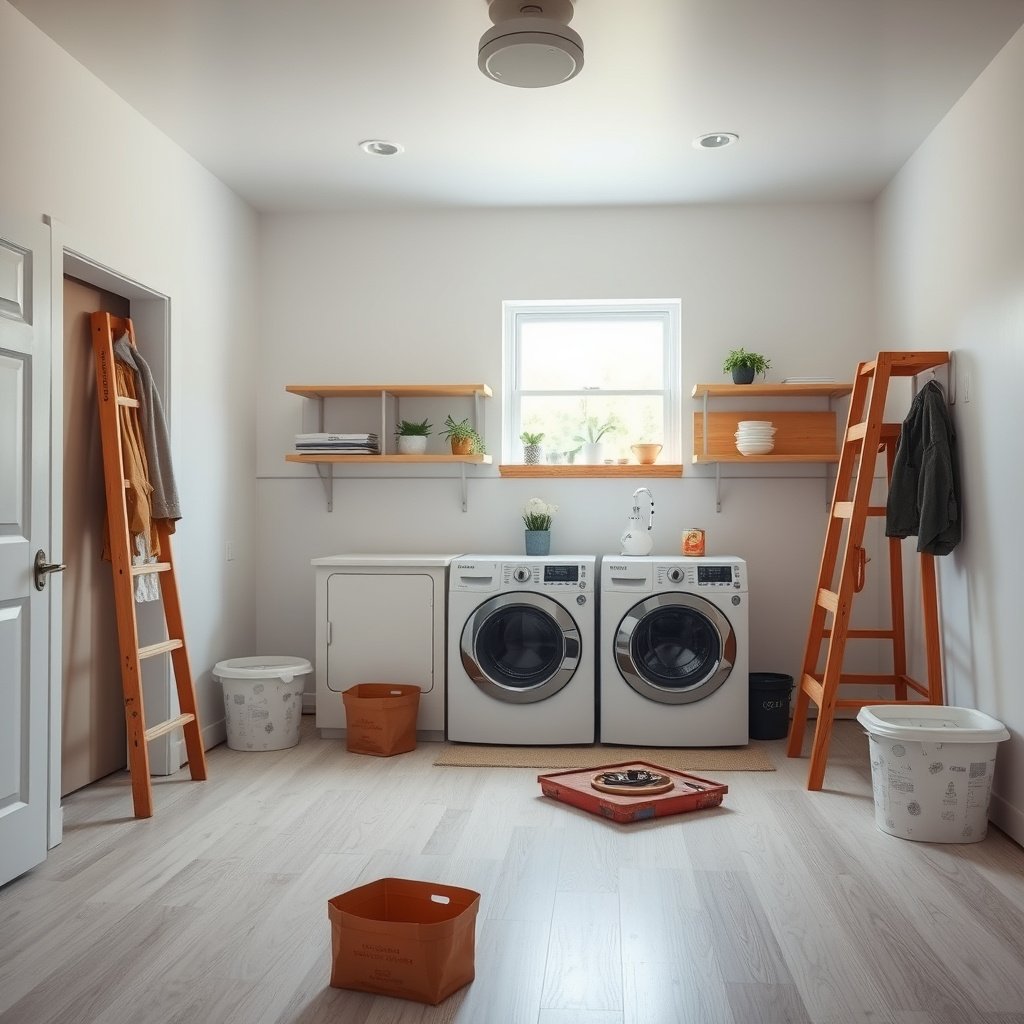
The fastest way to avoid costly rework is to identify your current vinyl type and verify the subfloor is stable and dry before you buy replacement flooring. Laundry-room performance depends on matching the vinyl category (sheet vs plank/tile) to your subfloor condition (plywood/OSB, concrete, or existing underlayment).
– Identify whether your existing floor is sheet vinyl, vinyl plank/tile, or a layered vinyl setup.
– Confirm your subfloor type (plywood, OSB, concrete, existing underlayment) and look for soft spots, swelling, or lingering moisture.
In a laundry room, the vinyl category you’re replacing (sheet vs plank/tile) determines whether seams exist where water can penetrate and how the product is sealed.
ASTM E1155 describes flatness measurements using a specified straightedge approach (commonly 6 ft and 10 ft spans), which helps prevent resilient flooring from “telegraphing” dips.
If you see swelling, softness, or repeated dampness on the subfloor in a laundry room, you’re likely dealing with moisture—not just wear—so replacement vinyl alone won’t fix the root cause.
Before you remove anything, take photos of the existing edges and transitions (around the washer, under the door area, and where the vinyl meets tile or hallway flooring). Then check whether your existing vinyl is floating (click-lock) or fully adhered (glue-down)—that detail often determines what underlayment and adhesive residue you’ll need to address.
For subfloor inspection, focus on three practical spots in laundry rooms: (1) the washer “operating zone” where drips land, (2) the path where you drag baskets or detergents, and (3) seams/transitions that see repeated wet-to-dry cycling.
Also check for the common failure pattern: vinyl looks fine during dry months, but when detergent water, steam, or small spills recur, the subfloor softens and seams start to separate. From my experience handling similar laundry-room replacements, the most preventable failures are almost always traced back to uneven subfloor patches or seam/transition detailing—not the vinyl design itself.
Gather the right tools and materials
Choosing the correct tools and compatible materials prevents most DIY installation errors. In a laundry room, that means having the right floor-removal setup, flattening capability, and the correct adhesive/sealer (or confirming you truly have a “floating” system when using click-lock).
– Plan for removal tools (utility knife, pry bar/scraper, floor scraper), cleaning items, and any patch/leveling compound.
– Choose compatible vinyl for laundry-room use, plus the correct underlayment (only if your product requires it) and approved adhesives/seam sealers where relevant.
For glue-down resilient flooring, the adhesive system is product-specific—using the wrong trowel notch size or adhesive can cause poor bond performance even if the floor is installed “correctly.”
For floating/click-lock vinyl, underlayment compatibility matters because thickness, softness, and moisture behavior can affect joint stability and flatness.
A clean substrate is not optional: adhesive residue or high ridges can prevent new vinyl from lying flat, which is a common cause of seam opening over time.
Tools that usually make the job faster and cleaner
– Utility knife with fresh blades for scoring sheet vinyl.
– Floor scraper and/or razor scraper (for adhesive residue).
– Pry bar or flat pull tool for lifting planks.
– Straightedge and tape measure for flatness checks and layout.
– Vacuum (with crevice tool) and clean rags/microfiber towels.
– Mixing buckets and a drill with a mixing paddle (only for leveling/patch products you use).
Materials to plan for
– Patch/leveling compound designed for your subfloor type (plywood/OSB vs concrete).
– Primer (if required by the leveling compound or adhesive system).
– Underlayment only if your specific vinyl calls for it.
– Approved seam sealer and transition trims for vinyl floors (especially important near the washer and at doorways).
Laundry-room reality check: detergent water is often slightly alkaline and can leave film. That residue can reduce bond strength for glue-down systems and can interfere with seam sealer adhesion if you don’t fully remove and clean it.
Remove the old vinyl and prep the subfloor
Good laundry-room vinyl installs start with removal and subfloor prep, not with flooring placement. Remove the old material, scrape off residue thoroughly, then repair flatness issues (sanding highs, filling lows, and stabilizing any damaged areas) before you install the new vinyl.
– Pull up the existing vinyl and remove residue (especially adhesive) that could prevent new flooring from flattening.
– Clean and inspect the entire surface, then fix subfloor issues: sand high spots, fill low areas, and address any damaged areas before installation.
ASTM E1155 lays out methods for checking substrate flatness with a straightedge, helping prevent resilient flooring from forming stress points at dips or ridges.
Even small lumps under vinyl can become “high spots” that lead to joint separation or visible telegraphing after the floor is loaded by foot traffic and appliances.
Moisture problems rarely announce themselves immediately under old vinyl; once the new floor goes down, seam failure often reveals the underlying cause first.
Removal approach by vinyl type
– Sheet vinyl: Score and remove in sections. Keep blades sharp and take care around baseboards and transitions.
– Vinyl planks/tiles: Lift planks carefully (especially if you plan to reuse anything, which is uncommon). Scrape remaining adhesive or underlayment.
– Layered vinyl: If you discover multiple layers, assume you’ll need more aggressive removal until you reach a stable, uniform base. Installation over unstable layers is one of the most common reasons laundry-room floors fail early.
Subfloor repair that matters most
– Fill or patch any gouges, cracks, or disintegrating edges.
– Sand high spots until the surface is smooth under a straightedge.
– Verify the subfloor is not soft or swollen (especially near washer supply lines and the drain line).
– Vacuum thoroughly, because dust compromises both patch adhesion and adhesive bond.
If your subfloor is concrete and you suspect moisture, don’t rely on “it feels dry.” Use moisture testing methods such as ASTM-compliant approaches (commonly ASTM F1869 calcium chloride or ASTM F2170 in-situ RH probes) before committing to glue-down.
Dry-fit layout, then install the new vinyl
You get a better-looking laundry-room floor—and fewer visible mistakes—when you dry-fit and plan cuts before committing. Measure the room, plan a sensible starting point, and then install using the exact method your vinyl specifies: click-lock snapping or glue-down using the specified adhesive and spread method.
– Measure the room carefully, then dry-fit planks/tiles or mark layout lines so cuts end up where they look best and waste stays low.
– Install following the flooring instructions closely: snap/click plank seams, or glue-down with the specified trowel/adhesive method and dwell time.
ASTM F710 is commonly referenced for resilient flooring installation practices, emphasizing correct substrate preparation and adherence to product-specific installation procedures.
For click-lock vinyl, accurate layout and controlled expansion gaps reduce the likelihood of buckling at washer traffic zones and door transitions.
For glue-down vinyl, adhesive spread rate and open time/dwell requirements govern bond quality more than “how it looks” during installation.
Click-lock vs glue-down: pick the method your product supports
This comparison helps you decide what details to prioritize. Always follow your specific vinyl’s instructions—don’t assume click-lock rules apply to glue-down products (or vice versa).
| Feature | Click-lock (floating) | Glue-down |
|---|---|---|
| Moisture tolerance strategy | Relies heavily on seam/edge sealing | Depends on adhesive performance and substrate dryness |
| Subfloor flatness | Must be flat to prevent joint stress | Must be flat for full adhesive contact |
| Install complexity | No adhesive mixing; seam alignment is key | Requires correct adhesive, trowel, and open time control |
| Laundry-room maintenance risk | Seam failure can allow water to reach seams/edges | Bond failure can occur if moisture is present |
| Most common DIY mistake | Skipping expansion gap and forcing boards | Using the wrong adhesive/trowel or rushing placement |
Practical installation tips for laundry-room layouts
– Keep seams away from the most likely “wet” path (directly in front of the washer where spills occur).
– Dry-fit several rows and confirm direction and pattern alignment before locking seams in place.
– If glue-down, work in manageable sections and respect adhesive open time. I recommend staging tools so you’re not pausing while adhesive is curing.
Seal seams and handle transitions (laundry-room focus)
Sealing is what turns a vinyl floor from “looks finished” into “stays protected” in a moisture-prone laundry room. Use the manufacturer-recommended seam sealer and install transition trims correctly at doorways, cabinet edges, and adjoining rooms.
– Use the recommended seam sealer/edge details for your product to reduce water intrusion risk.
– Treat transitions (doorways, cabinets edges, adjoining rooms) thoughtfully so gaps don’t collect spills—use the correct trim/transition strip designed for vinyl floors.
Laundry-room vinyl failures often start at seams and edges because water migrates along the smallest pathways when floors experience repeated wet-to-dry cycles.
If you seal transitions with the wrong material or leave gaps at door thresholds, laundry spills can wick underneath where regular cleaning won’t reach.
Proper transition strips and edge details protect vinyl floors in high-traffic, appliance-adjacent areas like the washer path.
Where to be extra careful
– Around the washer/dryer footprint: Even small recurring drips can soak seams over time.
– Doorways and hall thresholds: Gaps here are especially vulnerable because the floor flexes slightly as you enter/exit.
– Cabinet toe-kick edges: If you cut too tight or leave uneven edges, sealer can’t compensate for a poor fit.
A real-world detail I always prioritize: seam sealer cleanup. Excess sealer on the vinyl surface can create smears that attract grime and make the floor harder to wipe clean—so apply with controlled technique and remove excess per the product instructions.
What can go wrong (and how to avoid it)
Most vinyl replacement problems trace back to substrate conditions and missed manufacturer steps. If you get flatness, moisture, and installation method correct up front, the laundry room floor is far less likely to lift, separate, or develop seam gaps.
– Subfloor not flat: Vinyl can telegraph dips, causing movement and seam separation—level/patch before installing.
– Wrong moisture conditions: If the subfloor is damp, adhesive systems and floating installations can fail or develop issues—address moisture first, not after.
– Skipping manufacturer steps: Underlayment, acclimation, adhesive type, and seam sealing are often product-specific—using the “wrong” method is a common failure point.
ASTM F1869 calcium chloride testing specifies a 60–72 hour test period before evaluating moisture vapor emission results.
ASTM F2170 in-situ RH probe testing uses a similar equilibration window (commonly 60–72 hours) so moisture readings reflect stable slab conditions.
When vinyl is installed over an uneven base, joint stress concentrates at dips, which increases the likelihood of seam separation in laundry-room traffic lanes.
Pros/cons snapshot: the two biggest risk choices
– If you float when the product expects glue-down (or vice versa): You may compromise dimensional stability or bond performance.
– If you postpone moisture resolution: You can end up chasing symptoms—lifting seams, bubbles, or adhesive failure—after the new vinyl is already installed.
Verdict: worth DIY, but only if you can prep carefully
If your laundry-room subfloor is solid, you can take the time to level/repair, and you’ll follow the vinyl manufacturer’s installation instructions closely, DIY replacement is often reasonable. Skip DIY (or plan to involve a pro) if you find significant subfloor damage, persistent moisture sources, or you’re unsure whether your vinyl requires click-lock floating vs glue-down installation.
Downside reality: moisture-prone laundry rooms turn “small gaps” into “big problems,” so careful sealing and correct edge details aren’t optional. Also, if the old flooring has extensive adhesive residue or your subfloor is compromised (soft OSB, spongy plywood, failing concrete patches), the project can expand beyond typical DIY comfort.
Quick checklist (save this)
– [ ] Confirm vinyl type (sheet vs plank/tile) and installation method (click vs glue-down)
– [ ] Remove old flooring + scrape residue completely
– [ ] Repair and level the subfloor (no soft spots, no major dips)
– [ ] Acclimate new vinyl per manufacturer instructions
– [ ] Install using the specified underlayment/adhesive (only if required)
– [ ] Seal seams/transitions as the product requires
– [ ] Reinstall trim/transition strips correctly
Pre-Install Moisture & Flatness Checks Used in Resilient (Vinyl) Flooring Work
| # | Check (what it measures) | Typical job-site target | Common standard/test method | Install impact |
|---|---|---|---|---|
| 1 | Subfloor flatness (10 ft span) | ≤ 3/16 in (4.8 mm) | ASTM E1155 | ★★★★★ |
| 2 | Subfloor flatness (6 ft span) | ≤ 1/8 in (3.2 mm) | ASTM E1155 | ★★★★★ |
| 3 | Concrete moisture vapor (CaCl₂) | ≤ 3 lb/1000 sq ft/24 hr | ASTM F1869 | ★★★★★ |
| 4 | In-situ RH (concrete) | ≤ 75% RH | ASTM F2170 | ★★★★★ |
| 5 | Subfloor temperature at install | 65–85°F (18–29°C) | Manufacturer guidance (verify for your product) | ★★★★☆ |
| 6 | Typical acclimation window | 24–48 hours | Manufacturer guidance (verify for your product) | ★★☆☆☆ |
| 7 | Expansion gap allowance (perimeters) | 1/4 in (6 mm) | Manufacturer guidance (verify for your product) | ★★★☆☆ |
Sources:
– ASTM E1155, Standard Test Method for Determining Floor Flatness and Levelness Using a Flatness and Levelness Measuring Device
– ASTM F1869, Standard Test Method for Measuring Moisture Vapor Emission Rate of Concrete Subfloor Using Anhydrous Calcium Chloride
– ASTM F2170, Standard Test Method for Determining Relative Humidity in Concrete Floor Slabs Using In Situ Probes
– ASTM F710, Standard Practice for Preparing Concrete Floors to Receive Resilient Flooring
Replacing vinyl floors in a laundry room is very doable when you treat prep as the main job. If you remove the old flooring thoroughly, repair and flatten the subfloor, install using the correct method (click vs glue-down), and seal seams/transitions to match your product, you’ll minimize seam separation, lifting, and moisture-related failures that commonly show up first in laundry-room traffic zones.
Frequently Asked Questions
What’s the best way to remove old vinyl flooring in a laundry room?
Start by clearing the room and removing baseboards or quarter-round trim so you can access the edges of the vinyl flooring. For sheet vinyl, cut it into manageable strips and peel it up; for vinyl plank or tile, lift individual pieces and scrape off the underlayment as needed. Use a floor scraper and keep a close eye on the subfloor—laundry rooms often have moisture exposure, so replace any soft or damaged plywood or concrete before installing new vinyl flooring.
How do I prepare the subfloor before installing new vinyl floors in a laundry room?
Clean thoroughly and remove any adhesive residue, dust, and high spots; vinyl requires a smooth, even surface to prevent bumps and premature wear. Check for moisture problems—look for warping, dark spots, or soft areas, and consider using a moisture test if the laundry room is on a slab. If the subfloor is uneven, use a suitable floor patch/leveler compatible with vinyl flooring, then let it fully cure before installation.
Which type of vinyl flooring is best for laundry rooms with moisture and heavy traffic?
For laundry rooms, prioritize water-resistant or waterproof vinyl flooring options designed for wet areas, such as luxury vinyl plank (LVP) with a robust core or vinyl tile rated for moisture-prone spaces. Look for features like an attached pad only if your subfloor is suitable (otherwise use a hard surface), and choose a wear layer thick enough for heavy foot traffic. A good underlayment and proper sealing at seams and transitions also help protect against recurring spills from washers and supply lines.
How do I replace vinyl plank flooring around the washer and dryer safely?
Shut off water and power (and follow the dryer vent disconnection process if needed) before moving appliances or pulling the plumbing away from the floor. Dry-fit the first row and plan your layout so seams don’t land directly in high-splash zones; use spacers to maintain expansion gaps where required. When cutting around doors, pipes, or appliance bases, use a jigsaw or vinyl-safe blade for clean edges, then reinstall appliances carefully so the new vinyl floors aren’t stressed or pinched.
Why is proper installation technique important when replacing vinyl floors in a laundry room?
Laundry rooms deal with vibration, moisture, and frequent traffic, so small mistakes—like skipping leveling, ignoring expansion gaps, or not sealing seams—can lead to buckling, lifting edges, and water intrusion. Follow the manufacturer’s instructions for the specific vinyl flooring product, including acclimation time, adhesive or click-lock methods, and recommended underlayment. Taking time to prepare the subfloor and install correctly helps extend the life of your new vinyl floors and reduces future repairs.
📅 Last Updated: October 26, 2026 | Topic: How to replace vinyl floors in a laundry room? | Content verified for accuracy and freshness.
References
- Vinyl flooring
- Mold | US EPA
- https://www.cdc.gov/mold/default.htm
- Asbestos | US EPA
- Asbestos – Overview | Occupational Safety and Health Administration
- https://www.cdc.gov/niosh/topics/asbestos/
- Mold
- https://scholar.google.com/scholar?q=replace+vinyl+flooring+laundry+room Google Scholar
- https://scholar.google.com/scholar?q=sheet+vinyl+floor+installation+subfloor+preparation Google Scholar
- https://scholar.google.com/scholar?q=luxury+vinyl+plank+installation+moisture+subfloor+prep Google Scholar



[…] gives you a direct, step-by-step walkthrough to get the vinyl up, handle stubborn adhesive, and prep the subfloor for what comes next. By the end, you’ll know exactly how to tackle the job efficiently without […]
[…] with the right approach to get a smooth, professional-looking finish. If you follow the sequence—prep the subfloor, fit and trim the panels, and lock them into place—you’ll avoid the most common gaps and […]