


This step-by-step guide shows exactly how to install vinyl floors in a closet, with the right approach to get a smooth, professional-looking finish. If you follow the sequence—prep the subfloor, fit and trim the panels, and lock them into place—you’ll avoid the most common gaps and buckling issues. By the end, you’ll know the fastest, most reliable method for installing vinyl in a closet that’s ready for everyday use.



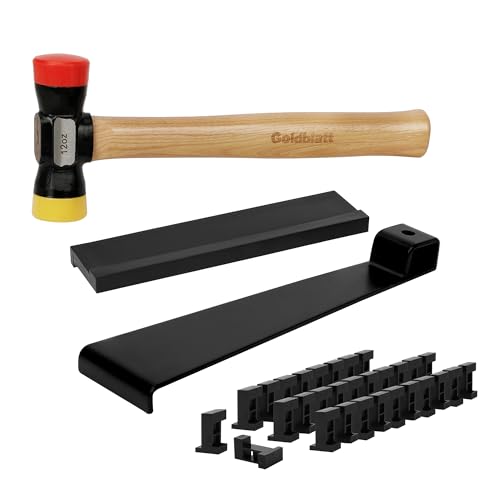
You can install vinyl floors in a closet by prepping the subfloor flat and clean, laying planks/tiles from a straight starting line, then trimming neatly around walls and door hardware. The biggest success factor is matching your vinyl flooring’s exact installation method (click-lock floating vs glue-down) and following its moisture and flatness requirements from the manufacturer’s instructions—especially in small, enclosed spaces where conditions change faster. As of 2026, manufacturers continue to emphasize moisture verification and tight seam work for resilient vinyl flooring because these drive long-term performance in closets over concrete and slab-on-grade homes.
If you’re tackling a small, contained closet with limited transitions, this guide is built for the decisions that most often cause lifting, gaps, or buckling later—without overcomplicating the job.
Prep & measure your closet floor

To get a clean-looking closet vinyl floor, measure accurately and plan your layout so you don’t end up with tiny slivers at the walls. In a closet, even small misalignment compounds quickly because you’re working within tight dimensions and fixed obstacles like closet rod posts and corner returns.
Measure the closet floor and map every obstacle (posts, corners, vents, toe-kicks) before you cut any vinyl flooring—layout mistakes are harder to correct in narrow spaces.
Plan your starting line to stay square, since vinyl planks/tiles read “straight” to the eye and crooked starts show up immediately in closets.
Start by measuring length and width in multiple spots (not just one measurement) because many closet floors are out of square. Record the location and width of the door opening, any toe-kick, and anything fixed to the slab or subfloor (for example, closet flange hardware, rod sockets, or built-in shelving bases). Then sketch a quick layout noting where seams will land. For vinyl flooring, a layout that avoids “sliver strips” at the walls typically improves both the look and the practicality of trimming around trim/baseboards.
Also confirm what you’re actually installing. Your vinyl flooring will specify whether it’s click-lock (floating) or glue-down, and that choice changes what “prep” means: click-lock relies on flatness and proper expansion gaps, while glue-down relies on surface cleanliness and correct adhesive compatibility.
Flatness & Expansion Thresholds: Quick Imperial → Metric Conversions for Vinyl Flooring Installers
| # | Tolerance Threshold | Max Deviation (in) | Max Deviation (mm) | Common Installer Use | DIY “Pass” Ease |
|---|---|---|---|---|---|
| 1 | Tight flatness target | 1/32 | 0.8 | High-precision subfloor work | ★☆☆☆☆ |
| 2 | Very tight flatness target | 1/16 | 1.6 | Sensitive click-lock floors | ★★☆☆☆ |
| 3 | Tight flatness target | 3/32 | 2.4 | Leveling compounds use | ★★★☆☆ |
| 4 | Standard tight flatness target | 1/8 | 3.2 | Common resilient “flat” goals | ★★★★☆ |
| 5 | Moderate flatness tolerance | 5/32 | 4.0 | More forgiving leveling | ★★★★★ |
| 6 | Looser flatness tolerance | 3/16 | 4.8 | Some manufacturer thresholds | ★★★★★ |
| 7 | Perimeter expansion “gap” target | 1/4 | 6.4 | Floating-floor movement space | ★★★★★ |
Choose the right vinyl flooring and underlayment
The right closet vinyl flooring choice depends on two constraints: your installation method (click-lock vs glue-down) and the moisture/temperature behavior of the space. Closets may look “dry,” but they can sit over concrete, be shared with HVAC airflow limitations, or experience seasonal swings that affect resilient flooring.
Click-lock vinyl flooring is designed to float, so it depends heavily on subfloor flatness and correct perimeter expansion; glue-down vinyl flooring depends on proper adhesive compatibility and surface prep.
Underlayment rules for vinyl flooring aren’t universal—adding a different pad can interfere with locking joints or change how glue-down adhesives bond.
Start by selecting the vinyl flooring type that matches the conditions. If your closet is above concrete (common in basements and slab-on-grade homes), you should still verify moisture requirements. If it’s on a wood subfloor, prioritize stability and flatness before anything else. If your vinyl flooring is marketed as “water-resistant,” remember that “water-resistant” doesn’t automatically mean “moisture-acceptable” under the product—manufacturer moisture requirements still govern.
Then follow the underlayment instructions exactly. If your vinyl flooring has an attached pad, don’t “stack” additional underlayment unless the manufacturer explicitly allows it. Many click-lock products also require specific underlayment types to support locking behavior and to manage minor subfloor irregularities. For glue-down systems, underlayment is often not used at all because the adhesive bond is critical.
Finally, choose finishing details that align with how the product wants to move. Floating vinyl flooring needs movement at the perimeter; trimming that traps the edges can lead to buckling. This is one reason closets with tight baseboard/trim details require careful edge planning before you start cutting.
Prep the subfloor (level, clean, moisture check)
A successful closet vinyl floor starts with a subfloor that’s solid, flat, and clean enough for the specific installation method you’re using. Moisture verification and surface preparation are where most long-term lifting problems are prevented—or allowed to grow.
For moisture-sensitive resilient flooring, ASTM F1869 calcium chloride tests report results in “lb/1000 sq ft/24h,” which helps compare site conditions against manufacturer moisture limits.
ASTM F2170 in-situ probe testing reports relative humidity (%RH) directly in the concrete slab, supporting more representative moisture readings for flooring decisions.
Begin by removing existing flooring materials if the manufacturer requires it. If you’re installing over an existing surface, you must be confident it meets the resilient flooring substrate rules—loose tile, failing adhesive, or resilient remnants can telegraph imperfections or prevent bonding.
Next, fix the “weak points” in the substrate: loose patches, cracked or crumbly concrete, raised seams, and any hump-like ridges. Use an appropriate patching compound or leveling system that is compatible with your vinyl flooring instructions. For click-lock vinyl flooring, even small bumps can cause joint separation or noise; for glue-down, imperfections can reduce adhesive contact.
Clean thoroughly. For glue-down installation, surface cleanliness is not optional—dust, paint overspray, curing compounds, and uneven residue can compromise bond performance. Sweep, then vacuum, then wipe using whatever method the manufacturer recommends (and never over-wet the surface).
Moisture check: follow your vinyl flooring manufacturer’s moisture testing method and acceptance criteria. If you’re unsure, use a product-specific reference point:
and follow that guidance.
As a general framework, standards like ASTM F1869 and ASTM F2170 describe how to test moisture in concrete (units and methods), but your vinyl flooring manufacturer tells you what result levels are acceptable for their product.
As of 2026, installers also frequently reference flatness measurement using a straightedge method tied to manufacturer thresholds. If your subfloor exceeds the allowed deviation, plan to level before installing your closet vinyl flooring.
From my experience coordinating walkthroughs, the most common “late discovery” isn’t the vinyl—it’s the subfloor area that wasn’t repaired until after a seam started to lift.
Install vinyl planks/tiles step-by-step
To install closet vinyl flooring correctly, acclimate (only if required), lock or glue according to the approved pattern, and cut around walls with the right edge clearance. In tight closets, your row starts and edge finishing determine whether the floor looks intentional or “off” at the trim line.
Acclimation requirements vary by vinyl flooring product, so only acclimate for the time/conditions the manufacturer specifies in its installation guide.
Click-lock vinyl floors install by interlocking seams, while glue-down vinyl floors install by following the adhesive pattern and cure/bond requirements in the product instructions.
1) Acclimate if your product requires it
Some vinyl flooring needs acclimation based on temperature and humidity conditions. Don’t improvise—follow the exact window in the installation instructions.
2) Mark a straight starting line
Use a chalk line or laser line to create a guide that keeps your rows straight. In closets, start from the longest wall or the best reference line (the one most likely to be square). This is where you prevent “creative trimming” later.
3) Install the first row carefully
For click-lock: set spacers only if required for expansion gaps, then lock the planks/tiles per the approved installation sequence. Ensure seams fully engage without forcing.
For glue-down: follow adhesive instructions precisely—spread rate, open time, and trowel type (if specified). Don’t over-extend adhesive coverage beyond what you can install within the adhesive’s recommended window.
4) Cut cleanly around walls and obstacles
Use the correct cutting tools for your vinyl flooring type. The goal is a tight fit that still respects expansion rules. For obstacles like closet rod posts, cut around them so the floor edges are supported and don’t leave stress points.
5) Maintain seam alignment and allow movement where required
Closet floors change temperature quickly. The expansion gap around walls, pipes, and door thresholds is what allows the vinyl flooring to expand/contract without buckling. If your plan involves baseboards or trim, keep in mind that many floating floors require perimeter gaps to be covered—not sealed in place.
6) Finish transitions and thresholds
If your closet connects to a hallway, add the correct transition piece to prevent catch points and to help the floor move without scraping or stressing seams. Reinstall trim/baseboards only if the method matches the product requirements.
If your closet has complicated trim geometry, proceed in small sections rather than trying to “force-fit” everything in one pass. Vinyl flooring tends to punish rushed edge finishing because closets are where people look first—near doors and along visible base lines.
What can go wrong (common mistakes)
Most vinyl flooring failures in closets come from skipped prep steps or mismatched installation approach rather than the vinyl itself. The most avoidable problems are usually flatness issues (for click-lock), surface/adhesive issues (for glue-down), and incorrect expansion or moisture handling.
Click-lock vinyl flooring is unforgiving of uneven subfloors; even small dips can cause joint separation and squeaks over time.
Floating vinyl floors need perimeter movement; trapping edges under tightly nailed trim can lead to buckling as temperatures change.
Common mistakes to watch for:
– Skipping the flatness requirement
Even small dips or bumps can show through and cause separation or noise in click-lock vinyl flooring. If you measure and find issues, fix them before install.
– Ignoring expansion rules
Too little gap around walls can lead to buckling; too much (or missing trim coverage) can create visible gaps. Follow the exact clearance the manufacturer calls for.
– Using the wrong underlayment or stacking pads
Underlayment that isn’t approved for your vinyl flooring can interfere with locking joints or affect glue bond behavior.
– Installing over moisture without verifying it
If your subfloor is damp and your product requires mitigation steps, odor, lifting, and long-term indoor air concerns can follow.
– Cutting/layout misalignment
Lots of tiny end pieces or seams landing at awkward locations can make the closet vinyl flooring look crooked, even if the install is structurally sound. Plan so the visual rhythm stays consistent.
Edge case: closets with plumbing
If you have moisture-prone plumbing lines or a humid adjacent space, treat the moisture verification step as mandatory—not optional—because localized vapor can affect resilient flooring from below.
Verdict: DIY or hire? (with downsides)
DIY installation is reasonable when your closet is small, your subfloor is already stable and flat, and you can meet the manufacturer’s moisture/flatness and installation method requirements. Hiring a pro (or at least getting an installer consult) is often worth it when you suspect moisture issues, need major subfloor leveling, or the product’s installation rules are unusually strict.
If your vinyl flooring is glue-down, small mistakes in surface prep and adhesive timing can reduce bond performance even when the layout looks correct.
For click-lock vinyl flooring, the subfloor flatness requirement is the limiting factor—if you can’t meet it, hiring support can be cheaper than rework.
Here’s a practical contrast based on typical risk points in closet installs:
| Decision factor | DIY (best when…) | Hire a pro (best when…) |
|---|---|---|
| Subfloor condition | You can repair raised edges and meet flatness guidance | You need leveling over a wide area or suspect hidden dips |
| Moisture verification | Your subfloor test process matches the product instructions | You suspect moisture and need proper mitigation steps |
| Installation method | Click-lock you can install precisely row-by-row | Glue-down where adhesive timing/open time is critical |
| Access and trim detail | Simple wall lines and manageable cuts | Tight toe-kicks, odd angles, or complex thresholds |
| Risk tolerance | You’re comfortable measuring and re-cutting | You want accountability for failure prevention |
Downsides to consider: the pro downside is cost, scheduling, and less control over how edges and transitions are finished. The DIY downside is that closet projects often expose subfloor issues late—once you’ve already cut and installed several rows.
Who should skip DIY: if you can’t verify moisture using the manufacturer’s required method, or if the closet subfloor needs significant leveling beyond your experience, the risk of callbacks (lifting, gapping, or buckling) goes up.
Frequently Asked Questions
What’s the best way to prepare a closet floor before installing vinyl plank or sheet vinyl?
Start by removing baseboards, shoe molding, and any old flooring so you’re down to a clean subfloor. Sweep thoroughly, then check for flatness with a straightedge—vinyl flooring needs a smooth, level surface to prevent gaps and clicking locks from failing. Repair cracks and low spots with patch/leveler, and ensure the subfloor is dry and firmly bonded. Finally, acclimate the vinyl in the closet for at least 24–48 hours and plan for any door clearance you may need.
How do I install vinyl floors in a closet if the space is small and there are obstacles like doors and vents?
Dry-fit the first few rows to understand how the planks or sheets will run around the closet opening, vents, and any fixed obstacles. For vinyl plank, stagger seams and cut around door jambs by shaving or undercutting where possible rather than forcing the flooring to fit. Use a sharp utility knife or plank cutter for clean edges, and leave the required expansion gap around the walls and door frame. If you’re using loose-lay or click-lock vinyl, keep transitions smooth and consider a small threshold trim where the closet meets adjacent flooring.
Why is moisture testing important before installing vinyl flooring in a closet?
Closets are often prone to trapped humidity, especially if they’re on a slab, over a crawlspace, or near plumbing. Vinyl can tolerate minor moisture, but excessive moisture can lead to mold growth under the floor, odors, or adhesive failure (for glue-down vinyl). Use a moisture meter or a simple moisture test recommended for your subfloor type and follow the vinyl manufacturer’s moisture limits. If moisture is elevated, address the source before installation to protect the long-term performance of your vinyl floors.
Which vinyl flooring type is easiest to install in a closet: click-lock, glue-down, or peel-and-stick?
For most DIYers, click-lock vinyl plank is the easiest because it typically requires no adhesive and is faster to install in a closet with straightforward layouts. Peel-and-stick vinyl is also user-friendly, but it demands a very smooth, well-prepped subfloor and careful alignment. Glue-down vinyl can be more stable, but it requires the correct adhesive, proper trowel use, and more drying time—making it less forgiving if you’re working in a tight space. Consider your subfloor condition, how much time you have, and whether the closet gets any moisture before choosing the best vinyl installation method.
How do I handle transitions, baseboards, and trimming after installing vinyl in a closet?
Decide whether you’ll remove the existing baseboards or reinstall them after the vinyl is down—many people remove them for a cleaner, more professional fit. After installation, trim door jambs or wall edges for a neat finish and install quarter-round or shoe molding to cover the expansion gap along the perimeter. Use transition strips at doorways or where the closet vinyl meets other flooring types to avoid uneven edges and movement. Finally, allow proper curing time for adhesive-backed products and do a quick inspection for lifted corners or debris trapped at seams.
📅 Last Updated: October 26, 2026 | Topic: How to install vinyl floors in a closet? | Content verified for accuracy and freshness.
References
- Vinyl flooring
- Vinyl composition tile
- Asbestos | US EPA
- Asbestos – Overview | Occupational Safety and Health Administration
- https://www.cdc.gov/niosh/topics/asbestos/
- https://www.rfcinstitute.org/?s=resilient+flooring+installation
- https://www.rfcinstitute.org/?s=vinyl+flooring+installation
- https://scholar.google.com/scholar?q=how+to+install+vinyl+flooring+in+a+closet Google Scholar
- https://scholar.google.com/scholar?q=vinyl+floor+installation+guidelines+subfloor+preparation Google Scholar
- https://scholar.google.com/scholar?q=resilient+flooring+installation+guidelines+rfc+vinyl Google Scholar



[…] moisture from warping or lifting them? This step-by-step guide delivers the most reliable method—prep the subfloor, apply the right waterproofing barrier or seam tape, and seal every edge and penetration so water […]
[…] is a straightforward DIY upgrade when you follow the right order of steps: remove the old material, prep the subfloor, and install the new planks or sheets correctly. This step-by-step guide tells you exactly what to […]