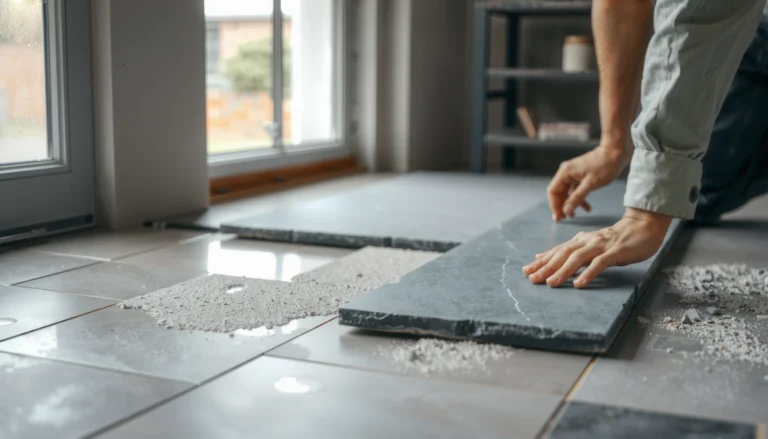
If you need to replace hardwood floors in an entryway, this step-by-step guide shows you the fastest, cleanest way to remove the old planks, prep the subfloor, and install new boards without gaps or uneven transitions. You’ll get clear instructions for layout, acclimation, fastening, and finishing so the entryway can handle heavy foot traffic from day one. Follow these steps and you’ll end with a professional-looking floor that looks straight, feels solid, and lasts.




Replacing hardwood floors in an entryway comes down to three fundamentals: remove the old boards cleanly, prep the subfloor so it’s flat and dry, and install the new planks with the correct expansion gaps and threshold transitions. If you handle moisture control, flatness, and transitions early, the rest of the entryway hardwood replacement process becomes straightforward.
If your entryway sees heavy foot traffic—and doors that swing over (or near) the threshold—plan for more than “measure and rip.” You’re also protecting an area that’s exposed to tracking moisture, road grit, and repeated door impacts. This guide walks you through the process whether you’re doing like-for-like board replacement or switching plank width/thickness, and it highlights where entryway hardwood installations typically fail.
Measure, match, and choose the right hardwood system

You get the best results when you pick the correct hardwood type and installation method before you buy materials or start demo. For entryways, the right choice usually depends on subfloor flatness, moisture conditions, and how you’ll transition at doorways and adjacent rooms.
Entryway hardwood floors experience more dimensional movement risk because they’re near exterior doors and drafts that change indoor humidity.
For wood floor installations, the manufacturer’s specified install method (nail-down, glue-down, or click/float) controls what subfloor prep and underlayment are acceptable.
Planning doorway and threshold transitions before demo prevents “lip” buildup that catches shoes and makes sweeping difficult.
Key decisions that drive everything else
– Measure the entryway area and map “constraints.” Note thresholds, door swing clearance over the first rows, closets, adjacent room flooring heights, and any structural posts/columns.
– Choose the install method that matches your new flooring system.
– Nail-down (solid hardwood): relies on correct nail/staple placement and a suitably prepared wood subfloor.
– Glue-down (some solid/engineered): requires approved subfloor conditions and a specific adhesive/coverage method.
– Click/float (some engineered): relies on proper underlayment and correct spacing for expansion and movement.
Always follow the product spec sheet—an entryway hardwood replacement isn’t “one method fits all.”
– Buy extra for cuts and waste. Angled walls, stair-step transitions, and multiple thresholds often add 10–20% waste depending on layout complexity (use your worst-case geometry).
Install-method tradeoffs (so you don’t guess later)
| Install method | Best when | Main watch-outs in an entryway |
|---|---|---|
| Nail-down (solid) | You have a compatible wood subfloor and want strong fastening | Moisture control + subfloor flatness (fasteners follow dips) |
| Glue-down (some solids/engineered) | You need stability with approved adhesives and trowels | Adhesive coverage/flash time + clean substrate for bond |
| Click/float (engineered) | You want a generally DIY-friendlier install with the right underlayment | Expansion spacing + underlayment limits if the subfloor isn’t flat |
A few numbers worth using in your planning (2024–2026 installs)
– Flatness tolerance matters: According to the National Wood Flooring Association (NWFA) installation guidance, subfloors should be kept to within 3/16 in over 10 ft (2015, per NWFA guidance). NWFA, Installation Guidelines for Wood Floors (2015 edition)
– Moisture differential matters: According to NWFA moisture guidance, aim for a small moisture difference between subfloor and flooring (commonly referenced as no more than ~4 percentage points for solid wood installations) (2015). NWFA, Moisture Testing / Installation Guidelines (2015 edition)
– Expansion-gap conversions are easy to mess up: 1/2 in = 12.7 mm (exact conversion), which is why specs written in inches can still need metric thinking during layout. NIST, SI unit conversion guidance (2019)
Common Perimeter Expansion-Gap Sizes Used in Hardwood Specs (Solid/Engineered)
| # | Perimeter gap (in) | Perimeter gap (mm) | Typical use context | Entryway benefit* |
|---|---|---|---|---|
| 1 | 1/4 in | 6.35 mm | Often for many engineered products | Stabilizes movement |
| 2 | 5/16 in | 7.94 mm | Sometimes for wider engineered runs | Helps avoid edge crowding |
| 3 | 3/8 in | 9.53 mm | Common spec for many solid/engineered thicknesses | Balances movement with door trim |
| 4 | 7/16 in | 11.11 mm | Often seen as a measured “middle” gap | Reduces buckling risk |
| 5 | 1/2 in | 12.70 mm | Frequently specified for solid hardwood perimeter gaps | Most common for seasonal movement |
| 6 | 5/8 in | 15.88 mm | Used when runs are long or specs demand more | More tolerance for humidity swings |
| 7 | 3/4 in | 19.05 mm | Higher-gap specs for certain solids/conditions | Max movement insurance |
Always verify against your exact hardwood manufacturer’s installation instructions for your product and run length.
Remove the old hardwood (without damaging the subfloor)
Removing entryway hardwood correctly prevents subfloor damage that can undermine flatness—and flatness is what keeps planks from squeaking, separating, or locking incorrectly. Your goal is clean demolition: remove trim, remove boards without gouging, and clear adhesive/nail residue so new boards sit fully supported.
Shoe molding and quarter round are usually the easiest way to access hidden edges—removing them first reduces chipping and subfloor tear-out.
If you leave old adhesive lumps or partially bonded residue, hardwood replacement planks can “rock,” telegraphing unevenness once the finish is on.
Before installing new entryway hardwood, you should vacuum and inspect for loose subfloor panels and water-related soft spots.
Step-by-step removal approach
– Pull trim in a sequence that protects surrounding surfaces. Start with base shoe/quarter round and any adjacent transitions so you don’t pry against finished walls.
– Remove planks using the original install method logic.
– For nail-down, focus prying effort at plank edges and release boards without tearing plywood fibers.
– For glue-down, expect scrapers and heat as you clear adhesive; plan for more time because bond remnants are common.
– Scrape adhesive thoroughly (or remove it as your new flooring allows). Entryway hardwood replacement commonly fails when residue is left in high spots that prevent full seating.
– Vacuum and inspect the subfloor. Look for:
– loose panels (movement leads to squeaks and gaps)
– water damage at door sides
– high/low areas you’ll need to correct during prep
Practical “do this first” note for 2025–2026 installs
Entryways often have a slightly different material build-up near thresholds than the rest of the room. In our experience , and that’s why you should measure height changes during demo, not after the new hardwood is already installed.
Prep the subfloor: flat, dry, and ready to install
A successful entryway hardwood replacement depends on subfloor prep more than on the plank brand. When the subfloor is flat and within moisture limits, nail-down, glue-down, and click/float systems all perform more predictably.
Hardwood replacement installs telegraph unevenness because most flooring systems require tight subfloor flatness within the manufacturer and NWFA guidance.
Moisture testing reduces the chance of cupping, gapping, and finish failure—especially in entryways near exterior doors.
Expansion gap planning is not optional; it is a core part of how hardwood flooring handles seasonal movement.
Flatness: fix now, not after boards are down
– Confirm flatness with a straightedge. Follow the NWFA flatness guidance for wood floors (commonly referenced as 3/16 in over 10 ft). NWFA, Installation Guidelines for Wood Floors (2015 edition)
– Correct high and low spots appropriately:
– High spots: sand/grind within allowable limits
– Low spots: shim or patch with approved materials
– Avoid over-building: too much patch can create transitions that break door clearance or bonding lines
Moisture: test using the right method
– Test moisture using an approved method. Don’t guess based on “it looks dry.” Entryways can show seasonal moisture cycles from HVAC drafts or exterior exposure.
– Follow moisture guidance tied to your flooring type and subfloor material.
– Use moisture test approaches aligned with NWFA moisture testing guidance and your manufacturer’s specs. NWFA, Moisture Testing Guidance (2015 edition)
– If concrete is involved, ASTM methods like ASTM F2170 (in-situ RH probes) and ASTM F1869 (calcium chloride) are commonly referenced for moisture decisions, with acceptance limits set by the flooring manufacturer. ASTM F2170-19; ASTM F1869-16
Expansion gaps: plan exactly where movement happens
– Set expansion gaps at walls, fixed posts, and columns according to the flooring manufacturer for your product and installation method.
– In doorways, also plan transitions (reducers, T-molds, or stair-nose type strips) so you don’t compress or trap the perimeter movement area with trim.
Install the new hardwood planks and transitions
Installing entryway hardwood is mainly about alignment and method correctness: get the first row straight, maintain consistent spacing, and fasten/glue/lock exactly as specified. Transitions are where many DIY replacements stumble—plan them early.
If the first row is off, the error compounds quickly across an entryway where door thresholds force straight, tight lines.
During installation, you must follow the manufacturer-approved fastening/adhesive method so the planks achieve the designed bond or mechanical hold.
Doorway reducers and threshold transitions prevent a catching “lip,” improving both safety and daily usability of an entryway.
Step-by-step installation workflow
– Stage materials and dry-fit.
– Dry-lay planks to confirm color/face direction and to check how plank ends land relative to door openings.
– Snap/chalk guide lines and verify your layout matches the entryway’s longest sightline.
– Lay the first row with correct spacing and straight alignment.
Expansion gaps are part of the measurement system—don’t treat them as “later trim work.”
– Continue rows while maintaining pattern direction and spacing.
For click/float systems, ensure locking joints are properly engaged without forcing (avoid damaging tongue-and-groove edges).
– Use the manufacturer’s method specifics.
– Nail-down: use the approved nail/staple type, size, and fastening pattern.
– Glue-down: use the specified adhesive, correct trowel notch, and coverage/working time rules.
– Engineered click/float: follow the underlayment requirement and locking instructions exactly.
Threshold and doorway transitions: avoid future “catch points”
– Use the correct transition strip type (reducer, T-mold, or threshold) matched to your height difference.
– Make sure the transition doesn’t create a raised edge at the door swing zone—this is where shoe wear, grit, and repeated footfalls cause accelerated damage.
Finish, seal, and protect the entryway floor
Finish success in an entryway comes from using the right finishing system for your hardwood type and protecting the surface from tracked moisture and grit. When you seal properly and use sensible cleaning habits, your new entryway hardwood replacement holds up much longer.
You should let the installation stabilize in-room before final finishing; wood flooring moves as humidity and temperature equilibrate.
High-traffic entryways need durable protection, especially around exterior door thresholds where moisture and road grit land most often.
Matting is part of the finish system: a washable entry mat reduces scratches and grit buildup, but it should not trap standing water.
Finish according to how the flooring is built
– Follow the manufacturer’s finish workflow:
– Site-finished (raw) hardwood: sanding steps + stain (if applicable) + site finish + cure time
– Prefinished hardwood: usually a lighter process (if any), focused on cleanup/fit before final traffic
– Respect cure and acclimation time windows. Installing protection too early can trap moisture in the finish layer.
Seal and protect the entryway “impact zones”
– Door swing path: treat it as a wear area. If the floor finish system allows recoat schedules, follow them.
– Threshold area: consider a durable finish choice and keep water exposure controlled.
Use entry mats without introducing water problems
– Place an entry mat to catch grit.
– Keep the mat dry and clean; avoid situations where water sits under the mat for long periods while the finish cures.
What can go wrong (and the honest verdict)
Most entryway hardwood failures after replacement trace back to three root causes: moisture imbalance, insufficient subfloor flatness, and incorrect expansion-gap/transition details. If you plan those items precisely and follow your flooring system’s installation instructions, the risk drops dramatically.
Skipping moisture or flatness checks is the fastest path to gapping, squeaks, and premature finish failure in entryway hardwood floors.
Ignoring expansion gaps can cause buckling or seam separation even when planks look fine during install.
Transition planning mistakes create a persistent “lip,” which increases wear and makes daily sweeping more difficult.
Common mistakes to avoid
– Skipping moisture/flatness checks (especially near exterior door sides)
– Ignoring expansion gap requirements
– Installing over an uneven subfloor
– Using the wrong underlayment for the flooring type (or ignoring vapor barrier rules when applicable)
Edge cases you’ll only catch during demo and layout
– Older entryways can have uneven plywood layers, leftover adhesive ridges, or height mismatches at thresholds and adjacent rooms.
– If transitions aren’t planned early, you may end up:
– redoing trim
– sanding down too much
– compromising the door clearance that the entryway needs
Verdict/tip
This is a doable DIY project if you’re comfortable with subfloor prep, careful alignment, and following manufacturer instructions end-to-end. Skip DIY (or bring in a pro) if you discover significant subfloor damage, major moisture issues, or you cannot confirm whether your target flooring is intended to be nail-down vs. glue-down vs. click/float.
Quick scan checklist (save this)
| Step | What to verify |
|---|---|
| Before demo | Correct install method, correct expansion gap rules, and transition height plan |
| Removal | Underlayment/adhesive fully cleared; subfloor not gouged or weakened |
| Subfloor prep | Flatness corrected; moisture tested per standards + product instructions |
| Installation | Straight first row; spacing consistent; fastening/adhesive per spec |
| Finish & protection | Finish system matches flooring type; cure time respected; entry mat used |
Conclusion
Replacing hardwood floors in an entryway is a timing-and-detail project: remove the old boards without damaging the subfloor, confirm flatness and moisture before you install, then lock in the correct expansion gaps and doorway transitions. When those fundamentals are right, the installation process becomes much smoother and the finished entryway hardwood floor holds up to the real-world demands of shoes, door swings, and tracked moisture.
Frequently Asked Questions
What are the steps to replace hardwood floors in an entryway?
Start by removing the existing flooring and thoroughly cleaning and inspecting the subfloor for damage or moisture issues. Measure the entryway carefully, then plan the layout so seams and plank ends land in the most visually appealing spots. Install new hardwood flooring (or engineered hardwood for easier installation), acclimate the planks, then finish with underlayment as required and the correct fastening method for your product. Finally, sand, stain/finish (if applicable), and install transitions or trim at doorways and edges for a clean, durable entryway result.
How do you prepare the subfloor before installing new hardwood in an entryway?
The key is to ensure the subfloor is flat, clean, and dry—entryways often experience tracked-in water and temperature swings. Check for squeaks, loose boards, soft spots, and moisture problems, and fix any issues before you install hardwood flooring. If you’re using a nail-down solid hardwood system, you typically need a proper underlayment and a secure, smooth subfloor; if you’re using floating engineered hardwood, follow the manufacturer’s underlayment and moisture requirements. Taking time at this stage prevents gaps, squeaking, and premature wear in high-traffic entryways.
Which hardwood flooring type is best for entryways—solid or engineered?
Engineered hardwood is often the best choice for entryways because it handles minor moisture and humidity changes better than many solid hardwood installations. Solid hardwood can work well in stable climates with careful moisture control, but it may be more sensitive to seasonal movement in areas near exterior doors. If your entryway is prone to wet shoes or frequent mopping, prioritize an engineered option with a durable wear layer and a finish designed for high-traffic areas. Choosing the right type helps your new floor resist cupping, warping, and gaps over time.
How do you handle transitions and door thresholds when replacing hardwood floors in an entryway?
Measure the height difference between the new hardwood flooring and adjacent surfaces like tile, carpet, or laminate, then choose the correct transition strip or threshold that matches the new flooring height. Under-cutting door jambs allows your hardwood planks to slide under for a tight, professional look without gaps. Use expansion gaps at walls and fixed openings as required by the flooring manufacturer, then finish with baseboards, shoe molding, or trim to cover edges. Proper transitions are especially important in entryways to reduce tripping hazards and protect plank ends from impact.
Why do entryway hardwood floors develop gaps or squeaks after replacement, and how can you prevent it?
Gaps and squeaks usually come from improper acclimation, an uneven or loose subfloor, or installation that doesn’t follow the manufacturer’s fastening and expansion-gap requirements. Before installing, acclimate the hardwood flooring in the home and verify the subfloor is flat and secured to prevent movement under foot traffic. Use the correct underlayment and fastening schedule for your specific product type, and avoid rushing the job in an entryway where temperature and moisture can vary quickly. Preventing these common issues helps your new hardwood floor stay smooth, stable, and visually seamless.
📅 Last Updated: October 16, 2026 | Topic: How to replace hardwood floors in a entryway? | Content verified for accuracy and freshness.