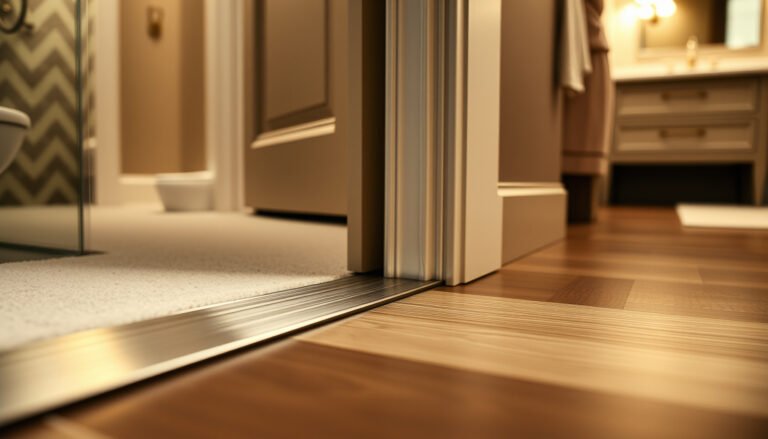
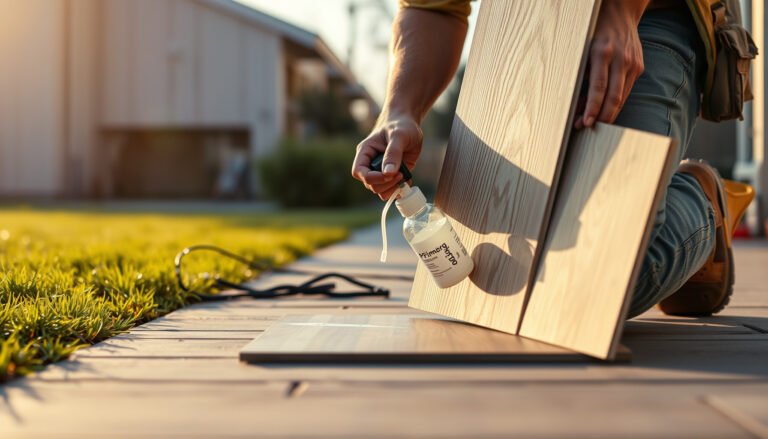
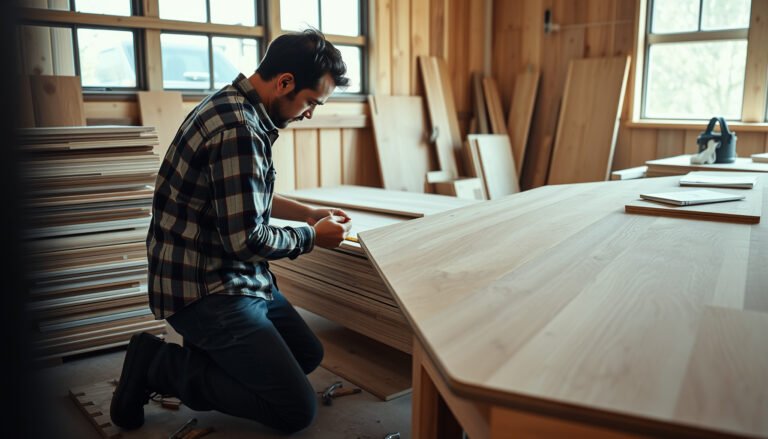
Replacing hardwood floors in a home gym? You’ll get a step-by-step replacement roadmap that tells you exactly what to do from pulling the old boards to installing and finishing the new surface. It’s written for the gym conditions that matter most—heavy foot traffic, dropped weights, and moisture control—so you can avoid the common pitfalls that ruin flatness and alignment. If you want a durable, properly installed hardwood gym floor, this is the fastest route to a clean, confident replacement.



Replacing hardwood floors in a home gym is mostly about controlling moisture, prepping the subfloor correctly, and choosing a finish that can handle frequent use. Start by assessing the existing floor condition and moisture conditions, then remove boards carefully and install new planks to the right expansion gap. This guide walks you through a practical workflow from teardown to finishing, plus common pitfalls to avoid.
If your gym gets heavy impact (dumbbells, sled pushes) or frequent rolling/dragging, the details matter—especially subfloor flatness and sealing. This is for homeowners planning a full board replacement (not just spot repairs) and want to do it methodically without surprises.
This is for homeowners replacing damaged hardwood in a home gym where equipment traffic is constant (wheels/rollers, steel plates, kettlebells dropped from waist height). If you’re dealing with localized cupping or a small patch, the workflow is similar but the scope (and risk) changes—so this post focuses on full board replacement.
Assess damage, moisture, and gym-specific wear

Yes—you should confirm how the hardwood failed and whether moisture is still active before buying materials, because the same problem will reappear after replacement. In a home gym, impact damage and subfloor moisture issues can look similar (gaps, sound changes, surface dulling), so you want to map the cause first.
According to ASTM F1869, the calcium chloride test reports moisture emission as pounds per 1,000 square feet over a 24-hour period.
According to ASTM D4442, oven-dry wood moisture content is determined by drying wood at 103 ± 2°C (217 ± 3.6°F) until constant mass, reported as a percentage.
– Check how far the problem goes (buckling, cupping, soft spots) before you buy materials. Start with the visible failures, but also inspect around them: in gyms, water and movement often “spread” beyond the first obvious wave in the plank.
– Verify the subfloor is dry and stable; if moisture is driving the damage, new hardwood will likely fail too. “Dry” should be measured (or at least strongly verified) because surface dryness can coexist with trapped moisture beneath the boards.
– Plan around gym stress points (under squat racks, treadmill zones, and where wheels/rollers travel). Heavy static loads plus rolling abrasion can expose any weak spot in flatness, adhesive bond, or finish cure.
What to look for during inspection (so you don’t misdiagnose the cause)
When hardwood replacement is planned for a home gym, the most useful “forensic” clues are:
– Pattern of movement: Random spots often suggest localized subfloor issues; broad waves can indicate moisture migration or inadequate expansion clearance.
– Sound changes during walking: Lifting/settling can reveal hollow spots, inadequate fastening, or structural movement.
– Surface wear vs. structural failure: Gym finish scratches and wear are surface-level and fixable during refinishing; widespread joint opening or plank instability signals a replacement-level problem.
From a practical standpoint, my biggest lesson (and the one I want you to learn without paying for it) is to treat every hardwood flooring replacement decision as a moisture-control project first. If you skip the moisture check, you may spend money on planks and still end up with buckling or joint separation in the first season.
Plan the materials and layout before you start
Yes—you should finalize the flooring type, installation method, plank orientation, and expansion strategy up front, because these choices dictate subfloor prep and underlayment/vapor barrier decisions. Planning also helps you reduce awkward cuts near equipment bases and keeps transitions aligned to how the gym is actually used.
Hardwood flooring performance depends on following the product’s installation system (underlayment, vapor barrier, and fastener/adhesive method) rather than mixing components from different systems.
ASTM moisture testing methods are designed to generate repeatable numeric results that can be compared against an installation requirement for wood flooring.
– Decide whether you’re replacing with engineered hardwood or solid hardwood based on your floor system and moisture risk; confirm product requirements in the manufacturer spec sheet. In a gym, HVAC cycling and seasonal humidity swings are common, and moisture tolerance is the deciding factor—not just look and cost.
– Map the plank direction and seams for the room, aiming for clean transitions and fewer awkward cuts. For rolling traffic, consistent plank direction can reduce edge-catching on the perimeter and at transitions to adjacent areas.
– Confirm installation method (nail-down/glue-down/float) because the subfloor prep and adhesive underlayment choices change. Nail-down and glue-down systems respond differently to flatness and moisture, and each has different failure modes.
Engineered vs. solid in a home gym (what actually changes)
If you’re trying to decide what to buy for a hardwood flooring replacement in a workout space, here’s a simple, decision-oriented comparison:
- Engineered hardwood
- Pros: Often specified for more environment variability when installed to its instructions; can be more stable across seasonal humidity swings when the subfloor system is correct.
- Cons: You still must meet the product’s moisture limits and follow its approved underlayment/vapor barrier system—“stability” isn’t a license to skip moisture prep.
- Solid hardwood
- Pros: Traditional nail-down feel and refinishing potential (depending on wear and plank thickness).
- Cons: Still requires strict moisture control and expansion gap compliance; gym impact and rolling abrasion can accelerate finish wear, making cure and topcoat selection critical.
Layout tips specific to gym traffic
When planning a hardwood flooring replacement for a home gym, consider these layout tactics:
– Align seams away from expected “pivot points.” For sled pushes and footwork drills, seams near high torsion areas can become weak zones faster.
– Keep transitions predictable. If the gym connects to a hallway, position the main transitions where airflow/temperature change is gradual, not right where doors slam or HVAC vents blast.
– Plan for equipment placement before fastening. Dry-fit rows around planned treadmill footprints, bench stations, and rack bases so you don’t end up with narrow slivers at the perimeter.
Remove the existing hardwood and prep the subfloor
Yes—slow, controlled teardown plus disciplined subfloor prep prevents the most common “looks fine at first, fails later” outcomes. Hardwood flooring replacement is only as good as the surface you install onto, especially under high-impact and rolling loads.
Flatness failures are a primary driver of joint stress in wood floors; when planks can’t seat properly, movement concentrates at seams and edges.
Subfloor contamination (nails/staples, adhesive residue, debris) can interrupt fastening or adhesion, creating localized hollow areas or bond failure.
– Remove boards without damaging the subfloor surface; clean off old nails, staples, adhesive residue, and debris.
– Evaluate subfloor flatness and repair high/low spots so the new planks lock together correctly. Use a straightedge and take note of repeating humps/valleys—gyms often experience uneven loads over time.
– Address squeaks and structural movement—flex can show up as joint gaps or finish failure. If you feel flex during inspection, treat it as a structural issue, not a “flooring-only” issue.
Flatness and moisture are inseparable in a gym
A gym is a worst-case environment for workmanship shortcuts: frequent temperature changes plus frequent foot traffic means you’ll see movement sooner. During teardown, prioritize:
– Fastener removal and surface cleaning (so the new hardwood seats and bonds properly).
– Moisture verification for the subfloor system (especially if buckling/cupping is present).
– Repairs to any subfloor deterioration so the replacement doesn’t span weak areas.
If your system is concrete (common in basements), plan for a moisture workflow using a standardized test method. For example, ASTM F1869’s unit format (lbs/1,000 sq ft/24 hr) is designed to produce a value you can compare against a flooring requirement—so use a method that outputs a comparable number. ASTM F1869
Install new hardwood: expansion gaps, underlayment, and fastening
Yes—you should treat installation as “system management,” not just board placement: expansion gaps, the correct underlayment/vapor barrier, and the manufacturer-required fastening/adhesive pattern are what protect the floor under gym use. For hardwood flooring replacement in a home gym, equipment stress amplifies any installation deviation.
Expansion gaps allow wood to move with seasonal humidity changes; missing or undersized gaps can lead to gapping or tenting under stress.
Moisture control systems should match the flooring manufacturer’s approved installation system; adding an unapproved vapor layer can trap moisture and increase failure risk.
ASTM moisture testing methods are used to generate repeatable results that can be compared to installation limits stated in flooring instructions.
– Follow the required expansion gap and acclimation instructions from your hardwood manufacturer (don’t guess).
– Use the specified underlayment/vapor barrier only if the flooring system calls for it; gym humidity swings can make “extra protection” worse if it traps moisture.
– Keep rows square and consistent; for impact-heavy areas, ensure fasteners/adhesion meet the manufacturer’s pattern and spacing requirements.
Expansion gap and gym perimeter geometry
Gym rooms often have unusual layouts: partial walls, equipment islands, and open-plan transitions. In a hardwood flooring replacement, the perimeter conditions matter:
– Walls aren’t always straight. Before fastening, confirm perimeter clearance paths so the expansion gap isn’t accidentally pinched by baseboard cuts or thick trim.
– Under equipment that can’t move: you still need the right clearance strategy around fixed edges (bench posts, rack columns), and you need to avoid “boxing in” the floor in a way that blocks movement.
Underlayment/vapor barrier: choose by system, not by fear
Many failures happen when homeowners “upgrade” the system. If you install an unapproved vapor barrier under hardwood, trapped moisture can create odors, adhesive issues (for glue-down systems), or mold risk in extreme cases. The safe approach is simple: follow the hardwood’s installation instructions as the governing spec.
Finish and protect the floor for gym use
Yes—durable finishing and correct cure time are the difference between a floor that looks great and a floor that survives day-one gym workouts. Hardwood flooring replacement is only half done once the boards are installed; the finish system must be selected and cured for heavy traffic and equipment loads.
Finish performance depends on correct surface prep (cleaning and sanding) and full cure time before heavy traffic.
If you load a fresh finish too early, coatings can soften, dent, or fail adhesion—especially when equipment wheels roll or plates impact the surface.
– Select a finish compatible with your hardwood type and installation method; gyms often need durable topcoats and careful cure time.
– Sand and clean thoroughly between steps; finish problems usually start with surface prep.
– Protect the floor during the break-in period: avoid heavy equipment traffic until the finish is fully cured per the product instructions.
A practical “gym protection” plan
After hardwood flooring replacement, equipment traffic is the real stress test:
– Use floor protectors under rollers and static machines (and confirm they’re appropriate for wood finishes).
– Keep dumbbells/plates on clean, non-abrasive bases if you drop or set them down.
– Avoid dragging sled runners directly on newly coated surfaces. Even if the finish looks “dry,” cure chemistry can still be developing.
What can go wrong (and how to avoid it)
Yes—most failures come from ignoring the root cause (moisture or movement), not from the visible top layer. If your hardwood flooring replacement targets the wrong problem, you’ll pay twice.
Installing over lingering moisture can cause buckling or cupping even when the new boards are correctly installed—because the driving moisture source remains.
Skipping expansion gap requirements prevents wood movement accommodation, increasing the risk of gapping or tenting after humidity swings.
– Installing over a subfloor with lingering moisture or movement: new floors can buckle, cup, or separate.
– Skipping or mis-sizing expansion gaps: seasonal movement can cause gapping or tenting.
– Using the wrong underlayment/vapor barrier: trapped moisture can lead to mold, odor, or adhesive failure.
– Rushing cure time for the finish: gym equipment loads can damage coatings before they fully harden.
Common edge cases in gyms
– Concrete slab + basement HVAC cycles: Dehumidifiers can help, but you must coordinate finish cure and airflow so you’re not inducing rapid swings right after installation.
– High-impact zones near racks: Dropped weights can turn micro-scratches into coating failures faster than normal foot traffic would.
– Wheels/rollers without protection: If equipment wheels scratch through a topcoat, the floor can require earlier-than-expected maintenance.
Verdict / tip: do it yourself if the subfloor is sound—skip if it isn’t
Do it yourself only if you can verify that the subfloor is flat, dry, and stable—otherwise, hire out. If your hardwood flooring replacement is over a subfloor with active moisture issues, structural movement, or major flatness defects, the replacement won’t solve the root cause and you may repeat the failure.
If your existing damage is limited and you can confirm the subfloor is flat, dry, and stable, replacing hardwood in a home gym is a manageable DIY project with careful planning. If you suspect ongoing moisture, major subfloor damage, or structural movement, consider hiring a flooring contractor first—replacing the top layer won’t fix the root cause.
When a contractor is the smarter move
– You can’t obtain repeatable moisture readings that align with your flooring requirements.
– The subfloor needs significant repairs (patching, leveling, or re-structuring).
– The installation requires an adhesive/vapor system with strict moisture and bonding conditions.
Quick checklist before you replace
– Confirm moisture condition and subfloor stability:
– Choose hardwood type + installation method from manufacturer specs:
– Verify expansion gap and acclimation requirements from the manufacturer:
– Prep subfloor flatness and repair defects before install
– Plan protection for gym traffic during finish cure time
Moisture Tests Used Before Hardwood Flooring Installation (Concrete vs. Wood)
| # | Moisture test method | Typical output | Time basis / measurement detail | Usefulness for hardwood replacement decisions |
|---|---|---|---|---|
| 1 | In-situ RH probe testing (ASTM F2170) | % Relative Humidity at slab depth | Measured in concrete after probe installation | ★★★★★ |
| 2 | Calcium chloride test (ASTM F1869) | Moisture vapor emission rate | Reported as lbs/1,000 sq ft/24 hr | ★★★★★ |
| 3 | Oven-dry wood moisture (ASTM D4442) | Wood moisture content (%MC) | Oven at 103 ± 2°C until constant mass | ★★★★☆ |
| 4 | Wood moisture meter calibration (ASTM D4444) | Meter readings calibrated to species/conditions | Used to improve measurement accuracy | ★★★☆☆ |
| 5 | Pin-type electrical resistance meters | Estimated %MC based on calibration curves | Fast spot checks; readings vary by species/temp | ★★☆☆☆ |
| 6 | Pinless dielectric moisture meters | Estimated moisture by dielectric response | Surface-weighted; needs baseline for context | ★★☆☆☆ |
| 7 | Indoor RH monitoring (gym HVAC control) | Relative humidity (%RH) in the air | Tracked over time; does not directly measure slab emission | ★☆☆☆☆ |
Sources
– ASTM F2170 — Standard Test Method for Determining Relative Humidity in Concrete Floor Slabs Using In Situ Probes (used to describe the RH probe approach and %RH output).
– ASTM F1869 — Standard Test Method for Measuring Moisture Vapor Emission Rate of Concrete Subfloor Using Anhydrous Calcium Chloride (used to describe lbs/1,000 sq ft/24 hr output).
– ASTM D4442 — Standard Test Methods for Direct Moisture Content Measurement of Wood and Wood-Based Materials (used to describe oven-dry method basis).
– ASTM D4444 — Standard Test Methods for Use and Calibration of Hand-Held Moisture Meters (used to support the role of calibration for meter accuracy).
Replacing hardwood floors in a home gym is doable, but only when you treat moisture control, subfloor prep, and installation system compliance as the primary work—not the board layout alone. If you verify the subfloor is flat and dry, follow your product’s expansion gap and underlayment/vapor barrier requirements, and protect the floor during full finish cure, you’ll start with a durable foundation built for impact and rolling traffic. If moisture is still active or the subfloor is unstable, prioritize getting the cause corrected first—because a top-layer replacement won’t stop the next failure wave.
Frequently Asked Questions
What is the best way to replace hardwood floors in a home gym?
Start by assessing how your gym use affects the existing hardwood, including heavy equipment weight, moisture exposure, and dropped weights. For a durable result, choose an appropriate hardwood thickness and finish designed for high-traffic and resistance to dents and scuffs. Remove the old flooring carefully, ensure the subfloor is level and structurally sound, then install new planks with proper acclimation and use gym-friendly finishes for long-term performance.
How do I prepare my subfloor before installing new hardwood in a home gym?
Begin by removing the old flooring and checking the subfloor for squeaks, rot, and any moisture issues that could warp new hardwood. Level the surface using appropriate subfloor patching or sanding so your hardwood replacement won’t flex or separate. If moisture is a concern—especially if the home gym is over a slab—install a suitable moisture barrier and follow manufacturer requirements for underlayment and glue-down or nail-down installation.
Which installation method is better for a home gym: nail-down, glue-down, or floating engineered hardwood?
The “best” choice depends on your subfloor type, moisture levels, and how stable your gym environment is. Nail-down hardwood works well on properly prepared wood subfloors and offers strong stability, while glue-down can be effective when you need excellent contact and sound dampening. Floating engineered hardwood is often chosen for faster installs and for situations where slight subfloor movement is expected, but it still requires the right underlayment and careful expansion-gap planning.
Why do hardwood floors get damaged in home gyms, and how can I prevent it after replacement?
Hardwood replacement in a gym often fails early when heavy equipment causes dents, when abrasive grit is tracked in, and when moisture from sweat, spills, or wet shoes isn’t controlled. Use protective flooring mats under power racks, weight benches, and barbell areas, and consider adding area rugs in high-movement zones. Choose a tougher finish—such as a polyurethane designed for floors—or consider a wear-resistant topcoat to reduce scratches and scuffs.
How do I choose the right hardwood type and finish for a home gym?
Look for hardwood options known for hardness and dent resistance, such as hickory or hard maple, and consider engineered hardwood if you want added stability in fluctuating humidity. For finishes, prioritize products labeled for high-traffic floors and use a robust topcoat system that can handle gym wear. Confirm compatibility with your installation method and maintenance routine (including cleaning products) so your hardwood floors in the home gym stay attractive and durable after replacement.
📅 Last Updated: October 17, 2026 | Topic: How to replace hardwood floors in a home gym? | Content verified for accuracy and freshness.
References
- Wood flooring
- https://www.fpl.fs.usda.gov/documnts/fplgtr/fplgtr190.pdf
- Silica, Crystalline – Overview | Occupational Safety and Health Administration
- Silica and Worker Health | Silica | CDC
- https://www.cdc.gov/niosh/topics/wooddust/
- Lead Renovation, Repair and Painting Program | US EPA
- https://scholar.google.com/scholar?q=hardwood+floor+installation+subfloor+preparation+moisture+acclimation Google Scholar
- https://scholar.google.com/scholar?q=wood+flooring+replacement+procedures+vapor+barrier+humidity Google Scholar
- https://scholar.google.com/scholar?q=home+gym+hardwood+flooring+impact+sound+reduction+underlayment Google Scholar