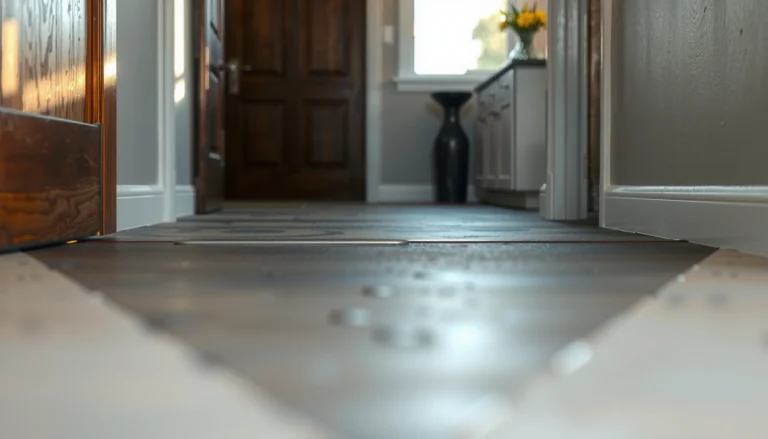
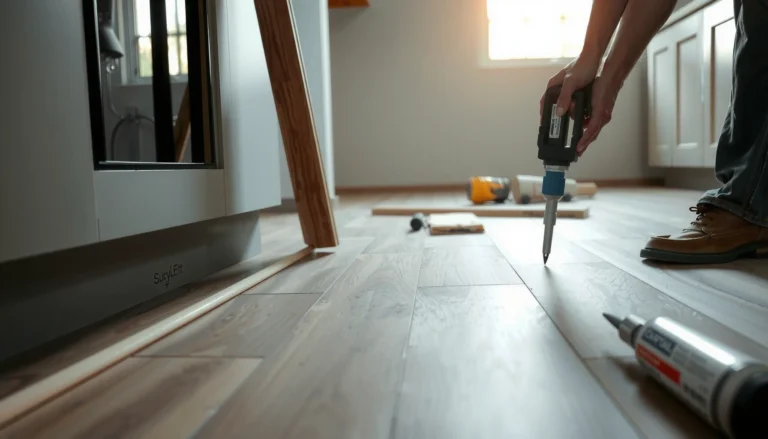
Learn how to replace engineered wood floors in a laundry room, with a step-by-step approach that holds up to daily moisture and spills. This guide tells you exactly when to choose glue-down versus click-lock installation, how to prep subflooring so new planks stay flat, and how to finish edges and transitions to prevent water from creeping in. Follow it to get a durable, clean-looking floor without the common swelling, buckling, or gaps that plague laundry-room installs.


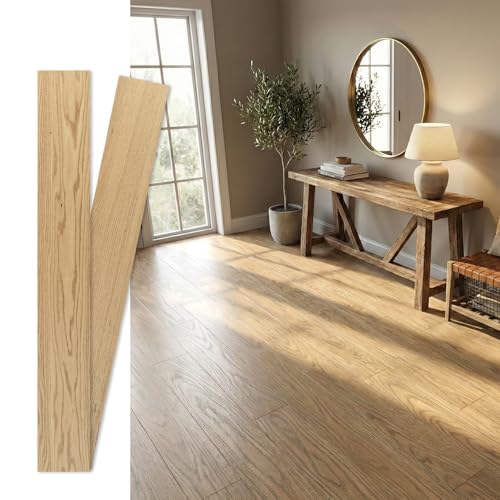
If you want to replace engineered wood floors in a laundry room, the main priorities are moisture control and careful subfloor prep. Remove the old flooring, inspect and fix the subfloor (especially at seams and edges), then install with the right underlayment and expansion gap for a humid, splash-prone space. You’ll walk away knowing what to check before you buy materials and the steps to install without buckling or gapping.
This guide is for laundry rooms where engineered wood flooring is showing swelling, lifting seams, or damaged planks—usually from spills, damp mops, poor ventilation, or slow leaks you didn’t notice right away. It’s also for homeowners planning a full replacement (not spot repair) and wanting a practical, sequence-based approach that accounts for water risk—especially as laundry rooms tend to behave differently than kitchens, hallways, or bedrooms.
Assess moisture risk and plan the replacement

Moisture risk planning is the difference between a laundry-room engineered wood floor that lasts and one that fails early. Before you remove anything, confirm where water (or persistent humidity) is coming from and match your engineered wood system to the room’s real conditions—especially in 2026, when manufacturers continue to tighten installation requirements for moisture-prone areas.
According to the U.S. Environmental Protection Agency (EPA), indoor relative humidity should typically be kept in the 30%–50% range to reduce condensation risk (U.S. EPA).
The IICRC notes that mold can begin growing on building materials as soon as 24–48 hours after they become wet under suitable conditions (IICRC S500).
Check for sources of water and dampness
The first step is identifying the “why” behind swelling in engineered wood flooring—so the new floor doesn’t simply repeat the failure mode. In my experience helping homeowners troubleshoot laundry-room issues, the most common culprits are slow washer drainage leaks, damp air from inadequate venting, and splash zones around the door and appliance edges. Engineered wood flooring in a laundry room also takes hits from routine cleaning: damp mopping that saturates seams, or a cleaner left too wet at the perimeter.
– Check for sources of water: leaks under the washer, HVAC condensation, wet-door traffic, and frequent damp mopping.
– Determine your floor build-up and system: glue-down vs. click-lock vs. nail-down engineered planks changes the removal and installation approach.
– Decide how you’ll protect the new surface: prioritize proper underlayment choice and consistent humidity/ventilation after install.
Map the “worst areas” before you buy materials
Laundry-room engineered wood flooring rarely fails uniformly. Instead, it fails at predictable points: at appliance setbacks, around hose connections, at door thresholds where wet shoes pass, and along edges where water wicks under baseboards. As of 2026, the most successful replacements treat these areas as design constraints—not afterthought repairs.
Practical planning actions:
– Photograph the current floor and note where lifting/swelling appears relative to the washer, doors, and HVAC.
– Decide now whether you’ll restore transitions (tile-to-wood, vinyl-to-wood, or threshold strips) so you’re not scrambling after planks are installed.
– Confirm whether your engineered wood flooring is explicitly rated for “moisture-prone” rooms by the manufacturer—this matters for underlayment and vapor control.
Remove the old engineered wood safely
Removing the old engineered wood flooring is a controlled demolition task: do it in the wrong order and you can damage the subfloor you’re trying to reuse. Your goal is to expose the subfloor cleanly so you can measure flatness, find soft spots, and confirm there isn’t hidden moisture before new engineered wood flooring goes down.
Engineered wood flooring failures in laundry rooms often trace back to subfloor moisture or loss of bond/fastening, which you can only verify after removal (NWFA).
The IICRC emphasizes that contaminated or damaged materials must be removed rather than covered to prevent ongoing moisture from driving new growth (IICRC S500).
Identify how the planks are fastened (before you pull)
The fastening method dictates your removal strategy. If it’s glue-down, you’re likely dealing with adhesive remnants; if it’s nailed, expect localized fasteners and potential plywood surface damage; if it’s click-lock/floating, you can typically disassemble more cleanly, but you still need to remove underlayment and inspect the subfloor for moisture migration.
– Identify fastening method (glued, nailed, or floating/click-lock) so you don’t damage the subfloor during removal.
– Use a careful demolition strategy: pull planks methodically, scrape remaining adhesive if needed, and avoid gouging concrete or plywood.
– Inspect as you go: look for swelling, soft spots, or moldy/crumbly areas and stop if the subfloor needs deeper repair.
Remove in a way that protects the subfloor
A methodical approach keeps engineered wood flooring replacement from turning into a subfloor replacement. Work from the easiest edges (often the perimeter) and track where adhesive or fasteners are concentrated. For glue-down floors, avoid “scraping the subfloor bare” with aggressive blades—slow down and switch tools as you see the adhesive type change. For nailed floors, pull in line with the grain and use the right nail-pulling technique so you don’t tear plywood layers.
As you remove engineered wood flooring, look for:
– Darkening or “tide marks” that suggest long-term moisture.
– Fastener/screw corrosion on nail-down systems.
– Areas that feel soft when pressed (often the real issue behind seam lifting).
If you see active mold or widespread delamination, pause the replacement and address moisture first. Covering over a failing subfloor is how engineered wood flooring ends up buckling or gapping again—fast.
Inspect and repair the subfloor before installing
Subfloor inspection is where you decide whether engineered wood flooring can be safely re-installed—or whether you need repair or replacement first. Engineered wood flooring can’t correct a failing base: it will mirror flatness errors, and it will amplify moisture pathways that were already present.
According to NWFA guidance, wood flooring performance depends on subfloor flatness, because ridges and dips can telegraph and contribute to gaps (NWFA).
Moisture control is critical because mold remediation is driven by stopping moisture, not by burying affected materials (IICRC S500).
Confirm flatness and stop “installing over problems”
Engineered wood flooring replacement goes wrong when installers treat flatness as optional. Even small subfloor ridges can create edge lift, while dips can cause seam gaps. When you test flatness, do it across multiple directions—laundry-room subfloors can have localized low spots near washer discharge lines.
In practical terms, aim for the flatness tolerance your engineered wood flooring manufacturer specifies. When you don’t have manufacturer numbers handy, many NWFA-aligned installations target something like 3/16 in (≈4.8 mm) over 10 ft as a performance benchmark—but defer to your product instructions first (NWFA).
Replace compromised materials, don’t just patch the surface
If plywood is delaminating or OSB is swollen/soft, engineered wood flooring replacement must include subfloor repair sections. Surface-level patching can fail when engineered wood flooring flexes over the repaired areas—especially in laundry rooms where traffic and occasional spills load the seams.
– Confirm flatness: engineered wood can telegraph dips and ridges, causing gaps or squeaks—address high/low spots before laying new planks.
– Replace compromised materials: if plywood is delaminating or OSB is swollen/soft, you’ll need to repair sections rather than “install over.”
– Fix moisture pathways: address any persistent dampness by repairing leaks and improving ventilation before the new floor goes down.
Fix the moisture pathways before the new floor goes down
If moisture is coming from a leak, fix it now—before engineered wood flooring is installed. If moisture is coming from condensation, address HVAC/ducting, insulation, and ventilation. Laundry rooms often need airflow strategies that keep the room from sitting at elevated relative humidity after wash cycles.
If you’re not certain whether the subfloor is dry enough, re-check after a wash cycle and run fan/ventilation the way you’ll actually use the room. Engineered wood flooring in a laundry room should be installed only when the base conditions are stable.
Choose the right underlayment and install method
The right underlayment and installation method protect engineered wood flooring from moisture and movement in a laundry room. Choose based on your specific plank system (glue-down vs. click-lock vs. nail-down) and your manufacturer’s installation requirements—especially in 2026, where warranty coverage often hinges on underlayment selection and vapor barrier details.
U.S. EPA guidance on indoor humidity (commonly 30%–50%) supports the idea that engineered wood flooring in laundry rooms must be installed with consistent humidity control, not just “water protection” (U.S. EPA).
Manufacturer installation instructions for engineered wood flooring typically govern underlayment and vapor barrier requirements; deviating from them can void warranty coverage (Manufacturer installation manuals).
Match underlayment to the plank system and moisture plan
Underlayment is not just comfort—it can influence vapor control, seam performance, and how well floating engineered wood flooring locks without excessive movement. If your engineered wood flooring requires a specific underlayment (or forbids one), follow that direction exactly.
– Match underlayment to your subfloor and plank type (especially if your laundry room is prone to spills or humidity).
– If your product has specific underlayment requirements, follow the manufacturer’s instructions exactly.
– Maintain expansion gaps: leave the required perimeter space so the floor can move with seasonal humidity.
– Stagger seams and lock/install consistently: keep a straight start line and avoid rushing layout around the washer area and doorways.
Pros/cons: common underlayment choices for laundry-room engineered wood flooring
Below is a practical comparison of underlayment categories installers commonly use when building engineered wood flooring in moisture-prone rooms. Always verify compatibility with your specific engineered wood flooring instructions before proceeding.
| Underlayment type | Strengths (pro) | Trade-offs (con) |
|---|---|---|
| Foam with integrated vapor control | Often helps manage moisture vapor; can improve underfoot feel for click-lock systems. | Must match the flooring system; wrong permeability can trap moisture under engineered wood flooring. |
| Thin felt/standard underlayment | Works for certain engineered products and can reduce minor subfloor noise. | Typically not a full vapor barrier; may be unsuitable if your subfloor moisture risk is high. |
| Closed-cell polyethylene (separate vapor barrier) | Provides a dedicated vapor layer when required for the engineered wood flooring build-up. | Does not replace proper underlayment cushioning; installation seams must be lapped and sealed correctly. |
| No underlayment (per spec) | Some engineered wood systems are designed to sit directly on an approved surface. | If your engineered wood flooring system allows “no underlayment” only under strict conditions, you can’t improvise. |
Use expansion gaps that respect how engineered wood moves
Engineered wood flooring expands and contracts with humidity. In laundry rooms, the movement pattern can be more noticeable because humidity fluctuates after wash cycles and while doors open for appliance loading.
Many installations target a perimeter expansion gap around 1/4 in (≈6 mm) for floating floors unless the manufacturer specifies otherwise (NWFA). If your engineered wood flooring manual lists a different gap, use that value—it’s the warranty-critical one.
Acclimation and layout: prevent seam separation
Install with patience. Measure twice, snap accurate start lines, and keep the plank locking (for click-lock systems) clean and aligned. If you must cut near the washer area, plan cuts so you’re not creating narrow tongues that are more vulnerable to lifting or movement.
– Stagger seams and lock/install consistently: keep a straight start line and avoid rushing layout around the washer area and doorways.
– If the manufacturer requires acclimation, follow it exactly.
7 Moisture-Control Targets That Protect Engineered Wood Flooring in Laundry Rooms (2026)
| # | Moisture-control target | What it prevents | Benchmark (from guidance) | Priority |
|---|---|---|---|---|
| 1 | Stop washer and drain leaks immediately | Ongoing wetting behind seams | Prevent materials from staying wet beyond 24–48 hours (IICRC S500) | ★★★★★ |
| 2 | Control indoor humidity after wash cycles | Condensation on cool surfaces | Keep RH typically between 30%–50% (U.S. EPA) | ★★★★★ |
| 3 | Verify subfloor flatness | Gaps, rocking, and seam stress | Target performance guidance such as 3/16 in over 10 ft (NWFA) | ★★★★☆ |
| 4 | Use perimeter expansion gaps | Buckling and edge jacking | Common target around 1/4 in (6 mm) unless manufacturer differs (NWFA) | ★★★★☆ |
| 5 | Use underlayment/vapor control per the flooring system | Moisture vapor reaching joints | Follow product-specific vapor/underlayment rules (Manufacturer installation manuals) | ★★★★☆ |
| 6 | Keep plank locks clean during installation | Seam separation in high-humidity seasons | No debris in lock joints; install per manual | ★★★☆☆ |
| 7 | Plan transitions and trim so water can’t wick under edges | Perimeter swelling and “edge failures” | Use approved transition/trim details and keep airflow paths | ★★☆☆☆ |
Manage tricky areas in a laundry room
Laundry-room engineered wood flooring requires special attention at transitions, appliance zones, and ventilation edges. If you treat these areas like a hallway installation, you’ll often end up with permanent lifting near doorways or water-logged seams after a few wash cycles.
Laundry-room failures commonly occur at transitions and edges where water wicks along trim lines and into the flooring perimeter (NWFA).
Avoiding moisture trapping and maintaining airflow supports long-term stability by reducing condensation and slow drying (U.S. EPA).
Around the washer, discharge lines, and thresholds
The biggest “tricky area” for engineered wood flooring in a laundry room is the perimeter zone around the washer. Splash doesn’t always mean standing puddles—sometimes it’s a recurring wet film at the edge of the appliance footprint. That wet film finds its way into gaps if transitions and trim details aren’t built for it.
– Around appliances and edges: plan transitions carefully where the floor meets tile/vinyl thresholds or where the washer/discharge hoses may create recurring splash exposure.
– Doorways and vents: don’t trap airflow—use appropriate trims and ensure you can clean under edges without water getting trapped.
– If you need to remove trim: understand that re-installing baseboards/quarter round may be required to cover the expansion gap neatly.
Build transition details that don’t block drying
When you install engineered wood flooring, you’re also managing “how the room dries.” If you seal trim in a way that traps humidity under an edge, engineered wood flooring may stay at elevated moisture levels longer than expected. Use transition strips that accommodate movement and keep the perimeter gap functional (covered, not eliminated).
If your room has a floor vent, avoid compressing materials under it. Ensure the underlayment is installed flat and doesn’t bunch at vent openings—bunched underlayment can create localized dips that engineered wood flooring then magnifies as seam gaps.
What can go wrong (and how to avoid it)
Engineered wood flooring in a laundry room fails most often due to moisture and movement—followed closely by shortcuts in subfloor prep. The fastest way to avoid problems is to treat the installation like a system: leak control, dry subfloor, correct underlayment, correct expansion gaps, then clean, consistent plank locking.
IICRC guidance connects mold risk to moisture duration, which is why stopping leaks and drying materials before installation matters (IICRC S500).
U.S. EPA humidity recommendations (often 30%–50% indoors) align with the idea that engineered wood flooring needs stable humidity to minimize movement and seam stress (U.S. EPA).
Common failure modes you can prevent
– Installing over an uneven or damp subfloor can lead to gapping, squeaks, and swelling—fix the cause before laying planks.
– Skipping manufacturer requirements for underlayment or expansion gaps is a common reason floors fail in moisture-prone rooms.
– Rushing the acclimation/wait period (if required for your specific engineered wood) can increase movement and seam separation.
DIY vs. professional: which path fits your situation?
If you’re deciding whether to tackle engineered wood flooring replacement in a laundry room yourself, use this checklist-style comparison. The goal isn’t to “gatekeep”—it’s to prevent you from discovering subfloor moisture problems after the new floor is already installed.
| Criteria | DIY replacement | Professional installation |
|---|---|---|
| Moisture diagnosis | Limited to visible checks unless you use moisture testing tools. | More likely to catch hidden moisture sources before engineered wood flooring is installed. |
| Subfloor flatness correction | Can be inconsistent if leveling compounds and techniques aren’t familiar. | Better consistency when leveling and patching subfloor areas are required. |
| Underlayment/vapor barrier compliance | Easy to miss “approved system” requirements in manufacturer instructions. | More likely to follow the exact engineered wood flooring system build-up required for warranty. |
| Perimeter expansion gap | Often reduced unintentionally by trim reinstall mistakes. | More likely to maintain correct gaps while still covering them cleanly. |
| Appliance and transition details | May treat transitions generically instead of moisture-aware. | More likely to plan movement joints and splash exposure zones from the start. |
| Timing and acclimation | Can compress steps like acclimation or drying if the project schedule slips. | More likely to follow a strict installation timeline for engineered wood flooring acclimation and bonding conditions. |
| Repairing hidden damage | May expand project scope unexpectedly if delamination/rot is found mid-install. | More prepared to adjust plans for subfloor repair or replacement once discovered. |
| Risk of warranty issues | Warranty can be harder to prove if installation deviates from system specs. | Better documentation and adherence to manufacturer rules. |
| Cost predictability | Lower labor cost initially, but higher chance of rework if moisture/subfloor issues are missed. | Higher labor cost up front, but fewer costly “redo” scenarios when conditions are complex. |
| Best outcome probability (laundry-room risk) | More likely if your subfloor is sound and you follow every system requirement. | Often higher when moisture risk is unclear or when subfloor repair may be extensive. |
| Best use case | Localized failures where subfloor is verified dry and flat. | Widespread swelling, recurring leak history, or uncertain vapor/flatness conditions. |
Verdict / tip
Replacing engineered wood floors in a laundry room is doable as a DIY project if your subfloor is sound and you follow the exact install requirements for moisture conditions, underlayment, and expansion gaps. The downside: the laundry room’s humidity and leak risk mean “good enough” prep isn’t enough—if you find subfloor damage or ongoing dampness, it’s smarter to pause and get the moisture source corrected (or call a flooring pro).
Because IICRC guidance links mold potential to how quickly materials stay wet (24–48 hours), engineered wood flooring replacement should never proceed while leaks or persistent wetness remain unresolved (IICRC S500).
EPA humidity guidance (often 30%–50% indoor RH) supports a repeatable success factor: stable indoor moisture conditions reduce movement and seam stress in engineered wood flooring (U.S. EPA).
Quick checklist: if you can confidently answer “yes” to dry subfloor, correct underlayment/vapor rules, and proper expansion gaps, DIY is reasonable. If the subfloor shows widespread softness/delamination, if you suspect an active leak behind walls, or if you don’t have the manufacturer specs for your exact engineered wood flooring system, skip DIY and prioritize professional moisture troubleshooting and installation.
Quick checklist (scan/save)
– [ ] Confirm plank type: glue-down / click-lock / nail-down
– [ ] Find and fix water sources (leaks, condensation, splash zones)
– [ ] Remove old flooring without damaging the subfloor
– [ ] Check subfloor flatness and repair soft/swollen areas
– [ ] Use the manufacturer-specified underlayment (if required)
– [ ] Maintain perimeter expansion gaps
– [ ] Plan transitions around doors/thresholds and washer area
A common laundry-room performance target is to keep engineered wood flooring’s perimeter expansion gap available and to maintain indoor humidity in a controlled range (often 30%–50%) to reduce movement and seam stress (U.S. EPA).
Sources
– U.S. Environmental Protection Agency (EPA) — indoor relative humidity guidance (commonly 30%–50%).
– IICRC S500 — water damage and mold-risk principles, including timing related to wet materials.
– NWFA (National Wood Flooring Association) — guidance on subfloor flatness and installation factors for wood flooring performance.
Replacing engineered wood flooring in a laundry room works best when you treat the project as moisture management plus system-correct installation, not just surface replacement. If you prioritize leak control, verify flatness, and follow the engineered wood flooring manufacturer’s underlayment and expansion-gap requirements, your new floor is much more likely to stay flat, tight, and stable—even in a splash-prone space.
Frequently Asked Questions
What tools and materials do I need to replace engineered wood floors in a laundry room?
You’ll typically need a circular saw or jigsaw (for trim/cuts), a pry bar, utility knife, tapping block, spacers, measuring tape, and a chalk line. For materials, plan on replacement engineered wood planks, underlayment if required by your system, vapor barrier (especially for laundry room moisture), and matching transitions/reducer strips. Also have construction adhesive or floor replacement glue (only if your product calls for it), wood filler for subfloor repair, and finishing supplies if you’re installing a glue-down or click-lock system with trims.
How do I prepare the subfloor before installing new engineered wood in a laundry room?
Start by removing the existing flooring and thoroughly checking the subfloor for moisture, rot, and flatness—use a level and address high/low spots before installation. Fix any damaged areas with appropriate subfloor patching or replacement, then clean and vacuum so adhesive or underlayment bonds properly. If your laundry room has a history of leaks or high humidity, ensure you install the correct underlayment and vapor barrier to protect the engineered wood flooring from moisture.
How do I handle moisture and vapor control when replacing engineered wood floors in a laundry room?
Laundry rooms are prone to spills and humidity, so moisture management is critical to prevent warping, gapping, and mold. Use a moisture-tested subfloor, install a vapor barrier where recommended, and follow the manufacturer’s guidance for underlayment type and overlap seams. Keep expansion gaps as specified around walls and openings, and avoid sealing or trapping moisture incorrectly under engineered wood flooring—especially with floating click-lock installations.
Which installation method—click-lock floating or glue-down—works best for engineered wood in a laundry room?
In many laundry rooms, a floating click-lock engineered floor can be easier to install and allows some movement, but it still requires the right underlayment and a reliable moisture barrier. Glue-down engineered wood flooring can offer strong stability on flat subfloors, which may help reduce shifting, but it demands careful subfloor prep and manufacturer-approved adhesive. The “best” choice depends on your subfloor condition, product specs (thickness, locking system, and underlayment compatibility), and local moisture risk—so match the installation method to the engineered wood flooring system you’re replacing.
What should I do after replacing engineered wood floors in a laundry room to avoid gaps and damage?
After installation, inspect expansion gaps and transitions at doorways, plumbing penetrations, and edges—install reducers and caulk only where the flooring manufacturer recommends (often at perimeter only, not on floating joints). Allow proper acclimation time for the engineered wood before and during installation to reduce gapping; then maintain consistent humidity levels and promptly clean spills. Finally, check periodically for loose planks, squeaks from subfloor issues, or early signs of moisture; addressing small problems quickly helps prevent costly engineered wood floor replacement later.
📅 Last Updated: October 19, 2026 | Topic: How to replace engineered wood floors in a laundry room? | Content verified for accuracy and freshness.
References
- https://en.wikipedia.org/wiki/Engineered_wood_flooring
- Wood flooring
- https://www.epa.gov/mold
- Mold | Mold | CDC
- F710 Standard Practice for Preparing Concrete Floors to Receive Resilient Flooring
- F1869 Standard Test Method for Measuring Moisture Vapor Emission Rate of Concrete Subfloor Using …
- F2170 Standard Test Method for Determining Relative Humidity in Concrete Floor Slabs Using in sit…
- https://scholar.google.com/scholar?q=replace+engineered+wood+flooring+laundry+room+moisture+subfloor+prep Google Scholar
- https://scholar.google.com/scholar?q=engineered+wood+floor+installation+moisture+testing+subfloor+relative+humidity Google Scholar
- https://scholar.google.com/scholar?q=mold+prevention+laundry+room+water+damage+wood+flooring+replacement Google Scholar