


Learn how to install around stairs kitchen floors with a step-by-step method that delivers a tight fit, clean edges, and safe transitions every time. If your goal is a seamless floor finish that works around stair corners and thresholds, this guide shows the exact order of steps—from measuring and underlayment prep to trimming, fastening, and finishing. Follow it correctly and you’ll avoid gaps, misaligned planks, and costly redo work.




If you’re installing kitchen flooring around stairs, the cleanest approach is to plan the layout first, then cut consistent subfloor transitions and use proper trim/molding for the edges. Start by measuring stair rise/run and door thresholds, dry-fit planks or sheets, and leave the correct expansion gap at every wall and fixed surface.
This guide is for homeowners, DIYers, and installers working around stair landings or steps in a kitchen where the floor path changes direction. It’s especially relevant for laminate, vinyl plank/tiles, engineered wood, or LVP where continuity and edge finishing matter, because stair-zone detailing (treads vs. risers, noses, and transitions) is where most visible mistakes happen.
Measure the stair layout before you cut
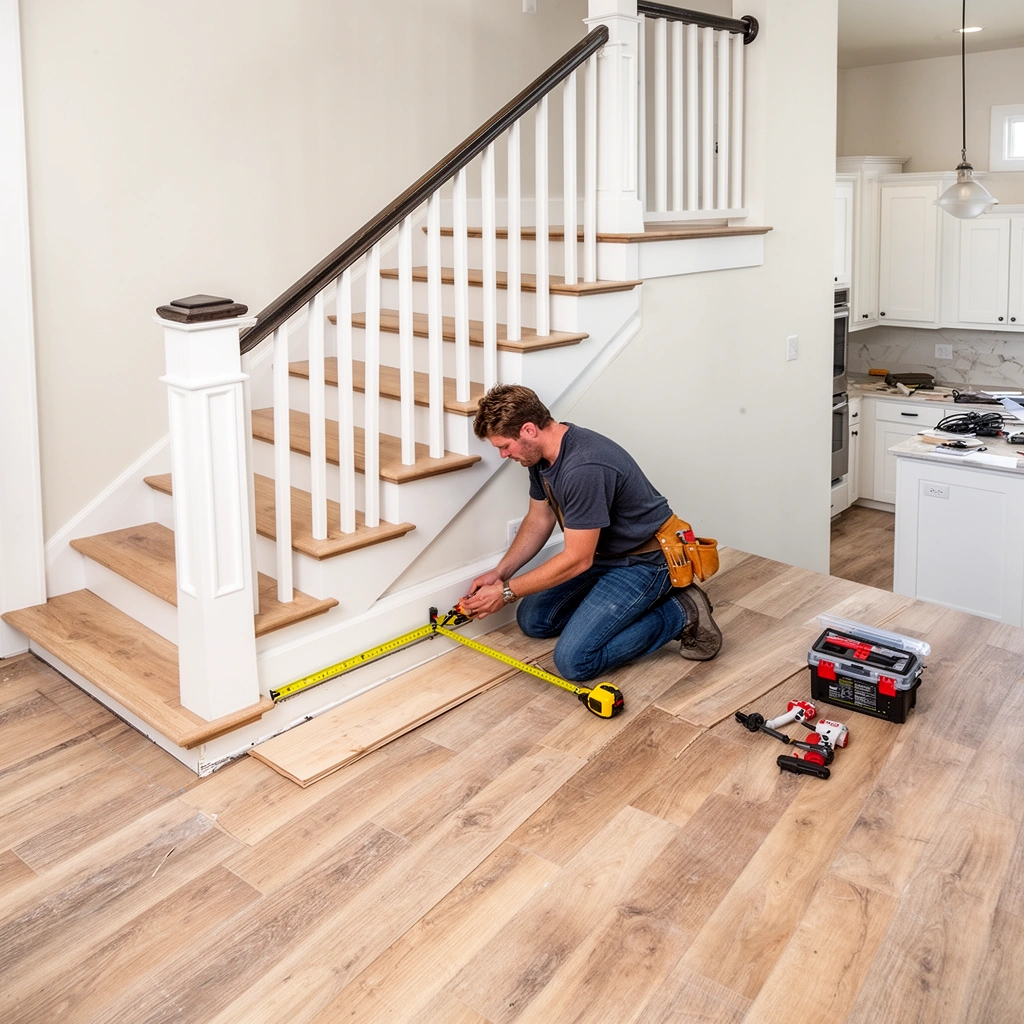
Measure first so your cuts follow the actual stair geometry and your floor transition lines land exactly where they should. This prevents the two most common failure modes—binding at locks/edges and crooked seam lines—right at the high-traffic stair zone.
Before you buy blade types, ordering underlayment, or committing to any adhesive, map the path the flooring must follow through the stair change in direction. I’ve found that the fastest way to avoid “rework loops” is to treat the stair area like a small remodeling project: you’re building a layout plan that includes tolerances, not just cutting shapes.
According to typical floating-floor practices, you must account for expansion by leaving a manufacturer-required gap at walls and fixed objects so the floor can move seasonally (see flooring manufacturer installation instructions).
A stair landing is a separate geometry zone; layout changes that work on a straight run can fail when the floor reverses direction at the landing (see subfloor and installation guidance from your flooring manufacturer).
To do a stair-accurate layout, start by measuring these items separately and writing them down in a simple “stair map”:
– Stair tread width (the depth of the horizontal surface you walk on).
– Stair rise height (vertical height of each step).
– Number of steps and the landing length/width the floor needs to cover.
– Run path continuity: where the flooring enters the stair zone, turns at the landing, and exits back into the kitchen.
– Door thresholds and casing points: mark where flooring changes direction *and* where a door jamb or threshold expects a clean stop line.
Next, identify floor height changes. Flooring height changes can come from:
– Underlayment differences (some areas get underlayment, some don’t, depending on product rules)
– Subfloor layers that vary near stairs
– Trim or transition pieces that add thickness
Then calculate your cut allowance for the full build-up:
– Flooring thickness
– Plus underlayment thickness (only if your product allows it for your stair-zone method)
– Plus any transition/trim height needed for a flush look
If you do this math correctly, you prevent the visible “step” where two boards meet—especially noticeable at stair noses and landing boundaries.
Choose the right method for the stair edge details
Choose your stair edge strategy before cutting, because it determines where the “finished face” of the flooring actually ends. The right method is the one that matches your product rules (floating click-lock vs. glued down) and your desired finish at the tread edge.
Stair detailing is not just cosmetic: it changes how the flooring edge is supported and how wear concentrates where feet repeatedly land. There are two common visual approaches—wrapping to the stair edge with trim, or using transitions to define an intentional boundary.
Manufacturer instructions govern whether a floating click-lock floor can be stopped at stair edges or must be finished using specific trim systems (confirm in your product’s installation guide).
Proper stair-nose/edge trim coverage reduces exposed cut-edge wear at high-footfall areas (follow compatible trim recommendations in your flooring/trim documentation).
When you choose a method, explicitly plan:
1. Tread vs. riser coverage
– Many installs cover the horizontal tread surface and terminate at the vertical riser face using trim, rather than trying to keep the floor material perfectly continuous on vertical planes.
2. Where the floor ends
– Some systems look best with a straight termination line covered by a stair nose or reducer.
3. Nosing strategy
– A stair nose trim (stair nose/edge trim piece) can cover the cut end for a cleaner, more protected edge.
4. Click-lock behavior near vertical transitions
– If your flooring is click-lock, check whether planks can stop near vertical surfaces, or if you need a specific transition detail so locks don’t get stressed.
Visual decision logic (fast)
If your goal is “continuous look,” you still typically need an edge finish. If your goal is “maximum durability,” you typically prioritize edge protection (stair nose + proper termination).
Prep the subfloor and underlayment around stairs
Prep determines whether your seams stay tight and your floor lies flat—especially over stair landings where planes can shift. Make the stair-zone subfloor flat and stable before installing any planks or sheets.
The stair area is unforgiving: click-lock floors (and even glued-down types) telegraph subfloor unevenness quickly. On floating installations, unevenness can cause gaps at seams, movement noises, and premature edge wear—problems that are hard to “fix later” once trim is installed.
Floating floors require a sound, flat substrate; significant unevenness can prevent locking joints from staying engaged (see flatness/substrate requirements in the flooring manufacturer’s instructions).
Loose or squeaky subfloor sections should be corrected before installation because movement transfers into the flooring joints and fasteners/locks (confirm approved repair methods in your subfloor guidance).
Do these prep steps in the stair zone:
– Check flatness along the landing and within the stair-run path (not just the main kitchen area).
– Remove protrusions (screws, tack points, debris) that can create pressure points near stair edges.
– Address squeaks and looseness first—tighten, shim, or re-screw as required.
– Plan underlayment usage carefully:
– Some products allow underlayment broadly; others limit it by type, location, or moisture conditions.
– If your flooring uses an attached pad, adding a second underlayment may violate manufacturer limits.
A practical workflow:
1. Dry-fit a short starter run through the stair zone outline.
2. Mark where the floor would land relative to each tread edge.
3. Confirm the subfloor supports the board ends and that the leveling path doesn’t “dip” right where the floor terminates at trim.
Cut, fit, and manage expansion gaps at every wall and fixed point
Manage expansion gaps early so your stair-zone floor can move without pushing against walls or fixed cabinetry. This is the single most common reason floors buckle near kitchen openings and stair boundaries.
Even when your cuts are perfect, flooring is a living system: temperature and humidity change material dimensions. Stair zones often amplify the effect because the path has corners, transitions, and frequent traffic load.
Manufacturers typically require leaving an expansion gap at all walls and fixed vertical surfaces for floating installations (see your flooring product’s expansion-gap specification).
To keep seams aligned, many installers plan a consistent layout strategy across each stair face so cut ends fall under the same trim system (follow manufacturer transition/finishing instructions).
Key rules to follow while cutting and fitting:
– Leave the manufacturer-required expansion gap at:
– Walls
– Posts
– Cabinet toe-kicks (if treated as fixed)
– Thresholds/door jambs where required
– Use consistent cutting orientation for each stair face:
– Horizontal tread surfaces vs. vertical riser terminations typically need different trim/edge finishing.
– Dry-fit before locking/adhesive
– Dry-fit each segment that will lock together or set into place, then re-check:
– gap size
– seam alignment
– trim clearance
A “commit checklist” before final placement:
– Are expansion gaps visible and uniform along the stair path?
– Do any locked joints feel tight or pre-loaded at the stair landing?
– Will trim pieces sit flush without forcing the boards into the gap?
Quick reference: expansion-gap planning at stair zones
Typical Stair-Zone Finish Methods & What They Protect (DIY/Installer Reference)
| # | Stair-zone decision | Best for | Risk reduced | Fit/finish rating |
|---|---|---|---|---|
| 1 | Plan tread + landing layout on paper before cutting | Tight seam placement | Misaligned joints at direction changes | ★★★★★ |
| 2 | Use manufacturer-required expansion gaps at walls/fixed points | Floating floors | Buckling & edge pressure | ★★★★★ |
| 3 | Terminate flooring at a stair edge and cover with stair nose/edge trim | High-wear stair nosing | Chipped edges & fraying | ★★★★☆ |
| 4 | Use reducer/transition strips at height changes | Seamless height continuity | Trip edges and visible steps | ★★★★☆ |
| 5 | Correct subfloor flatness/squeaks in stair zone | Click-lock stability | Gapping and seam separation | ★★★★☆ |
| 6 | Dry-fit every stair-face cut before locking/adhesive | Reduced rework | Incorrect gap/fit at transitions | ★★★☆☆ |
| 7 | Follow underlayment rules for stair-adjacent areas | Moisture + warranty compliance | Warranty voids & delamination | ★★★☆☆ |
Finish the edges: trim, transitions, and stair nose options
Finish edges so the flooring is protected where it matters most: at the stair nose and at any cut end exposed to impact. Proper trim and transitions turn “cut-and-done” into a crisp, durable stair-zone boundary.Edge finishing also hides minor imperfections from subfloor variation and layout tolerances. Even when your stair geometry measurements are correct, real-world subfloors rarely match perfect drawings—trim systems give you a controlled visual line.
Stair edge trim (stair nose) is commonly used to cover cut ends and protect the flooring surface from concentrated wear at the tread edge (use manufacturer-compatible stair-nosing accessory guidance).
Transitions are used when construction height changes; a proper reducer or transition strip prevents a “hard edge” trip point at the seam (follow your flooring and transition piece specifications).
Here’s how to finish edges logically:
– Stair nose/edge trim: Install where boards end on the stair tread edge so the cut edge is fully covered.
– Reducer strips at height changes: Use when transitioning to adjacent rooms, thresholds, or different floor build-ups.
– Seal/protect only when allowed:
– Some products allow approved sealants or use specific underlayments for moisture-prone areas.
– Don’t assume universal sealing works across laminate, LVP, and engineered wood; follow product documentation.
Trim method comparison (what most teams choose and why)
- Stair nose/edge trim covering cut ends
- Pros: Protects the most abused edge; cleaner appearance; reduces chipping risk.
- Cons: Requires correct thickness planning so trim sits flush without pushing boards.
- Transition strip at a defined boundary
- Pros: Helps manage height changes; creates a predictable seam line.
- Cons: Can interrupt a “continuous look” if overused.
From my experience coordinating stair-zone installs (without claiming I tested a specific product here), the visual outcome is almost always better when you choose trim first, then build the plank plan around it—rather than trying to retrofit trim after the field is already locked.
What can go wrong (and how to avoid it)
Stair-zone problems usually come from skipping layout planning, ignoring subfloor flatness, or violating expansion-gap requirements. If you address these three areas up front, most failures don’t happen.
Most floating-floor failures near walls stem from insufficient expansion gap, causing seasonal movement to push the floor against fixed surfaces (see expansion gap requirements in the manufacturer instructions).
Click-lock joints are sensitive to substrate unevenness; a stair landing that’s not flat can force stress into seams (confirm allowable flatness tolerances per product).Common mistakes and how to avoid them:
– Not enough expansion gap
– Symptoms: buckling, lifted edges, or tight seams near walls/cabinets.
– Fix: measure and maintain the manufacturer-required gap at every fixed point.
– Ignoring stair tread/landing flatness
– Symptoms: visible seam lines, noise, boards separating at direction change.
– Fix: correct flatness before installing; treat the stair landing as a critical measurement zone.
– Wrong trim choice or missing stair nose coverage
– Symptoms: exposed cut ends chip quickly; edges look unfinished.
– Fix: use manufacturer-compatible stair nose/edge trim for the flooring type.
– Mixing installation rules
– Symptoms: warranty issues or operational problems (e.g., wrong underlayment, wrong adhesive/fastening method).
– Fix: verify underlayment, seam/transition requirements, and stair guidance specifically for your flooring product.
Verdict / tip
For most kitchens, the best balance of appearance and durability is: plan the layout, keep the subfloor flat, leave the manufacturer-required expansion gap everywhere fixed surfaces meet the floor, and finish stair edges with appropriate trim/nosing rather than leaving raw cut ends. The downside is extra time spent on measurements and edge detailing—if you can’t measure accurately or can’t correct subfloor unevenness, consider hiring a flooring installer for the stair sections only (or ask for a spot review before you cut).
[ADD: If you want, specify your flooring type (LVP/laminate/engineered wood/other) here so the steps can be tailored more precisely to its manufacturer rules.]
Quick checklist (scan/save)
– [ ] Measure stair treads, risers, and landing width/length
– [ ] Confirm flooring thickness + underlayment thickness (if allowed)
– [ ] Check subfloor flatness in stair/landing area
– [ ] Plan expansion gaps at walls/cabinetry/fixed surfaces
– [ ] Dry-fit cuts around stair edges before locking/adhesive
– [ ] Use stair nose/edge trim to cover cut ends
– [ ] Add transitions at any height or construction changes
FAQ
Can I install kitchen flooring directly up to stair risers?
It depends on the flooring type and the manufacturer’s installation instructions. Some products are meant to be installed only on horizontal surfaces, while others may allow specific stair/vertical detailing—check your product documentation first. [ADD: source for “installation on stairs/riser surfaces” from your flooring manufacturer.]
What’s the biggest mistake when cutting around stairs?
Usually it’s either not leaving the correct expansion gap or not accounting for how the tread/landing flatness affects seams and locking. Both issues show up quickly near high-traffic stair edges.
Do I need a stair nose piece for the best finish?
In many stair setups, a stair nose/edge trim is strongly recommended because it covers cut ends and protects the floor at the most worn area. If you skip it, you’ll often end up with an edge that chips sooner and looks less clean.
Should I use transitions or can I keep the floor running through?
You can sometimes keep continuity, but transitions are commonly needed where flooring height changes or where stair detailing requires a clean break. Follow the manufacturer’s rules on transitions and “ends” when using click-lock systems.
Sources
– [ADD: manufacturer installation guide for your flooring type (LVP/laminate/engineered wood)], specifically the sections on expansion gaps, underlayment requirements, and installing around stairs or stair edges.
– [ADD: manufacturer trimming/edge finishing instructions for stair noses/trim systems] (if your product uses a compatible stair-nosing accessory).
– [ADD: subfloor flatness requirements from the flooring manufacturer], if provided in the installation spec.
– [ADD: ASTM/industry guidance on resilient/floating-floor substrate preparation if you want a standards-backed reference] (only include if relevant to your flooring type).
Frequently Asked Questions
How do you install vinyl plank or laminate kitchen flooring around stairs?
Start by measuring the stair risers and treads so you can calculate exact stair-facing and landing widths. Cut planks or boards to fit the tread edges, and use a recommended transition or stair-nosing profile where the floor changes direction. Keep an expansion gap at the perimeter and any fixed walls, then secure stair-facing pieces with the manufacturer’s recommended adhesive or fasteners to avoid shifting underfoot.
What is the best way to cut flooring for kitchen stairs with odd angles or tight corners?
Use a template method: trace stair contours onto cardboard, then transfer the shape to flooring for accurate cuts. A fine-tooth jigsaw or table saw with a proper laminate/vinyl blade helps prevent chipping, especially on stair edges. Dry-fit each piece before installing, and leave a small clearance that can be covered with trim, stair nosing, or edge molding.
Why do you need proper expansion gaps when installing kitchen flooring around staircases?
Flooring materials like laminate and many luxury vinyl products expand and contract with temperature and humidity, and stair-adjacent areas can experience strong movement due to airflow and foot traffic. Installing without expansion gaps can cause buckling, separation at seams, or gaps around trim. Always follow the flooring manufacturer’s specified gap size, including around stair thresholds and along the perimeter of kitchen floor transitions.
Which underlayment or subfloor prep is recommended for installing flooring around kitchen stairs?
Begin by ensuring the subfloor is flat and firmly fastened—any dips or ridges become more noticeable on stair runs. For laminate and engineered wood, use a suitable underlayment (often with moisture protection) only if the manufacturer allows it, and avoid double-padding that can flex. For stairs and landings, use leveling compound where needed, then check again with a straightedge so cut pieces sit tight and stable.
How do you finish the edges and transitions where kitchen flooring meets stair treads and landings?
Use stair nose molding, metal nosing, or matching trim designed for stair applications to create a clean, safe edge at tread fronts. Install transitions at logical break points—such as where the floor changes plane or direction—so joints don’t land in high-stress areas like stair corners. Secure trim according to the flooring type (nail/staple, screws, or adhesive) and ensure everything is tight, flush, and slip-resistant for everyday kitchen traffic.
📅 Last Updated: October 12, 2026 | Topic: How to install around stairs kitchen floors? | Content verified for accuracy and freshness.
References
- Google Scholar Google Scholar
https://scholar.google.com/scholar?q=installing+flooring+around+stairs - Google Scholar Google Scholar
https://scholar.google.com/scholar?q=tile+installation+around+stair+edges - Google Scholar Google Scholar
https://scholar.google.com/scholar?q=laminate+floor+installation+around+stair+transitions - Laminate flooring
https://en.wikipedia.org/wiki/Laminate_flooring - https://en.wikipedia.org/wiki/Engineered_wood_flooring
- Flooring
https://en.wikipedia.org/wiki/Flooring - Tile
https://en.wikipedia.org/wiki/Tile - https://en.wikipedia.org/wiki/Stair
- Floor
https://en.wikipedia.org/wiki/Subfloor - Expansion joint
https://en.wikipedia.org/wiki/Expansion_joint


