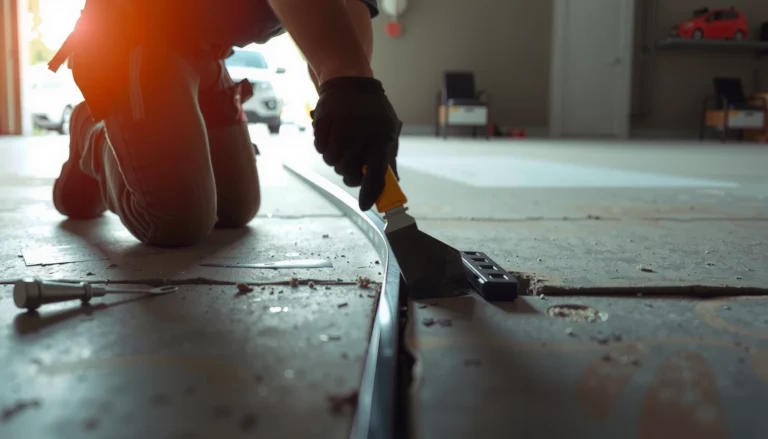
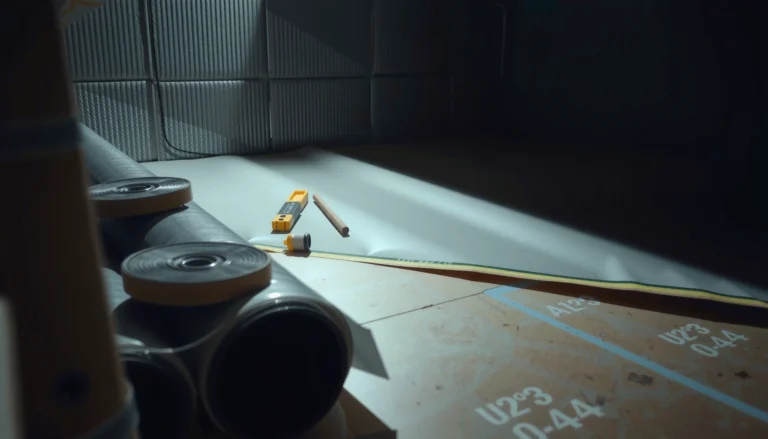
Replacing basement floors doesn’t have to be guesswork—this step-by-step guide shows you exactly how to replace basement floors, from prep and demo to subfloor repair and final installation. It lays out the fastest, cleanest workflow for common basement conditions so you can choose the right materials and avoid the mistakes that cause uneven floors and moisture problems. If you want a clear, practical path from start to finish, this is your playbook.




Replacing basement floors is usually a two-part job: remove the old surface (and any damaged subfloor), then build a moisture-safe base before installing the new flooring. If your basement gets damp, fixing moisture first is what prevents warping, moldy smells, and lifting—so the right “order of operations” matters as much as the materials you choose. This guide walks you through practical steps to replace basement floors safely, from prep to finishing, and helps you decide what to DIY versus what to verify with a contractor.
If you’re planning a DIY replacement because your basement floor is cracked, stained, uneven, or showing signs of moisture damage, this is for you. It’s also a useful roadmap for working with a contractor—especially when you’re unsure whether you need a subfloor repair, a vapor barrier, or a specific flooring type.
Plan the replacement: moisture, materials, and scope

You can avoid most basement-floor failures by planning around moisture behavior first, then selecting materials and a compatible installation method. The goal is to create a system where the slab/subfloor, underlayment/vapor barrier, and top flooring all “agree” with basement humidity and temperature swings.
Start by documenting what’s there now: flooring type, thicknesses, adhesives, underlayment, and any previous patching. Basements often hide “layer history” (paint, leveling compound, old adhesive, or glue-down residue) that affects how new materials bond and how moisture moves. As of 2026, most reputable basement flooring systems still follow the same principle: moisture control is integrated into the installation, not added after problems show up.
Basement failures often trace back to moisture traveling through concrete slabs, so vapor control must be planned before the new flooring goes down.
Moisture testing methods like in-situ relative humidity (ASTM F2170) are designed to measure slab moisture conditions at depth, not just surface appearance.
Most floating and laminate systems require manufacturer-specified expansion gaps to manage dimensional movement caused by humidity and temperature.
Check what’s underneath and how far you’ll go
– Inspect layers: remove a small test area if needed to confirm whether you have a vapor barrier already, what type of subfloor (plywood/OSB vs. particleboard), and whether there’s adhesive residue.
– Measure area and note obstacles: support columns, stair landings, plumbing protrusions, sump pits, and HVAC returns.
– Decide your scope boundary: replacing “just the surface” can be misleading if the subfloor is water-weakened or if the slab is repeatedly sweating.
Decide whether to remove down to a better base
Concrete slabs can sometimes be reused if they’re stable and you can achieve flatness. But if the slab is spalled, chronically wet, or too uneven, partial removal usually leads to future soft spots or telegraphing through new flooring.
Match the new flooring to basement conditions
Basement constraints usually include:
– Moisture (vapor transmission and/or condensation)
– Temperature swings (especially if the basement is intermittently conditioned)
– Potential floor heave or slab movement over time
In practice, the “best” flooring is the one whose installation instructions explicitly address basement use and specify the required underlayment/vapor barrier approach. Use the manufacturer’s documents as your technical “source of truth.”
For concrete/moisture testing and system design, reference [ADD: ASTM F2170 and relevant manufacturer technical documents for your specific flooring system].
Prep the room and remove the old basement floors
Clear, ventilate, and protect the space so you can remove layers without damaging walls, fixtures, or the edges where the new system must seat cleanly. Good prep also reduces dust, which matters because basements trap fine particulate and adhesive grit.
Before you start demolition, plan your disposal method (bagging/sweeping won’t always be enough with old adhesives). If there’s paint or adhesive that may be hazardous, follow local rules for dust control and disposal.
Basement demolition typically involves adhesive removal and dust control, so good ventilation and surface protection are essential for a clean, safe install.
Removing flooring in mapped layers helps preserve accurate thickness assumptions for transitions, baseboards, and expansion-gap planning.
Clear the space and control dust
– Move furniture, shelves, and loose items.
– Cover walls, electrical outlets, and HVAC returns with plastic sheeting.
– Ventilate with fans to the exterior (not just recirculation), and use PPE appropriate for dusty work.
Remove flooring and track layers
– Lift carefully and record what you find: adhesive type, underlayment layers, and any existing membrane.
– Scrape and clean thoroughly: leftover adhesive, paint overspray, and debris interfere with leveling compounds and membranes.
Inspect the base as you remove layers
Look for:
– Cracks (active vs. dormant)
– Soft spots (subfloor damage)
– High ridges and low spots (flatness problems)
– Persistent dampness signs (darkening, mineral staining, or musty odor)
If you see evidence of active moisture intrusion, treat that as a separate project (e.g., plumbing leak, drainage, grading, foundation issues) before you lock in new flooring layers.
Repair the concrete/subfloor before installing new flooring
You should repair and flatten the slab/subfloor first because new flooring systems fail more often from unevenness than from “minor cosmetic” imperfections. A moisture barrier or underlayment works best when the base is clean, stable, and prepared to spec.
Concrete repairs and subfloor replacements are not interchangeable with moisture control. Patching fixes surface conditions; vapor control addresses moisture movement. Both must be done correctly, in the right order.
Levelness and stability are prerequisites for most underlayment and flooring systems; uneven concrete can cause gaps, squeaks, and early wear.
Replacing water-weakened wood or particleboard subfloor sections is often necessary because compromised materials can continue to deform even after moisture is reduced.
Patch cracks and fix high/low spots
– Use a concrete patch/leveler formulated for interior slab conditions.
– Follow mix ratios and thickness limits.
– Allow cure/dry time as specified—don’t rush to install a vapor barrier before the compound is ready.
Address damaged subfloor sections (if present)
If the basement has wood/OSB/particleboard subfloor:
– Replace sections that feel soft, saggy, or clearly water-damaged.
– Verify fasteners and support spacing so the subfloor doesn’t flex under traffic.
Dry and clean thoroughly
Clean means more than “looks clean.” You need a surface that’s free of dust and contaminants so membranes and underlayments adhere per instructions. For concrete moisture-related decisions, align to testing methods such as ASTM F2170 (relative humidity) where applicable. [ADD: ASTM F2170 overview and manufacturer requirements for your flooring system]
Install a moisture-safe system (vapor barrier + underlayment)
You should install a moisture-safe “flooring stack” designed for basements so vapor doesn’t reach the underside of the finished flooring. In many basement scenarios, this means a specific vapor barrier (sometimes membrane sheets) plus an underlayment that’s compatible with the top flooring.
This is where you match materials—not just brand names. A vapor barrier that’s too thin, incorrectly overlapped, or incompatible with the flooring method can fail even if the floor looks great at install time.
A basement vapor barrier strategy is most reliable when it follows the flooring manufacturer’s required overlap, seam sealing, and installation details.
“Stack consistency” matters: if one area is layered differently than another, differential movement and soft spots can develop.
Choose the correct vapor barrier/underlayment strategy
Common approaches include:
– Sheet vapor barrier (e.g., polyethylene) with taped seams
– Peel-and-stick membranes designed for concrete
– Manufacturer-required underlayment systems with specified moisture performance
Data point to plan around: a “typical” sheet vapor barrier in many flooring instructions is around 6 mil thickness (0.15 mm)—but always verify the thickness and performance class required by your flooring system. [ADD: manufacturer vapor barrier spec or installation guide for your flooring system]
Follow installation rules exactly
Key details that frequently determine success:
– Seam overlap and taping method (type of tape matters)
– Wall and perimeter sealing approach
– Whether overlaps must run a particular direction
– Whether the barrier is continuous under transitions/edges
Maintain the system’s dimensional behavior
Floating floors and engineered systems rely on consistent build-up. Avoid bridging low spots with shortcuts that change height in one area more than another.
For moisture testing and concrete conditions, use the measurement method and limits listed in your flooring manufacturer’s technical documents. [ADD: flooring manufacturer technical sheet for moisture limits]
What a compatible “system” typically looks like
– Concrete slab (clean, prepared)
– Vapor barrier/membrane (sealed seams, correct overlap)
– Underlayment (if required by flooring type)
– Floating/engineered/laminate/other top flooring (with correct expansion gaps)
Choose and install the new basement flooring
You can choose basement flooring confidently when you select a product whose installation method fits the moisture-controlled base you built. The best outcome comes from installing the flooring exactly as specified—especially around expansion gaps, transitions, and edge details.
Basements aren’t forgiving: dimensional movement happens, and it needs space to “work,” not pressure to buckle. This is also where many DIY installs diverge from instructions.
Many floating flooring systems require perimeter expansion gaps to prevent buckling as humidity changes.
Transitions and edge details are not aesthetic-only; they’re structural components that help manage movement and keep moisture behavior consistent at boundaries.
Select the right installation method for your base
– If you’re using a floating system, you’ll need the correct underlayment type and a stable vapor barrier below.
– If you’re gluing or using a direct attachment method, verify whether that method is allowed over your moisture-controlled slab and what adhesive conditions are required.
Keep expansion gaps and perimeter handling correct
A commonly referenced baseline for expansion gaps in many flooring systems is about 1/4 inch (6 mm)—but requirements vary by product and manufacturer. Always follow your specific installation guide. [ADD: manufacturer expansion-gap requirement]
Install transitions and edges last
Don’t treat transitions as “afterthoughts.” Install them after the field floor is set so you can:
– Confirm level/flatness consistency
– Keep gaps consistent at doorways and fixed posts
– Avoid trapping moisture at fixed surfaces
What can go wrong (and how to avoid it)
Most basement floor problems come from moisture being addressed too late, base prep being rushed, or installation requirements being treated as optional. If you want fewer callbacks, focus on the system-level “compatibility” between slab, barrier, underlayment, and finished flooring.
Below is a clear trade-off view of common moisture-control approaches so you can spot likely failure modes before you install.
| Approach | Pros | Cons / Watch-outs |
|---|---|---|
| Sheet vapor barrier + taped seams | Often cost-effective and easy to understand; works well when installed with continuous sealing. | If seams aren’t sealed correctly or punctured during install, moisture can bypass the barrier. |
| Peel-and-stick membrane | Can provide strong continuity if the slab surface is properly prepped and dry. | Surface cleanliness and adhesion conditions are critical; poor substrate prep leads to edge lifting. |
| Leveling/patching as a “band-aid” | Improves flatness and reduces telegraphing of slab imperfections. | Doesn’t stop vapor; if moisture continues, the underlayment/top flooring can still fail. |
Common mistakes to avoid
– Skipping moisture control: A basement can look dry yet still have slab vapor transmission or intermittent condensation.
– Installing over uneven concrete: ridges and low spots create movement points that lead to gaps, squeaks, or premature wear.
– Mismatching the flooring to the base: some products require specific underlayments or moisture conditions; ignoring them can void performance or warranties.
– Using the wrong patch/leveling approach: porous or incorrectly mixed materials can affect bond and drying behavior.
– Cutting corners on acclimation and spacing: dimensional movement needs planned space and time to stabilize with basement conditions.
Currently, most manufacturer-install practices emphasize adherence to their acclimation and spacing requirements to prevent buckling and joint separation as conditions change.
Verdict / tip: do it yourself only if moisture is under control
DIY basement floor replacement is most reasonable when moisture is under control, the slab/subfloor is stable, and you can follow the flooring manufacturer’s required vapor barrier/underlayment setup without shortcuts. If there’s active water intrusion (leaks, persistent dampness, recurring musty odor), replacing floors without fixing the cause can waste money and may create a continuing mold-risk cycle.
Here’s the decision logic to keep you on the safe side:
– Proceed with DIY if: the slab is stable, you can achieve flatness, and you can install a continuous moisture-safe system per instructions.
– Skip DIY (or at least pause and get help) if: moisture sources are unclear, there’s evidence of active leaks, or the slab repeatedly sweats despite corrective measures.
Moisture problems must be corrected at the source (e.g., leaks and drainage) before replacing floor assemblies, otherwise new flooring can fail again.
When you follow manufacturer installation details for vapor barriers and expansion gaps, the risk of warping and lifting drops substantially.
Quick checklist: basement floor replacement
– [ ] Identify moisture source(s) and decide on a moisture-safe flooring system
– [ ] Remove old flooring and thoroughly clean the base
– [ ] Repair cracks/soft spots and level high/low areas
– [ ] Install the correct vapor barrier/underlayment per flooring instructions
– [ ] Install new flooring with expansion gaps and proper transitions
– [ ] Final inspection for gaps, level, and any weak spots at edges
Basement Moisture Control Options: Practical Selection Guide (Typical ranges)
| # | Moisture-Control Layer | Best Fit When | Install Sensitivity | Moisture Resilience |
|---|---|---|---|---|
| 1 | 6-mil sheet poly + taped seams | Slab can be cleaned/dried and seams can be sealed | Medium | ★★★☆ |
| 2 | Peel-and-stick membrane system | Substrate prep is achievable for strong adhesion | High | ★★★★☆ |
| 3 | Continuous sealed membrane + perimeter sealing | You need robust perimeter protection | High | ★★★★★ |
| 4 | Underlayment-only (no vapor barrier) | Very limited moisture and manufacturer approval | Very High | ★☆☆☆☆ |
| 5 | Leveling/patching to achieve flatness | No active moisture issues; flatness is the constraint | Low–Medium | ★★☆☆☆ |
| 6 | Dry-screed / raised flooring system | You need height management and capillary break layers | Medium | ★★★★☆ |
| 7 | Moisture-resistant underlayment with sealed base | You have known vapor control and want cushion/comfort | Medium | ★★★☆ |
Note: “Best fit” and resilience ratings are practical, system-level guidance and do not replace the specific installation and moisture-limit requirements in your flooring product documentation. Validate with the manufacturer for your exact stack.
FAQ
How do I know if my basement floor needs moisture control first?
If you see recurring dampness, condensation, musty odors, staining on/near the slab, or if the concrete surface shows persistent dark patches, moisture control should be treated as a priority before flooring replacement. Replacing flooring without addressing moisture is a common pathway to cupping, odor, and lifting.
Can I replace basement floors without removing all the old material?
Sometimes, but it depends on what’s underneath: adhesive residue, damaged subfloor, height changes, and the flooring manufacturer’s requirements. If the base is unstable or uneven, partial removal usually leads to problems later.
What flooring types work best in basements?
It depends on basement moisture and slab/subfloor condition. Look for products whose installation instructions explicitly address basement use and specify required vapor barriers/underlayment and moisture limits (often referencing in-situ testing standards such as [ADD: ASTM F2170 or the relevant testing method for your flooring system]).
How long should I wait after leveling or patching concrete?
Wait time varies by product and thickness. Always follow the leveling/patch manufacturer’s cure and dry-time guidance before installing a vapor barrier or flooring; installing early can trap moisture.
Do I need expansion gaps in a basement?
In most flooring systems that require them, yes—expansion gaps prevent buckling and joint issues as humidity and temperature change. Follow the flooring manufacturer’s installation instructions for exact requirements (gap width, perimeter details, and transition handling).
Sources
– [ADD: manufacturer installation instructions for the specific flooring you plan to install, including vapor barrier/underlayment and expansion-gap requirements]
– [ADD: manufacturer technical data for the concrete patch/leveler you plan to use, including cure/dry-time guidance]
– [ADD: primary guidance from a reputable flooring association or concrete/moisture-vapor guidance body—use what matches your flooring type and subfloor conditions]
– [ADD: ASTM F2170 (in-situ relative humidity testing) overview and how it’s referenced by your flooring manufacturer]
Replacing basement floors is a project where the “system” matters more than any single product. Plan for moisture control up front, prep and clean the base thoroughly, repair and level before you install barriers, and then install the finished flooring using the manufacturer’s exact stack requirements and spacing details. If you have active moisture concerns, address the source first—otherwise even a perfect-looking install can fail again.
Frequently Asked Questions
What’s the best way to replace basement floors if there’s moisture or flooding?
Start by identifying the moisture source—check gutters, downspouts, foundation cracks, and consider a dehumidifier before replacing basement flooring. For damp basements, choose moisture-resistant flooring like vinyl plank with an underlayment rated for subfloors, or install a cement-based underlayment and use a vapor barrier where appropriate. Avoid sealing over severe water intrusion; if water routinely enters, address the waterproofing first, then replace the basement floor system.
How do you remove old basement flooring and prep the slab for new installation?
Remove existing flooring (carpet, tile, laminate, or old adhesive) and scrape down to a clean, sound surface. Repair cracks and spalls with an appropriate concrete patch, then level high spots or fill low areas using a self-leveling underlayment made for basement use. Finally, clean thoroughly—vacuum dust and check flatness—because uneven basement floors can cause squeaking, gaps, and premature wear in new flooring.
How do you replace basement floorboards if the joists are damaged or sagging?
Inspect the wood subfloor and foundation supports for rot, mold, or structural weakness, and replace any compromised joists or subfloor panels before installing new flooring. Use pressure-treated materials where ground moisture risks exist and ensure proper ventilation to reduce future basement humidity issues. If the sagging is significant, consult a structural pro, since correcting only the surface can lead to recurring floor failure.
Which basement flooring materials are easiest for DIY homeowners to install over concrete?
For DIY basement floor replacement, floating vinyl plank and laminate are often the simplest because they don’t require heavy mortar or specialized tools. If you install over concrete, use the correct underlayment and consider a vapor barrier to manage basement moisture. Tile can be done by motivated DIYers, but it requires careful substrate preparation, proper thinset, and grout curing time to prevent cracking and moisture problems.
Why does replacing basement floors require careful leveling and moisture control?
Basements are prone to humidity, which can cause warping, mold growth, and adhesive failure if you skip moisture barriers and proper ventilation. Uneven subfloors lead to stress on planks or tiles, resulting in gaps, loose edges, or cracked surfaces after installation. By addressing flatness and waterproofing readiness during basement floor replacement, you improve durability, comfort, and the long-term performance of your new basement flooring system.
📅 Last Updated: October 11, 2026 | Topic: How to replace basement floors? | Content verified for accuracy and freshness.
References
- Google Scholar Google Scholar
https://scholar.google.com/scholar?q=basement+floor+replacement+concrete+slab+repair+subfloor - Google Scholar Google Scholar
https://scholar.google.com/scholar?q=basement+floor+vapor+barrier+moisture+control+installation - Google Scholar Google Scholar
https://scholar.google.com/scholar?q=asbestos+removal+floor+tiles+guidance+basement - https://www.epa.gov/asbestos/asbestos-homeowners-and-renters
- Asbestos – Overview | Occupational Safety and Health Administration
https://www.osha.gov/asbestos - Mold | Mold | CDC
https://www.cdc.gov/mold/ - https://www.hud.gov/program_offices/healthy_homes/mold
- https://www.energy.gov/energysaver/basements-and-crawl-spaces
- Floor
https://en.wikipedia.org/wiki/Subfloor - WBDG
https://www.wbdg.org/resources/basement-moisture-control