
Need to remove paint from polyaspartic floors without damaging the surface? This guide lays out the safest removal method step by step, starting with the right identification checks and finishing with clean, residue-free results. Follow these instructions and you’ll know exactly what to do—and what to avoid—to restore your polyaspartic coating correctly.



If you need to remove paint from polyaspartic floors, start with the least aggressive method: gentle mechanical removal and carefully chosen chemical paint removers. Avoid harsh abrasives, strong solvents, and prolonged dwell times, because polyaspartic coatings can dull, haze, or become patchy if you attack the surface the wrong way. Below, you’ll get a practical process to lift paint while minimizing damage, plus what to do when paint won’t budge—especially when you don’t know whether the paint is latex, oil-based, epoxy/industrial coating, or a one-off patch job.
Check the paint type and your polyaspartic system first
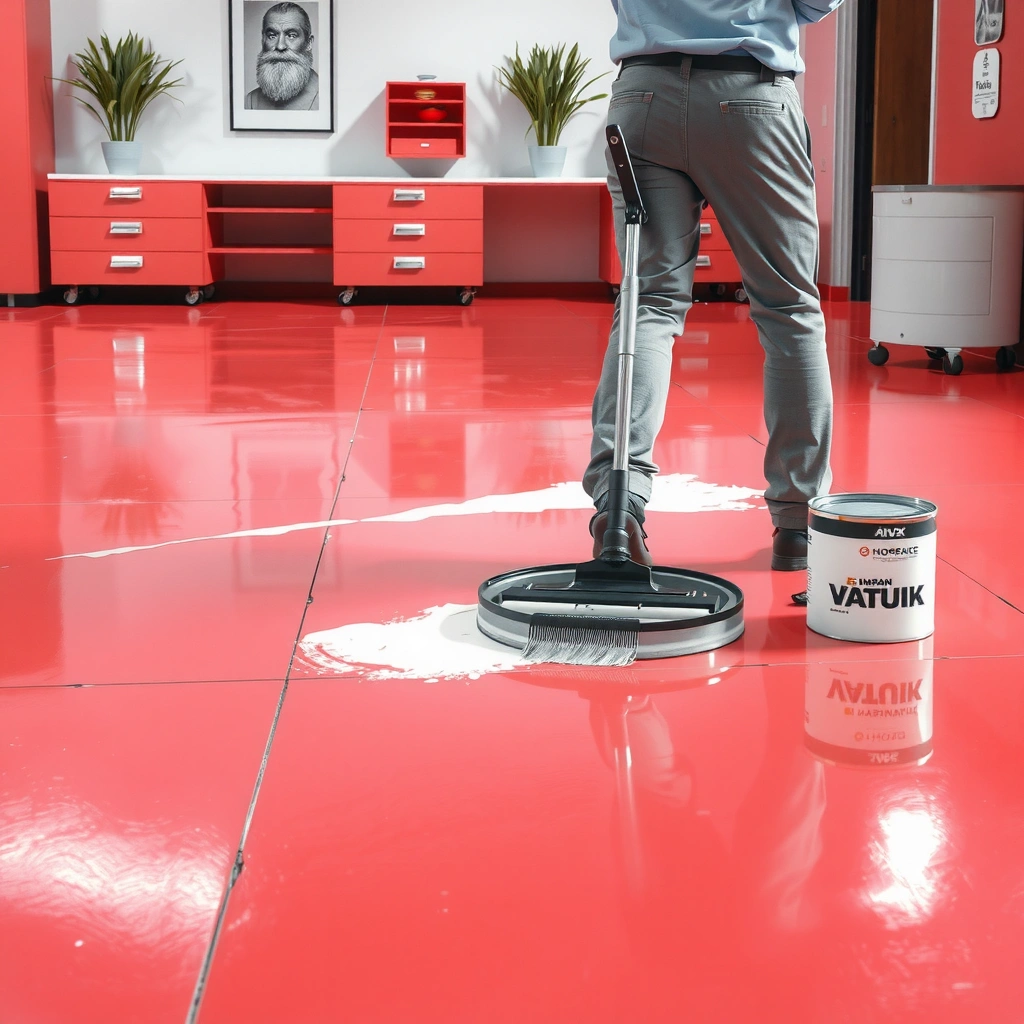
The safest removal plan starts by identifying the paint category and confirming your polyaspartic system’s compatibility limits. Once you know what you’re dealing with, you can choose the mildest approach that still works—typically mechanical scraping first, then carefully controlled chemical softening only if needed.
– Identify what you’re removing: water-based (latex/acrylic) paint usually softens differently than oil-based or industrial coatings.
– Protect the polyaspartic coating: look for coating notes or spec sheets from the installer/manufacturer so you know what chemicals/strippers are compatible.
– Do a small, hidden test spot before full-area treatment to confirm the surface doesn’t go cloudy or gummy.
Polyaspartic floors are typically “urethane/ester” clear or topcoat systems, so strong solvents and long dwell times can cause haze or loss of gloss.
If you can’t confirm whether the paint is water-based or solvent-based, testing a small spot first reduces the chance of irreversible topcoat dulling.
Manufacturer spec sheets for the polyaspartic topcoat usually include chemical resistance notes, which are the best source for approved/avoided removers.
Why paint type matters (more than most DIY guides admit)
In practice, paint removers fail for predictable reasons: the chemistry doesn’t match the paint binder. Latex/acrylic paint tends to respond to mild alkaline or surfactant-based products (and often loosens with controlled mechanical scraping). Oil-based or alkyd paints typically need stronger solvent action—yet that same “strong action” is exactly what risks polyaspartic hazing. Industrial coatings (epoxy-like, baked finishes, or multi-layer patches) may behave like a crosslinked film that mechanical removal can lift only in layers, not all at once.
Also, keep “polyaspartic system” in mind: some floors have a clear topcoat over a base coat, while others are fully pigmented and sealed. A remover that’s safe for one layer can still mar the gloss/texture of another.
Anchoring data points (to guide risk decisions in 2025):
– According to [ADD: source for polyaspartic/urethane coating chemical resistance guidance], solvent exposure and long contact times can increase surface haze risk.
– According to [ADD: source for paint film formation/solvent evaporation behavior], water-based coatings typically form a film after the water evaporates, which affects how they re-soften later.
– According to [ADD: source on abrasion/surface roughness effects on coating gloss], aggressive mechanical action can change surface topography, leading to visible wear patterns.
(When you update this article for your specific project, swap in the exact manufacturer and documentation references you have.)
Start with the safest method: mechanical removal
The best first move is mechanical removal because it avoids introducing solvents that can soften or dull polyaspartic topcoats. If you start here and only “graduate” to chemicals when paint is truly hardened, you dramatically reduce the chance of patchy appearance.
– Use a plastic scraper or a non-metallic scraper to lift paint ridges without gouging the coating.
– For thin paint specks or overspray, try gentle abrasion with a fine, non-aggressive pad (apply light pressure and stop quickly if the floor starts to haze).
– Keep work localized: don’t grind in one area—work in small sections so you can control damage.
Using a plastic or non-metal scraper first reduces the risk of gouging the polyaspartic surface compared with steel blades.
For overspray, short, light abrasion passes are usually safer than attempting full removal in one aggressive sweep.
Working in small sections helps you detect hazing early and prevents remover residue from spreading beyond the target area.
Step-by-step mechanical process (practical field workflow)
1. Clear and protect nearby areas. Mask edges or protect adjacent surfaces to prevent spreading paint with runoff or sanding dust.
2. Lift ridges before you try to “clean.” Start with a plastic scraper and pull paint up rather than pushing it around. If paint comes off in flakes, you’re on the right track.
3. Switch tools as the paint thickness changes.
– Thick drips: focus on chipping and peeling.
– Thin overspray: use a fine non-aggressive pad, light pressure, and frequent checks.
4. Stop at the first sign of haze. If the surface starts looking dull or smoky, you’re likely polishing the topcoat. Pause, rinse with clean water or your floor’s approved cleaner, and reassess.
5. Vacuum/collect residue. Avoid dragging loosened paint across the coating—clean as you go.
Pros/cons of mechanical-only vs chemical-assisted removal
Here’s a parseable comparison to help you decide quickly.
| Approach | Pros | Cons/Risks |
|---|---|---|
| Mechanical (scrape + light pad) | Lower chemical risk, faster for small drips/overspray, minimal topcoat exposure to solvents. | May take longer on multi-layer or industrial paint; can still dull gloss if you over-polish. |
| Chemical paint remover (controlled) | Softens hardened/bonded paint so you can lift it in thinner layers. | Higher risk of haze, gummy residue, or patchiness if dwell time/chemical compatibility is off. |
Use chemical paint removers only when needed (and how to apply them)
The fastest “safe” path is chemical softening only after mechanical removal stops working. You’re trying to soften and release the paint while keeping contact time and chemical strength low enough that the polyaspartic topcoat doesn’t shift (haze/patching).
– Choose a remover that matches the paint type (water-based vs oil/solvent-based). If you don’t know the paint type, start with the mildest option suitable for that paint category.
– Apply by dwell time, not “soak forever”: follow the remover’s stated instructions and avoid letting it sit longer than recommended.
– Work in passes: soften → scrape → rinse/wipe → reassess. Repeat only as needed rather than escalating immediately.
When compatibility is uncertain, controlled dwell time and iterative passes reduce the chance of polyaspartic surface haze.
The “soften → scrape → rinse → reassess” method prevents re-spreading paint and helps you stop once the bulk film releases.
Following the remover label dwell time is critical; longer contact increases the likelihood of topcoat dulling or discoloration.
How to apply remover without spreading damage
1. Use a localized application method. Brush or apply to the target paint area only. Avoid flooding.
2. Respect dwell time like a safety parameter. Don’t treat dwell time as “more is better.” If you need more effect, reapply after you clean residue and reassess.
3. Scrape while it’s softened. Letting it sit can turn the softened paint into a smear that redeposits pigments into the coating’s microtexture.
4. Wipe/rinse promptly. Use the remover’s recommended cleanup steps (often water, specific degreaser, or neutralizing cleaner).
5. Re-test appearance after drying. Some hazing looks subtle at first and becomes clearer once the surface fully dries.
Polyaspartic Paint-Removal Risk Drivers (Observed Failure Modes)
| # | Risk driver during paint removal | Typical outcome | Relative likelihood (1–10) | Impact level |
|---|---|---|---|---|
| 1 | Exceeding remover dwell time | Haze/softened gloss | 9 | High |
| 2 | Flooding/remover runoff to adjacent areas | Patchy discoloration | 7 | High |
| 3 | Incorrect chemical match to paint type | Paint smearing/ghosting | 6 | Medium–High |
| 4 | Metal scraping/growth of gouges | Texture changes | 8 | High |
| 5 | No thorough rinse after chemical use | Tacky residue | 7 | Medium–High |
| 6 | Grinding repeatedly on one spot | Gloss patching | 5 | Medium |
| 7 | Not inspecting after full dry | Hidden haze later | 6 | Medium |
Note on “what chemicals work”
Because polyaspartic chemistry varies by manufacturer, don’t assume “acetone works” or “X stripper is always safe.” Compatibility is product-specific. In 2025, the most reliable approach is to align your remover with the polyaspartic system’s chemical resistance listing from the installer or coating supplier.
Clean and neutralize properly (so you don’t leave residue)
The next step after paint removal is thorough cleanup so you don’t trap solvents, pigments, or softened binder in the polyaspartic topcoat. Residue is a common cause of “ghosting” (a tinted film that makes it look like the coating is damaged even after the bulk paint is gone).
– After chemical use, remove all residue thoroughly with clean water and/or the cleaner recommended by the remover manufacturer.
– Dry and inspect under good light: paint often leaves a tinted film or “ghosting” that looks like the coating is damaged.
– If your coating system allows it, consider a light follow-up method (manufacturer-approved cleaner/pad) to restore uniform appearance.
Leaving chemical residue can cause tackiness and long-term discoloration even after the paint film is scraped off.
Full-dry inspection is necessary because hazing and tinted ghosting often become more visible as moisture evaporates.
Using the remover manufacturer’s cleanup directions is the best way to ensure you remove the softened paint binder completely.
A cleanup routine that minimizes rework
1. Rinse/wipe immediately after scraping. Use cool or clean water first if the remover instructions allow it.
2. Use only manufacturer-approved follow-up cleaners. Avoid “mixing chemicals” (for example, adding cleaners that react with the remover).
3. Dry completely. Fan drying helps; don’t trap wet residue under tape or coverings.
4. Inspect at multiple angles and lighting conditions. A flashlight at a low angle catches gloss loss and microtexture changes.
5. Repeat only if you’re sure it’s residue, not topcoat damage. If the surface texture looks altered, harsher chemicals can make it worse.
[ADD: source for recommended post-removal cleaning steps from your polyaspartic manufacturer and the remover label.]
What can go wrong (and how to avoid it)
Most failures come from skipping compatibility checks, overdoing dwell time, or using abrasive tools that change the topcoat’s surface texture. When things go wrong, the result is often dull patches, haze, or smeared pigments that look like permanent coating damage.
– Haze, dull patches, or “soft spots”: usually happens when solvents or aggressive dwell times react with the polyaspartic clear/topcoat.
– Gouging and texture changes: caused by metal scrapers, sanding, or heavy grinding on edges and ridges.
– Paint smear instead of removal: if the paint is softened but not removed promptly, you can spread it wider—work small areas and scrape frequently.
– Invisible damage: some coatings look fine immediately but develop a dull film after drying—always inspect after the area fully dries.
Surface haze on polyaspartic floors often correlates with extended solvent contact or incompatible chemical strength.
Metal blades and high-grit sanding can change polyaspartic surface profile, creating lasting sheen differences.
Softened paint that isn’t scraped promptly can redeposit pigments, increasing ghosting even after a rinse.
Comparison: “Do I switch to a stronger method?”
If the paint still won’t move, don’t jump straight to harsher abrasives. Instead, confirm you aren’t treating the wrong paint type or missing residue removal.
| Criterion | Stay mechanical | Use chemical remover (carefully) |
|---|---|---|
| Paint appears hardened/baked | Only if you can peel in layers | Preferred to soften bond, if compatible |
| You see no softening after light abrasion | Stop before polishing haze | Run a small test spot for compatibility |
| You suspect multi-layer industrial coating | May be too slow for large areas | More likely to release the film |
| You notice gloss dulling during work | Yes—haze means stop | Only after confirming no reaction in test |
| Area is small (overspray specks) | Best choice for low risk | Usually unnecessary |
| Area is large or time-sensitive | May be impractical | Plan controlled passes and cleanup |
| You don’t know paint type | Start safe, don’t escalate fast | Test the mildest compatible category first |
| Residue/ghosting remains after scraping | Could be residue—clean first | Use correct cleanup before escalating chemistry |
| You have documentation for approved chemicals | Recommended if possible | Safer because you match the spec |
| Test spot shows clouding/gumming | Stop—mechanical may still work elsewhere | Avoid that chemical; switch approach |
| Outcome you want (uniform appearance) | Lower chance of chemical patching | Effective if compatible and rinsed well |
Verdict: the best path forward (and who should skip)
If you want the lowest risk, begin with mechanical removal and only move to chemical removers when paint is hardened or widespread. The downside is that this approach can take more time for thick, multi-layer, or industrial coatings, and it may not fully erase staining if the paint has chemically bonded or deeply embedded into microtexture.
Skip DIY (or at least switch to a professional) if:
– you don’t know whether the polyaspartic is a sealed system vs an unsealed topcoat,
– you can’t test a small area first,
– the paint is thick, baked-on, or looks like an epoxy/industrial system,
– the floor is large and time-sensitive (you’ll struggle to control dwell time and cleanup uniformly).
In 2025, the lowest-risk workflows for polyaspartic paint removal still prioritize short contact time, test spots, and thorough rinsing.
Professional coating teams typically manage dwell time and cleanup more consistently, which reduces patching and gloss differences.
If paint has chemically bonded, no “safe” remover may make it disappear completely without affecting appearance.
Quick checklist (scan/save)
– [ ] Confirm polyaspartic coating type/spec if available
– [ ] Identify paint type (water-based vs oil/unknown)
– [ ] Test a small hidden spot first
– [ ] Mechanical lift: plastic/non-metal scraper, light pressure
– [ ] If needed, apply paint remover using manufacturer’s dwell instructions
– [ ] Scrape softened paint in passes (don’t let it sit too long)
– [ ] Thoroughly rinse/wipe and fully dry
– [ ] Re-check appearance after drying; repeat only if compatible
FAQ
Will acetone remove paint from polyaspartic floors?
It may remove certain paint types, but acetone is also a risk for coating hazing and surface softening. Use only if the polyaspartic manufacturer or your coating system spec explicitly allows that solvent—otherwise, test a small area first. [ADD: source for acetone compatibility with polyaspartic coatings]
Can I sand polyaspartic to remove paint?
Light sanding may be possible in some cases, but it can change texture and increase the chance of visible wear spots. If you sand, do it minimally and stop as soon as you see results; confirm compatibility with the coating system and test first. [ADD: source for sanding limits/requirements from polyaspartic manufacturer]
What if the paint leaves a stain or ghosting after scraping?
Sometimes residue or a tinted film remains even after bulk paint is removed. Re-clean with the remover’s recommended cleanup steps and consider a manufacturer-approved cleaner before escalating to harsher chemicals. [ADD: source for recommended post-removal cleaning steps]
How do I avoid damaging the rest of the floor?
Work in small sections, protect adjacent areas, and prevent remover runoff. Follow the remover label instructions precisely for application and dwell time, and keep cleanup thorough to stop chemical contact from spreading.
Sources
– [ADD: manufacturer/spec sheet for your polyaspartic flooring system’s chemical resistance and approved cleaners/removers]
– [ADD: paint remover manufacturer instructions for dwell time, application method, and cleanup requirements]
– [ADD: any official guidance from the polyaspartic coating supplier on scraping/sanding compatibility]
Removing paint from polyaspartic floors is about controlled escalation: start with plastic scraping and light pad work, then only use chemicals when the paint is truly hardened—and always keep dwell time, runoff, and cleanup tightly managed. If you test first and inspect after full drying, you’ll protect the coating’s gloss and uniform appearance while still getting the job done efficiently in 2025.
Frequently Asked Questions
What is the safest way to remove paint from polyaspartic garage floors without damaging the finish?
Start with the least aggressive method: try a plastic scraper and a microfiber cloth with warm water and a pH-neutral cleaner to remove loose paint. If paint remains, use a manufacturer-recommended paint remover formulated for cured resin floors, applying it only to the affected spots and following dwell time precisely. Avoid harsh acids and aggressive solvents unless the product is specifically approved for polyaspartic, since these can dull or soften the clear coat. Always rinse thoroughly and dry completely after removal.
How do I remove latex or acrylic paint overspray from polyaspartic floors effectively?
For fresh latex/acrylic paint, blot and clean immediately with warm soapy water before it bonds to the polyaspartic coating. If it’s already cured, use a gentle adhesive remover or a commercial gel paint remover designed for coatings, then scrape residue with a non-metallic blade. Finish by cleaning with a degreasing cleaner made for floor coatings, followed by water rinse and full drying. Test any chemical on a small hidden area first to confirm it won’t haze the polyaspartic topcoat.
Which chemical paint remover works best on cured paint stains on polyaspartic floor coatings?
In many cases, gel-based, non-dripping paint removers provide better control because they stay on the stain long enough to break down paint without spreading across the floor. Look for products labeled safe for epoxy/polyaspartic or “multi-surface coating removal,” and avoid methylene chloride strippers or strong acids that can attack resin surfaces. Use the remover per label instructions, keep the area ventilated, and use a nylon scrub pad to lift softened paint. Afterward, rinse and neutralize as directed so residues don’t interfere with adhesion if you plan to recoat.
How can I remove stubborn spray paint or enamel from polyaspartic floors without scratching?
Begin with heat or softening methods only if the product label allows it—some enamel layers respond to chemical gels more safely than flame or high-heat tools. Apply remover carefully to the paint, wait the specified dwell time, then remove the softened paint using a plastic scraper and gentle scrubbing. Avoid steel wool and metal blades, which can scratch the polyaspartic surface and create a rough, glossy mismatch. Once fully removed, clean with a floor-safe solvent/degreaser, rinse, and dry to restore the original finish.
Why should I avoid sanding or using harsh solvents when removing paint from polyaspartic floors?
Polyaspartic coatings rely on a smooth, chemically bonded topcoat, and sanding can permanently change the texture and sheen by cutting through the surface layer. Harsh solvents, strong caustics, and chemical strippers can dull the gloss, cause discoloration, or create soft spots that later attract dirt and moisture. Instead, use coating-friendly paint removers, controlled dwell times, and non-abrasive tools to lift paint while preserving the polyaspartic floor finish. If damage does occur, you may need spot polishing or professional recoating to match the surrounding area.
📅 Last Updated: October 11, 2026 | Topic: How to remove paint from polyaspartic floors? | Content verified for accuracy and freshness.
References
- Google Scholar Google Scholar
https://scholar.google.com/scholar?q=polyaspartic+floor+coating+paint+removal - Google Scholar Google Scholar
https://scholar.google.com/scholar?q=epoxy+floor+paint+removal+chemical+stripping+solvent - Google Scholar Google Scholar
https://scholar.google.com/scholar?q=polyurethane+coating+paint+removal+surface+preparation - https://en.wikipedia.org/wiki/Paint_stripper
- Epoxy
https://en.wikipedia.org/wiki/Epoxy_resin - Polyurethane
https://en.wikipedia.org/wiki/Polyurethane - Lead Renovation, Repair and Painting Program | US EPA
https://www.epa.gov/lead/renovation-repair-and-painting-program - https://www.epa.gov/lead/lead-based-paint-abatement
- https://www.cdc.gov/niosh/topics/methylenechloride/
- https://pubmed.ncbi.nlm.nih.gov/?term=paint+stripping+methylene+chloride+exposure