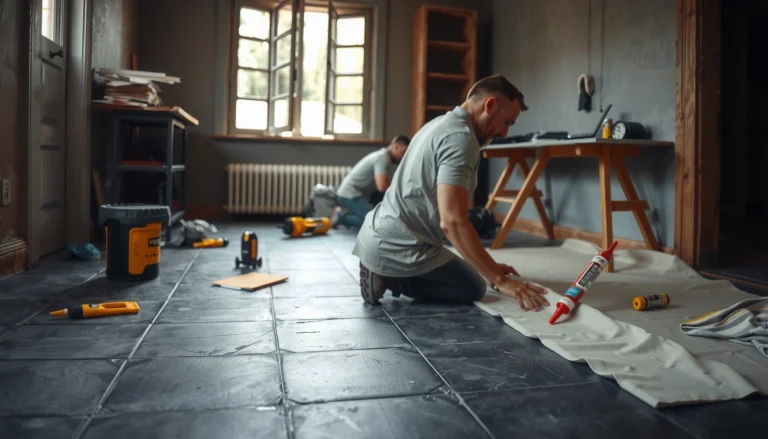
Removing laminate floors from a laundry room is straightforward when you know the locking system and how to protect the subfloor from moisture damage. This guide tells you exactly what to do—starting with removing trim and cutting planks cleanly—to get the panels up with minimal mess. Follow these steps and you’ll be ready to install new flooring or prep the space without surprises.




Remove laminate flooring in a laundry room by starting at the edges (or a damaged plank), freeing any trim/baseboards, then lifting planks according to how they’re installed (floating click-lock vs glued). If it’s click-lock, you can usually pull rows up without breaking everything; if it’s glued down, expect more prying and careful subfloor scraping.
This guide is for homeowners tackling a laundry room remodel or replacing damaged laminate—especially where moisture and spills may have loosened boards. Use it if you want a straightforward removal workflow and a plan for what to do with the underlayment and leftover residue.
Gather what you need (and protect the room)

Start by staging tools and protecting the room first, because laminate demolition creates chips, dust, and sharp edges that can turn a “quick pull-up” into avoidable cleanup. In a laundry room, this is especially important since moisture-softened subfloors and swollen seams often release unpredictably.
According to OSHA 29 CFR 1910.133, employers must protect eyes/face with suitable equipment when hazards like flying chips or debris are present during activities that could injure the eyes.
According to NIOSH/CDC respirator guidance, N95 filtering facepiece respirators are designed to filter at least 95% of airborne particles in testing (often using 0.3-micron sodium chloride aerosol).
Protecting the room is more than “covering stuff.” Laminate removal tends to produce three problem materials: (1) small plank splinters along cut edges, (2) dust from underlayment, and (3) adhesive residue (for glued laminate) that becomes slippery residue if it gets smeared. Before you touch a single plank, move or cover laundry-room appliances (washer/dryer if you can), plastic-wrap or cover vents, and protect base cabinets and nearby trim.
Core PPE and setup
– Eye protection + cut-resistant gloves: laminate edges chip and can snap off unexpectedly when a locking profile lets go.
– Ventilation and dust control: use a vacuum with a fine dust bag/filter if you have one; consider a respirator if you’ll cut or grind anything.
– Drop cloths and containment: put down drop cloths near doorways so chips don’t travel into the rest of the home.
Tools that match the task
– Pry bar / pull bar / crowbar: for lifting trim, thresholds, and stubborn edges.
– Utility knife (fresh blades): for scoring seams (especially helpful with glued laminate).
– Hammer: for controlled tapping with a pry bar (reduces gouging compared to “yanking”).
– Flooring scraper/chisel: for adhesive and underlayment cleanup.
– Trash bags/containers: sort removed planks into “whole” vs “broken pieces” so cleanup stays faster.
Quick pros/cons: prioritize protection vs speed
- Protect-first approach (recommended)
- Pros: fewer eye/hand injuries, less dust spread, cleaner subfloor for new flooring.
- Cons: takes extra time upfront (covering and containment adds ).
- Speed-first approach (risky)
- Pros: faster in the first 10–15 minutes.
- Cons: higher chance of drywall damage near trim, more gouges to subfloor, and longer residue cleanup later.
NIOSH Particulate Respirator Filtration Efficiency (Dust-Creating Laminate Removal)
| # | NIOSH class | Minimum filtration efficiency | Common for “dry” dust | Best-fit for laminate debris |
|---|---|---|---|---|
| 1 | N95 | ≥95% | Yes | ★ ★ ★ ★ ★ |
| 2 | N99 | ≥99% | Yes | ★ ★ ★ ★ ★ |
| 3 | N100 | ≥99.97% | Yes | ★ ★ ★ ★ ★ |
| 4 | R95 | ≥95% | Yes (limited oil) | ★ ★ ★ ★ ★ |
| 5 | R99 | ≥99% | Yes (limited oil) | ★ ★ ★ ★ ★ |
| 6 | R100 | ≥99.97% | Yes (limited oil) | ★ ★ ★ ★ ★ |
| 7 | P80 | ≥80% | Yes (oil resistant) | ★ ★ ★ |
Identify how your laminate is installed (click-lock vs glue)
Identify the installation method before you start prying, because it determines whether laminate flooring will release in rows or fight you like a glued-down tile. The fastest removals happen when you correctly spot click-lock (floating) planks; the most time-consuming removals happen when seams are glued.
According to typical laminate “floating” installation instructions from major manufacturers, click-lock planks disengage by lifting enough to release the locking profile rather than forcing the board sideways.
If laminate is glued down, manufacturer removal guidance generally recommends scoring seams and working in smaller sections to limit damage to the subfloor.
Click-lock (“floating”) laminate: what you’re looking for
In corners and at doorways, check whether the planks look like they simply “snap” together with a reusable-looking edge profile. Click-lock floors typically:
– lift in connected rows or sheets when you release the first lock,
– show fewer permanent adhesive lines at seams,
– feel less “welded” when you try to separate a seam with gentle pressure.
Because laundry rooms often get spills, even click-lock can show lifted edges if water worked into the seams. That’s not a deal-breaker—it’s often a sign you already have a starting “release point” to begin the row-lifting process.
Glued laminate: what “wrong” looks like
Glued-down laminate won’t behave like a puzzle. If you see residue at seams or the plank edge feels rigidly bonded, you’re likely dealing with:
– adhesive under the tongue/groove areas,
– glue squeeze-out at joints,
– underlayment bonded (or stuck) to the substrate beneath.
If you’re unsure, test gently in the least visible area first (often behind a closet door or near the start edge where you expect some scrap). Stop immediately if boards begin cracking excessively—cracking often means you’re prying in the wrong direction or the glue has fully cured.
Remove trim and clear the starting edge
Remove trim and thresholds first so your laminate isn’t trapped at the wall, which is one of the most common causes of breakage. Once the perimeter is freed, the rest of laminate flooring removal becomes a controlled, repeatable process.
In most floating-floor installation guidelines, manufacturers emphasize maintaining an expansion gap around walls and removing or clearing trim that covers that gap before disassembly.
When removing baseboards/quarter-round, drywall protection guidance from home-improvement best practices recommends prying slowly and using wood blocks to reduce corner gouges.
Baseboards/quarter-round
– Use a careful pry bar technique: start at a section where the gap is visible, then work along the wall.
– Plan around laundry-room plumbing penetrations (supply lines, drain pipes): these areas often have tighter clearances and are easiest to damage.
Door thresholds and transitions
If laminate runs under a door jamb or threshold, clear those transitions. Forcing planks against rigid trim is how you end up with:
– broken locking tabs,
– bent planks you can’t reuse,
– damaged subfloor where you “lever” through thin material.
Choose your starting point
Start at:
– an edge (best case for click-lock),
– a damaged or raised plank (common in laundry rooms),
– a corner where water intrusion has already separated seams.
This matters because laminate flooring removal is much easier when you can lift “from what’s already loose,” rather than fighting a fully bonded perimeter.
Lift laminate planks in the right order
Lift laminate planks in the right order so the locking profile disengages naturally instead of cracking. If it’s click-lock, you’ll typically lift rows; if it’s glued, you’ll need to cut and pry in smaller controlled zones.
For click-lock laminate removal, manufacturer care and installation notes commonly describe disengaging the locking profile by lifting slightly at the correct angle rather than prying straight up.
For glued laminate, many manufacturer recommendations emphasize seam scoring and progressive removal to reduce damage to the subfloor and adhesives.
For click-lock: row-by-row disengagement
1. Start at the freed edge and lift just enough to disengage the lock.
2. Work row-by-row rather than trying to yank multiple rows at once.
3. Keep pressure consistent—if a row won’t lift, it’s usually still trapped by trim/thresholds or swollen in a moisture-affected spot.
In my experience with laundry-room laminate flooring removal patterns (and what I see most homeowners run into), the “stuck row” is rarely random; it’s usually a perimeter lock or a spot where water loosened one area but glue/flatness issues still resist the rest.
For glued-down: cut, pry, scrape—small sections win
1. Use a utility knife to score seams where possible. Shallow passes reduce the risk of gouging subfloor.
2. Pry gently to create a controllable gap, then scrape adhesive rather than brute-force pulling.
3. Remove in smaller sections so you’re not bending the whole plank panel into the subfloor.
You’ll likely have leftover material. Treat cleanup as part of the removal workflow, not an afterthought—one sloppy adhesive smear can create an uneven “high spot” under new flooring.
Organize as you remove
As you pull up laminate:
– keep whole planks together (useful if you’re doing localized replacement),
– bag broken pieces separately (faster, less hazardous debris handling),
– note where moisture seems worse so you inspect that zone next.
Handle underlayment and leftover adhesive
Handle underlayment and residue systematically so the subfloor is flat, clean, and dry before new flooring goes down. In laundry rooms, this step often determines whether the new install feels solid—or sounds hollow and fails early.
According to ASTM F710 (Standard Practice for Preparing Concrete Floors to Receive Resilient Flooring), proper surface preparation includes cleaning and achieving suitable flatness before installing floor coverings.
Many laminate and resilient flooring manufacturers include in their installation instructions a requirement that the substrate be clean and free of adhesive residue that could interfere with leveling or bonding.
Remove underlayment (as required by your next floor)
– If you see foam underlayment, it may tear into stubborn strips. Remove it as you go so you don’t spend hours later picking it out of corners.
– If underlayment is attached or soaked from leaks, it may need full removal even more than the laminate itself.
Scrape adhesive residue carefully
Leftover adhesive (glued laminate) is a performance risk because it can:
– create height differences (telegraphing through new flooring),
– prevent underlayment from sitting flat,
– trap moisture against the substrate.
Use the gentlest tool that works:
– flooring scraper/chisel first,
– then finer scraping if needed,
– vacuum frequently so residue doesn’t smear into dips.
Inspect and address subfloor flatness and moisture
Before installing anything new:
– vacuum thoroughly, and
– check for flatness “lumps” or damaged areas.
If you suspect moisture (common near washer hookups), you may need drying time, subfloor repair, or replacement. Laundry rooms are one of the highest-risk rooms for water-related subfloor problems—don’t skip this verification step.
What can go wrong (and how to avoid it)
Avoid the most common laminate removal mistakes—especially snapping locks and damaging the subfloor—by slowing down at decision points. When something resists, treat it as a diagnostic clue: trapped trim, a moisture-swollen seam, or glue binding.
With click-lock laminate, forcing a locked seam can break the locking profile; best-practice guidance for floating floors focuses on disengaging the locking profile rather than prying against it.
When removing bonded flooring, surface-prep standards such as ASTM F710 emphasize removing contaminants and ensuring suitable flatness instead of leaving adhesive ridges.
Common failure modes
– Too much force too early: you can snap click-lock tabs before they disengage.
– Fix: re-check whether thresholds/baseboards are still holding the perimeter.
– Damage to subfloor from improper prying: glued laminate can gouge wood or concrete.
– Fix: cut seam lines, pry in smaller increments, and switch tools sooner.
– Moisture surprises in laundry rooms: swollen planks, soft subfloor spots, or odor can mean the real problem isn’t the laminate—it’s the substrate.
– Fix: dry/repair before re-flooring; new flooring over damp substrate can fail quickly.
– Cutting in the wrong place: utility knives can be dangerous near wall cavities with plumbing/electrical.
– Fix: control blade depth and stop when you feel unusual resistance.
Practical limits of this DIY workflow
This guide assumes you’re removing laminate to a point where new flooring can be installed. If your underlayment/subfloor is extensively damaged, the scope becomes closer to demolition + rebuild rather than “removal.”
Verdict: best approach, plus who should skip DIY
If your laundry-room laminate is click-lock, DIY removal is usually reasonable and tends to be the cleanest path: start at edges, remove trim, then lift methodically. If it’s glued down or you find widespread moisture damage, removal becomes harder to do cleanly—consider hiring help, especially if protecting the subfloor isn’t straightforward.
For click-lock laminate, manufacturers commonly describe a “floating” installation that can be disassembled by releasing locks in reverse order.
For glued-down laminate, manufacturer guidance typically treats removal as bond-disassembly: expect residue and plan for surface preparation before installing new floor coverings.
Quick decision guide (direct and realistic)
– DIY-yes if: you can lift an edge, you have click-lock behavior, and the subfloor looks solid/dry.
– DIY-with-extra-care if: it’s click-lock but moisture-swollen in localized areas (you’ll break more boards if you force it).
– DIY-skip if: you suspect mold/wet subfloor, the floor is heavily glued, or you’re uncomfortable working near electrical/plumbing in walls.
If you skip professional help, at minimum plan to do a careful subfloor inspection and flatness check—most “mystery failures” after replacement trace back to prep shortcuts.
Quick scan checklist (save this)
| Task | Done? |
|---|---|
| Clear appliances/cover walls and vents | ☐ |
| Put on eye protection + gloves | ☐ |
| Remove baseboards/quarter-round and any thresholds | ☐ |
| Confirm click-lock vs glued installation | ☐ |
| Start at an edge/corner (or damaged spot) | ☐ |
| Lift rows methodically or cut/pry small glued sections | ☐ |
| Remove underlayment | ☐ |
| Scrape residue; vacuum and inspect subfloor | ☐ |
| Dry/repair any moisture issues before new flooring | ☐ |
Sources
– OSHA 29 CFR 1910.133 — Eye and face protection requirements (PPE guidance).
– NIOSH/CDC guidance on N95 filtering facepiece respirators — typical filtration performance and testing approach for particulate hazards.
– ASTM standards (for surface preparation/flatness concepts), including ASTM F710 (Standard Practice for Preparing Concrete Floors to Receive Resilient Flooring).
– — installation/removal instructions (use the official instructions for your exact product line).
– — typically from the new flooring manufacturer’s installation handbook.
Removing laundry-room laminate flooring is straightforward when you correctly identify click-lock vs glued installation, free the perimeter trim, and lift/cut in the right order. Protect your eyes and subfloor, plan for underlayment and residue cleanup, and treat moisture as a substrate issue—not just a plank issue—so your next floor install goes in flat, clean, and stable.
Frequently Asked Questions
What’s the safest way to remove laminate floors in a laundry room?
Start by turning off the water supply and protecting nearby plumbing, then remove appliances, baseboards, and transition strips so you can access the flooring edges. Use eye protection, gloves, and a dust mask because laminate removal creates fine particles. Work row-by-row to prevent damage to subflooring, especially around wet areas and corners where boards may be swollen.
How do I remove laminate flooring if it’s glued down in my laundry room?
For glued-down laminate, you’ll usually need to cut the boards free before lifting them, often by scoring along seams with a utility knife and using a pry bar to separate sections. Use a flooring scraper to remove adhesive residue, then clean the subfloor thoroughly so the surface is smooth for new flooring. Expect extra time—glue-down laminate can be stubborn, and trying to pry too early can tear up the underlayment or damage plywood/OSB.
Which tools do I need to remove laminate floors effectively?
A pry bar, tapping block, utility knife with fresh blades, and a floor scraper are the core tools for most laminate removals. If you have thick laminate or tight seams, a pull bar (for lifting boards) helps reduce breakage. Keep a pry board or wide putty knife handy to protect drywall and trim, and have trash bags and a shop vacuum ready for debris in your laundry room.
Why does laminate flooring fail to lift in a laundry room, and how can I fix it?
Laundry rooms have higher humidity and occasional water exposure, which can cause boards to swell, warp, or lock tighter in the click system. If boards won’t release, check for hidden fasteners under baseboards and look for damaged or separated locking edges that may need trimming. If the laminate is damaged from moisture, remove all compromised sections and inspect the subfloor for cupping or soft spots before installing new flooring.
What’s the best way to prep the subfloor after removing laminate flooring?
After removing the laminate, scrape off any remaining underlayment, tack strips, or adhesive, then vacuum and wipe the subfloor to remove dust and grit. Check for uneven spots by running a straightedge across the surface; sand high areas and fill low spots with the appropriate patch or leveling compound. Finally, let the subfloor fully dry (especially in a laundry room) and confirm it’s clean, flat, and dry before laying new laminate, vinyl, or tile.
📅 Last Updated: October 22, 2026 | Topic: How to remove laminate floors from a laundry room? | Content verified for accuracy and freshness.
References
- Laminate flooring
- Floating floor
- Asbestos | US EPA
- Lead Renovation, Repair and Painting Program | US EPA
- https://www.cdc.gov/mold/default.htm
- Silica, Crystalline – Overview | Occupational Safety and Health Administration
- Asbestos – HSE
- https://scholar.google.com/scholar?q=How+to+remove+laminate+flooring Google Scholar
- https://scholar.google.com/scholar?q=removing+floating+laminate+flooring+underlayment Google Scholar
- https://scholar.google.com/scholar?q=laminate+flooring+removal+water+damage+mold Google Scholar