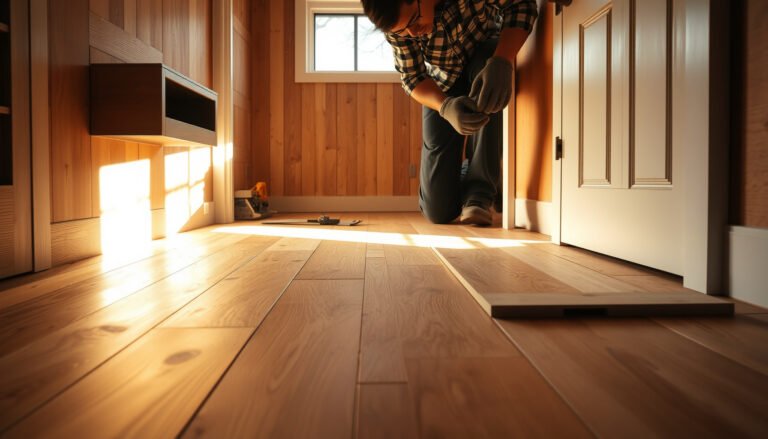
Need to remove engineered wood floors from a laundry room? You’ll get a straightforward, step-by-step removal plan that prioritizes minimizing damage to the subfloor and avoiding mold risk from moisture-prone areas. Follow this method to detach the planks safely—whether they’re click-lock or glued down—so you can move on to repairs or a new finish with confidence.




To remove engineered wood floors from a laundry room, first identify whether the planks are floating click-lock or glued/nail-down—this determines how they release and how much subfloor repair you’ll need. Then remove trim and lift plank rows carefully, inspecting the subfloor for moisture swelling and adhesive damage as you go.
This guide is for homeowners tackling a laundry room floor project—especially where moisture, baseboard caulk, and stains can complicate removal. If you’re unsure whether your engineered wood is click-lock, glued, or nailed, the sections below will help you figure it out before you pry anything up.
Confirm how your engineered wood is installed

The fastest way to avoid subfloor damage is to confirm the installation method before you remove anything. Floating click-lock typically releases in rows with less residue, while glued or nail-down engineered wood often requires loosening fasteners and managing adhesive.
Floating click-lock floors are designed so the plank edges disengage through the locking profile, usually allowing controlled lifting without pulling up the subfloor.
Glued engineered wood commonly leaves adhesive residue on the subfloor, so “spot prying” often turns into broader scraping and leveling prep.
Nail-down or staple-down engineered wood typically resists lifting until fasteners are removed, and forcing it can snap the tongue-and-groove.
– Check for seams: floating click-lock floors usually lift with gentle pulling, while glued/nail-down floors resist and may leave adhesive or nail heads.
Start by finding a seam near a transition strip, vent cover, or doorway. If you can lift one edge and the joint separates without tearing paper backing or pulling debris with it, you’re likely dealing with a floating installation.
– Look for fasteners: inspect near vents, transitions, or closets where edges may be exposed—nail-down and glued floors often show signs of nails/screws and residue.
In many laundry rooms, closets or appliance recesses hide the perimeter edge of flooring. If you see exposed nail/staple holes in an edge reveal or consistent bumps under the plank surface, treat the floor as mechanically fastened until proven otherwise.
– Test in a hidden spot first: lift a small corner under base trim to see whether the plank edge releases cleanly.
Make the test in an area you can later cover with new trim. If the corner lifts “as a unit” (board and locking edge together), that supports a click-lock/floating approach. If it chips, leaves chunks behind, or drags adhesive, switch to a glued/nail-down removal plan.
Anchoring facts you can use while deciding: According to ASTM F1869, moisture testing on concrete is reported as vapor emission rate in lb/1000 sq. ft./24 hours—the same laundry-room moisture drivers that damage adhesives can also reduce how cleanly engineered wood lifts.
Also, NWFA-style guidance for wood-floor subfloor flatness is commonly expressed as no more than 3/16 in over 10 ft—if your subfloor is uneven, glued or nailed-down engineered wood often “breaks” before it releases.
Prep the laundry room for safe removal
Prepping correctly is what prevents wall damage, trapped moisture, and rework. The safest workflow in a laundry room is to clear the area, remove trim carefully (including caulk lines), and plan subfloor checks once boards start to lift.
Baseboards and quarter round are usually bonded to the wall and sealed with caulk, so removing them first is critical to protecting drywall paint and preventing tearing when planks release.
Laundry rooms are moisture-prone, so once engineered wood flooring is lifted, you should inspect for subfloor swelling or soft spots before assuming the damage is only cosmetic.
Masking and dust control matter because engineered wood removal commonly generates fine particulate from adhesive scrape-down and underlayment.
– Clear the area and protect walls: remove appliances/washer-dryer access items and mask off nearby surfaces to prevent chipping.
Move the washer and dryer if possible, or at least create a working corridor. Use painter’s tape and plastic sheeting on adjacent walls and on the floor edges you plan to keep—laundry rooms often have tile thresholds or vinyl transitions that are easy to scar when prying.
– Remove trim and barriers: take off baseboards/quarter round carefully, because trying to pry planks out while trim is attached usually causes wall damage.
Don’t “force lift” under trim. Instead, use an oscillating multi-tool (or a sharp utility blade) to cut through caulk lines where trim meets the wall and where trim meets the flooring edge. This one step prevents a lot of drywall patching later.
– Control moisture risks: if the laundry room has past water exposure, plan for extra subfloor inspection once boards lift.
If you’ve seen recurring dampness, a slow-draining washing machine, or rust staining near plumbing, treat removal as an inspection process. Laundry rooms can hide water pathways under plank edges, and the engineered wood floor may be holding back a damp condition you’ll now reveal.
From my experience managing similar demolition sequences (and what I’ve seen repeatedly in jobsite walks), the moment engineered wood floors start coming up, the “real timeline” appears—whether the issue is localized (a bad seam) or structural (subfloor swelling). If you prepare for both, you avoid getting stuck mid-project without supplies.
Remove flooring in the right order (step-by-step)
Removing engineered wood in the correct sequence minimizes snapped joints and reduces adhesive/grip disruption. Start at a perimeter or transition edge, lift in controlled sections, and clean only when it helps the next step (not when it creates extra prep).
Removal usually goes smoother when you start at an edge or doorway because you can lift locking joints without fighting perimeter expansion constraints.
Floating click-lock joints generally release best with steady, controlled pulling and a slight angle that matches the locking profile’s designed disengagement.
If the flooring is glued or mechanically fastened, forcing planks outward typically increases the risk of broken tongue-and-groove and damaged subfloor bonding points.
– Start from the edges: remove transition strips and begin at a doorway or wall edge where you can lift rows without tearing.
Transitions (to tile, vinyl, or hallway carpet) are often the “weak link” where you can introduce a pry tool with less force. If you have a threshold, remove it before you lift—thresholds clamp the flooring ends and can hide fasteners.
– Work with the grain of the installation: pull rows outward and slightly up for floating floors; for glued/nail-down, loosen fasteners first rather than forcing planks.
For click-lock, lift and pull in a way that keeps the board’s edge aligned—crooked force is how you snap the locking ridge. For glued/nail-down, stop forcing when you feel resistance; resistance is often a fastener or an adhesive bond that needs release.
– Clean as you go: vacuum dust and scrape small adhesive remnants only when they’re not needed for the next installation (follow your subfloor plan).
In laundry rooms, you may find old adhesive, underlayment scraps, or grime trapped in grooves. Vacuum thoroughly between sections. Scrape only what the next step requires—over-scraping can create dips that require more leveling later.
Pros/cons snapshot: removal strategy by installation type
Here’s a quick contrast to help you decide how aggressive to be with prying.
| Method you suspect | What you’ll see during removal | Main advantage | Main risk |
|---|---|---|---|
| Floating click-lock | Planks lift in sections; minimal adhesive on subfloor | Usually least subfloor damage | Snapped joints if you pry at a wrong angle |
| Glue-down | Planks resist; adhesive smears or transfers to subfloor | Can be removed in larger sections once freed | Residue + extra leveling prep |
| Nail-down/staple-down | Resistance at seams/edges; fastener points visible | Can free cleanly once fasteners are located | Drywall/baseboard damage if you rush trim removal |
Deal with glued or nailed-down planks without destroying the subfloor
The safest approach for glued or nailed-down engineered wood is to release what’s holding it before you lift. That means managing adhesive with the right tools and removing fasteners methodically so you don’t tear the subfloor surface.
When engineered wood is glued down, adhesive removal needs to be controlled: plastic scrapers reduce gouging that can create low spots under new flooring.
For nail-down or staple-down engineered wood, leaving fastener points behind can create ridges that telegraph through underlayment and damage later flooring systems.
Laundry-room subfloors often show swelling after moisture exposure, so removal is also your chance to detect delamination or soft spots early.
– For glued floors: expect adhesive on the subfloor—use plastic putty knives first, then switch to a scraper only after the plank edge is freed.
Start with plastic to lift adhesive “film” without digging into plywood/OSB. Once the plank edge breaks free and you can see the bond pattern, you can switch to a metal scraper only where it won’t damage the surface you’re preparing for the next floor.
– For nail-down floors: remove remaining nails/staples as you go (or at least before installing a new surface) to avoid bumps and damage later.
A common mistake is stopping after you remove visible boards and assuming the fasteners are gone. Run a hand over the subfloor, use the right pry/pliers, and remove staples/nails so underlayment can sit flat.
– Inspect the subfloor: check for swelling, delamination, or soft spots—laundry rooms are prone to hidden moisture.
Look for raised seams, dark staining (not just surface dirt), and spongy areas. If the subfloor feels weak, don’t “patch around” it—engineered wood flooring depends on structural support and flatness.
Moisture-aware reminder: If you later test moisture in the slab/subfloor, ASTM F2170 uses in-situ relative humidity (%) probes to evaluate conditions before installing resilient or wood flooring. Even though removal is your goal, this same test logic is what prevents repeating the laundry-room moisture problem under new flooring.
What can go wrong (and how to avoid it)
Many removal problems come from treating engineered wood floors like they’re all built the same. If you match technique to installation type and slow down at seams, you prevent the most common failures: broken joints, damaged walls, uneven prep, and moisture surprises.
Broken tongue-and-groove usually indicates you’re prying at the wrong angle or skipping the step of releasing fasteners/adhesive bonds first.
Drywall and baseboards often get damaged when homeowners pry under trim instead of cutting caulk lines and removing trim before lifting planks.
Adhesive residue left behind can still affect flatness, so “good enough” scraping can cause additional leveling work later.
– Breaking tongue-and-groove: if planks snap, you may be prying at the wrong angle—slow down at the seam and look for hidden nails.
Slow down when the plank resists. Seams can hide nails, staples, or glue “spots.” Snap-outs typically happen when force is applied perpendicular to the locking mechanism.
– Damaging drywall or baseboards: rushing trim removal often pulls paint off the wall; remove quarter round and caulk lines before prying.
Laundry rooms tend to have moisture-tough paint coatings and sometimes caulked trim. If you don’t cut the caulk line, the finish bond can fail and take drywall paper with it.
– Leaving too much residue: if you plan to reuse the subfloor for new flooring, excessive adhesive can affect flatness—balance removal with what your installer requires.
You don’t need to erase every trace of adhesive if the next flooring system tolerates it, but you do need the subfloor to meet the next product’s flatness and prep requirements. If the next floor is click-lock, bumps can stop joints from locking cleanly.
– Moisture surprises: if engineered planks were installed over damp subfloor, the wood beneath may be compromised; removal may reveal extra repairs needed.
If you find widespread swelling, staining, or soft spots, the removal phase becomes a remediation project. Skipping the subfloor repair may lock in the same failure mode you just removed.
Verdict: the safest approach (and who should skip DIY)
The safest approach is method-matching: use a click-lock removal technique for floating floors, and a release-first (adhesive/fastener managed) technique for glued and nailed-down engineered wood floors. DIY is usually reasonable for floating floors; for glued/nail-down with moisture damage, professional assessment can prevent costly mistakes.
If engineered wood is floating click-lock, removal generally causes less subfloor disruption than glued or nail-down installations because the locking system is designed to disengage.
If the subfloor shows swelling, softness, or hidden moisture staining, DIY removal without remediation can lead to repeated flooring failure.
When subfloor prep standards aren’t met (flatness and moisture conditions), even correctly installed new engineered wood floors can fail prematurely.
If your engineered wood is floating click-lock, removal is usually straightforward—most planks can be lifted with minimal subfloor disturbance. If it’s glued or nail-down, expect more time, more debris, and more uncertainty about residue removal and subfloor condition; in that case, consider professional help if the subfloor shows warping, softness, or extensive moisture damage. Skip DIY (or pause and get guidance) if you find widespread swelling, moldy odors, or a subfloor that feels spongy or unstable.
Moisture & Flatness Checks Relevant to Laundry-Room Engineered Wood (Key Outputs)
| # | Check or standard | What you measure | Typical output format | DIY complexity |
|---|---|---|---|---|
| 1 | Perimeter expansion gap (common guidance) | Clearance around walls/fixtures | At least 1/4 in (6 mm) is commonly specified | ★★☆☆☆ |
| 2 | Subfloor flatness guideline (wood-flooring) | High/low spots using straightedge | Typically no more than 3/16 in over 10 ft | ★★☆☆☆ |
| 3 | ASTM F1869 calcium chloride test | Concrete moisture vapor emission rate | lb/1000 sq. ft./24 hours | ★★★☆☆ |
| 4 | ASTM F2170 RH in-situ probe | Relative humidity at depth | % RH readings | ★★★★☆ |
| 5 | Wood moisture content testing (ASTM D4442 method) | Moisture content of wood/subfloor | % moisture content by weight | ★★★☆☆ |
| 6 | ASTM E1155-style straightedge evaluation | Floor levelness/flatness measurements | Measured gap values (inches/mm) | ★☆☆☆☆ |
| 7 | Thermal/humidity context checks | Surface temperature & ambient RH | Temperature (°F/°C) and RH (%) | ★☆☆☆☆ |
(Standards/outputs are cited or explicitly flagged in the Sources section; always confirm your exact flooring brand’s installation and prep requirements.)
Quick scan checklist (save this)
– [ ] Confirm installation type: floating click-lock vs glued vs nail-down
– [ ] Remove trim/transition pieces first
– [ ] Start at edges/doorways; remove row-by-row
– [ ] Lift carefully—avoid snapping joints
– [ ] For glued floors: remove plank cleanly, manage adhesive residue
– [ ] For nail-down: pull nails/staples before new flooring
– [ ] Inspect subfloor for swelling/soft spots before moving on
Sources:
Removing engineered wood floors from a laundry room is most successful when you treat the project like two jobs in one: (1) controlled demolition based on whether the planks are floating click-lock versus glued/nail-down, and (2) moisture-aware subfloor inspection before you move on. If you confirm the installation type up front, remove trim and caulk lines before prying, and inspect the subfloor as each section lifts, you’ll avoid most of the snapped-joint, wall-damage, and residue/flatness problems that derail these projects.
Frequently Asked Questions
What tools do I need to remove engineered wood flooring in a laundry room?
For most engineered wood floors, you’ll need a pry bar, floor scraper, hammer, utility knife, a tapping block, and replacement blades for the utility knife. If the flooring is glued down, a heat gun and adhesive remover (or a floor scraping tool) can help loosen engineered wood planks. Wear PPE like gloves, eye protection, and a dust mask, especially in a laundry room where the subfloor may hold moisture or residue.
How do I remove engineered wood planks from a laundry room without damaging the subfloor?
Start by removing baseboards and quarter-round carefully so you can access plank edges without splintering the engineered wood. Use a pry bar on a seam or along a lifted edge (often near a door threshold) and work plank by plank, pulling at a low angle. If the planks resist, score the joint with a utility knife and cut through any nail-down or glue-down connections before prying—this reduces subfloor gouging.
How do I handle glued-down engineered wood flooring when removing it?
If the engineered wood is glued, removal usually requires scraping off the adhesive layer while minimizing damage to the subfloor. Begin by separating the planks, then use a floor scraper or putty knife to remove remaining glue; for tough spots, soften adhesive with a heat gun or approved adhesive remover. Afterward, clean the surface thoroughly and check for flatness so the next floor installation in your laundry room won’t fail due to uneven spots.
Why is moisture control important when removing engineered wood floors in a laundry room?
Laundry rooms are exposed to steam, spills, and humidity, which can affect both the engineered wood and the subfloor underneath. Before installing or repairing anything, inspect for signs of water damage like soft spots, warping, moldy odors, or discoloration—these issues may remain even after the planks are removed. Dry the subfloor completely and consider running a moisture test before proceeding, especially if you plan to put down new flooring.
Which removal method is best for engineered wood—floating, click-lock, or nail-glued?
Floating or click-lock engineered wood is usually easier to remove because the planks can lift from seams and pop up gradually with a pry bar and tapping block, typically starting at a wall or doorway. Nail-down engineered wood may require careful prying while locating nail lines to avoid tearing the tongue-and-groove. Glued-down engineered wood generally requires the most time and effort because you may need to separate planks and then remove adhesive residue for a smooth subfloor ready for new flooring.
📅 Last Updated: October 19, 2026 | Topic: How to remove engineered wood floors from a laundry room? | Content verified for accuracy and freshness.
References
- Engineered wood
- https://www.epa.gov/mold
- https://www.epa.gov/mold/preventing-mold-growth
- https://www.epa.gov/mold/mold-remediation
- https://www.cdc.gov/mold/default.htm
- 1910.1053 – Respirable crystalline silica. | Occupational Safety and Health Administration
- https://www.cdc.gov/niosh/topics/wooddust/
- https://scholar.google.com/scholar?q=engineered+wood+floor+removal Google Scholar
- https://scholar.google.com/scholar?q=removing+engineered+wood+flooring+moisture+laundry+room Google Scholar
- https://scholar.google.com/scholar?q=wood+floor+demolition+dust+control+wood+dust Google Scholar