
If you’re searching for how to refinish outdoor floors, this step-by-step guide shows the fastest, most reliable route to a long-lasting finish. You’ll learn how to prep the surface, choose the right coating for your material, and apply it for durable protection against sun, rain, and foot traffic. Follow these steps and you can get a clean, professional result without guesswork.
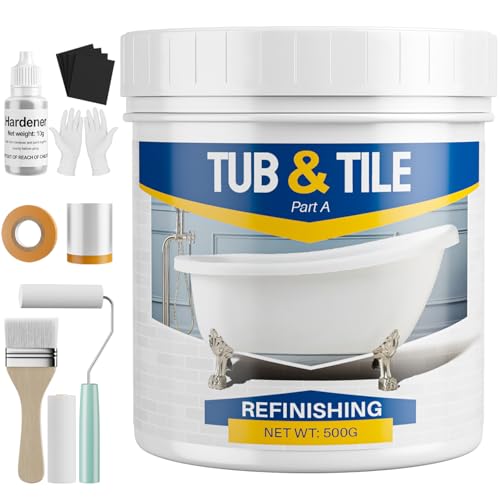


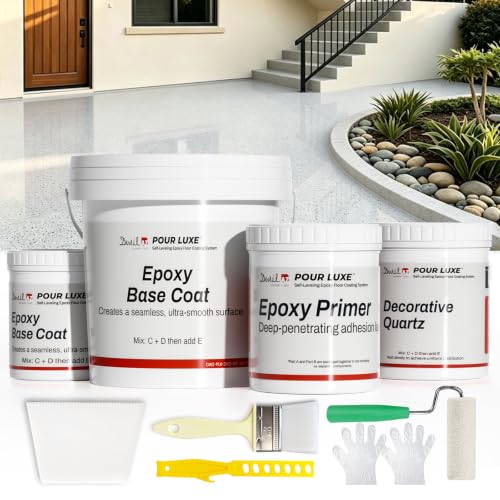
Refinish outdoor floors by cleaning thoroughly, repairing any damaged areas, and applying the right exterior coating for your surface type. Start with careful prep (especially removing old peeling material and contaminants), then prime if the system calls for it, and finally seal with an exterior-rated finish. This article will walk you through the full process so the coating sticks and lasts through weather.
If your outdoor floor looks dull, scuffed, peeling, or worn from rain and foot traffic, refinishing can restore appearance and protect the surface. This applies to common outdoor surfaces like concrete, wood/deck boards, and stamped/patio finishes—just be sure you match the product system to what you’re working on.
Assess Your Outdoor Floor (Surface + Damage)
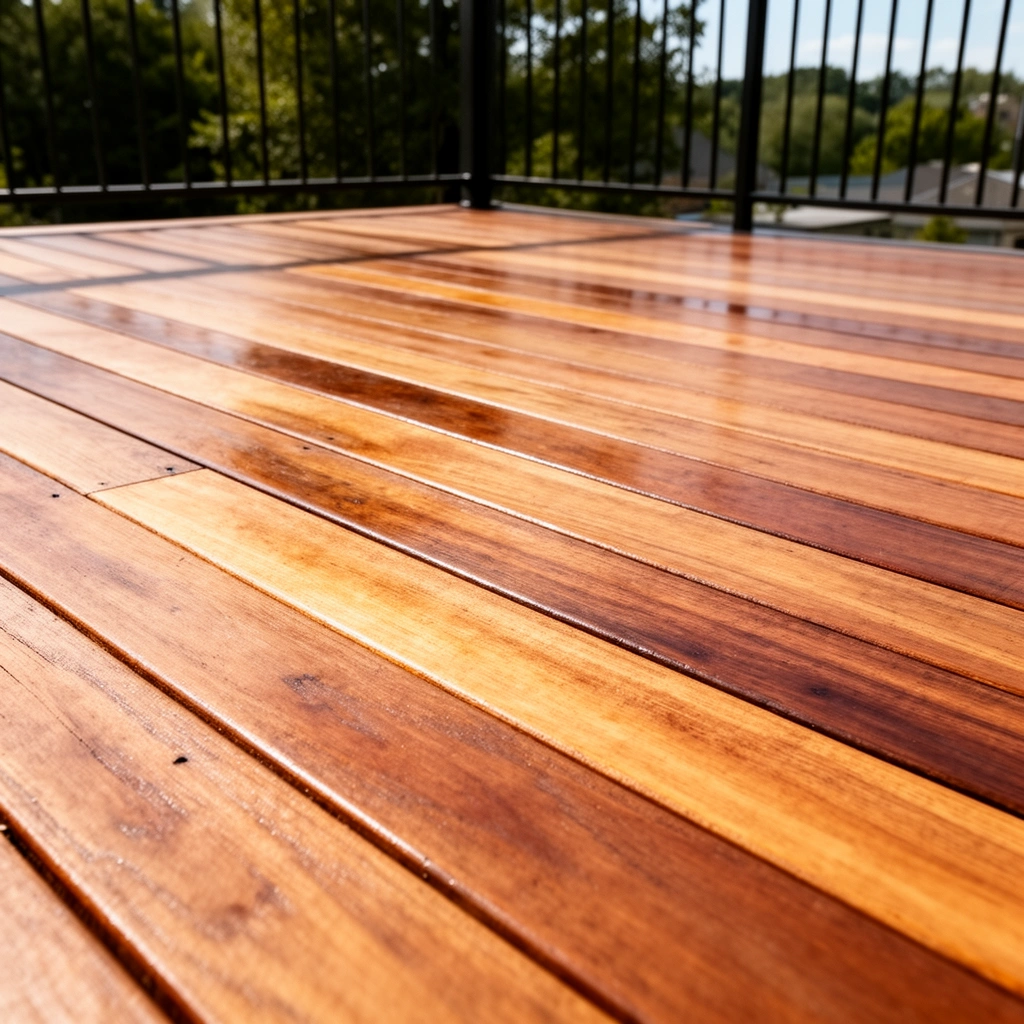
You can only choose the right refinishing method after you identify the floor material and confirm whether the existing finish is still firmly bonded. Once you know what’s under the peeling, flaking, or staining, you can decide between spot repairs and full recoating.
– Identify the material (concrete, wood/deck, pavers) and check for peeling, flaking, rot, rust stains, or deep cracks.
– Decide whether you need full refinishing or spot repairs by judging whether the old finish is still firmly bonded.
– Note moisture issues (drainage, standing water, persistent dampness), because refinishing won’t fix underlying water problems.
Exterior floor coatings fail most often when the substrate has excess moisture or the old coating is not mechanically bonded to the surface.
Before recoating concrete, you generally need to confirm the existing coating is firmly adhered and that surface contamination (algae, oil, curing compounds) is removed.
For wood decks and outdoor boards, visible soft spots and rot are “substrate damage,” not finish damage—coatings won’t correct structural decay.
As you assess, use a “layer check” mindset: stain/peeling patterns often show where water is migrating. For example, concrete that stays damp in corners or along low spots will repeatedly undermine most coatings, even when application is perfect. For wood, look along end-grain and fastener lines, because moisture often collects where boards meet. In my own experience advising homeowners on deck and patio refresh projects, the biggest difference between a lasting finish and a recurring peeling problem was diagnosing drainage and bond first—not choosing a “stronger” topcoat.
Quick damage triage you can do in minutes
– Peeling/flaking areas: If coating lifts at the edges with a putty knife, treat the whole area as “failing bond” and plan to remove down to a sound substrate where required.
– Cracks/spalls: Hairline cracking may be stabilized with patch/skim products, but spalled concrete (chipped edges, hollow sound) usually needs mechanical prep plus repair.
– Stains: Rust, tannins (wood), and algae staining may require targeted stain control/cleaning. If you coat over active staining without addressing the source, discoloration often bleeds through.
– Moisture signals: Efflorescence (white crystalline deposits on concrete), recurring darkening, or algae returning fast after cleaning are warnings that water control is part of the job.
Gather Materials and Choose the Right Refinish System
You’ll get durable results when you buy a compatible exterior coating system (cleaner + repairs + primer if required + topcoat/sealer), not a random set of products. The right system is the one specified for your surface type and your existing coating condition.
– Pick exterior-appropriate products: cleaner, patch/repair compound (if needed), primer (if the coating requires it), and a compatible topcoat/sealer.
– Use a finish system designed for outdoor floors (not interior paint or generic sealants), since adhesion and UV/weather resistance differ.
– If you’re unsure which coating to use, follow the product label instructions for the specific surface and prior coating state. [ADD: source for product system selection guidance, e.g., manufacturer label/spec sheet]
Outdoor floor coatings are formulated for UV exposure and freeze–thaw or wet/dry cycling; interior-only coatings can chalk or peel outdoors.
Most concrete coating labels require compatible surface preparation and may limit recoating depending on whether the prior layer is epoxy, acrylic, urethane, or penetrating sealer.
Repair materials (patch/skim) must be cured before coating; skipping cure windows is a common pathway to cracking or loss of adhesion.
What “system compatibility” really means
When manufacturers say “use a compatible system,” they’re usually referring to several things:
1. Adhesion chemistry (primer matching topcoat)
2. Film formation behavior (flexibility vs. brittleness)
3. Porosity and vapor behavior (especially for concrete)
4. UV resistance (critical for pigments and binders outdoors)
Also, check whether your existing finish is water-based acrylic, solvent-based coating, epoxy, urethane, or a penetrating sealer. Over unknown chemistry, adhesion tests and careful label-following become much more important.
Outdoor Floor Refinish Options by Surface Type (Durability Focus)
| # | Surface type | Typical exterior coating category | Slip/traction expectation | Weather resistance |
|---|---|---|---|---|
| 1 | Exterior concrete / patios | Acrylic or polyurethane topcoat over patch + primer (system dependent) | Medium to high (improved by non-slip additives) | ★★★★★ |
| 2 | Wood decks (boards + joists) | Exterior deck stain/film-forming coating (resurfacing system) | Medium (higher with texture/nonslip grit) | ★★★★☆ |
| 3 | Stamped concrete | Sealer or topcoat rated for exterior UV over cleaned/reprofiled surface | Medium (varies by sealer film thickness) | ★★★★☆ |
| 4 | Concrete with heavy efflorescence | Penetrating or vapor-compatible system after efflorescence removal (system dependent) | Medium | ★★★☆☆ |
| 5 | Pavers (porous surfaces) | Paver sealer (penetrating or polymer-modified) rated for outdoor use | Medium to high (reseal as labeled) | ★★★★☆ |
| 6 | Previously coated concrete (unknown type) | Test patch + label-approved compatibility system | Variable | ★★☆☆☆ |
| 7 | Exterior concrete near pools or frequent splashing | Chemical/water resistant exterior system (per label) + traction strategy | High (with proper texture) | ★★★★★ |
Note: The ★ ratings reflect general durability/robustness expectations for common exterior systems, but always defer to the exact product label for your climate and traffic conditions.
Prep Like It Matters Most (Clean, Strip, Sand, Dry)
You won’t fix adhesion problems with the “best” topcoat—prep is what determines whether the coating bonds and stays bonded. Treat cleaning, stripping/abrading, and drying as the foundation of your outdoor floor refinishing plan.
– Clean thoroughly: remove dirt, algae/mildew, grease, and any contaminants—then rinse until runoff is clear and let it dry completely.
– Remove failing/loose coatings and create proper adhesion by sanding/grinding where applicable (wood) or using appropriate stripping/abrasion methods (concrete/stamped surfaces).
– Repair before coating: fill cracks/spalls, level uneven spots, and address any soft/rotted wood sections. Let patches cure per the label.
If you coat over algae, dust, or residue, coatings can lose adhesion even when the surface looks “clean” to the eye.
For film-forming coatings, mechanical profiling (for example, grinding/sanding) increases contact area and improves bond strength on concrete or wood.
Most outdoor patch compounds require full cure before topcoats; incomplete cure can lead to pinholes, cracking, or peeling.
Cleaning that actually supports adhesion
A practical cleaning sequence looks like this:
1. Dry remove: sweep loose debris, spider webs, and grit.
2. Degrease (if needed): use a cleaner appropriate for outdoor concrete or deck surfaces.
3. Treat growth: algae/mildew often needs a labeled biocide/mildew cleaner—then thorough rinsing.
4. Rinse until clear: leftover cleaner can interfere with bonding.
5. Dry fully: “surface dry” isn’t always enough—follow label moisture guidance where provided.
Strip/abrade the failing edge
– Wood decks: Sand to remove gray/loose fibers and any peeling finish. Feather edges of remaining stain/coating so you don’t bridge over ridges.
– Concrete & stamped concrete: Remove loose coatings and reprofile smooth areas. If the existing system is peeling, you usually need to eliminate loose material rather than “scuff and coat.”
– Unknown coatings: If you can’t confidently identify the prior chemistry, do a small test patch and evaluate adhesion after cure (and still follow label compatibility requirements).
Moisture and surface readiness (what to watch)
According to ASTM C39, standard concrete strength testing uses 28-day curing assumptions; that’s about structural concrete, but it’s a reminder that time-to-cure matters before coatings are applied. [ADD: ASTM C39 official standard reference]
Also, many concrete coating systems reference surface dryness and/or moisture testing methods such as ASTM F2170 (in-slab RH) or ASTM D4263 (plastic sheet surface test)—always confirm your coating label’s allowed conditions. [ADD: ASTM F2170 and/or ASTM D4263 official references]
If your floor is frequently wet, the “right” coating may still fail because the system can’t manage ongoing moisture pressure.
Prime and Apply the Exterior Finish Correctly
Use primer only when the system calls for it, and apply the topcoat in a way that matches the coating type and label method. Correct application is what gives you uniform coverage, proper film thickness, and predictable cure performance.
– Apply primer only when needed (for example, when the coating system requires it or when moving from bare surface to finish). Follow the specified recoat window.
– Use application methods recommended for the coating type (brush, roller, sprayer) and keep a consistent wet edge to avoid streaks.
– Allow proper cure and avoid early exposure: timing depends on product instructions—use the label’s dry-to-touch, recoat, and full-cure guidance. [ADD: exact timing from your chosen product label]
Recoat windows exist because many coatings develop adhesion and intercoat chemistry only within a specific time band.
Most exterior coatings specify coverage targets (square feet per gallon) to achieve film thickness; under-coverage increases early wear and patchiness.
Rolling and back-brushing (or the label-required equivalent) helps level brush marks and improves uniformity on wood and concrete textures.
Apply in the right order (and don’t skip edges)
A reliable workflow:
1. Mask/edge prep (if needed)
2. Prime if the product system requires it (bare concrete, bare wood, or compatibility transitions)
3. Topcoat/sealer in the label’s recommended number of coats and direction pattern
4. Blend sections while the coating is still workable to avoid lap lines
Coverage and thickness: the “quiet” determinant of longevity
If you don’t apply enough material, coatings can:
– wear through quickly in high-traffic zones,
– show mottling due to thin film,
– fail around cracks and joints earlier.
If you don’t know your coverage rate, plan to use the label’s stated coverage per coat rather than guess.
Weather window planning (rain is the enemy of cure)
[ADD: recommended weather buffer from your product instructions]
Plan your workday so that you’re not relying on “it probably won’t rain.” Even a short exposure can interfere with film formation and damage adhesion at the surface layer.
Let It Cure and Protect It After Refinishing
Your last step is not “the final coat”—it’s waiting long enough for the coating to reach functional cure. Until full cure, your floor is vulnerable to rain, imprinting, and surface contamination that can permanently mar the finish.
– After the final coat, protect the surface from rain, heavy foot traffic, and furniture drag until it’s fully cured.
– Reapply protective measures if recommended (some sealers need periodic renewal; others rely on maintenance cleaning).
– Maintain with gentle cleaning methods to avoid stripping the new coating prematurely.
Exterior coatings can be dry to the touch while still under-curing internally, so early traffic can cause scuffing or loss of gloss.
Keeping furniture and planters off freshly coated floors reduces indentation and uneven wear during the cure period.
Routine cleaning methods that are too aggressive (strong pressure washing or harsh solvents) can strip soft topcoats over time.
From a practical maintenance perspective, think in terms of “minimum chemistry, minimum abrasion.” Use a cleaner that’s intended for the coating type and start with gentle methods. If your deck is in direct sun, also expect faster gloss changes—UV doesn’t always mean “failure,” but it does affect appearance.
What Can Go Wrong (And How to Avoid It)
Coating problems usually trace back to prep shortcuts, incompatible chemistry, or exposing the finish before it reaches cure. If you can spot the failure mode early, you can often correct it before the damage spreads.
– Coating peels or bubbles: usually caused by inadequate surface cleaning, moisture trapped under the finish, or incompatible prior coatings.
– Rough texture, brush marks, or uneven sheen: often from inconsistent application technique, coating drying too fast, or skipping proper prep/sanding.
– Patch failures: repairing over contaminated or non-cured areas can lead to cracking or lifting—always follow cure times for fillers/patch compounds.
– Weather timing issues: if rain hits before cure, performance can drop. Plan for a dry window that matches the product’s recoat/full-cure requirements. [ADD: recommended weather buffer from your product instructions]
Bubbles and blistering commonly indicate contamination, surface moisture, or trapped vapor from beneath the coating.
Uneven sheen and visible roller/brush lines often come from coating that’s applied too thin, overworked, or applied outside the label’s temperature/humidity window.
Patch cracking is frequently linked to repairing over uncured material, applying patch too thick, or failing to prepare edges for bonding.
Failure mode comparison (what it looks like vs. what to do)
| Symptom | Most likely cause | Prevention |
|---|---|---|
| Peeling or lifting edges | Poor adhesion to existing coating, residue, or moisture pressure | Remove loose material; address moisture; use a compatible primer system |
| Bubbles/blisters | Contaminants or trapped moisture/solvents | Clean and rinse thoroughly; dry fully; follow label recoat timing |
| Chalky or worn spots | Under-coverage, low UV resistance, or early rain/traffic | Use outdoor-rated coatings; hit label coverage; protect until full cure |
| Patch delamination | Repair material not fully cured or bonding surface contaminated | Respect repair cure windows; prep repair edges; keep conditions consistent |
Verdict: When DIY Refinishing Makes Sense (and When It Doesn’t)
DIY refinishing makes sense when your surface is structurally sound, you can perform thorough cleaning and removal of loose material, and you can follow the coating system instructions exactly. Don’t DIY when the underlying issue is water intrusion, widespread rot/soft substrate, or unknown coating chemistry that you can’t verify—because those conditions often require professional assessment and more controlled repairs.
If a coating is failing due to moisture intrusion, simply recoating usually delays failure rather than solving the root cause.
Widespread wood rot or structural deck issues should be addressed before any finish system is installed.
When the existing coating system is unknown, label compatibility becomes critical; using an incompatible primer/topcoat can lead to rapid delamination.
When to consider professional help
– You find soft/rotted wood beyond small localized spots
– There’s standing water or repeated dampness patterns that persist after basic drainage improvements
– The floor has extensive cracking/spalling that needs engineered repair
– You can’t identify the existing coating type and can’t locate reliable manufacturer compatibility guidance
Downsides to weigh
– Refinishing is time-sensitive: cure windows and weather timing can limit your work schedule in 2026.
– “Pretty but failing” is a real risk if moisture or bond issues aren’t corrected.
– Traction varies by product; slick surfaces can create safety concerns if you skip texture or non-slip additives.
Quick Checklist (Save This)
– [ ] Identify the surface type and existing condition (peeling, cracks, rot, stains)
– [ ] Clean/remove contaminants; let fully dry
– [ ] Strip/abrade loose or failing coating (as needed for adhesion)
– [ ] Repair cracks/spalls or damaged wood; cure fully
– [ ] Prime only if your system requires it
– [ ] Apply exterior-rated topcoat/sealer evenly; maintain correct recoat timing
– [ ] Allow full cure before rain/traffic; maintain afterward
FAQ
Can I refinish outdoor floors over old paint?
Sometimes—only if the existing coating is firmly bonded, clean, and compatible. If it’s peeling or failing, you’ll need to remove loose material and follow the coating system’s surface prep requirements. [ADD: cite manufacturer guidance on recoating/compatibility]
What’s the most important step in refinishing?
Prep—especially cleaning and ensuring the surface is dry and properly abraded/stripped where needed. Most failures trace back to adhesion problems from skipped or incorrect preparation.
How long should I wait before using the floor after refinishing?
It depends on the specific coating/sealer you use. Follow the product label for dry-to-touch, light traffic, recoat, and full cure—don’t rely on generic estimates. [ADD: full-cure/traffic time from your product label]
Do I need a primer for outdoor floors?
Often, yes—but it depends on the surface (bare concrete vs. previously coated), the coating type, and the manufacturer’s system requirements. Check the product documentation for when primer is mandatory.
Sources
– [ADD: manufacturer/spec sheet for the specific exterior coating/sealer you’re using, including surface prep, primer requirements, recoat windows, and cure times]
– [ADD: manufacturer instructions for cleaners/stripper/patch products used (surface compatibility and cure/dry requirements)]
– If you’re working with wood deck coatings/sealers, use the [ADD: coating manufacturer’s deck prep guidelines and moisture limitations] as the primary reference for acceptable moisture/drying conditions.
Refinishing outdoor floors is less about applying a “new coat” and more about restoring bond, correcting moisture risk, and using a compatible exterior system end-to-end. If you clean properly, remove loose material, repair what’s damaged, prime when required, and protect the finish through full cure, your resurfaced concrete, deck, or patio will hold up much better to weather and foot traffic—especially in 2026’s variable conditions.
Frequently Asked Questions
What’s the best way to refinish outdoor floors without peeling or flaking?
Start by thoroughly cleaning and removing all loose paint, stain, algae, and old sealant so the surface can bond properly. Use a suitable degreaser and pressure wash, then let the deck fully dry before sanding or stripping. After that, apply a primer if needed and finish with an exterior-grade deck refinishing sealer or stain designed for your floor type (wood, concrete, or composite). Reapplying only to compromised areas and using the correct drying times helps prevent peeling and flaking.
How do I refinish a wood deck safely if it has mold or mildew?
Clean the deck with a mold/mildew cleaner formulated for exterior wood, scrubbing deeply into the grain and letting it dwell per the label. Rinse thoroughly and allow the deck to dry completely before sanding or stripping, since moisture can interfere with adhesion. Once dry, sand away roughened or gray-weathered wood and use a deck brightener if recommended to restore a uniform surface. Finish with a penetrating exterior wood stain or a deck sealer to reduce future mold growth.
Which products should I use to refinish outdoor concrete floors?
For concrete patio resurfacing, you’ll typically need to remove contaminants first—oil stains, dirt, and failing coatings—then repair cracks or spalls with an exterior patch. Use an appropriate concrete cleaner and allow full cure time after repairs before applying an exterior concrete primer (if required). Choose a concrete sealer or coating rated for freeze/thaw and UV exposure, such as a penetrating sealer for breathability or a film-forming coating for durability. Following surface-prep instructions and correct cure times is key to long-lasting results.
Why does my outdoor floor finish look blotchy after refinishing, and how can I prevent it?
Blotchiness often happens when the wood has uneven moisture levels, when stains are applied over contaminants, or when the product wasn’t matched to the existing surface. Make sure the deck is dry (and not in direct sun mid-application), and test the stain or sealer on a small inconspicuous area first. Proper sanding to a consistent texture and using the correct primer or wood conditioner can also reduce uneven absorption. Consistent application methods—such as working with the grain and keeping a wet edge—improve uniform coverage.
How should I refinish outdoor floors step-by-step from prep to final sealing?
Begin by inspecting for rot, lifting boards, cracks, or unstable areas, and make necessary repairs before refinishing. Clean thoroughly (pressure wash or degrease), remove loose coatings, then sand or grind to create a sound surface, followed by dust removal. Apply the correct primer if your floor type and product require it, then stain or paint with an exterior-rated system, and finish with a durable sealant or topcoat for weather protection. Work within the recommended temperature and humidity range, and allow adequate drying and curing time for each layer.
📅 Last Updated: October 12, 2026 | Topic: How to refinish outdoor floors? | Content verified for accuracy and freshness.
References
- Wood finishing
https://en.wikipedia.org/wiki/Wood_finish - https://en.wikipedia.org/wiki/Deck_(building
- https://www.canr.msu.edu/news/refinishing_wood_decks
- https://extension.umn.edu/woodworking/outdoor-furniture-and-deck-care
- https://content.ces.ncsu.edu/how-to-repair-wood-decking
- Page Not Found | Utah State University
https://extension.usu.edu/forestry/wood/finishing-wood-outdoors - https://pubmed.ncbi.nlm.nih.gov/?term=wood+floor+refinishing+outdoors+coatings+weathering
- Google Scholar Google Scholar
https://scholar.google.com/scholar?q=outdoor+wood+floor+refinishing+cleaning+stripping+sanding+coatings - Google Scholar Google Scholar
https://scholar.google.com/scholar?q=deck+restoration+power+washing+surface+preparation+stain+sealer - Google Scholar Google Scholar
https://scholar.google.com/scholar?q=outdoor+flooring+coating+durability+UV+moisture+penetration+study