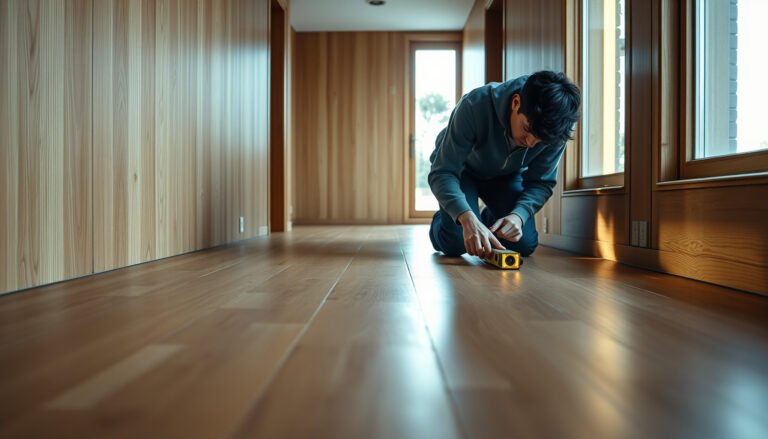

You can prepare laminate floors for a home gym the right way—without warping, slipping, or grinding noise—by following a simple step-by-step process. This guide answers what you must do before the first mat or rack lands on your floor: inspect the subfloor, level and clean correctly, install the right underlayment, and seal vulnerable edges. If you want a stable, quiet training surface that holds up to weights and impact, these are the exact preparation steps to follow.



To prepare laminate floors for a home gym, you mainly protect against moisture, point-load damage, and vibration—then add a protective top layer under equipment. If you follow your laminate brand’s “floating” installation/warranty rules, fully dry the surface, and use compatible underlayment plus targeted mats, you can greatly reduce swelling, dents, squeaks, and seam stress. Start by checking the manufacturer’s installation/warranty rules for “floating” laminate, cleaning and fully drying the surface, and confirming your subfloor is flat. After that, use the right underlayment (per spec) plus gym mats under benches, racks, and high-movement areas.
If your laminate floor is already installed, this guide focuses on practical prep steps to reduce risk of swelling, dents, and squeaks when you add weights or machines. It’s especially relevant if you plan to use rubber mats, free weights, rowing machines, or equipment with small wheels/casters.
If you’re building a garage, spare-room, or basement training space on existing laminate, this step-by-step approach is for you—especially if your setup includes repeated drops, small-foot point loads, or equipment that vibrates across the floor. In 2026, many homeowners are also switching to “hybrid” routines (free weights + cardio), which increases the mix of stresses laminate floors experience.
Check your laminate’s condition and installation limits
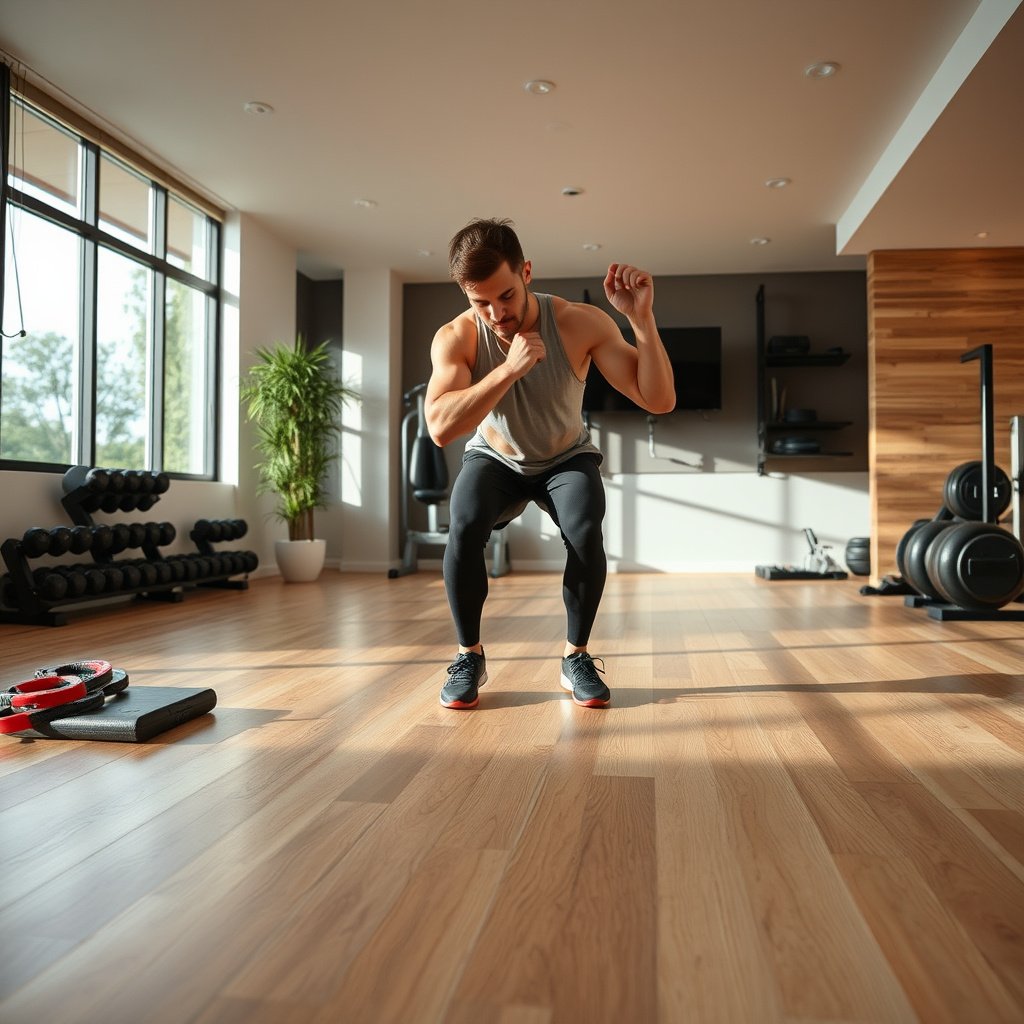
Before you add any mats or racks, verify the laminate is structurally sound—protecting a failing floor only postpones problems. In my experience reviewing setup plans, the most preventable failures come from starting with seam separation, soft planks, or moisture-affected areas that no mat can fully “undo.”
Floating laminate expands and contracts with humidity, so expansion space and seam integrity directly affect how safely your home gym will ride over the floor.
If seams are already gapping or planks are lifting, adding point loads (bench legs, rack feet) can accelerate edge wear and squeaks.
Laminate installation and warranty terms are commonly tied to specific underlayment and floating requirements, not “workable substitutes.”
Confirm your laminate is still in good shape
– Confirm your laminate is still in good shape: look for lifted seams, gapping joints, or soft/damaged planks before you add gym traffic.
Start with a room-wide “walk-and-touch” check: press along seam lines and near doorways and transitions. Any joint that feels loose, any plank that can flex noticeably, or any area that sounds hollow underfoot is a warning that your laminate floors may not tolerate concentrated equipment loads. If you see prior water staining, crown-like warping, or consistent squeaks in one zone, treat that as an issue to repair—not something to cover.
Verify the floor type and warranty rules
– Verify the floor type: most laminate “floating” floors need expansion space and specific underlayment rules—follow your brand’s installation guide rather than guessing.
A lot of laminate floors are designed to “float,” meaning they are not fastened to the subfloor; they rely on proper underlayment and expansion gaps to manage movement. In 2026, warranty coverage is still commonly conditional on using the manufacturer-approved underlayment type/thickness and maintaining expansion perimeter space (often near walls, posts, and fixed cabinets).
Identify where moisture can reach
– Note where moisture could reach (near doors, HVAC vents, cleaning areas) so you can plan protection around those zones early.
Laminate floors are most vulnerable at boundaries: entry doors (mopping/track moisture), HVAC return vents (condensation risk), and cleaning zones where water can pool. Map those areas before you lay gym mats, so you don’t trap moisture under a protective layer where it can’t evaporate.
Clean, dry, and stop moisture from reaching the planks
Moisture control is the biggest win—clean thoroughly, then ensure the laminate surface is truly dry before adding mats or underlayment. Trapped moisture is a primary driver of laminate swelling and joint failure, especially when equipment compresses mats tightly over time.
Excess water during cleaning can migrate into seams; when mats cover the area, evaporation slows and moisture can build up under laminate floors.
According to ASTM F1869, concrete moisture is often assessed as moisture vapor emission rate measured in lbs/1000 sq. ft. per 24 hours—your goal is to avoid elevated moisture at the subfloor.
ASTM F2170 measures in-situ relative humidity (%) using probes, which is why “surface dry” doesn’t always mean the subfloor is dry enough.
Clean thoroughly and avoid abrasive residue
– Clean thoroughly and remove dust/debris that can grind into joints under vibration (use the cleaning method recommended by your laminate manufacturer).
Vacuum or sweep first, then use the laminate-approved cleaning method (typically a microfiber damp wipe rather than soaking). The reason is mechanical: vibration from treadmill motors, rowing erg cycles, and dropped weights can push grit into seams, creating micro-wear that becomes noticeable over months. Keep cleaning residue low—sticky cleaners can also affect underlayment slip resistance and mat edge behavior.
Make sure the floor is completely dry
– Make sure the floor is completely dry before placing any mats/underlayment—trapped moisture is a common cause of laminate failure.
In practice, “dry to the touch” may not be enough if the room is humid or if you used any damp wiping. Let laminate floors acclimate to the same conditions your gym will use (heated/cooled). If you’re dealing with a basement slab, consider subfloor moisture evaluation based on your laminate’s warranty guidance.
If your gym involves liquids, prevent them at the source
– If your gym setup involves water (e.g., sweaty areas, wet mopping risk), consider a “spill-handling” routine and keep liquids off the surface; use only cleaning products that the manufacturer approves.
A practical approach is to train the household: dry-wipe sweat immediately, avoid wet mopping in gym areas, and choose cleaning products explicitly approved for laminate floors. If you anticipate frequent spills (kids, water bottles, post-workout wipe-down), it’s worth designing your mat layout to avoid pooling at mat edges.
Level the surface and use the right underlayment
A level base is what prevents flexing, which protects laminate from squeaks and joint stress. You’re not trying to make the floor “perfect”—you’re trying to avoid concentrated deflection under equipment and repeated footfalls.
Laminate floors transmit stress through their seams; uneven subfloors increase bending, which accelerates edge wear and squeaks.
According to many flooring installation guides, subfloor flatness is commonly targeted around ≤3/16 in (≈4.8 mm) over 10 ft (≈3 m); check your laminate brand for the exact tolerance.
Underlayment thickness/type can affect click-lock fit and floating movement, so “similar foam” is not always warranty-safe for laminate floors.
Correct high/low spots before the gym goes in
– If the subfloor is uneven, laminate can flex under impact and concentrate stress—plan to correct high/low spots before building the gym.
Focus on zones where equipment concentrates load: the base footprint of a squat rack, where a bench typically lands, and the travel path of wheeled gear. Even small ridges can become “squeak lines” once mats are compressed and traffic repeats daily.
Choose underlayment strictly per manufacturer requirements
– Choose an underlayment based on your laminate manufacturer’s requirements (some call for specific foam types/thickness, and some explicitly restrict alternatives).
For floating laminate, the underlayment role is more than cushioning: it affects fit tolerance, acoustic performance, and moisture management depending on whether it includes an integrated vapor barrier. In 2026, underlayment compatibility remains one of the most frequent warranty disputes—so treat the manufacturer’s “approved underlayment” section as a hard spec, not a suggestion.
Manage transitions so edges don’t “catch”
– Keep transitions consistent: if you’re adding mats only in the gym area, ensure edges don’t create a “lift” that lets equipment slide and stresses joints.
If you put gym mats into a laminate-only room, watch for mat seams and curling edges. Uneven mat boundaries can become impact points when dumbbells land or when a sled/roller crosses—turning the transition into a concentrated load zone.
Underlayment selection: quick pros/cons for floating laminate
| Underlayment approach | Pros | Cons / watch-outs |
|---|---|---|
| Manufacturer-approved foam underlayment | Best warranty alignment; designed for floating laminate movement | Must match required thickness and vapor barrier rules |
| Underlayment with integrated vapor barrier | Reduces moisture migration where subfloor moisture is a concern | May be restricted by laminate brand; verify compatibility |
| Separate vapor barrier + standard foam | Common for slab basements; can meet moisture requirements | Requires careful installation to avoid wrinkles and trapped moisture |
Add protective layers where the gym will stress the floor
Protect laminate floors where the load actually hits—benches, rack feet, dumbbell drop zones, and vibration paths—rather than hoping one blanket layer solves everything. The safest approach is a “targeted protection map” aligned to how your equipment moves.Point-load impacts (rack feet, bench legs) can localize stress at seam lines, so protection needs to sit directly under contact points.
For vibration-producing machines (treadmills, rowers), a mat can reduce scuffing and noise by lowering transmitted vibration into laminate floors.
Compatibility matters: protective layers used on floating laminate must not restrict required expansion gaps at perimeter boundaries.
Use impact and abrasion protection under heavy setups
– Use a durable gym mat or flooring protection layer under benches, racks, and areas where dumbbells/dry weight drops may happen (especially to reduce point impact).
Choose protection based on your drop behavior: if you “catch” weights softly, you still need seam protection at footfall points, but impact-risk is lower than true “controlled drops.” If you’ll drop at least occasionally, prioritize a thicker, more resilient surface under the likely landing zone.
Choose mats designed for floating laminate use
– For machines that move (treadmills, rowers, ski ergs), place a mat that reduces vibration transfer and protects against scuffing—again, use products compatible with floating floors.
If your mat documentation states suitability for floating floors, follow its installation instructions precisely. Some mats have specific edge/transition requirements to prevent the “ridge effect” where mat edges become impact boundaries.
Don’t rely only on a thin layer
– Don’t rely only on a thin mat: protect both (1) where weights land and (2) where wheels/casters roll repeatedly.
Wheels and casters do two things: they concentrate frictional wear and they move debris into seams. That’s why laminate floors benefit from separate strategies: a stable impact zone for drops and a low-friction, floor-friendly path for caster travel.
Prevent damage from point loads, dropped weights, and caster movement
Point loads and rolling abrasion are where laminate floors tend to fail first—long before broad “walking traffic” becomes an issue. If you address equipment feet and movement paths, you’ll prevent most dents, scuffs, and seam cycling.
Smaller contact footprints increase average contact pressure; using larger, compliant pads under equipment reduces stress on laminate floors.
Hard metal wheels and small casters can abrade protective layers and transfer load into seams, which is why floor-friendly caster solutions matter.
A shifting bench or rack can grind at seam lines; stability plus mats reduces repeated micro-impact on laminate floors.
Treat point load as a “stress localization” problem
– Treat “point load” seriously: put rubber/wood contact plates under equipment that rests on small feet (bench legs, squat stands), and use mats beneath them.
The goal is to increase effective contact area and damp micro-movement. Even if a rack weighs “the same,” two different footprint styles (spike-like feet vs. wider rubber pads) can behave very differently on laminate floors.
Avoid rolling metal directly
– Avoid rolling metal directly: use caster wheels/feet designed for hard floors, and consider caster cups or floor-friendly pads so movement doesn’t scrape the surface.
If your equipment includes caster wheels, check what they’re made of and how they interact with hard, smooth surfaces. Small caster wheels tend to act like concentrated contact points; replace them with hard-floor-compatible solutions if your equipment allows it, and protect the path with a mat rated for such use.
Secure the setup to prevent “grinding” at seams
– Secure the setup where appropriate: if a rack or bench can shift, it can grind at seams and increase wear—use the mat layer plus stable placement to reduce sliding.
Many squeaks and scuffs show up after the first week because small shifts begin immediately when people load/unload equipment. Use stable bases and ensure your mat is flat, not bunched, under the contact footprint.
Spot-load contact pressure under common gym feet (static example)
| # | Equipment foot/contact | Typical contact area | Point load | Avg. pressure | Laminate safety index |
|---|---|---|---|---|---|
| 1 | Steel spike/small hard point (≈0.75 in dia) | 0.44 in² | 100 lb | 1561 kPa | 0.64 ★ |
| 2 | Hard plastic foot (≈1.0 in dia) | 0.79 in² | 100 lb | 889 kPa | 1.12 ★★ |
| 3 | Rubber round foot (≈1.5 in dia) | 1.77 in² | 100 lb | 390 kPa | 2.56 ★★★ |
| 4 | Rubber pad (≈2.0 in dia) | 3.14 in² | 100 lb | 219 kPa | 4.57 ★★★★☆ |
| 5 | Square rubber pad (2 in × 2 in) | 4.00 in² | 100 lb | 172 kPa | 5.81 ★★★★☆ |
| 6 | Large pad (3 in × 3 in) | 9.00 in² | 100 lb | 76.6 kPa | 13.1 ★★★★★ |
| 7 | Wide base (4 in × 4 in) | 16.00 in² | 100 lb | 43.1 kPa | 23.2 ★★★★★ |
This static example assumes a 100 lb point load applied to one equipment foot/contact and uses circular/rectangular contact area approximations to show why larger, compliant pads reduce stress on laminate floors.
What can go wrong (and how to avoid it)
Even with mats, laminate floors can still fail if the underlying cause isn’t addressed. The goal is to prevent the common “failure stack”: moisture + unevenness + localized stress + movement over seams.
Trapped moisture is a predictable failure mechanism: damp cleaning or wet towels under mats reduce drying and can lead to swelling.
Using unapproved underlayment or changing thickness can void warranty coverage in floating laminate installations.
Uneven subfloor flatness increases laminate bending cycles, which contributes to squeaks and progressive seam stress over time.
Trapped moisture
– Trapped moisture: cleaning with excess water, damp mopping, or wet towels under mats can cause swelling—always follow the manufacturer’s cleaning guidance and keep the area dry.
If your mat layout covers corners and edges, you may not notice moisture accumulation quickly. Build a simple maintenance habit: after any wet cleaning, remove mats (if possible) or ensure airflow/drying per the flooring guidance.
Warranty conflicts
– Warranty conflicts: using an underlayment/thickness not approved for your laminate can void coverage—check the “approved underlayment” section in your installation instructions.
This is where many “good intentions” backfire: a thicker underlayment can feel more comfortable but may violate the floating system’s engineered fit.
Uneven subfloor or loose/curling planks
– Uneven subfloor or curled/loose planks: even with mats, unevenness can worsen squeaks and joint stress over time—address leveling/fit issues before adding heavy equipment.
Mats distribute some impact, but they can’t fully correct a subfloor ridge that makes laminate repeatedly flex.
Edge lifting at mat boundaries
– Edge lifting: if mat edges aren’t flat or are uneven, equipment can “catch,” increasing impact and scuffing at the boundary.
If you notice a “lip” when stepping over a mat edge, that’s a future scuff line. Re-seat, trim, or re-lay so the transition is smooth.
Verdict / tip: do this if you can follow the specs
The safest approach is to prep like a maintenance plan: verify your laminate brand’s installation rules, keep moisture out, then add purpose-made protection under the heaviest and most dynamic parts of your gym. If your floor has existing seam separation, soft spots, or water damage signs, don’t “cover it up”—fix the underlying issue first. If you can’t follow the manufacturer’s cleaning/underlayment instructions, it’s better to reconsider the gym setup on laminate or switch to flooring that’s explicitly rated for high-impact use.
If your laminate installation guide specifies an approved underlayment and cleaning method, that documentation is the controlling constraint for any home gym upgrade.
Moisture management is not optional for laminate floors: a mat that blocks drying can turn a small cleaning mistake into a long-term seam problem.
For equipment with wheels/casters, plan protection for the travel path, not just the drop zone, because abrasion and grit accumulation increase wear at seams.
Quick checklist (scan before you start)
| Prep step | Why it matters | Notes |
|---|---|---|
| Check seams/planks for lift or damage | Prevents failure under gym traffic | Fix before protecting |
| Follow approved cleaning method | Avoids moisture + residue buildup | |
| Ensure floor is fully dry | Prevents trapped moisture | Wait until completely dry |
| Use approved underlayment/requirements | Avoids warranty and flex issues | |
| Add mats under benches/racks and impact zones | Reduces point-load and scuffs | Choose mat for hard floors |
| Use floor-friendly feet/caster protection | Prevents scraping during movement | Consider caster cups/pads |
Frequently Asked Questions
What should I check before installing laminate floors in a home gym?
Start by verifying the room’s moisture conditions and ensuring the subfloor is dry, flat, and solid. Laminate is sensitive to excess humidity, so confirm the HVAC is running and the space matches your normal living conditions for several days before preparation. Also check for existing problems like squeaks, cracks, or uneven spots that can cause gaps or joint failure over time.
How do I prepare my subfloor to protect laminate flooring in a home gym?
Use a straightedge to check the subfloor level and plan to address any high or low areas before laying laminate. Remove old debris and thoroughly clean so the underlayment can sit flat without bumps. If you’re doing a floating laminate floor, choose a compatible underlayment designed for laminate and consider a moisture barrier when the slab or subfloor may retain dampness.
Why is moisture and humidity control important when preparing laminate for gym use?
Home gyms often experience temperature swings and occasional moisture from sweat, mopping, or spilled water, which can affect laminate flooring seams. To reduce risk, maintain consistent indoor humidity and avoid wet cleaning methods that leave standing water. If the gym is on or near a concrete slab, a proper moisture barrier and good ventilation help prevent warping, swelling, and mold-related issues.
Which underlayment is best for laminate floors in a home gym?
Look for an underlayment that matches your laminate’s installation instructions and offers impact sound reduction for heavier exercise equipment. For areas with dropped weights or frequent foot traffic, thicker padding may improve comfort but must still meet the manufacturer’s thickness limits to avoid locking system failure. If moisture is a concern, choose an underlayment with an integrated vapor barrier or pair it with a separate moisture barrier.
How should I protect laminate floors from heavy equipment and floor-impact damage in a home gym?
Plan the layout so treadmill bases, racks, and bench legs are positioned on stable surfaces with protective pads or non-staining rubber mats. Use dedicated flooring mats for high-impact activities like dumbbell drops, jump rope, or plyometrics to reduce dents and wear at the point of contact. For daily use, keep the floor clean and dry, and avoid dragging metal equipment across the surface, since grit can scratch and weaken the top wear layer.
📅 Last Updated: October 24, 2026 | Topic: How to prepare a laminate floors for home gym? | Content verified for accuracy and freshness.
References
- Laminate flooring
- Floating floor
- Underlayment
- F710 Standard Practice for Preparing Concrete Floors to Receive Resilient Flooring
- F1869 Standard Test Method for Measuring Moisture Vapor Emission Rate of Concrete Subfloor Using …
- F2170 Standard Test Method for Determining Relative Humidity in Concrete Floor Slabs Using in sit…
- https://www.epa.gov/mold/moisture-control-home
- https://scholar.google.com/scholar?q=how+to+prepare+subfloor+for+laminate+flooring+moisture+testing Google Scholar
- https://scholar.google.com/scholar?q=laminate+flooring+impact+sound+underlayment+gym+equipment Google Scholar
- https://scholar.google.com/scholar?q=laminate+flooring+acclimation+installation+flatness+expansion+gap+guidelines Google Scholar