
Preventing water damage to vinyl floors is straightforward if you act early and control moisture at the source. Stop spills immediately, use the right cleaning products, and keep seams and edges sealed to prevent water from getting underneath. Follow these practical steps and you’ll protect your vinyl from swelling, warping, and long-term discoloration.




Prevent water damage to vinyl floors by keeping spills from sitting and by blocking moisture from reaching seams, edges, and underlayment. The most reliable approach is a tight routine: reduce tracked-in wetness, clean with minimal liquid, dry quickly (especially along seams), and fix any leak or persistent damp area immediately.
If you have vinyl plank or vinyl tile with any loose edges, gapping seams, or you’ve moved into a home with higher humidity or occasional leaks, this is for you. It also helps if you have kids/pets, use a wet mop occasionally, or deal with tracked-in rain and snow from the outdoors—because those day-to-day events are usually what start the problem.
Identify where water actually gets in
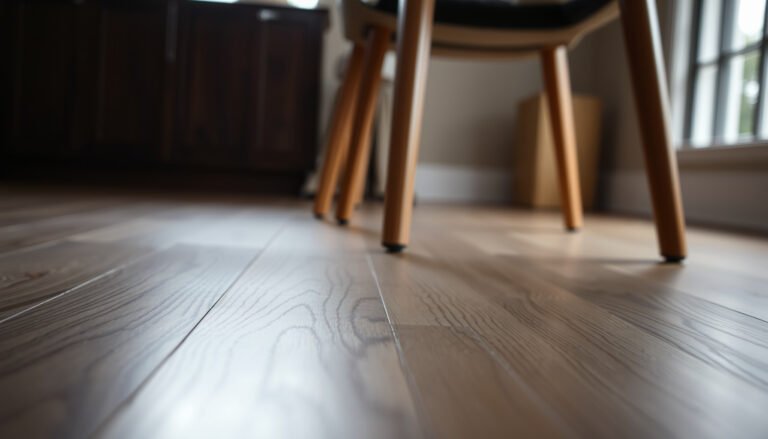
Water damage typically starts at the “weak points” rather than on the vinyl surface itself. In most homes, moisture finds a path through seams, around fixtures, and under edges—then underlayment or subfloor materials get exposed.
– Check seam lines, around toilets/sinks, and along baseboards for gaps or lifted edges—these are common entry points for moisture.
– Be realistic about “water-resistant” vs “waterproof”: seams and underlayment are often the weak spots even when the top layer resists spills.
– Map your high-risk zones (near exterior doors, plumbing runs, dishwasher/water lines) so you can focus prevention where it matters most.
Moisture intrusion through seams and edges is a common failure mode for resilient flooring because water can move underneath the surface layer.
U.S. EPA guidance emphasizes that hidden dampness can support mold growth within days if moisture is not controlled.
Indoor humidity control (commonly kept below 60% relative humidity) reduces the likelihood that damp areas remain wet long enough to cause secondary damage.
Know the “water map” in your house
Start by walking your floor like water would. Look for:
– Visible seam gaps: hairline spacing is enough for repeated wetting to work water underneath.
– Edge failures: vinyl that has lifted at a wall/baseboard line often signals moisture movement, expansion/contraction issues, or an installation gap.
– Fixture interfaces: around toilets, sinks, vanities, dishwashers, refrigerators with water lines, and any plumbing chase.
If your home has a basement or crawl space, you may also see moisture showing up in a pattern—often along exterior walls, under windows, or near HVAC returns. That “pattern” matters: it tells you whether you’re dealing with a spill/fixture leak (localized) or persistent humidity/condensation (spread out).
Quick reality check: water-resistant isn’t a free pass
A lot of vinyl floors are marketed as water-resistant to everyday splashes. But the limiting factor is usually how seams are sealed (factory finish, locking mechanism, and any installed transitions) and what’s underneath (underlayment type, concrete moisture, or subfloor material). If your vinyl installation doesn’t include a moisture-rated underlayment system—or if the product warranty limits “wet” exposure—standing water can still create swelling or loosening over time.
Prevent moisture before it lands on the floor
The best prevention is reducing how much water reaches the floor in the first place. By controlling tracked moisture and indoor dampness, you prevent the “multiple exposures” that eventually defeat seam protection.
– Use door mats and “no-shoe” routines to reduce how much water gets tracked in during wet weather.
– Control indoor humidity (especially if you have basements, crawl spaces, or AC/heat swings) because persistent damp air can increase the chance of condensation.
– Put protective pads under furniture and avoid rubber-backed mats that can trap moisture underneath.
EPA guidance recommends keeping indoor humidity at or below 60% relative humidity to help reduce mold risk.
Limiting tracked-in moisture with doormats and footwear rules reduces repeated wetting events—one of the most common triggers for resilient flooring seam failure.
Condensation risk increases with temperature swings; HVAC operation and ventilation affect how long surfaces stay damp.
Build a “dry entry” system
In practical terms, your goal is to stop water at the boundaries:
– Place two doormats at entrances (outside mat to knock off bulk, inside mat to catch remaining moisture).
– If you live in a snowy climate, encourage residents to shake off boots before entering.
– For families with pets, a dedicated wipe station near the door prevents muddy paws from becoming constant moisture exposure.
Small improvement, big payoff: repeated wetting often does more long-term harm than a single spill, because seams repeatedly cycle from wet → damp → dry while water slowly migrates underneath.
Manage humidity like a maintenance item
Even when you never spill, high indoor humidity can contribute to condensation—especially near exterior walls or plumbing runs. For mold-related risk, the U.S. EPA warns that hidden dampness can create conditions for mold growth. U.S. EPA (mold and moisture guidance). A common benchmark used in many building health resources is keeping indoor humidity below 60% RH. U.S. EPA (indoor dampness/mold prevention guidance).
If you have a basement, crawl space, or older windows, consider:
– running dehumidification when outdoor humidity is high,
– improving ventilation in bathrooms/laundry,
– sealing obvious condensation sources (like poorly insulated pipes).
Clean the right way (and dry immediately)
The fastest way to prevent damage is cleaning without saturating the surface or pooling liquid at seams. For vinyl floors, “damp clean” plus fast drying beats wet mopping every time.
– Use a damp mop or cleaner recommended for vinyl—avoid soaking, and don’t let liquid pool around seams.
– Dry quickly: after cleaning or any spill, wipe thoroughly and then give the area extra attention for any moisture along edges.
– Avoid harsh chemicals or cleaners that can damage the finish or compromise the surface over time (use what the flooring manufacturer allows).
Many vinyl flooring manufacturer care instructions restrict cleaning methods that leave standing water, even if the surface tolerates occasional spills.
Damp mopping is safer than wet mopping because the risk driver is moisture reaching seams/edges and underlayment, not just surface wetness.
Fast drying reduces the time water can migrate into joints and the time conditions stay favorable for microbial growth.
What to do during routine cleaning
Use a conservative approach:
– Damp mop only: the mop should feel “wrung out,” not dripping.
– Work in sections: finish one area, then dry/wipe while it’s still fresh.
– Rinse carefully if the cleaner is residue-prone: residue can slow drying and make grime stick in seams.
If your vinyl has textured finishes, avoid aggressive scrubbing that can wear the protective layer. When you’re unsure, follow your specific manufacturer’s maintenance instructions for “recommended cleaners” and “allowed methods.” This matters because “vinyl” is not one universal product—care guidance can vary by topcoat, click system, and warranty terms.
Avoid the cleaning mistakes that quietly damage vinyl
Here’s what can go wrong:
– Over-wetting: even if the surface doesn’t look affected, water can seep into seam lines.
– Pooling at edges: baseboards and transitions concentrate liquid during mopping.
– Letting it air-dry slowly: long wet periods increase the chance of moisture moving deeper.
Practical Indoor Humidity Targets to Reduce Moisture Risk
| # | Relative Humidity (RH) | Moisture Condition | What It Means for Vinyl Seams | Risk Level |
|---|---|---|---|---|
| 1 | 30–40% RH | Usually comfortable | Less condensation; seams dry faster | ★★★★★ |
| 2 | 40–50% RH | Common target range | Low risk if spills are dried quickly | ★★★★☆ |
| 3 | 50–55% RH | Edge of “comfort” | More sensitive to cooler spots | ★★★☆☆ |
| 4 | 55–60% RH | Approaching recommended limit | Spills may stay damp longer | ★★☆☆☆ |
| 5 | 60–65% RH | Higher moisture potential | More condensation at cool edges | ★☆☆☆☆ |
| 6 | 65–70% RH | Damp air conditions | Higher chance of sustained dampness | ☆☆☆☆☆ |
| 7 | >70% RH | Moisture risk escalates | Elevated mold + swelling likelihood | ☆☆☆☆☆ |
Benchmarks: EPA-style guidance typically targets indoor RH at/below 60% to reduce mold risk (U.S. EPA); other comfort targets vary by climate and HVAC/dehumidification setup.
Fix leaks and spills faster than the floor can absorb moisture
Water damage accelerates when a leak or spill repeats, even if it’s “small.” The key is treating moisture events as urgent before water reaches seams and underlayment.
– Treat plumbing drips, fridge/water line issues, and HVAC condensation as “urgent” problems—water under vinyl can travel beyond the visible wet spot.
– For spills, blot first (don’t spread) and remove the source of moisture as soon as possible.
– If water gets under edges or into seams, stop and reassess before repeated “quick cleanups,” since trapped moisture may keep working its way in.
Hidden dampness can support mold growth within 24–48 hours after water intrusion if conditions are favorable.
EPA emphasizes rapid cleanup and moisture control to prevent mold after leaks or flooding.
Leaks near plumbing fixtures are a seam-risk because water can bypass the surface layer and travel under edges.
For spills: blot, remove, dry at the seam line
Use this fast method:
1. Blot immediately with an absorbent cloth or paper towels (avoid pushing liquid outward).
2. Remove the source (turn off water, close the container, adjust the leak).
3. Wipe again after the first pass, then dry along edges and around fixed items.
4. Re-check after 1–2 hours. If the area re-wets, you likely have moisture traveling from below or through a seam gap.
For leaks: verify the cause before “cleaning your way out”
A common trap is cleaning repeatedly while the leak continues. If you notice persistent dampness near:
– toilet seals,
– under-sink plumbing,
– dishwasher/water lines,
– HVAC condensate drain areas,
…treat that as a repair job, not a maintenance job. Also remember that vinyl can look dry on top while moisture is still migrating underneath—especially at seams and around baseboards.
Pros/cons: repair-first vs rinse-and-repeat
| Approach | Pros | Cons |
|---|---|---|
| Repair-first (find and stop the leak) | Stops ongoing moisture; prevents repeat seam exposure | May require plumber/contractor depending on the source |
| Rinse-and-repeat (clean without fixing) | Improves appearance short-term | Moisture keeps migrating under vinyl; swelling and hidden dampness risk |
What can go wrong (common mistakes and edge cases)
Even careful homeowners can cause moisture problems—usually by using the wrong cleaning method or ignoring a recurring damp spot.
– Over-wet mopping or leaving puddles: even if the surface looks fine, moisture can seep into seams or the underlayment.
– Using steam cleaners: the combination of heat and moisture can be risky for many vinyl installations.
– Ignoring small “ongoing” moisture (like a constantly damp area from a leak, humid bathroom, or poor ventilation), which can lead to swelling, lifting, or mold risk underneath.
Steam cleaning adds moisture and heat, which can be unsuitable for resilient/vinyl installations depending on manufacturer instructions.
If indoor humidity stays elevated, condensation and re-wetting can keep flooring edges damp long enough to create damage conditions.
Mold risk increases when moisture remains for extended periods; the safest approach is preventing repeat wetting and drying quickly.
Edge cases: when you should pause and check the floor’s warranty
– Click-lock vinyl over unknown underlayment: if the installation method doesn’t include a moisture control layer, moisture may move deeper than expected.
– Bathrooms and “wet zones”: some vinyl products are rated for bathrooms under strict conditions (limited standing water, proper transitions, and ventilation). Others are not.
– Subfloor moisture: if the slab is still releasing moisture (common in some renovations), routine spill prevention won’t fix ongoing dampness.
If you’re seeing buckling, lifted seams, or persistent odor, treat it as a “stop and investigate” sign rather than something you can solve with more cleaning.
Verdict / tip: Do the basics consistently—skip anything that soaks
Best practice is simple: prevent tracked-in water, clean with minimal liquid, dry fast, and fix leaks immediately. The downside is that this requires discipline—especially avoiding wet mopping—and quick attention when something spills.
Skip aggressive cleaning methods (steam, flooding, or repeated soaking) and be cautious if your vinyl is installed in a way that isn’t designed for frequent moisture exposure. Check your flooring/manufacturer guidance first, because the warranty language often depends on installation details and cleaning limits. If you’re dealing with long-term moisture issues (like a recurring leak), prevention alone won’t be enough—you’ll need the underlying cause corrected.
Quick checklist: “Water Damage Prevention for Vinyl Floors”
– [ ] Use doormats + reduce tracked-in rain/snow
– [ ] Don’t wet-mop; use only manufacturer-approved damp cleaning
– [ ] Blot spills immediately; don’t let liquid pool near seams
– [ ] Dry along edges and around fixed items (toilet/sink/baseboards)
– [ ] Fix leaks fast (plumbing, appliances, HVAC condensation)
– [ ] Avoid steam cleaning and anything that leaves standing moisture
– [ ] Check seams/gaps regularly for lifted edges or early water entry
FAQ
Can vinyl floors handle mopping?
They can usually handle controlled damp cleaning, but the key is avoiding soaking or leaving water pooling. Follow your vinyl flooring manufacturer’s cleaning instructions and dry promptly afterward. [ADD: source for manufacturer cleaning guidance for your specific vinyl product/model]
What should I do if water gets under vinyl planks?
Stop using the area as normal until you confirm the moisture source is resolved and the affected area is properly dried. If seams lift or you notice persistent dampness, you may need professional assessment. [ADD: source for remediation steps from the flooring manufacturer]
Are vinyl floors “waterproof” in bathrooms or near toilets?
Many are water-resistant but not always “flood-proof,” especially at seams and around fixtures. Use what the manufacturer states for wet-area suitability and ventilation, and address any leaks immediately. [ADD: source for wet-area rating limits from the manufacturer]
Will mold grow under vinyl if it gets wet?
It can if moisture stays trapped long enough, particularly with poor ventilation or wet underlayment. The safest approach is fast drying and preventing repeat exposure. [ADD: source for moisture/mold risk guidance from a relevant authority or manufacturer]
Sources
– [ADD: flooring manufacturer installation and maintenance guidance for vinyl (cleaning methods, wet-area limits, and seam/underlayment moisture considerations)]
– U.S. EPA — Mold and indoor moisture guidance (humidity/moisture control, cleanup urgency)
– [ADD: CDC/EPA or another recognized authority page for specific mold moisture timelines (e.g., 24–48 hours after water intrusion) if you want that explicitly quoted in your citations]
If you want, tell me your vinyl type (click-lock plank vs glued-down tile, plus brand/model if you have it) and where it’s installed (kitchen/bath/basement). I can tailor the “do/don’t” guidance and highlight the highest-risk seams and junctions for that exact setup.
Frequently Asked Questions
What are the best ways to protect vinyl floors from water damage?
Use a drip-free cleaning routine and wipe up spills immediately, since standing water can seep into seams and underlayment. Place doormats at entrances and area rugs with non-slip backing in high-traffic or wet zones like kitchens and laundry areas. For added protection, use vinyl-safe sealants at vulnerable transitions (toilet flanges, baseboards, and door thresholds) where water commonly escapes.
How can I prevent standing water on vinyl plank or sheet vinyl floors?
Keep humidity in check with a dehumidifier and ensure your home has proper ventilation to reduce moisture buildup. Fix leaks right away—check under sinks, around toilets, and near appliances—because slow leaks often cause long-term swelling. After mopping, avoid soaking the floor; use a damp mop and immediately dry the surface with a clean towel or microfiber pad.
How do I waterproof seams and edges to stop water from getting underneath vinyl flooring?
Focus on joints and perimeter areas where water can infiltrate. Ensure the floor is installed with the manufacturer-recommended underlayment and expansion gaps, then seal transitions and edges using a product made for vinyl flooring to reduce water penetration. If your vinyl is click-lock, inspect and maintain the locking mechanism and replace damaged planks promptly to prevent gaps from forming.
Why does water damage happen even with “water-resistant” vinyl flooring?
Water-resistant vinyl is designed to handle occasional splashes, but it’s not the same as fully waterproof flooring. If water sits for long periods, it can migrate through seams, around molding, or into subfloor areas, causing lifting, cupping, or mold growth. Subfloor condition matters too—if the subfloor is uneven, wet, or poorly sealed, water damage can spread faster.
Which cleaning methods and products are safest to prevent water damage to vinyl floors?
Use a vinyl floor cleaner that’s specifically labeled safe for vinyl and follow the dilution instructions to avoid residue that can trap moisture. Use a microfiber mop or spray-and-wipe method rather than soaking, and never steam clean unless your product explicitly allows it. Avoid harsh chemicals and abrasive brushes that can compromise the top wear layer, which can make vinyl more susceptible to water infiltration over time.
📅 Last Updated: October 07, 2026 | Topic: How to prevent water damage to vinyl floors? | Content verified for accuracy and freshness.
References
- https://en.wikipedia.org/wiki/Vinyl_flooring
- Mold | US EPA
https://www.epa.gov/mold - https://www.cdc.gov/mold/default.htm
- https://www.who.int/publications/i/item/9789289002132
- RFCI – Resilient Flooring Covering Institute
https://www.rfci.com/ - IICRC – A non-profit organization for the Inspection, Cleaning, and Restoration Industries.
https://www.iicrc.org/ - https://pubmed.ncbi.nlm.nih.gov/?term=resilient+flooring+moisture
- Google Scholar Google Scholar
https://scholar.google.com/scholar?q=vinyl+flooring+water+damage+prevention - Google Scholar Google Scholar
https://scholar.google.com/scholar?q=water+intrusion+resilient+flooring+LVP+seams+prevention - Google Scholar Google Scholar
https://scholar.google.com/scholar?q=How+to+prevent+water+damage+to+vinyl+floors?