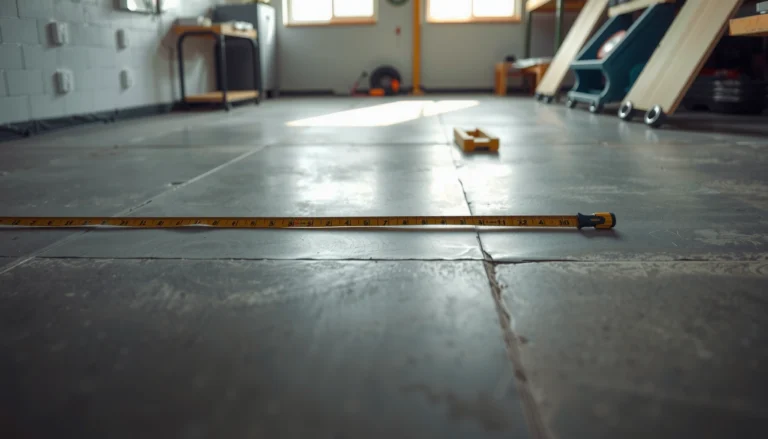
Want to know how to prepare laminate floors for a laundry room that will handle water risk and heavy traffic? The best approach is to lock down the subfloor first—level it, seal any gaps, and use the right moisture barrier—so the planks won’t swell or separate. Then you’ll prep for installation with proper acclimation and the correct underlayment thickness to get a tight, durable finish. Follow these steps and your laminate floor will be ready for real laundry-room conditions, not just dry-day assumptions.




Prepare laminate flooring for a laundry room by controlling moisture and planning for expansion before you install. Focus on a clean, level, and fully dry subfloor, then use the correct laminate-approved underlayment (often with an added moisture barrier) so seams and edges don’t swell, gap, or buckle as humidity changes—especially in 2026 laundry setups where dryers, washer cycles, and occasional splashes are routine.
If your laundry room sees spills, wet laundry, steam from dryers, or occasional water splashes, laminate prep matters more than in a low-moisture space. This guide walks through prep steps so your laminate flooring can handle frequent dampness better. It’s designed for homeowners coordinating prep themselves and for anyone aligning installation timing with drying and curing requirements.
Check moisture risks in your laundry room first

Start by mapping where water vapor and liquid water actually come from in your space, then verify moisture levels against laminate and underlayment specifications. In a laundry room, laminate failures are most often linked to moisture getting to the subfloor or edges rather than to day-to-day foot traffic.
Laundry-room laminate performance depends on moisture control at the source (leaks, appliance steam, and splashes), not only on the flooring surface.
U.S. EPA guidance emphasizes maintaining indoor relative humidity around 30%–50% to reduce mold-supporting conditions in homes (2012). U.S. Environmental Protection Agency, “A Brief Guide to Mold, Moisture, and Your Home” (2012)
Concrete slab moisture is commonly measured using in-situ relative humidity probes (ASTM F2170), because it reflects moisture conditions at the slab depth where flooring materials react. ASTM F2170
– Identify moisture sources like washer leaks, dryer exhaust condensation, sink splashes, humid air near appliances, and water tracked in from floors after washing.
– Pay special attention to washer supply lines, drain hose connections, and the floor area where the washer sits (slow leaks can be hard to see).
– For dryers, check whether your setup is truly vented outdoors; poorly routed exhaust can contribute moisture and humidity to the room.
– If you have a floor drain, confirm whether it ever receives water during maintenance or overflow events.
– Use a moisture-check approach based on your subfloor material and manufacturer guidance (don’t guess—follow the laminate/underlayment specs).
– For concrete slabs, homeowners typically use either in-situ relative humidity testing (ASTM F2170) or calcium-chloride moisture vapor emission testing (ASTM F1869), depending on what your laminate/underlayment allows. ASTM F2170; ASTM F1869
– For wood subfloors, you still need to confirm dryness, but your testing and allowable moisture limits will differ from concrete.
– Plan to keep water away from seams by improving drainage and addressing leaks before you install.
– Laminate floating systems still have joints and perimeter gaps; water that repeatedly wicks to those areas can create swelling or edge stress even when the plank tops look fine.
– If you can eliminate the moisture cause (fix leaks, reroute exhaust, improve ventilation), you reduce the “how long until failure” risk for laminate flooring dramatically.
Verify the subfloor is level, clean, and dry
Start by making the subfloor flat, sound, and completely dry before you ever lay laminate flooring. Even high-quality laminate with the right moisture barrier can fail if the base is uneven or contaminated.
Laminate locking-joint separation is commonly tied to subfloor flatness problems that force joints to flex repeatedly under normal foot traffic.
Flooring installation over an uneven substrate increases stress on laminate seams, making gapping and movement more likely over time.
Preparing for laminate installation typically includes removing residue and repairing low/high spots so planks achieve full, consistent contact with the underlayment.
– Remove old flooring, adhesive residue, dust, paint overspray, and any debris that could prevent flat contact.
– Scrape down ridges, high spots, and dried mastic globs; those “little” bumps often telegraph through underlayment and stress joints.
– Vacuum thoroughly, then wipe (as allowed by your prep plan) so laminate flooring doesn’t bridge over grit.
– Repair dips, bumps, or uneven patches; laminate can fail or lock-joint seams can separate if the surface isn’t within the allowed tolerance.
– Use a straightedge and check multiple directions; laundry rooms often have localized dips near washer locations.
– If you do patching, confirm the patch is fully cured and dry before testing again or moving forward with underlayment.
– Let the subfloor fully dry if it’s been exposed to moisture; avoid installing over damp areas.
– If you’ve recently discovered a leak, don’t treat “it seems dry now” as verification. Re-check moisture after the area has had time to equilibrate.
– This matters for laminate flooring because moisture can travel through the subfloor and underlayment edges even when the surface looks fine.
Moisture & Flatness Standards Commonly Referenced in Laminate Prep
| # | Standard | What It Measures | Key Output / Units | Why It Matters for Laundry Rooms |
|---|---|---|---|---|
| 1 | ASTM E1155 | Floor flatness & levelness | FF / FL numbers | Helps prevent joint stress that can lead to gapping in moving laminate flooring |
| 2 | ASTM F2170 | In-situ concrete moisture | % relative humidity (RH) | Verifies slab conditions before installing laminate flooring in laundry rooms where vapor loads rise |
| 3 | ASTM F1869 | Moisture vapor emission rate | lb / 1000 sq ft / 24 h | Provides an option when your laminate/underlayment spec permits slab moisture testing |
| 4 | ASTM E96 / E96M | Water vapor transmission | perm value | Supports moisture barrier selection for laminate flooring underlayment layers |
| 5 | ASTM E1745 | Vapor retarder classification | Class I–IV perm ranges | Helps you choose an underlayment moisture barrier appropriate for laundry-room vapor exposure |
| 6 | ASTM F710 | Concrete floor preparation | Surface prep methods | Reduces risk by improving adhesion and removing contaminants before flooring systems go in |
| 7 | NWFA subfloor guidance | Flatness tolerance for wood subfloors | Common targets: 3/16 in over 10 ft | Directly relevant to laminate joint performance under laundry-room humidity swings |
Choose the correct underlayment and moisture barrier
Start by selecting underlayment that matches both your laminate system and your laundry-room moisture conditions. The right underlayment doesn’t just cushion—it manages vapor and supports correct floating-floor performance.
Many laminate failures traced to moisture originate from missing or incorrectly installed vapor barriers, especially at seams and perimeter edges.
ASTM E1745 classifies vapor retarder performance by perm ratings (e.g., Class I is 0.1 perms or less), which helps standardize material selection for moisture control. ASTM E1745
Laminate manufacturers can specify whether an added plastic vapor barrier is required and how it must be taped or overlapped.
– Select an underlayment designed for laminate and (if required) a moisture barrier suitable for laundry-room conditions.
– Use the underlayment recommended by (or explicitly approved for) your laminate brand and locking system.
– If your laminate includes an attached pad, check whether you still need a separate vapor barrier; stacking layers can create too much “give” and compromise the joint design.
– Follow the laminate manufacturer’s instructions on whether you need an added plastic vapor barrier and how seams should overlap/tape.
– For laundry-room laminate flooring, seam detailing is a high-impact step: an unsealed underlayment seam can become a moisture wick path.
– Install the barrier per instructions, including overlap direction and taped seams, so water vapor can’t migrate freely into the system.
– Don’t stack extra layers unless the manufacturer explicitly allows it—too much cushioning can affect locking joints.
– Excess thickness can create point loading (movement under legs and appliances), accelerating joint stress.
– If you’re unsure whether a foam underlayment + plastic sheet combo is allowed, confirm against the laminate installation handbook for your exact model and thickness range.
Plan spacing, transitions, and edge protection
Start by treating expansion gaps and transitions as part of your moisture strategy, not just a “finish carpentry” detail. Laundry rooms amplify humidity swings, and laminate flooring needs controlled room to expand and contract without buckling.
Perimeter expansion gaps prevent laminate flooring from locking up when humidity increases, reducing buckling risk.
Transitions at doorways can reduce stress concentration at edges, which is important where laundry-room moisture exposure is unpredictable.
Edge protection planning matters because laminate is most vulnerable where water vapor or liquid can reach the perimeter and seams.
– Leave the required expansion gap around walls, cabinets, and door frames so the floor can move with humidity changes.
– Fixed features create “anchors” while the floating laminate tries to move; gaps keep movement stress from building at the wrong points.
– Don’t compress the gap under baseboards or by over-tight trim—follow the laminate system’s specified clearance.
– Use appropriate transition strips at doorways or between rooms to reduce stress on edges and joints.
– Transitions help manage height differences and movement constraints between adjoining spaces.
– In laundry rooms, transitions are also where you should verify the underlayment/barrier detailing doesn’t get compromised during threshold finishing.
– Seal or protect vulnerable areas where moisture can reach (for example, careful finishing around thresholds), using only methods approved for your laminate system.
– Some laminate manufacturers allow specific perimeter sealing methods; others explicitly prohibit sealants that can trap moisture.
– Treat laminate flooring “edge sealing” as spec-dependent: always follow the written allowance, especially around thresholds and transitions.
Prepare for installation day: acclimation and layout
Start by acclimating laminate flooring to the room’s temperature and humidity conditions and then planning the layout to avoid problematic cuts near walls. This step directly supports joint stability and helps the flooring sit flat and correctly expanded once installed.
Laminate flooring acclimation is typically required by manufacturers so planks adjust to room conditions before they’re locked into place.
Planning the first row and avoiding narrow strip sections near walls reduces the likelihood of tight fitting that can stress laminate joints.
Staging materials away from water sources helps prevent damage to laminate and underlayment during laundry-room demo and prep.
– Acclimate laminate planks in the room per the manufacturer’s temperature/humidity requirements (don’t skip this step).
– As of 2026, many installation handbooks still require acclimation time windows and condition ranges—use the printed requirements for your product, not generic rules.
– Keep planks in packaging (or per your manual) and monitor HVAC conditions so the laundry room doesn’t swing drastically during acclimation.
– Dry-lay or plan the first row to keep patterns balanced and avoid narrow, hard-to-fit sections near walls.
– Laundry rooms often include closets, base cabinets, and built-in thresholds; layout planning prevents “tiny sliver” planks that are more prone to movement at edges.
– Confirm your pattern direction and seam staggering against the room dimensions early.
– Stage materials away from direct water sources and keep them protected from spills during prep work.
– Protect underlayment rolls from dampness and store laminate off concrete where possible.
– Keep your installation tools organized so you don’t drag debris back onto the subfloor after cleaning and drying.
What can go wrong (and how to avoid it)
Avoid the most common failures by treating moisture, flatness, and expansion rules as one system—not separate chores. In laundry rooms, laminate flooring is sensitive to small problems that become large once repeated damp cycles occur.
Warping/swelling in laminate most often traces back to installing over a damp substrate or using a moisture barrier setup that doesn’t match the laminate’s written requirements.
Joint failure (gapping or separation) is frequently linked to an out-of-tolerance subfloor, inadequate leveling, or an underlayment system that doesn’t meet the installation spec.
Expansion mistakes—especially skipping the required edge gap—can cause buckling as laminate flooring absorbs and releases moisture-driven humidity changes.
– Warping/swelling from trapped moisture: usually from installing over a damp subfloor or using an underlayment setup that doesn’t meet the moisture requirements—verify the laminate/underlayment spec.
– If moisture testing shows elevated readings, stop and resolve the moisture source or mitigation path before installing laminate flooring.
– If you’re using an added moisture barrier, confirm it’s continuous and correctly taped at seams.
– Joint failure (separation or gapping): often caused by an out-of-tolerance subfloor, skipping leveling, or using the wrong underlayment thickness.
– In many installations, the underlayment is allowed only up to a certain thickness and compressibility level—too much “squish” can turn normal walking into repeated joint stress.
– Expansion problems: forgetting the edge gap can cause buckling, especially in humidity swings typical of laundry rooms.
– Appliances and fixed cabinets can create “pressure points” where laminate movement concentrates if expansion space is missing.
– Ignoring appliances and plumbing: leaks behind or under laundry appliances can ruin laminate quickly—address plumbing and consider water-sensing solutions where practical.
– Check behind the washer after a test cycle and inspect the surrounding area for dampness signs.
Verdict: do this prep, but know the limits
If you follow laminate manufacturer requirements for subfloor flatness, dryness, expansion gaps, and moisture barrier/underlayment selection, you give laminate flooring the best chance of performing in a laundry room. The tradeoff: laminate is still not the same as flood-rated flooring—persistent high humidity, recurring leaks, or standing water can exceed what a floating laminate system tolerates.
Here’s a practical contrast for laundry-room decisions:
| Option | Best for | Main limitation in laundry rooms |
|---|---|---|
| Laminate flooring | Controlled moisture, no chronic leaks, quick cleanup of spills | Edges/seams can be vulnerable if vapor barrier or subfloor dryness isn’t compliant |
| Water-tolerant LVP / waterproof click floors | Frequent splashes, higher humidity cycles, faster “oops” recovery | Still needs correct install and flatness; cheap products may lock poorly or dent |
| Tile (ceramic/porcelain) | Wet zones, occasional overflow, long-term durability | Higher labor/cost; grout maintenance and underlayment system matter |
That said, laminate isn’t the best choice for locations that regularly flood or stay wet—if you have frequent leaks or persistent high humidity, consider a more water-tolerant flooring option instead, or at minimum resolve the moisture source before installing.
Quick checklist: laminate prep for a laundry room
– [ ] Fix leaks and eliminate ongoing water sources first
– [ ] Subfloor is clean, dry, and repaired where uneven
– [ ] Subfloor meets the laminate’s flatness tolerance
– [ ] Correct underlayment + moisture barrier setup per manufacturer
– [ ] Expansion gap planned around all fixed edges
– [ ] Underlayment seams overlapped/taped exactly as directed
– [ ] Laminate acclimated to room conditions
– [ ] Transitions and thresholds planned to protect vulnerable edges
Sources
– U.S. Environmental Protection Agency (EPA), “A Brief Guide to Mold, Moisture, and Your Home” (2012)
– ASTM E1155, “Standard Test Method for Determining FF Floor Flatness and FL Floor Flatness Number”
– ASTM F2170, “Standard Test Method for Determining Relative Humidity in Concrete Floor Slabs Using in Situ Probes”
– ASTM F1869, “Standard Test Method for Measuring Moisture Vapor Emission Rate of Concrete Subfloor Using Anhydrous Calcium Chloride”
– ASTM E96/E96M, “Standard Test Methods for Water Vapor Transmission of Materials”
– ASTM E1745, “Standard Specification for Water Vapor Retarders Used in Contact with Soil or Granular Fill Under Concrete Slabs”
– ASTM F710, “Standard Practice for Preparing Concrete Floors to Receive Resilient Flooring”
When laminate flooring prep in a laundry room is done spec-by-spec—moisture controlled, subfloor verified, and underlayment installed correctly—it can perform reliably. If moisture is recurring or you expect frequent wet events, plan for a water-tolerant alternative instead of treating prep as a substitute for moisture mitigation.
Frequently Asked Questions
What’s the best way to prep laminate flooring in a laundry room before installation?
Start by verifying the subfloor is flat, clean, and dry—laminate can fail if there are high spots, debris, or moisture. Remove old flooring, repair damaged areas, and vacuum thoroughly so no grit interferes with the underlayment. Because laundry rooms often have humidity and water exposure, confirm moisture levels are within the manufacturer’s limits before laying laminate.
How do I prepare a subfloor for laminate floors in a laundry room?
Check the subfloor for flatness using a straightedge; most manufacturers require minimal variation across the room. Scrape off paint, adhesive residue, or raised nails, and fill low spots with a suitable leveling compound. If the subfloor is concrete, consider using a moisture barrier/underlayment system designed for laminate to reduce water vapor risk common in laundry areas.
How should I handle moisture protection when preparing laminate flooring for a laundry room?
Use the specific underlayment and moisture barrier recommended by the laminate manufacturer, since laundry rooms can experience spills, humidity, and condensation from dryers and washers. Seal transitions and edges around plumbing penetrations using an approved sealant to help prevent water from creeping under the laminate. Keep a small gap at perimeter expansion joints so water doesn’t trap and damage the boards.
Which tools and materials should I gather to prep laminate flooring correctly?
You’ll typically need a floor scraper, vacuum, leveling compound (if needed), straightedge/level, spacers, and a measuring tape for accurate layout. For moisture prep, gather the correct laminate underlayment and any required vapor barrier, plus sealant for seams near sinks, washer hoses, and doorways. If you’re working over concrete, also plan for proper surface testing and any prep primers/patches that the leveling system requires.
Why is acclimating laminate important, and how do I do it for a laundry room?
Laminate can expand and contract with temperature and humidity changes, so acclimation helps reduce gaps or buckling after installation. Let the planks sit in the laundry room area, in their unopened packaging, for the time specified by the manufacturer—usually 48 hours or more. Maintain normal HVAC conditions during acclimation and after installation to stabilize humidity, especially in rooms where laundry appliances create fluctuating moisture.
📅 Last Updated: October 22, 2026 | Topic: How to prepare a laminate floors for laundry room? | Content verified for accuracy and freshness.
References
- Laminate flooring
- Underlayment
- Floor
- Vapor barrier
- https://www.epa.gov/mold/mold-and-moisture
- https://www.cdc.gov/mold/dampness.html
- https://scholar.google.com/scholar?q=laminate+flooring+installation+preparation+subfloor+levelness+moisture+barrier Google Scholar
- https://scholar.google.com/scholar?q=laminate+flooring+laundry+room+moisture+humidity+vapor+barrier Google Scholar
- https://scholar.google.com/scholar?q=laminate+flooring+acclimation+before+installation+humidity+temperature Google Scholar