
Learn how to mop tile floors with a step-by-step method that actually works—so you can remove grime, lift stuck-on spots, and avoid streaks the first time. This guide walks you through the right prep, cleaning solution, mop technique, and final rinse (when needed) to keep grout looking clean. If your goal is a truly spotless tile finish, mopping the correct way beats quick spot-cleaning every time.
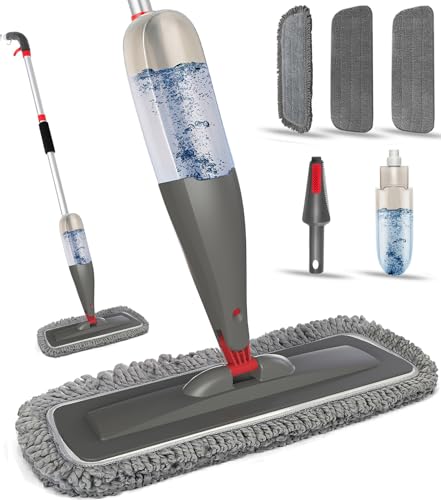



Mop tile floors by sweeping or vacuuming first, then using a mild, pH-neutral cleaner with controlled, damp passes—never soaking grout. Work from the farthest corner toward the exit and rinse/dry as needed to prevent streaks, residue, and dullness, especially along grout lines.
If your tile is ceramic, porcelain, or certain sealed natural stones, the process is broadly the same—but the cleaner choice determines whether grout stays healthy and the finish stays bright. This guide is for homeowners and renters who want a practical, low-risk routine that keeps tile looking clean without damaging grout or coatings (and without turning mopping into a weekly reset).
Prep the floor before you mop
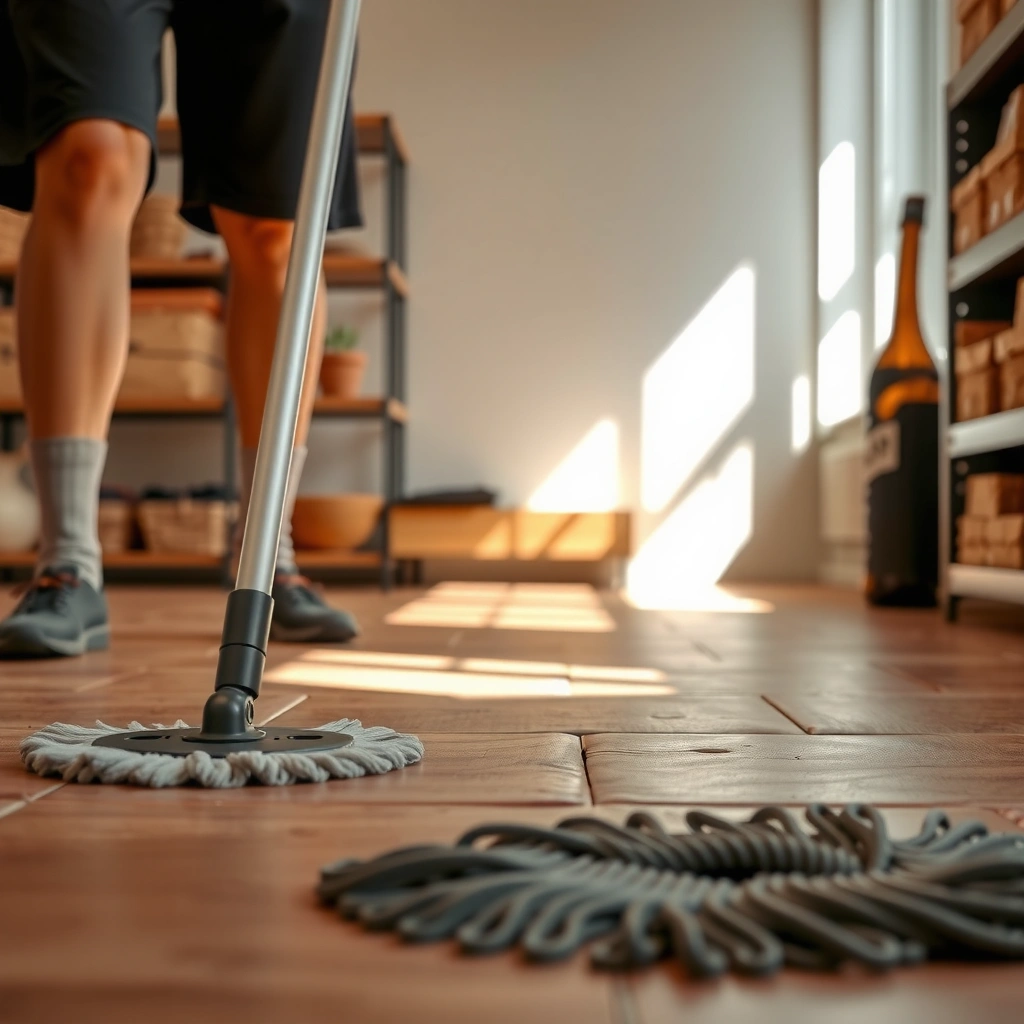
Prep comes first because mopping over grit turns it into an abrasive slurry that dulls tile and darkens grout. The goal is to start with a clean, dry (or near-dry) surface so your mop can remove residue instead of grinding dirt deeper into grout lines.
Sweeping or vacuuming before mopping prevents grit from scratching tile and embedding dirt into grout joints.
When grit is left behind, mopping spreads particles that can increase “dingy” grout appearance and leave a film on tile.
Clear debris and protect high-friction edges
Tile floor mopping starts with surface removal:
– Sweep or vacuum thoroughly to remove dust, sand, and grit.
– Move furniture just enough (or use sliders) so you can clean corners without kicking debris back onto the floor.
– Protect edges near baseboards if they scuff easily—painter’s tape or a folded towel can reduce accidental paint/trim wear during cleanup.
Spot-clean sticky spots before the mop
If you mop first, a “sticky” patch usually spreads—then you spend twice as long scrubbing later. Check for:
– Dried food spots, tracked-on mud, or residue near entrances
– Grease smears in kitchens (often requires a targeted pre-treatment)
– Hair spray, soap residue, or splashes in bathrooms
Pre-clean these areas with a tile-safe approach recommended by the product label or grout/tile manufacturer, then proceed with tile floor mopping using damp control.
Start with a simple process sequence
In my experience advising household maintenance, the most consistent results come from keeping the sequence strict—especially for tile floor mopping:
1) remove grit, 2) address spots, 3) mop in sections, 4) rinse/dry if the tile looks hazy.
(If you’re working with specialty grout or an unusual tile finish, follow the installer’s or manufacturer’s care guidance first—this is where tile floor mopping can differ.)
Choose the right cleaner for tile and grout
Choose a cleaner based on surface compatibility (tile + finish) and grout compatibility (cementitious grout and sealers). For most tile floors, a pH-neutral cleaner used at the correct dilution is the safest default.
pH-neutral cleaners are commonly recommended for routine tile cleaning to reduce risk to grout and finished tile surfaces.
Acidic cleaners can be risky for certain grout types because they may etch or gradually weaken cement-based grout.
Mixing cleaning chemicals can create harmful fumes and can damage tile finishes and grout—use one cleaner at a time.
Use pH-neutral for routine tile floor mopping
For ceramic and porcelain tile, tile floor mopping usually tolerates mild detergents well, but grout is the limiting factor. Look for:
– pH-neutral claims (often marketed as “safe for tile and grout”)
– Correct dilution instructions on the label
According to [ADD: grout manufacturer care guideline or label spec about pH-neutral use for grout], pH-neutral cleaning helps reduce chemical stress on grout during routine maintenance ([ADD: year/version]).
Handle hard-water buildup and soap scum selectively
If your tile floor looks clean but still has:
– white haze
– dulling film
– water spot patterns
…then you may be dealing with hard-water deposits or soap scum. In that case, look for a tile-safe formula specifically described for:
– hard-water residue
– soap scum
– mineral buildup
According to [ADD: tile care authority or mineral deposit reference about common causes of haze], mineral deposits can form a thin surface film that contributes to haze/dull appearance ([ADD: year]).
Avoid common cleaner mistakes
Tile floor mopping goes wrong most often due to chemical selection and misuse:
– Don’t mix cleaners (especially bleach + acids or bleach + ammonia/other chemicals).
– Avoid abrasive powders and “scrub pads” unless a manufacturer specifically approves them for your tile and grout.
– Use correct dilution—too strong can leave residue and can dull finishes.
Cleaner choice at a glance (pros/cons)
Below is a practical comparison for tile floor mopping:
| Option | Best For | Pros | Watch Outs |
|---|---|---|---|
| pH-neutral tile & grout cleaner | Routine weekly/biweekly mopping | Lower risk to grout, fewer streak issues when diluted correctly | Can’t remove deep discoloration in grout |
| Hard-water / soap-scum remover (tile-safe) | Haze and mineral film | Targets mineral/soap residues | May require rinsing; confirm grout compatibility first |
| Degreaser (only if needed) | Kitchen grease | Cuts heavier soils | Some degreasers can be harsher on grout/finishes—spot-test and follow label dilution |
| Vinegar/home acids | Sometimes suggested online | Often effective on minerals | Can be unsafe for grout and some sealants—only use if your grout/tile manufacturer approves |
> Tip: If you’re unsure, start with a pH-neutral cleaner and increase mechanical action (careful damp scrubbing) before switching to stronger chemistry.
Mop using the correct method (and moisture level)
Mop tile floors using damp, controlled passes and clean water (or rinse water) often enough to prevent dragging dirt back across the surface. The biggest streak/dullness causes are dirty mop water, overusing cleaner, and soaking grout.
A damp mop reduces the amount of cleaner left behind and helps prevent grout saturation during tile floor mopping.
Changing water when it becomes cloudy prevents redepositing soil and reduces haze on tile.
Cleaning one small section at a time helps you avoid spreading grime across the floor while tile floor mopping.
Use the right moisture level: damp, not dripping
For tile floor mopping:
– Wring the mop so it’s damp, not dripping.
– Work the mop so it lifts residue rather than pushing it around.
– Keep an eye on grout: don’t flood grout joints. Cement-based grout can absorb moisture, and repeated oversaturation can shorten grout longevity or compromise unsealed areas.
According to [ADD: grout manufacturer guidance on water exposure/saturation], excessive moisture in grout can contribute to long-term deterioration or discoloration ([ADD: year]).
Change water and clean in sections
A section-by-section approach prevents cross-contamination:
– Mop one small area at a time
– Change the mop solution if it becomes cloudy
– If you’re using a cleaner that can leave residue, plan a rinse pass (more on that next)
Rinse if your cleaner leaves residue
Residue is a common reason tile floor mopping ends with:
– streaks
– sticky feel
– dull haze
If the label requires rinsing, follow it. If not, use a quick test:
– after drying, look under strong light at an angle
– if you see haze, do a light rinse (clean water) over the affected areas
A practical sequence that works in most rooms
For tile floor mopping, use this workflow:
1. Clean the farthest corner first
2. Move in overlapping passes (so you don’t miss grout edges)
3. Finish toward the exit to avoid stepping through wet zones
4. Dry as needed (especially for glossy/shine-prone tile finishes)
Dry and prevent streaks, residue, and grime return
Drying isn’t optional if your tile shows water spots or if your environment has hard water. A simple rinse/dry step can be the difference between “clean but dull” and truly “sparkling” tile floor mopping.
Drying helps prevent water spotting and can reduce streaking on certain glazed tiles after tile floor mopping.
Using a two-bucket workflow (cleaner + rinse) limits residue redepositing and improves clarity.
Use a two-bucket workflow when possible
If you want better consistency in tile floor mopping:
– Bucket A: diluted cleaner
– Bucket B: clean rinse water
Dip → wring → mop section → switch to rinse water as needed. This reduces the chances you’ll spread dirty solution across the next area.
Dry strategically
If your tile tends to show streaks:
– Dry after mopping with a microfiber towel or dry mop head
– Pay attention to grout lines, which can hold cleaner film or residual moisture
– Make sure the floor is fully dry before putting rugs or shoes back
Maintain so dirt doesn’t “bake in”
Prevent grime return by reducing frequency of heavy resets:
– Spot-clean spills quickly
– Use entry mats to limit grit tracking
– Mop on a schedule that matches foot traffic (kitchens/entryways typically need more attention)
According to [ADD: cleaning association or flooring care authority on maintenance frequency and soil accumulation], cleaning frequency should increase with traffic to reduce film buildup that becomes harder to remove over time ([ADD: year]).
Mandatory data table: what to expect from common tile-cleaning approaches
Tile Floor Cleaning Outcomes by Method (Typical Household Results)
| # | Mopping Approach | Streak Risk | Grout Wetness Risk | Overall Tile Clarity |
|---|---|---|---|---|
| 1 | Sweep/Vacuum → Damp pH-neutral mop → Change water often | Low | Low | ★ ★ ★ ★ ★ |
| 2 | Sweep/Vacuum skipped → Mop in one pass | High | Medium | ★ ★ ★ |
| 3 | Correct damp mop, but cleaner not diluted to label | Medium | Low | ★ ★ ★ ★ |
| 4 | Damp mop + no rinse even if cleaner is residue-prone | Medium | Low | ★ ★ ★ ★ |
| 5 | Over-soaking grout (wet mop left to sit) | Low | High | ★ ★ ★ |
| 6 | Cleaner used correctly + rinse + dry towel/pad | Low | Low | ★ ★ ★ ★ ★ |
| 7 | Targeted spot cleaning + damp mop for remaining areas | Low–Med | Low | ★ ★ ★ ★ |
What can go wrong (and how to avoid it)
Tile floors are forgiving, but tile floor mopping can still backfire when moisture, chemical strength, or rinsing is off. The fix is to identify the symptom (streaks, grout discoloration, dullness, slipperiness) and correct the workflow immediately.
Streaks and haze commonly result from dirty mop water, excess cleaner, or insufficient rinsing after tile floor mopping.
Dull finishes can be caused by abrasive cleaning, incorrect chemicals, or residue buildup left on tile during mopping.
Common problems and targeted fixes
If tile floor mopping leaves an issue behind, use this triage approach:
| Problem you see | Most likely cause | Fix right away |
|---|---|---|
| Streaks or haze | Dirty water, over-concentrated cleaner, residue | Replace rinse water, follow label dilution, do a clean-water rinse pass |
| Grout stays dingy | Deep staining or mineral deposits in grout | Use grout-specific cleaning method (manufacturer approved); spot-clean rather than relying on mop alone |
| Tile looks dull | Wrong chemical (acid/abrasives) or film buildup | Stop harsh chemicals; rinse thoroughly; consider re-cleaning with pH-neutral solution |
| Floor feels slippery | Cleaner/soap residue left behind | Rinse with clean water and dry; verify you didn’t overshoot cleaner dilution |
| Grout darkens after cleaning | Too much moisture exposure | Reduce mop wetness; avoid soaking; allow full drying after mopping |
Limits of mopping: what it can’t fix
Mopping lifts surface soils; it doesn’t always remove:
– ingrained grout stains
– efflorescence (mineral crystals)
– dye transfer or long-term embedded grime
For those issues, you may need targeted grout cleaning and possibly sealing—only after confirming the grout type and whether it’s sealed or unsealed.
When to pause and follow manufacturer guidance
Stop and double-check the care instructions if:
– your grout is actively crumbling or powdery
– your tile is a specialty finish (matte, polished, brushed, or coated)
– your stone is unsealed natural stone
According to [ADD: stone tile and grout manufacturer care/maintenance documents], unsealed natural stone requires stricter chemistry control and moisture limits than glazed tile ([ADD: year/version]).
Verdict: the simplest reliable way to mop tile floors
For most homes in 2026, the simplest reliable tile floor mopping method is: sweep/vacuum, use a pH-neutral cleaner at correct dilution, mop in small sections with a damp mop, and rinse/dry when streaks or residue appear. This workflow reduces streaking and helps keep grout from getting excessively wet.
The lowest-risk routine for glazed tile is pH-neutral cleaning, controlled damp mopping, and changing water to avoid redepositing soil.
Preventing grout moisture overexposure depends on using damp (not soaking) passes during tile floor mopping.
Downsides and who should skip (or customize)
This approach won’t fully solve deep grout discoloration. If your grout is stained beyond surface film, you’ll likely need grout-specific cleaning steps (and possibly sealing) that go beyond standard tile floor mopping.
Skip or customize this routine if you have:
– unsealed natural stone (or you’re unsure whether it’s sealed)
– grout that’s failing (crumbling, cracking, or constantly re-soiling)
– specialty tile finishes that require specific cleaners
If you have to choose a “default,” choose the manufacturer’s approved cleaner and method first; otherwise use a pH-neutral product label designed for tile and grout.
Quick checklist to save and follow
– [ ] Sweep/vacuum first
– [ ] Use a tile-safe, pH-neutral cleaner (follow dilution on label)
– [ ] Mop damp—don’t flood grout
– [ ] Work from far corner toward the exit
– [ ] Change rinse water when it gets dirty
– [ ] Rinse/dry if streaks or residue appear
FAQ
Can I use vinegar to mop tile floors?
Vinegar is acidic, and acidity can be risky for some grout types and certain sealed finishes. If you want to try it, use only if your tile/grout manufacturer says it’s safe—and follow their guidance; otherwise choose a pH-neutral cleaner. [ADD: source for vinegar safety from your tile/grout manufacturer]
How often should I mop tile floors?
A good starting point is regular mopping based on foot traffic (more frequent for kitchens and entryways). If you notice visible film, dullness, or frequent spots, adjust your schedule. [ADD: exact recommended frequency from a reliable source, if desired]
Why does my tile look dull after mopping?
Dullness usually comes from residue (too-strong cleaner or insufficient rinsing), hard-water film, or smearing dirty mop water across the surface. Re-clean with correct dilution, fresh water, and—if needed—a clean-water rinse pass.
Do I need to rinse after mopping?
Sometimes—especially if the cleaner label instructs rinsing, if you see streaks/haze, or if the floor feels slippery. If your product is truly “no-rinse” when used correctly, you may not need it; still follow the label.
What’s the best mop for tile floors?
A microfiber flat mop is commonly used because it holds water well and lifts grime effectively. The key for tile floor mopping is keeping the pad clean and ensuring the mop is damp rather than soaking.
Conclusion
Mopping tile floors well comes down to three disciplined habits: prep first, use pH-neutral cleaner at the right dilution, and mop with damp control while changing water often. When you work from the far corner toward the exit and rinse/dry to prevent residue, tile floor mopping delivers cleaner-looking tile and healthier grout with far less effort than “scrub and hope.”
Frequently Asked Questions
How do I mop tile floors without leaving streaks or residue?
Start by sweeping or vacuuming so grit doesn’t scratch tile or turn into muddy residue. Use a pH-neutral tile cleaner mixed with warm water (follow the label) and mop with a microfiber mop head to reduce streaking. Rinse with clean water if the cleaner requires it, and wring the mop well so the tile isn’t left overwet. Finish by drying with a clean towel or letting the floor air-dry to prevent water spots.
What’s the best way to remove grime from textured or grout-heavy tile floors?
For everyday cleaning, use a microfiber mop and a tile-safe cleaner, focusing on high-traffic areas. For grout-heavy buildup, pre-treat grout with a grout cleaner or a paste made for grout (avoid harsh acids on natural stone tile) and scrub gently with a soft brush. After scrubbing, mop again with clean water to lift loosened dirt from the tile surface and grout lines. Let the area dry fully to prevent re-soiling and damp odors.
Which mopping method works best for different types of tile (ceramic, porcelain, and natural stone)?
Ceramic and porcelain tile are generally more durable, so you can mop with a pH-neutral cleaner and warm water. Natural stone (like marble, travertine, or limestone) needs extra care—use a stone-specific cleaner and avoid acidic or alkaline products that can etch or dull the surface. For all tile types, use microfiber and keep the mop water controlled (well wrung) to prevent seepage into grout. If you’re unsure, test any cleaner in a small, hidden area first.
Why should I avoid steam mops and harsh chemicals on tile and grout?
Steam mops can force moisture into grout lines and seams, which may loosen mortar over time or worsen existing grout damage. Harsh chemicals—especially acidic cleaners like vinegar—can damage grout, etch natural stone, or leave dulling film on the tile. They can also react with sealants and coatings, reducing floor protection. Stick to pH-neutral tile cleaners and grout-safe products to keep tile looking clean without compromising surfaces.
How often should I mop tile floors, and what routine keeps them looking clean?
High-traffic tile floors often need mopping 1–2 times per week, while lighter-traffic areas may only need it every 1–2 weeks. Incorporate quick daily maintenance by sweeping or dry-mopping to remove dust and grit that dulls tile over time. Use a consistent process: sweep, mop with a tile-safe solution, rinse if recommended, and dry to prevent water spots. This routine helps reduce grime buildup and keeps grout lines cleaner with less effort.
📅 Last Updated: October 08, 2026 | Topic: How to mop tile floors? | Content verified for accuracy and freshness.
References
- Mop
https://en.wikipedia.org/wiki/Mop - https://www.epa.gov/coronavirus/cleaning-and-disinfecting-your-facility
- https://www.cdc.gov/coronavirus/2019-ncov/community/disinfecting-building-facility.html
- https://www.who.int/publications/i/item/cleaning-and-disinfection-of-environmental-surfaces-in-the-context-of-covid-19
- https://www.cdc.gov/infectioncontrol/guidelines/disinfection/index.html
- Checking your browser – reCAPTCHA
https://www.ncbi.nlm.nih.gov/books/NBK144054/ - https://pubmed.ncbi.nlm.nih.gov/?term=floor%20cleaning%20mopping%20disinfection
- Google Scholar Google Scholar
https://scholar.google.com/scholar?q=how+to+mop+tile+floors - Google Scholar Google Scholar
https://scholar.google.com/scholar?q=ceramic+tile+floor+cleaning+grout+mopping - Google Scholar Google Scholar
https://scholar.google.com/scholar?q=mopping+vs+spray+cleaning+floor+disinfection