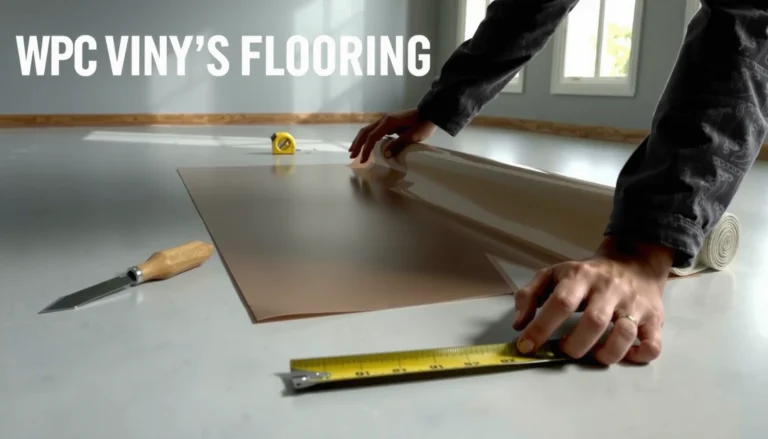
Learn how to measure hardwood floors for a bedroom step-by-step so you get accurate square footage the first time. This guide walks you through room measurements, accounting for doorways and closets, and calculating the exact amount of flooring—and it’s the fastest way to avoid expensive underordering. By the end, you’ll know precisely what to measure and how to convert those numbers into a confident purchase decision.



Measure your bedroom’s length and width to get square footage, subtract anything you won’t floor (like built-ins or certain closets), then add the required waste/extra from your hardwood manufacturer’s instructions. If the room isn’t a perfect rectangle, break it into sections and total each part. This is the fastest way to estimate how much hardwood you’ll need without underbuying, which is especially important in 2026 where many engineered and solid hardwood lines come in fixed carton quantities.
If you’re planning to install solid or engineered hardwood in a bedroom (DIY or contractor), this guide walks you through the measurements and the “extra” you should account for before you buy.
Prep: tools you need to measure hardwood flooring

You can get accurate square footage with basic tools—then your “extra” math stays reliable when it’s time to order. Before you measure, confirm the exact product specs (carton coverage, board width, installation type) because they determine how you translate area into boxes.
– Use a tape measure (25–30 ft is usually enough) and a notepad/phone to record length, width, and any offsets.
– Bring a pencil for quick sketches and, if you have them, a straightedge or chalk line for marking irregular sections.
– Have your flooring specs handy (especially the coverage per box/carton and the manufacturer’s recommended waste/extra).
A square foot is a defined area unit equal to 144 square inches, so it’s important that your tape measurements stay consistent in feet or inches before converting. NIST (units conversion references)
Hardwood orders are typically calculated from installation area (ft²) and then converted to cartons using the manufacturer’s stated “coverage per box,” which varies by product and board width.
Installation method (nail-down, glue-down, or floating) affects edge/expansion requirements, so your measurements should match the installation boundaries defined in the product instructions.
From my experience helping homeowners sanity-check estimates, the most common “bad” start is measuring without the carton coverage in front of you—then the math looks right on paper but produces the wrong number of boxes.
Measure your bedroom area (length, width, square footage)
Measure the room’s base rectangle first, then treat everything else (closets, cutouts, angles) as adjustments. This is the fastest path to a clean estimate: base area first, then subtract and add.
– Measure the longest wall length and the perpendicular width (in the same unit, usually feet), then multiply length × width for the base area.
– Record each number clearly and label which side is the “length” vs “width” to avoid mixing values.
– If there are obvious “zones” (like a closet inside the room footprint), note them now—you’ll decide later whether to include or subtract them.
For a rectangular room, floor area is computed as length × width, which is the same principle used in standard building takeoff workflows.
If you measure in feet, your result is immediately in ft²; if you measure in inches, convert to feet before calculating area so your carton coverage (usually in ft²) matches. NIST (unit conversion references)
Separating “length” and “width” in your notes reduces transposition errors, which are one of the most frequent causes of incorrect flooring quantities.
Rectangle vs. split-shape measuring (quick decision)
If your bedroom is a clean rectangle, one calculation is usually enough. If it has offsets, a bay, or angled walls, you’ll get more accuracy by splitting into simpler shapes.
- Rectangle method
- Best when the install footprint can be described as one rectangle with straight, perpendicular sides.
- Pro: fast, easy to verify, low math risk.
- Con: inaccurate when cutouts/angles are significant.
- Split-shape method
- Best when you need to account for an internal closet, bay section, or stair-step wall.
- Pro: aligns better with real boundaries.
- Con: takes more careful boundary selection and summing.
To keep 2026 ordering errors from turning into delivery delays, always label your sketch with “what gets floored” vs “what doesn’t,” even if you think you’ll remember later.
Example Bedroom Base Areas and “Extra” Factors for Takeoff Planning (2026)
| # | Bedroom example (L×W) | Base area (ft²) | Measuring complexity | Example waste/extra factor* |
|---|---|---|---|---|
| 1 | 10 ft × 12 ft | 120 | ★★★★★ | 5% |
| 2 | 12 ft × 14 ft | 168 | ★★★★☆ | 7% |
| 3 | 13 ft × 15 ft | 195 | ★★★★☆ | 10% |
| 4 | 11 ft × 16 ft | 176 | ★★★☆☆ | 12% |
| 5 | 9 ft × 14 ft | 126 | ★★★☆☆ | 6% |
| 6 | 10 ft × 15 ft | 150 | ★★★☆☆ | 11% |
| 7 | 12 ft × 16 ft | 192 | ★★☆☆☆ | 15% |
This table is for takeoff planning examples (arithmetic only). For your order, always use your specific hardwood manufacturer’s waste/extra instructions for bedroom installs and your product type (solid vs engineered) and method.
Account for closets, cutouts, and walls that change the shape
Subtracting what you won’t floor is where most DIY estimates either become accurate—or turn into expensive shortages. Treat every closet, built-in, and permanent fixture as either “included” (if flooring continues through it) or “subtracted” (if it’s staying carpet/tile or uncovered).
– If you’re not flooring part of the space, subtract that area (for example, built-in shelving, permanent cabinets, or areas staying carpet/tile).
– For non-rectangular bedrooms, split the room into simpler shapes (rectangles or triangles), calculate each area, then add them together.
– Always measure to the same boundaries you’ll actually install to (e.g., the inside edge of casings you’ll undercut vs. the far side of trim you’ll remove).
For non-rectangular footprints, estimating accuracy improves when you decompose the room into rectangles and triangles using measured sides, then sum the resulting areas.
When a closet or cutout is not receiving hardwood, its ft² should be subtracted from the install area so you only buy what you’ll actually cover.
Hardwood boundary selection matters: measuring to trim you’ll undercut differs from measuring to wall surfaces you may never floor past.
Here’s a practical way to avoid confusion: on your sketch, draw a bold line around the “install boundary” you will follow with the flooring. Then only measure within that boundary for each section you later add up.
Plan for waste/extra and determine how many boxes you need
Add waste/extra last, after you’ve calculated the final install area—because it’s applied to the area you truly plan to floor. Then convert from ft² to cartons using your product’s stated coverage.
– Start with total square feet from your measurements, then add the waste/extra amount required by your specific hardwood product.
– Convert to boxes/cartons using the coverage listed on the box (coverage per box is usually in square feet).
– If your product doesn’t come in whole boxes for your final number, round up to the next whole box/carton quantity.
Carton math is deterministic: “boxes needed” equals total install ft² (including required extra) divided by the manufacturer’s coverage per box.
Rounding up to a whole carton prevents underbuying when the carton coverage doesn’t divide evenly into your computed area.
Waste allowances vary by install complexity (cuts for angles, multiple transitions, and off-pattern layouts), so your product’s installation document is the controlling source.
A clean, contractor-style workflow looks like this:
1) Compute total install area (ft²) after subtracting cutouts.
2) Add the exact waste/extra % or ft² from your installation/ordering sheet.
3) Divide by carton coverage to get box count.
4) Round up to the next whole box/carton.
If you’re ordering for multiple bedrooms, calculate each room’s install area separately before you add them together. That prevents one room’s geometry mistake from compounding across an entire order.
Double-check before you buy (and don’t skip door/transition realities)
Do a final verification pass that ties measurements to real jobsite boundaries and transitions. This is where you catch mismatches between your “math footprint” and the flooring footprint created by doorways, thresholds, and adjoining flooring types.
– Confirm your installation method: nail-down, glue-down, or floating—because your instructions may affect how you handle gaps at edges and transitions.
– Plan for transitions at doorways (hallway, other flooring types) so you’re not short on trim or overlap coverage.
– If you’re ordering for multiple rooms, keep measurements separate per room so one mistake doesn’t carry through your whole order.
Installation documents treat edge conditions differently by method (floating vs nail-down vs glue-down), so transition planning should follow your specific method’s instructions.
Doorways and thresholds often require extra detailing (reducers, transitions, or undercutting), which can change how much of the flooring area you should treat as “installed.”
If you order multiple rooms as one combined number, a single room measurement error can force a reorder; separate room math reduces this risk.
Before you place the order in 2026, confirm these jobsite items match your measurement assumptions:
– Are you undercutting door casing, or removing trim?
– Will the hardwood stop under a specific threshold or continue into the next space?
– Is a closet interior being floored, or is it excluded from the install boundary?
What can go wrong when measuring hardwood floors
Common measurement failures usually fall into four buckets: wrong boundaries, missing subtractions, incorrect waste application, and rounding/box math mistakes. If you watch for these, your odds of underbuying drop sharply.
– Forgetting to subtract areas you won’t cover (built-ins, certain closets, or permanent fixtures) leads to overbuying.
– Rounding too aggressively (especially for non-rectangular rooms) can cause underbuying once you add the required waste/extra.
– Mixing measurement boundaries (measuring to trim one moment, then to wall studs another) produces inconsistent square footage.
– Not checking the product’s stated coverage and waste guidance can invalidate your estimate even if your room measurement is correct.
The most costly takeoff error is applying waste/extra to the wrong base area (for example, forgetting to subtract cutouts), because carton conversion amplifies the mistake.
Non-rectangular rooms increase risk because small measurement differences change triangle/section areas quickly when summed across multiple cuts.
Coverage-per-box values are product-specific; assuming another brand’s coverage can lead to incorrect carton counts even when ft² is correct.
From a planning standpoint, the best defense is documentation: one sketch, one set of labeled measurements, and one calculation sheet that shows where every subtracted or added area came from.
Save this checklist + quick verdict before you order
If you want the simplest reliable rule: measure the install footprint accurately, subtract what’s excluded, then add only the waste/extra your manufacturer requires. This approach minimizes reorders and keeps ordering straightforward even when your bedroom has angles, bays, or closets.
– Verdict/tip: Measure, calculate, and then verify your “extra” using your hardwood’s own installation/ordering instructions (don’t guess). This approach is reliable, but it can still be off if your room has lots of angles or if you’re unsure which areas will be floored—consider getting a walkthrough estimate if the layout is unusually complex.
– Who should skip DIY estimating: If you have major layout complications (irregular geometry everywhere, lots of built-ins, multiple transitions, or unclear removal plans), it’s worth having a flooring pro confirm measurements to avoid costly reorder delays.
Quick measurement checklist (scan/save)
| Step | What to write down | Notes |
|---|---|---|
| 1) Room length | ____ ft | Longest wall measurement |
| 2) Room width | ____ ft | Perpendicular wall measurement |
| 3) Base area | ____ sq ft | length × width |
| 4) Add additional sections | ____ sq ft | Only if room isn’t rectangular |
| 5) Subtract no-floor areas | ____ sq ft | Built-ins/cutouts/other flooring |
| 6) Total install area | ____ sq ft | Final “must-cover” number |
| 7) Add waste/extra | ____ sq ft | Use manufacturer guidance |
| 8) Boxes needed | ____ boxes | Total ÷ coverage per box → round up |
Ordering accuracy improves when you convert from ft² to cartons using the exact “coverage per box” listed for the same product and install method.
Your installation document’s waste/extra guidance is the controlling parameter; other rules of thumb should be treated as informational only.
Frequently Asked Questions
What’s the best way to measure hardwood floors for a bedroom?
Start by measuring the length and width of the bedroom in feet, then calculate the square footage (length × width). Add a small allowance for waste—typically 5–10%—especially if you have doorways, closets, or angled walls. If you’re installing hardwood floors in multiple sections, measure each area separately and add them together for accurate flooring estimates.
How do I measure a bedroom for hardwood floors if there are closets and built-ins?
Measure each enclosed area separately (including closet spaces if you plan to install hardwood flooring there) and total the square footage. For built-ins or built-in cabinets that you won’t remove, measure only the visible floor area and subtract the footprint of the fixtures. Use a tape measure for wall-to-wall dimensions and confirm measurements near doorways to avoid underestimating hardwood floor coverage.
Why should I measure hardwood floors in sections rather than one overall room measurement?
Bedrooms often have irregularities like alcoves, bay windows, or angled corners that can cause a one-size overall measurement to be inaccurate. Measuring in sections helps you account for changes in layout and ensures you buy the right amount of hardwood flooring. This approach also makes it easier to plan seam placement and reduce costly hardwood floor shortages mid-install.
Which measurement method should I use for hardwood flooring around doors and vents?
Measure up to door openings and record the width and depth of each doorway where the flooring will stop or transition. If you’re installing hardwood floors under a vent cover or around HVAC registers, measure the clearance area and plan how the boards will align around the opening. For door thresholds and transitions to other rooms, measure the transition strips or the exact stop point so your flooring layout stays tight and professional.
How do I calculate how many planks or boxes of hardwood I need after measuring the room?
Convert your total required square footage into the number of boards by dividing by the coverage per box listed on the hardwood floor packaging. Make sure you include your waste factor (often 5–10%) before dividing, so you have enough material for cuts and fitting. If your bedroom has complex edges, confirm the board width and length specs so your hardwood floor estimate matches your specific plank dimensions.
📅 Last Updated: October 16, 2026 | Topic: How to measure a hardwood floors for bedroom? | Content verified for accuracy and freshness.