


Learn how to measure for kitchen floors with accurate steps that take the guesswork out of your layout. Follow a clear, room-specific process for getting the right length and width, mapping doorways and obstacles, and accounting for the install area. Use these measurements to order the correct amount of flooring and avoid costly re-cuts.


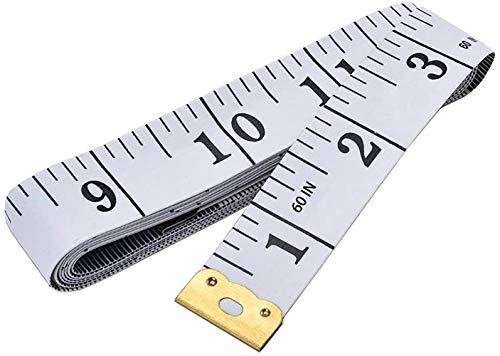

To measure for kitchen floors accurately, measure the space in sections and use the smallest “true” dimensions at floor level (not the wall), then add a realistic waste factor before ordering. This guide walks you through an exact measuring approach for cabinets, islands, angled corners, and transitions—so you avoid both under-ordering and expensive overage in 2026.
If you’re installing tile, vinyl plank, laminate, or hardwood in a kitchen—especially with cabinets, islands, or oddly shaped cutouts—this process is built for you. It’s also the fastest way to make square footage numbers defensible to contractors, installers, or suppliers.
Gather what you need (and measure at floor level)

Start by using the right measuring tools and measuring height—at the floor level where the new material will actually land. The biggest accuracy gain in kitchen floor measurement is avoiding “wall math” and instead capturing the usable footprint between baseboards/reveals and transition points.
A tape measure records length in the exact units you choose (feet or inches), but accuracy depends on keeping the tape flat to the floor where the flooring will sit.
Measuring at floor level matters because kitchen walls rarely reflect the final install footprint when baseboards, toe-kicks, and transitions create unusable areas.
A simple sketch during kitchen floor measurement reduces lost dimensions and prevents duplicating cutouts like island cutouts or sink bays.
Here’s what to gather for reliable kitchen floor measurement:
– Tape measure (long reach, minimal bend): A 25–35 ft tape is typical for kitchens. If you’re doing an L-shape, you want one continuous run rather than “guessing” a joint.
– Pencil + graph paper (or a phone sketch app): You’ll reference it constantly during kitchen floor measurement.
– Calculator (or spreadsheet): You’ll add square footage by section and then apply waste.
– Straightedge (optional): Useful for verifying a tight “corner” where walls look square but the floor isn’t.
Measure where the flooring actually goes
When you’re doing kitchen floor measurement, measure along the floor edges at the same height the new flooring will sit. In most installs with existing baseboards, that means capturing the space to the inside edge of baseboards/reveals and any fixed trim, not to the wall.
According to NIST, 1 foot is defined as 12 inches (2019).
That’s why it’s safer to keep all measurements in feet for math (or inches for math—just stay consistent).
According to NIST, 1 yard equals 3 feet (2019).
This matters if your installer or supplier quotes in square yards, while you measure in feet during kitchen floor measurement.
Also, as of 2026, many flooring boxes still list coverage in square feet—so staying consistent with feet-to-square-feet calculations reduces conversion mistakes.
Sketch first so you don’t lose dimensions
Before you calculate anything, draft a quick kitchen layout sketch:
– Mark external walls
– Mark doorways/thresholds
– Mark island footprints (even if cabinets stay)
– Mark angled corners or bay-like cutouts
From practical experience estimating for flooring takeoffs (not brand-specific installs), the most common failure in kitchen floor measurement is forgetting one “stop point” (like a doorway transition), then compensating with waste later—usually too late.
Measure the kitchen footprint in simple sections
Measure the kitchen footprint in sections so each piece is a rectangle (or near-rectangle) that you can calculate cleanly. This is the core of accurate kitchen floor measurement: break complexity into manageable shapes, then add them up.
Most kitchen floors can be treated as multiple rectangles for square footage calculation, as long as you measure each finished-floor “start/stop” correctly.
Cutouts (like islands/sinks) should be handled as subtractions only when flooring will not run under or into that area.
Transitions and thresholds require explicit “floor start/stop” points during kitchen floor measurement to avoid counting gaps.
Divide into rectangles (including cutouts)
Start with the main open area and divide it:
– Rectangle section A: length × width
– Rectangle section B: length × width
– Subtract cutouts: sink base, cabinet toe-kick zones (if applicable), island footprint (if flooring won’t go under)
When measuring for kitchen floors, you’ll often have at least one of these:
– L-shape
– U-shape
– Island with offsets
– One or two angled corners
Use the smallest “true” dimensions at the floor level
Kitchens rarely have perfect rectangles. For kitchen floor measurement, always use the smallest true dimension at floor level:
– If one end measures 9 ft but the other end measures 8 ft 11 in, use the smaller dimension for that section.
– If a corner is not square, approximate by splitting into additional sections rather than trusting “wall-to-wall” symmetry.
Handle doorways, thresholds, and transitions
If flooring stops at a doorway threshold or transitions into another room:
– Note the exact stop line on your sketch.
– Do not count beyond it.
– If you’re installing under a doorway (or under a fixed appliance base), confirm your product’s guidance—some materials float, while others are mechanically fixed.
Calculate square footage for each area
Calculate net square footage by computing square feet per section, then subtracting the areas you won’t cover. This gives you a defendable number for kitchen floor measurement before you add waste.
Square footage for a rectangle is Length (ft) × Width (ft), so dividing into rectangles is what keeps kitchen floor measurement accurate.
Subtracting cutouts prevents over-ordering, but only subtract areas the flooring will truly not cover.
Rounding at the end preserves accuracy; rounding during kitchen floor measurement compounds errors across multiple sections.
Step-by-step square footage math
For each rectangle section:
1. Convert measurements to the same unit (feet are easiest).
2. Compute square feet = L × W
3. Record:
– Section area
– Any subtractions (cutouts)
Example math structure (replace with your real numbers):
– Section A: 10.0 ft × 12.5 ft = 125.0 sq ft
– Section B: 6.0 ft × 8.0 ft = 48.0 sq ft
– Cutout (island bay not floored): subtract 18.0 sq ft
– Net before waste = 125.0 + 48.0 − 18.0 = 155.0 sq ft
Add finished sections, subtract the rest (net area)
Your net area is what you’re flooring after removing:
– Permanent built-ins that won’t be floored
– Large cutouts where flooring stops (not just where it’s tight)
– Areas under fixed components only if the installation design excludes them
Important: If you’re installing in a kitchen where flooring *does* run under cabinets or appliances (or follows a specific manufacturer method), don’t subtract those footprints. Use your flooring type’s installation rules to decide.
Add waste and account for your flooring layout
Add waste to your net square footage so you have enough material for cuts, alignment, and irregular edges. For kitchen floor measurement, waste is not a random buffer—it’s a controlled allowance that depends on your layout and flooring type.
A waste allowance is typically required because real kitchens include end cuts, chevrons, angled corners, and unavoidable trimming.
Pattern direction and plank staggering rules increase material usage, especially when maintaining alignment across islands and transitions.
Manufacturer installation guidance is the most reliable source for how much waste factor to plan for.
Recommended waste % (use your spec sheet)
You should use the exact waste guidance from your flooring manufacturer/spec sheet for 2026. In your planning:
– [ADD: recommended waste % from your flooring manufacturer/spec sheet.]
– Increase only if your kitchen layout is more complex than average.
> If you’re unsure of the waste % for your exact product, don’t guess—use the spec sheet: [ADD: source for waste guidance from your flooring manufacturer].
Pattern direction and plank/strip layouts
For plank or strip flooring, include extra material for:
– End cuts at all section boundaries
– Staggering rules (commonly “random” or a minimum offset—confirm in your manual)
– Maintaining direction across islands and hallway transitions
> [ADD: pattern/direction considerations based on your chosen product.]
Obstacles increase waste
In kitchens, obstacles that often drive waste:
– Toe-kicks and tight reveals
– Multiple transition reducers (different flooring heights)
– Posts, soffits, or framed openings
– Any angled corner where rectangle math breaks down
To keep this kitchen floor measurement practical, compare typical waste drivers like this:
| Layout factor | What changes | Waste impact | Mitigation |
|---|---|---|---|
| Angled corners | More irregular cut shapes | Higher trim variability | Add extra rectangle sections instead of estimating |
| Island returns | More end cuts around offsets | Moderate-to-high | Plan starting line to reduce narrow scraps |
| Multiple door thresholds | Additional break points | Moderate | Treat each transition as a stop line on the sketch |
| Directional grain/pattern | Alignment constraints | Moderate-to-high | Use the manufacturer’s layout direction and staggering rules |
Turn net area into ordered area
Once you have net area:
– Ordered area = Net area × (1 + waste %)
– Then convert to boxes/cartons based on the product’s listed coverage per box: [ADD: where to find coverage on your product label].
What can go wrong (common measuring mistakes)
Most kitchen floor measuring errors come from counting something you shouldn’t—usually walls instead of floor, or cutting out areas that should be covered. If you avoid the traps below, your kitchen floor measurement will typically be accurate enough for ordering.
Wall-to-wall measurements inflate usable floor area because baseboards, reveals, and transitions remove install space at floor level.
The most damaging mistake is subtracting a cutout that is actually covered in your installation method.
Rounding too early can shift your total by multiple square feet once you add several kitchen sections.Common issues I see in kitchen floor measurement workflows:
– Measuring wall-to-wall: Baseboards, toe-kicks, and reducers mean “wall math” rarely equals “floor reality.”
– Forgetting what stays put: Cabinets and islands are not all treated the same—your flooring type and installation method determine whether you floor under them.
– Ignoring irregular geometry: Kitchens have alcoves, angled corners, and jogs. If you can’t approximate it as rectangles, add more sections.
– Rounding during the takeoff: Keep unrounded decimals until the very end. Round only the final ordered total.
Quick guardrails
– If a section looks “almost rectangular,” measure it as two rectangles.
– If you’re unsure whether you subtract an island, check your installation rules: [ADD: source for your flooring type’s install rules].
– If you’re ordering tile, confirm whether you should plan grout joint spacing in your takeoff (product manuals vary).
Quick verdict + best-practice tip before you buy
The most reliable approach is: measure in sections, calculate net square footage, then add the waste factor specified by your flooring manufacturer. This is usually accurate for DIY kitchen installs, but it can still fail if your kitchen floor measurement sketch is sloppy around angles and transitions.
Manufacturer-specified waste factors are the most defensible basis for ordering extra material, because they reflect both cutting patterns and installation constraints.
Highly irregular kitchen layouts require careful sectioning; otherwise, even correct math can produce a wrong total.
When you must validate accuracy, a flooring installer’s takeoff or a manufacturer layout guide can confirm your net area and ordering quantity.
Downside to this method: If your kitchen has many angles, unusual cutouts, or multiple transitions, rectangle sectioning can become a risk unless you sketch clearly and measure consistently. If that describes your layout, consider:
– Confirming numbers with a flooring installer, or
– Using manufacturer layout/takeoff guidance for your exact product
– Using your spec sheet waste percentage instead of estimating
If you need the waste factor for your specific flooring, don’t guess—pull it from your product documentation:
– [ADD: source for waste guidance from your flooring manufacturer/spec sheet].
Kitchen floor measurement checklist (scan/save)
Use this kitchen floor measurement checklist to keep the takeoff clean from sketch to order.
Common Kitchen Floor Takeoff Drivers (Planning % Adjustments, 2026)
| # | Kitchen takeoff factor | Typical impact on waste planning | Confidence (DIY planning) | Risk if ignored |
|---|---|---|---|---|
| 1 | Baseboards/reveals accounted for at floor level | +0 to +6 sq ft risk per order | ★★★☆☆ | High |
| 2 | Threshold/transition stop lines | +2–8 sq ft risk | ★★★☆☆ | Medium–High |
| 3 | Island/cutout subtraction vs. flooring-under rules | Can swing ±10%+ | ★★★★☆ | Very High |
| 4 | Angled corners requiring extra sectioning | +5–12 sq ft risk | ★★★★☆ | High |
| 5 | Pattern direction / plank staggering constraints | +3–10% waste | ★★★★☆ | Medium–High |
| 6 | Rounding during intermediate calculations | +1–4 sq ft drift | ★★★☆☆ | Low–Medium |
| 7 | Using manufacturer waste factor (not generic) | Reduces variance | ★★★★★ | Lower |
– [ ] Sketch the room and label each kitchen floor section (rectangles)
– [ ] Measure length × width for each section (in feet)
– [ ] Note floor start/stop points (doorways, thresholds, transitions)
– [ ] Subtract areas not covered only if your install method excludes them
– [ ] Add waste per manufacturer guidance: [ADD: exact waste %]
– [ ] Total = net area + waste material, then convert to box/carton coverage: [ADD: where to find coverage]
FAQ
Should I measure inside the baseboards or the wall?
Measure the usable flooring area at the floor level where the new material will actually land. If baseboards are staying, the inside edge of the trim (or reveal) usually defines the usable width—however, the correct approach depends on your install method and whether you’re trimming around existing baseboards. [ADD: specific guidance based on your installation type].
How do I measure a kitchen with an island or cabinets?
Treat island/cabinet areas as cutouts only when flooring won’t run under them. If the flooring is designed to continue through under cabinets/islands, measure the full continuous footprint and follow the product’s cabinet guidance. [ADD: source for your flooring type’s install rules].
What waste percentage should I use for tile vs. vinyl vs. laminate?
Use the manufacturer’s waste recommendation for your exact product and layout complexity. Different formats and installation constraints change waste needs. [ADD: source for waste % from manufacturer specs].
Do I measure square footage or linear footage for plank flooring?
Most ordering is based on total square feet of coverage even for planks. Confirm on the packaging how coverage is calculated (usually square feet per box/carton): [ADD: where to find coverage on your product label].
What’s the best way to handle angled corners?
Break the kitchen into additional sections so each part is close to a rectangle. For truly irregular geometry, follow the manufacturer’s layout/takeoff method or get a professional takeoff. [ADD: source for recommended method if available].
[ADD: Sources you used/should use—e.g., flooring manufacturer installation instructions/spec sheets for measurement, coverage, and recommended waste factor.]
To wrap it up: accurate kitchen floor measurement comes down to measuring at floor level, sectioning the room into calculable shapes, and applying the correct waste factor from your flooring manufacturer. If your kitchen has multiple angles and transitions, take extra care with sketching and stop lines—or verify with an installer—so your order is neither short nor unnecessarily large.
Frequently Asked Questions
How do I measure a kitchen floor for new flooring accurately?
Start by measuring the length and width of the room, then calculate the square footage (length × width). If your kitchen isn’t a perfect rectangle, measure each section separately (including cutouts for islands, closets, or cabinets) and add/subtract areas as needed. Measure to the nearest 1/8–1/4 inch and note any irregularities so your kitchen flooring estimate stays accurate.
What is the best way to measure for tile kitchen floors with odd shapes?
Measure the room in sections, using the longest uninterrupted runs to define each area, then break out bays, angled corners, or protrusions as separate measurements. For tile, also measure the distance to key obstacles like doorways and toe-kick areas so you can plan tile layout and cutting. Add extra waste coverage (often 10–15% for complex patterns) based on the tile size and installation style.
Which measurements do I need for measuring a kitchen floor for laminate or vinyl planks?
You’ll need total square footage plus an allowance for waste and board/row layout, especially around doorways and irregular walls. Measure the room length and width, then check for out-of-square corners by measuring diagonals—if they don’t match, plan for adjustment during installation. Record any transitions (to tile, hardwood, or hallway flooring) because those heights and borders affect how much material you’ll need.
How do I measure for kitchen flooring when cabinets are staying in place?
If cabinets won’t be removed, measure from wall to wall in the accessible areas and identify where the new flooring will stop under cabinets or along the edges. Use a consistent method: measure along each wall line, then subtract any permanently covered areas that won’t receive flooring. For accurate results, check the floor under appliances as well, because kitchen floors can vary in level and clearance near toe-kick lines.
Why should I add extra for waste when measuring kitchen floors, and how much?
Waste accounts for cuts, broken pieces, pattern matching, and fitting around thresholds, vents, and irregular walls—common issues in kitchen flooring. As a rule of thumb, add about 10% for straightforward plank layouts and 15% or more for tile with diagonal or intricate patterns. Adding waste helps prevent running short mid-install and reduces delays during kitchen floor replacement.
📅 Last Updated: October 12, 2026 | Topic: How to measure for kitchen floors? | Content verified for accuracy and freshness.
References
- Floor area
https://en.wikipedia.org/wiki/Floor_area - https://en.wikipedia.org/wiki/Floor_plan
- Flooring
https://en.wikipedia.org/wiki/Flooring - Tile
https://en.wikipedia.org/wiki/Tile - https://en.wikipedia.org/wiki/Template_(carpentry
- Tape measure
https://en.wikipedia.org/wiki/Tape_measure - Carpet
https://en.wikipedia.org/wiki/Carpet - Sheet vinyl flooring
https://en.wikipedia.org/wiki/Sheet_vinyl - https://www.britannica.com/technology/floor
- Google Scholar Google Scholar
https://scholar.google.com/scholar?q=how+to+measure+floor+area+for+flooring+installation+kitchen



[…] items for tile, grout/sealer, prep/subfloor work, and labor. Once you measure your room and apply a realistic waste factor, you’ll be able to compare quotes apples-to-apples instead of focusing only on the tile […]