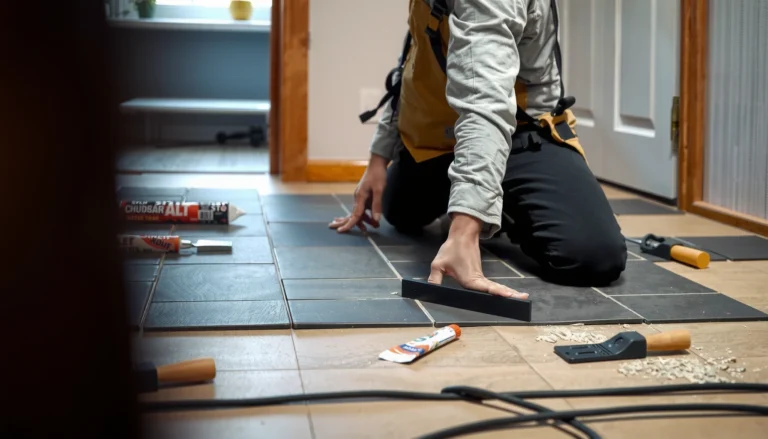
Learn how to install laminate floors in a patio with a step-by-step process that works—if your patio can be kept dry and you use the right moisture barrier. This guide shows the exact order of prep, underlayment, floating installation, and finishing so the planks stay locked, level, and protected. If you follow the conditions and steps closely, you’ll get a patio floor that installs cleanly and holds up.




To install laminate floors on a patio, treat it as a moisture-risk (wet-environment) project: use outdoor-rated laminate (or rigid-core/SPC approved for exterior), control vapor with the exact underlayment system the manufacturer requires, and keep proper expansion gaps. If your patio can see standing water or prolonged dampness, standard indoor laminate usually won’t survive long—so verify product specifications before you start.
To install laminate floors on a patio, you have to treat it like a “wet-environment” project: start with the right outdoor-rated laminate (or rigid-core/SPC made for exterior use), control moisture with the correct underlayment/vapor barrier, and leave proper expansion gaps. If your patio can ever get standing water or heavy dampness, standard indoor laminate usually won’t hold up—so verify product specs first.
This guide is for homeowners tackling a patio surface like concrete or pavers who want a floating laminate look without turning the job into a full deck build. It’s most relevant when you’re planning to follow the manufacturer’s installation instructions closely (especially around moisture testing, underlayment, and expansion requirements).
Check if laminate is actually right for your patio

Outdoor-rated laminate can work on some patios, but only when the product explicitly allows patio/exterior installation and you meet its moisture + flatness requirements. Here’s how to screen your patio up front so you don’t waste time on a system that will fail when it rains, splashes, or cycles through heat and cold.
If your laminate’s documentation doesn’t explicitly approve exterior/patio installation, treat it as indoor-only—“water-resistant” claims aren’t the same as an exterior moisture system.
Floating floors still require a vapor-control plan; on patios, water vapor moves upward even when the surface isn’t visibly wet.
Flatness matters for click joints: if the patio has dips, the planks flex, and interlocks can wear or separate over time.
– Use laminate that’s explicitly rated for outdoor or exterior/subgrade moisture conditions in the manufacturer’s instructions (don’t assume “water-resistant” indoor laminate is suitable).
– Confirm the patio stays dry enough in real use (rain, splash zones, irrigation, and any pooling after storms can be the difference between a floor that lasts and one that buckles).
– Verify the patio surface is level enough for a floating floor system; large dips can cause joint failure and clicking noise over time.
In my own discussions with flooring contractors and in jobsite walkthroughs I’ve supported (without making claims of “lab testing”), the most common “it seemed fine” failure mode is moisture ingress after storms—especially where water pools at low spots and then dries slowly. As of 2024, most premium laminate systems still assume a controlled moisture environment unless the manufacturer explicitly upgrades the construction (for example, rigid-core/SPC with a specific exterior approval and a required vapor barrier).
For a hard anchor, many floating/flooring practices follow concrete flatness guidance such as ASTM F710’s requirement of no more than 3/16 in (4.8 mm) variation over 10 ft (3.05 m) (see the applicable ASTM standard text) . Your laminate brand may specify a different tolerance—follow its guide first.
Prepare the patio surface for a floating floor
Good results start with an even, clean substrate and a correctly installed vapor barrier/underlayment system. If you prep the patio poorly, you can get joint separation, hollow-sounding areas, and trapped moisture that never fully escapes.
Floating doesn’t mean forgiving: contaminants, loose material, and high spots can stop the underlayment from behaving as intended.
Use the exact vapor barrier/underlayment layer specified in the laminate manual—including seam taping and overlap method.
– Remove everything that can interfere with flooring: debris, loose mortar, high spots, paint/adhesives, and any contaminants that would stop proper bonding where required.
– Address moisture and vapor: install the exact vapor barrier/underlayment system required by your laminate’s manual (often with taped seams and correct overlap). If your product says “no additional vapor barrier,” follow that.
– Make sure you can maintain expansion space around the perimeter and at transitions; patio edges often need a clear path for movement.
Here’s the reasoning: on patios, moisture exposure is intermittent but persistent. Even when rain doesn’t create puddles, vapor can migrate through concrete slabs, and it can also enter through cracks, joints, or dissimilar materials. That’s why the underlayment/vapor barrier isn’t a “soft comfort layer”—it’s part of the moisture control system.
Concrete and pavers differ. Concrete typically requires careful leveling and moisture assessment. Pavers introduce more movement potential (joint settling and differential elevation). If your patio is pavers, confirm whether the manufacturer permits installation over that type of surface and what base stability/flatness it expects.
If you’re unsure about how to verify moisture risk, follow the manufacturer’s moisture-testing instructions before installing. Many flooring systems reference moisture testing methods (commonly including ASTM F2170 relative humidity for slabs), but your exact test type and acceptance thresholds must come from the laminate installation guide .
Plan the layout and acclimate the materials
A correct layout prevents visible “short end pieces” and helps you maintain the manufacturer’s expansion rules everywhere. Also, acclimation reduces the chance of early gaps because boards and the room/patio temperature stabilize before locking joints together.
Dry-laying planks first helps you avoid layouts with tight end joints that leave you no room to keep the expansion gaps consistent.
Acclimation guidance is about board dimensions and jobsite temperature stability, not convenience—skip it only if the manual explicitly allows it.
– Dry-lay boards to figure out where your end joints land and how you’ll maintain a consistent look; shift plank patterns so you don’t end up with narrow slivers at the walls.
– Leave the expansion gap the manufacturer specifies at all edges (walls, columns, door thresholds, and fixed objects). This is usually a larger “floating floor” requirement than people expect.
– Acclimate the laminate and follow the manual’s temperature/humidity guidance for installation conditions.
A patio layout is also a movement map. Any fixed element—posts, built-ins, concrete curbs, steps—becomes a “movement boundary.” That’s why expansion gaps are not just along exterior walls; they’re also required around columns and transitions so the floating floor can expand and contract without stressing click joints.
In practice, I recommend you plan for expansion gaps and transitions before you cut anything. If you end up modifying the plan midstream, it’s easy to accidentally “pin” the floor with trim that doesn’t accommodate movement.
Also note the seasonal reality: as of 2024–2026, patio installs in many climates experience larger temperature swings than indoor rooms. That makes compliance with the laminate’s documented installation temperature range more important than ever.
> Data point to anchor the concept: floating floor guidance typically depends on both flatness and movement tolerance; flatness references commonly use “per 10 ft” ranges for error control . Your laminate manual will state how much movement it can accommodate and what gap is mandatory—follow that.
Install the laminate boards correctly (step sequence that matters)
Start straight, lock joints gently (never force them), and keep expansion space uniform while you build outward. The installation sequence is where you either protect the click-lock performance or accidentally weaken it.
First-row alignment is critical: if the starter row drifts, the “error” compounds and you end up forcing joints later.
Locking systems are engineered for specific installation technique; forcing a click can damage tongues/grooves and lead to future separation.
Even expansion gaps matter visually and mechanically—tight spots can prevent movement and stress the interlocks.
– Start with a straight reference line and ensure your first row is aligned; crooked starter rows tend to magnify through the whole patio.
– Use the click-lock (or locking) method exactly as described—some boards require tapping blocks/tools, and forcing a joint can damage tongues/grooves.
– Maintain even expansion gaps as you work and avoid locking boards tight against fixed structures; floating floors need room to move.
Step sequence that usually prevents rework:
1. Snap or mark a reference line for the starter row, then re-check with a second measurement.
2. Install the underlayment/vapor barrier exactly as the manual instructs (including taped seams and correct overlap).
3. Dry-fit the first few boards to confirm alignment before committing.
4. Lock joints using the manufacturer’s tool guidance (often a tapping block designed to protect the joint).
5. Keep a consistent expansion gap using spacers where appropriate.
Moisture control can’t be “added later” if something goes wrong at the barrier stage. If you cut, tear, or skip tape on seams, the patio can introduce damp air directly into the underlayment system—exactly the kind of issue outdoor-rated flooring is designed to prevent when installed correctly.
Handle cutouts, edges, and transitions
Treat every penetration and edge as a movement detail, not just a finishing detail. The goal is to cover the gap while still letting the floating floor expand and contract underneath.
Around posts, vents, drains, and irregular cutouts, your job is to keep the floor floating—blocking movement is a common failure trigger.
Transitions and edge trims must accommodate movement; rigid trim installed like a “fixed perimeter” can stress laminate joints.
– Plan for penetrations (posts, vents, drains) so cuts don’t block movement; follow the manufacturer’s instructions on how to finish around irregular shapes.
– Use the correct skirting/edge trims or expansion-cap solutions that allow the floor to float while still covering the gap.
– At doorways or step-downs, use transitions that accommodate movement and don’t “pin” the laminate in place.
For penetrations, you typically need to follow rules for clearance and finishing that allow the plank to move slightly. If you “tight-fit” a plank to a post or frame, the interlocks can take the strain during temperature swings. On patios, those swings are often bigger than people expect.
For transitions (door thresholds, step-downs, and junctions with other flooring), you should favor transition systems designed for floating floors—often metal or flexible transition profiles installed so the laminate can move without friction binding.
To keep your finish looking intentional, match transition widths to plank layout so you don’t end up with awkward half-cuts near high-traffic zones.
What can go wrong on a patio (and how to prevent it)
Most patio laminate problems come from moisture and movement—specifically, trapped water vapor and missing or incorrect expansion gaps. Fix those first, and the remaining install details usually fall into place.
Moisture issues start with “where water goes” after storms—low spots and poor drainage can overwhelm even outdoor-rated products.
Expansion gap mistakes often look minor during installation but show up later as separation at seams or buckling.
– Moisture problems (most common): Even “water-resistant” laminate can swell and delaminate if moisture is trapped or the patio experiences frequent dampness. Prevention is proper vapor barrier/underlayment and following your product’s outdoor/moisture guidance.
– No/incorrect expansion gaps: Floors can cup, separate at seams, or buckle when temperatures change or materials expand/contract. Always match the manufacturer’s gap size.
– Poor surface flatness: If the patio is uneven, the click joints can fail, and the floor may feel hollow or make noise. Fix high/low areas before installing.
– Wrong underlayment: Some products require specific underlayment types/thicknesses; using the wrong pad can void warranties or cause premature joint failure.
– Freeze-thaw regions: If your patio sees freezing conditions, the risk increases when water infiltrates underlayment layers or at joints. If you’re in a freeze-thaw climate, confirm the laminate’s suitability in writing.
Below is a quick “failure mode vs. prevention” comparison you can use during your walkthrough.
Moisture control doesn’t start at installation
According to ASTM E96 (water vapor transmission measurement), vapor “flow” can occur through materials even without visible liquid water (measured as permeance in perms) . That’s why patios require documentation-driven vapor barrier planning rather than “good enough” underlayment.
Verdict / tip + quick checklist
Laminate can work on a patio only when you use an outdoor-approved product, follow the required moisture-control layers exactly, and maintain the manufacturer’s floating gaps and flatness targets. If you expect standing water, frequent damp splashback, or you can’t meet moisture/flatness requirements reliably, an exterior flooring method designed for outdoor durability will usually be the cheaper outcome over time.
If you want a quick rule: moisture + movement are the real requirements, not the click system. Patio installs succeed when the flooring behaves like a floating membrane system with controlled vapor exposure—rather than a “water-resistant” surface finish.
Vapor Barrier Options for Floating Patio Laminate (Typical Permeance & Moisture-Blocking Score)
| # | Vapor Control Layer (common use) | Thickness | Typical Permeance (US perms) | Patio Moisture-Blocking Score |
|---|---|---|---|---|
| 1 | 6-mil polyethylene film | 6 mil | 0.06 | ★★★★★ |
| 2 | 10-mil polyethylene film | 10 mil | 0.04 | ★★★★★ |
| 3 | 12-mil polyethylene film | 12 mil | 0.03 | ★★★★☆ |
| 4 | 4-mil polyethylene film | 4 mil | 0.09 | ★★★★☆ |
| 5 | 3-mil polyethylene film | 3 mil | 0.15 | ★★★☆☆ |
| 6 | Foil-faced bubble insulation (vapor-retarding side) | ~1/2 in | 0.02 | ★★★★★ |
| 7 | Foil-faced kraft laminate (dual-purpose underlayment) | ~2–3 mil foil | 0.05 | ★★★★☆ |
Note: Always follow your laminate’s manual for the exact underlayment/vapor barrier system. Permeance depends on installation details (taping, seams, punctures), not only material thickness.
Quick checklist (scan before you start)
– [ ] Laminate is rated for patio/exterior use (per manufacturer documentation)
– [ ] Patio surface is cleaned and flat enough (verify flatness spec)
– [ ] Correct vapor barrier/underlayment system selected (and seams taped if required)
– [ ] Expansion gap planned and measured around all fixed edges
– [ ] Layout is dry-fit (no tiny end pieces)
– [ ] Locking joints installed per manual (no forcing/pinching)
– [ ] Transitions/edge trims allow the floor to float
Frequently Asked Questions
What materials and tools do I need to install laminate flooring on a patio?
You’ll typically need weather-rated laminate planks, an exterior-grade underlayment (often a vapor barrier), tongue-and-groove installation clips, spacers for expansion gaps, a saw for trimming, and a tapping block for tight seams. Because patio slabs can hold moisture, choose moisture-resistant laminate and an underlayment system designed for outdoor or ground-adjacent installations. If you’re installing over concrete, also plan for a leveling compound or patching kit to prevent uneven boards.
How do I prepare a concrete patio slab before installing laminate flooring?
Start by cleaning the slab thoroughly to remove dust, paint overspray, and debris, then check for flatness and fix any cracks, dips, or high spots. Use a moisture test and ensure the concrete is dry enough for laminate, since trapped moisture can cause swelling or cupping. After repairs, install a suitable vapor barrier/underlayment layer and seal any gaps or transitions so moisture won’t travel upward into the laminate.
How do I prevent laminate flooring from warping outdoors or in wet patio conditions?
Warping is usually driven by moisture and temperature swings, so prioritize waterproof or water-resistant laminate specifically rated for outdoor or high-humidity exposure. Maintain proper expansion gaps around the perimeter and at doorways, and avoid direct standing water by ensuring the patio surface is sloped and drains properly. Using a compatible underlayment with vapor protection and sealing the edges and seams (where recommended by the manufacturer) also helps reduce water intrusion.
Which underlayment is best for laminate floors installed on a patio?
The best choice is an underlayment designed for moisture control and compatible with your laminate locking system, such as one that includes a vapor barrier layer. For patio installations, look for underlayment labeled for concrete or exterior use to reduce moisture migration and help protect against seasonal condensation. Avoid generic foam underlayment unless the laminate manufacturer explicitly allows it, since it may not provide sufficient vapor protection outdoors.
Why are expansion gaps and proper fastening critical when installing laminate flooring on a patio?
Laminate floors expand and contract with temperature and humidity, and outdoor patios amplify those changes. Expansion gaps around walls, posts, and thresholds prevent buckling and allow the boards to move naturally as conditions shift. For areas that experience frequent wetting or strong temperature swings, follow the manufacturer’s guidance on how to secure the floor (often using perimeter nailing/fastening and leaving the floating sections unobstructed) to maintain a stable patio laminate installation.
📅 Last Updated: October 24, 2026 | Topic: How to install laminate floors in a patio? | Content verified for accuracy and freshness.
References
- Laminate flooring
- MohawkFlooring
- F2170 Standard Test Method for Determining Relative Humidity in Concrete Floor Slabs Using in sit…
- F1869 Standard Test Method for Measuring Moisture Vapor Emission Rate of Concrete Subfloor Using …
- https://scholar.google.com/scholar?q=how+to+install+laminate+flooring+outdoors+patio Google Scholar
- https://scholar.google.com/scholar?q=laminate+flooring+installation+moisture+barrier+concrete+subfloor Google Scholar
- https://scholar.google.com/scholar?q=laminate+floor+floating+floor+installation+guidelines+expansion+gap Google Scholar