
Learn how to install transitions for outdoor floors with a clear, step-by-step process that works for most concrete, paver, and deck edges. You’ll get the right selection criteria for the transition type, the correct surface prep, and the fastest installation method to keep water and debris from slipping under. Follow these steps to achieve a straight, durable finish that won’t lift or crack after freeze-thaw cycles.




Install outdoor floor transitions by prepping a stable, clean edge, fastening (or adhering) the transition so it can tolerate movement, and sealing all exterior contact points to manage water. Done right, your seam resists lifting, cracking, and pooling—even when temperature and moisture cause the flooring to expand and contract.
If you’re joining deck boards to tile, concrete to pavers, or vinyl to patio flooring, transitions aren’t just cosmetic. They’re a structural “interface” that keeps edges aligned, protects waterproofing or drainage planes, and creates a safer, more walkable surface. The best results come from following the transition manufacturer’s profile design (including expansion guidance) and matching the sealant and fastening strategy to the specific outdoor materials you’re connecting.
This guide is for homeowners and DIYers installing transitions between outdoor flooring surfaces where edges would otherwise lift, crack, or collect water.
Plan the Transition (Measure Heights + Choose the Right Profile)
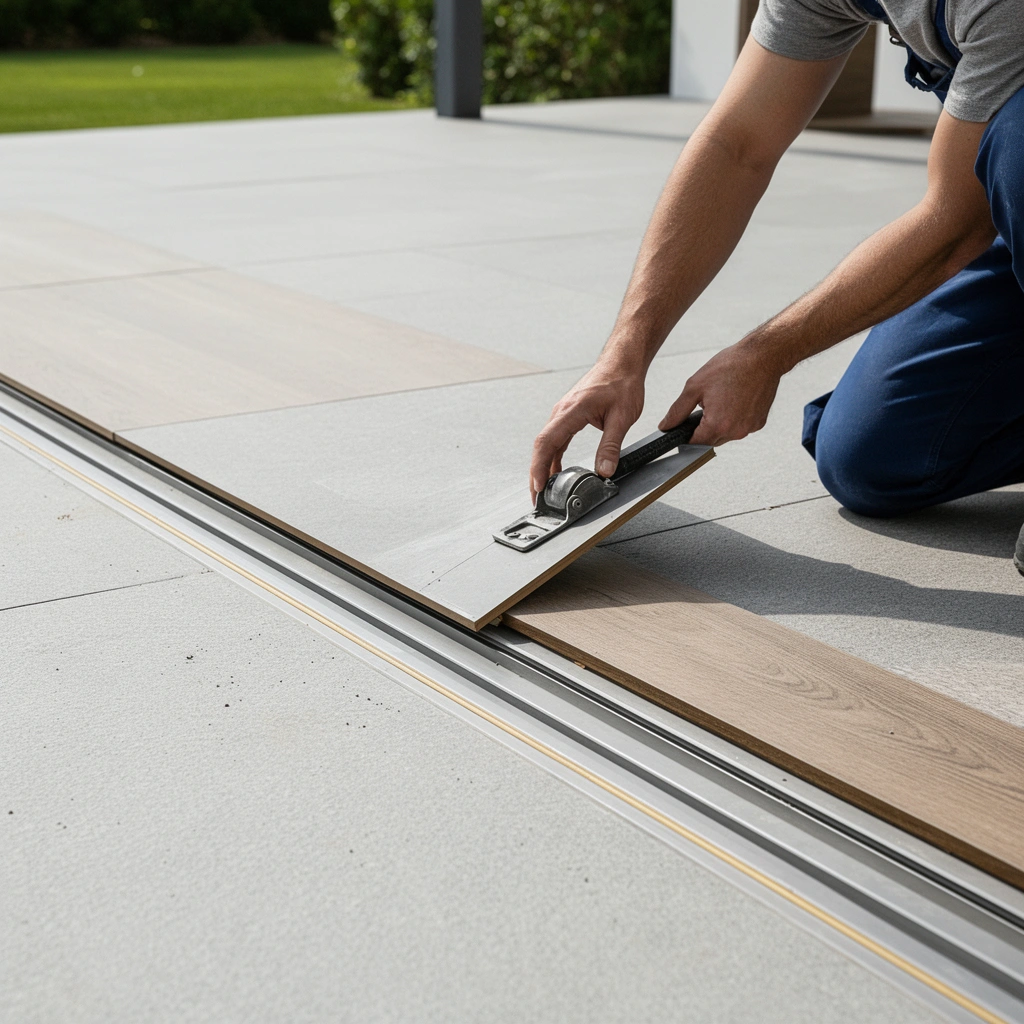
The fastest way to get a transition that looks straight and performs well is to measure height differences across the entire seam and select an outdoor-rated profile built for expansion. If you “pick by eye,” you usually end up with gaps, rocking, or water tracking at the edges.
Start by treating outdoor transitions like a system: transition profile + substrate + fasteners/adhesives + sealant + the two flooring materials. That’s the only way to ensure the seam can handle real-world movement from heat, freeze-thaw cycles, rain, and drying.
For exterior use, a transition profile should be explicitly rated for moisture exposure and temperature cycling by the manufacturer; otherwise, corrosion or material deformation can loosen the system.
Measure the finished elevation at multiple points along the seam to confirm whether you need a reducer/step profile or a flat transition that will sit evenly without forcing the flooring.
– Measure the finished height difference between both flooring surfaces at multiple points, not just one spot.
Use a straightedge (or a laser level) and measure at several locations—especially near corners, dips, and areas where one surface meets a slope or drain.
– Pick a transition type that matches the job and is rated for outdoor exposure and moisture.
Common outdoor seam scenarios:
– Height change (stairs/step): threshold/step transitions that visually “bridge” the lip.
– Same height but different materials: flat transitions designed for clean alignment.
– Tapered grade differences: reducers that manage a gradual step and reduce trip risk.
– Match the profile to the movement reality of your materials.
Outdoor flooring systems move. Expect more movement when joining different material types (e.g., wood/plastic deck products to rigid tile or concrete).
Outdoor Transition Profiles vs. Seam Performance (Field-Use Scenarios, 2025)
| # | Transition profile (outdoor use) | Typical height change handled | Outdoor moisture durability | Best for | Install risk when misused |
|---|---|---|---|---|---|
| 1 | Stainless threshold/step | 0–12 mm | ★★★★★ | Deck→tile, step-ups | Low |
| 2 | Exterior flat transition (aluminum/anodized) | 0–6 mm | ★★★★☆ | Concrete→pavers, equal heights | Low–Med |
| 3 | Reducer profile (tapered) | 4–18 mm | ★★★★☆ | Sloped concrete→pavers | Med |
| 4 | ADA-style ramp threshold (outdoor rated) | 8–25 mm | ★★★★☆ | High trip-risk transitions | Med–High |
| 5 | Membrane-compatible exterior strip | 0–10 mm | ★★★★★ | Deck drainage planes to tile | High |
| 6 | Rubber/plastic joint transition (sealed) | 0–14 mm | ★★★☆☆ | Temporary/semi-exterior patios | Med–High |
| 7 | Mortar-set metal edge strip (exterior grade) | 0–9 mm | ★★★★★ | Concrete edges, tile boundaries | High |
– Use sealant and fastening compatibility as part of the “profile choice.”
If a transition requires a specific sealant chemistry (common with membrane transitions), that requirement drives your selection more than aesthetics.
– Anchor decision with standards and test methods.
For example, exterior sealants used at joints are commonly specified by performance criteria for movement and adhesion. (ASTM C920)
According to ASTM C920, sealants are classified by their joint movement capability (e.g., Class 25 = ±25% movement and Class 50 = ±50% movement) and by intended use in exterior applications (ASTM C920, sealant standard). This matters because outdoor transitions typically sit on moving edges—your sealant must keep working when the seam opens and closes.
Prep the Subfloor and Edge Profiles
The transition can only perform as well as the edge it’s installed to, so prep the substrate first and treat stability as non-negotiable. If the substrate flexes or the edge crumbles, the transition will loosen regardless of how good the profile is.
Outdoor seams often fail at the “hidden” interface: wood framing that moves, crumbling mortar beds, or a concrete edge with dust, paint, or laitance. Before any screw goes in or adhesive is applied, make the seam area clean, flat, and structurally sound.
A transition does not correct a warped or undermined edge; manufacturer guidance typically assumes a stable, properly prepared substrate for fastening/adhesion.
If the seam rocks when pressed by hand, you’re likely installing over a substrate that will eventually break the bond line or loosen fasteners.
– Clean and check the substrate for level/flatness; transitions won’t “fix” uneven edges.
Remove debris, mildew, loose coatings, and any contaminants that reduce adhesion. For tile or mortar edges, confirm the surface is sound—not hollow-sounding.
– Remove loose material and confirm the edge is stable enough for fasteners or adhesive.
If you’re fastening, ensure there’s solid material to bite into. If you’re adhering, confirm the surface matches the adhesive’s approved substrates (that information is usually in the adhesive/TDS).
– Plan for drainage and water management.
The goal is to reduce water intrusion at the seam. If water can run underneath a system designed to resist it, you’ll need additional waterproofing details at the substrate level—beyond just the transition.
From my experience as a builder working with exterior tile interfaces, the biggest “DIY surprises” happen when the sub-structure is slightly out of plane. The transition looks fine during dry conditions but starts to gap after a freeze-thaw or after heavy rain saturates one side more than the other. When I see rocking at the edge, I treat it as a framing/substrate issue first, not a trim-profile issue.
Install the Transition Base/Track
The transition base/track is what keeps the seam straight, so dry-fit and fasten according to the manufacturer’s pattern and spacing. When you follow the recommended screw/anchor method, you control movement instead of letting it chew up the edges over time.
Many outdoor transitions come with a base/track component designed to lock alignment. Installing that base incorrectly—wrong fasteners, wrong spacing, or skipping predrilling—creates leverage points that lead to loosened sections and water paths.
Dry-fitting the transition along the seam before fastening helps prevent bowed lines and improper trim that can create water-catching gaps.
Outdoor transition systems typically specify exact fastener spacing and whether predrilling is required to avoid splitting or corrosion-prone failures.
– Dry-fit first: place the transition along the seam and mark where it needs to be trimmed for a tight, even line.
– Follow the manufacturer’s method for fastening:
– Use the screw/anchor type specified (stainless or exterior-rated hardware where required).
– Maintain the spacing and screw pattern the profile design calls for.
– Predrill only if the instructions require it (especially with metals that can create stress points).
– Work from a datum line if the seam is long.
Snap a line or use a straightedge reference so the base/track stays aligned as you progress.
Cut, Fit, and Leave Expansion Space
A clean-looking transition is only “clean” if it can move without being forced. Cut and fit carefully, and leave expansion gaps exactly where the system requires them so the flooring and transition can expand/contract independently.
Outdoor materials move due to temperature and moisture changes. Transitions are designed to accommodate some of that movement—when you eliminate the designed gap, you often trigger buckling or seam separation.
Outdoor flooring and junction systems expand/contract with temperature and moisture, so leaving the specified expansion space is essential for avoiding buckling and edge cracking.
For joint systems, forcing the transition “tight” can convert normal movement into stress that breaks adhesive bonds or lifts tile edges.
– Test-fit each piece, then cut carefully.
You want the transition flush without forcing the surfaces. If you’re trimming a metal profile, deburr cut edges to reduce corrosion starting points.
– Keep expansion gaps where the transition system calls for them.
Use the manufacturer’s gap callouts. If the profile uses a foam/insert or gasket, don’t delete it—those components often provide the movement tolerance and water resistance.
– Avoid “gap-filling” expansion joints with rigid mortar/caulk.
Expansion areas require flexible, properly rated sealants—not hard-setting fillers—unless the system explicitly allows it.
Seal and Finish for Water Management
Seal transitions like you’re protecting a drainage detail, not like you’re just “finishing edges.” Use exterior-rated sealant compatible with both the transition profile and the flooring materials to reduce water intrusion and freeze-thaw damage.
Even a correctly installed transition can leak if water finds an unsealed contact point. The sealing strategy is usually where DIY jobs either become durable—or turn into repeat repairs.
Use an exterior-rated sealant designed for joints and movement, and apply it at the seam contact points specified by the transition and flooring manufacturers.
ASTM C920-rated sealants are tested for adhesion and movement capability, which is critical at exterior flooring transitions where joints cycle open and closed.
– Use the recommended sealant for exterior use where the transition meets flooring or edging.
Sealant selection depends on chemistry compatibility (metal vs. cementitious vs. polymer surfaces). (ASTM C920 provides performance classification criteria for exterior joint sealants)
– Finish any exposed edges according to the product instructions.
If the transition profile is designed to be left bare or coated, follow that. Painting or coating the wrong product can compromise corrosion resistance or adhesion of sealants.
– Key compatibility note (what to verify):
– Transition material (anodized aluminum, stainless steel, PVC/rubber, etc.)
– Flooring material (porcelain/ceramic tile, pavers, concrete, vinyl)
– Waterproofing system (membrane type if present)
Where compatibility is critical, don’t guess—confirm using the sealant manufacturer’s compatibility chart and the transition manufacturer’s installation instructions. [ADD: source for sealant compatibility guidance for the specific sealant/transition material you’re joining.]
What Can Go Wrong (And How to Avoid It)
Outdoor transitions fail for predictable reasons: wrong materials, missing expansion allowance, or unstable substrates. If you address these three categories early, you’ll avoid most premature seam breakdown.
Most transition failures are mechanical (loosened fasteners or rocking substrate) or water-driven (unsealed contact points), not purely aesthetic issues.
Seams without correct expansion clearance can buckle or crack because joint movement stress concentrates at the transition edges.
Common failure modes
– Wrong fasteners or sealing methods:
Transitions can fail early if you use the wrong exterior-rated adhesive/sealant or skip required sealing points.
– No expansion allowance:
Installing transitions too tightly can cause buckling, gaps, or movement that damages flooring edges. Outdoor materials move more than most DIYers expect—especially when moisture content changes.
– Installing over unstable substrate:
If the subfloor flexes or the edge crumbles, the transition will loosen and “pull away,” creating voids that collect water.
Comparison: DIY-friendly vs. pro-required decisions
| Factor | DIY is usually fine if… | Get a pro if… |
|---|---|---|
| Height variance | You can select a profile that matches the measured elevation change. | The seam is significantly uneven and needs structural correction. |
| Substrate stability | Edge is rigid and doesn’t rock when pressed. | Framing/mortar crumbles, flexes, or has voids. |
| Waterproofing complexity | No membrane or detailed drainage plane is required. | You’re integrating a membrane system where one wrong sealant compromises the whole detail. |
| Sealant performance | You can match exterior joint sealant ratings for movement (per ASTM classification). | You can’t confirm movement capability or adhesion compatibility. |
Verdict: Do This Yourself (or Get Help)
A DIY transition install is a good fit when you can measure accurately, select an exterior-rated transition profile, and follow the manufacturer’s fastening and sealing instructions. Skip DIY (or bring in a pro) when the seam substrate is unstable, the elevation mismatch is large, or you’re working inside a complex waterproofing system where an incorrect sealant can fail the entire area.
From a practical perspective, the “right” transition is rarely the one with the best looks—it’s the one designed for outdoor movement and installed with the correct interface steps. If your seam is simple (equal heights, rigid substrate, straightforward edges), DIY is often successful. If you’re joining complex layers (membranes, specialty waterproofing, or unusual substrates), the safest path is professional installation.
If your seam integrates waterproofing membranes or requires specific sealant chemistries, professional installation reduces the risk of mis-sealing and hidden water intrusion.
If you follow manufacturer fastening/expansion guidance and seal exterior contact points, transitions are designed to remain stable through routine outdoor movement cycles.
Quick Checklist (Scan Before You Start)
– [ ] Measure height differences at multiple points
– [ ] Choose an outdoor-rated transition type/profile
– [ ] Verify the substrate is stable and cleaned
– [ ] Dry-fit and mark cuts before fastening
– [ ] Use the manufacturer’s fastening/sealant instructions
– [ ] Leave required expansion space
– [ ] Seal exterior contact points to manage water
FAQ
Do outdoor floor transitions need expansion gaps?
Yes—most outdoor flooring systems expand/contract with temperature and moisture. Use the expansion guidance from the specific transition/profile and the flooring manufacturer.
What’s better for outdoor transitions: screws or adhesive?
It depends on the transition system and substrate. Many outdoor transitions use fasteners for stability; some use adhesive or a combination—follow the installation instructions for your exact product.
Can I install transitions over uneven outdoor flooring?
You can sometimes shim/prepare minor variations, but major unevenness usually leads to gaps or movement. If the substrate is significantly out of level, address that first.
What sealant should I use for outdoor transition seams?
Use an exterior-rated sealant compatible with the materials you’re joining (transition material + both flooring types). [ADD: source for sealant compatibility guidance if you have specific brands/materials.]
Sources:
– [ADD: manufacturer installation instructions for the exact outdoor transition profile you plan to use]
– [ADD: flooring manufacturer installation guide for outdoor expansion/gap requirements]
– ASTM C920 (sealant standard referenced for exterior joint sealant performance classification and movement capability)
– [ADD: applicable sealant manufacturer technical data sheet (TDS) for outdoor compatibility and substrate prep]
When you install outdoor transitions with disciplined measurements, a substrate that’s truly stable, and a sealant strategy designed for movement and water exposure, your seam will stay straighter and safer for the long run. If anything in the job—height variance, edge stability, or waterproofing complexity—looks out of spec, pause and correct that first; a transition can bridge surfaces, but it can’t replace structural prep or proper expansion detailing.
Frequently Asked Questions
What materials and tools do I need to install transitions for outdoor floors?
You’ll typically need the right transition strip (aluminum, vinyl, rubber, or stainless steel) designed for exterior use, along with exterior-rated fasteners or adhesive. Gather a tape measure, level, chalk line, oscillating saw or angle grinder for trimming, and a utility knife if you’re using rubber/vinyl transitions. For best results, use a weatherproof sealant compatible with your flooring type and ensure you have safety gear for outdoor cutting.
How do I properly measure and prepare subflooring before installing outdoor floor transitions?
Start by measuring the width difference between adjoining outdoor flooring surfaces and account for any expansion gaps needed due to temperature changes. Remove dirt, loose edges, and old caulk, then check the transition area for dips or uneven spots—leveling compound may be required. Dry-fit the transition, mark cut lines, and ensure drainage won’t be blocked; for outdoor transitions, leaving the correct clearance helps prevent lifting or cracking.
How do I install aluminum or rubber threshold transitions between patio and deck flooring?
For aluminum transitions, position the strip over the joint, drill and fasten into solid substrate (not just loose surface material), and use exterior screws rated for outdoor exposure. For rubber transitions, apply exterior construction adhesive or use mechanical fasteners if recommended by the manufacturer, then press firmly and allow proper curing time. Seal any exposed edges with a compatible exterior sealant to reduce water intrusion and improve long-term durability.
Why do outdoor floor transitions fail, and how can I prevent gaps or lifting?
Transitions often fail due to poor subfloor prep, incorrect fastening, or failing to accommodate movement from freeze-thaw cycles and heat expansion. Gaps and lifting can also happen if water pools at the seam or if sealant is missing or not weather-rated. To prevent issues, use transition strips meant for outdoor floors, maintain drainage, install with the recommended exterior fasteners/adhesives, and leave expansion space where the manufacturer specifies.
Which outdoor floor transition is best for uneven surfaces and different heights?
If heights differ or the joint isn’t perfectly level, consider a ramp-style threshold transition (aluminum or rubber) designed to bridge grades smoothly. For small height changes, a tapered transition can reduce trip hazards while providing a tight outdoor seal along the seam. Always choose the transition thickness and profile based on your specific outdoor floor thicknesses, and verify compatibility with your surface material (tile, pavers, concrete, composite decking, or wood).
📅 Last Updated: October 12, 2026 | Topic: How to install transitions for outdoor floors? | Content verified for accuracy and freshness.
References
- Google Scholar Google Scholar
https://scholar.google.com/scholar?q=how+to+install+deck+transition+strip+outdoor+flooring - Google Scholar Google Scholar
https://scholar.google.com/scholar?q=exterior+floor+transition+threshold+installation+expansion+gap - Google Scholar Google Scholar
https://scholar.google.com/scholar?q=outdoor+deck+expansion+joint+installation+details - Redirecting…
https://www.ada.gov/2010ADAstandards_index.htm - eCFR :: 28 CFR 36.403 — Alterations: Path of travel.
https://www.ecfr.gov/current/title-28/chapter-I/subchapter-A/part-36/section-36.403 - Expansion joint
https://en.wikipedia.org/wiki/Expansion_joint - https://en.wikipedia.org/wiki/Deck_(building
- https://en.wikipedia.org/wiki/Threshold_(architecture
- https://en.wikipedia.org/wiki/Slip_resistance
- https://en.wikipedia.org/wiki/Waterproofing