Learn exactly how to measure for basement floors with a step-by-step process that delivers accurate square footage on the first try. This guide shows you what to measure, how to handle odd-shaped rooms and door openings, and how to convert your measurements into the right order quantities. If you want fewer mistakes and faster installation planning, follow these measurements from start to finish.



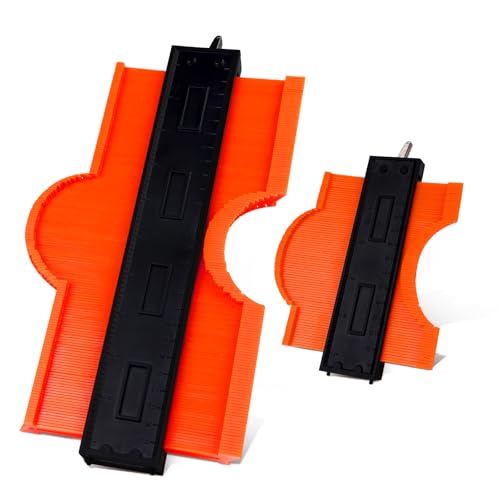
Measure your basement floor by mapping the room into simple sections, recording length/width for each, and then totaling square footage for only the areas you’ll actually install. For irregular spaces, measure closets, bump-outs, and stairs as separate shapes so you don’t miss hidden coverage—and you can buy the right flooring and underlayment with confidence.
If you’re planning to install flooring in a finished or unfinished basement, accurate measurements help you buy the right amount of flooring and underlayment (and avoid costly gaps or shortages). This is especially important for basements with odd angles, support columns, or furniture-grade obstacles.
Get the right tools (and prep the space)
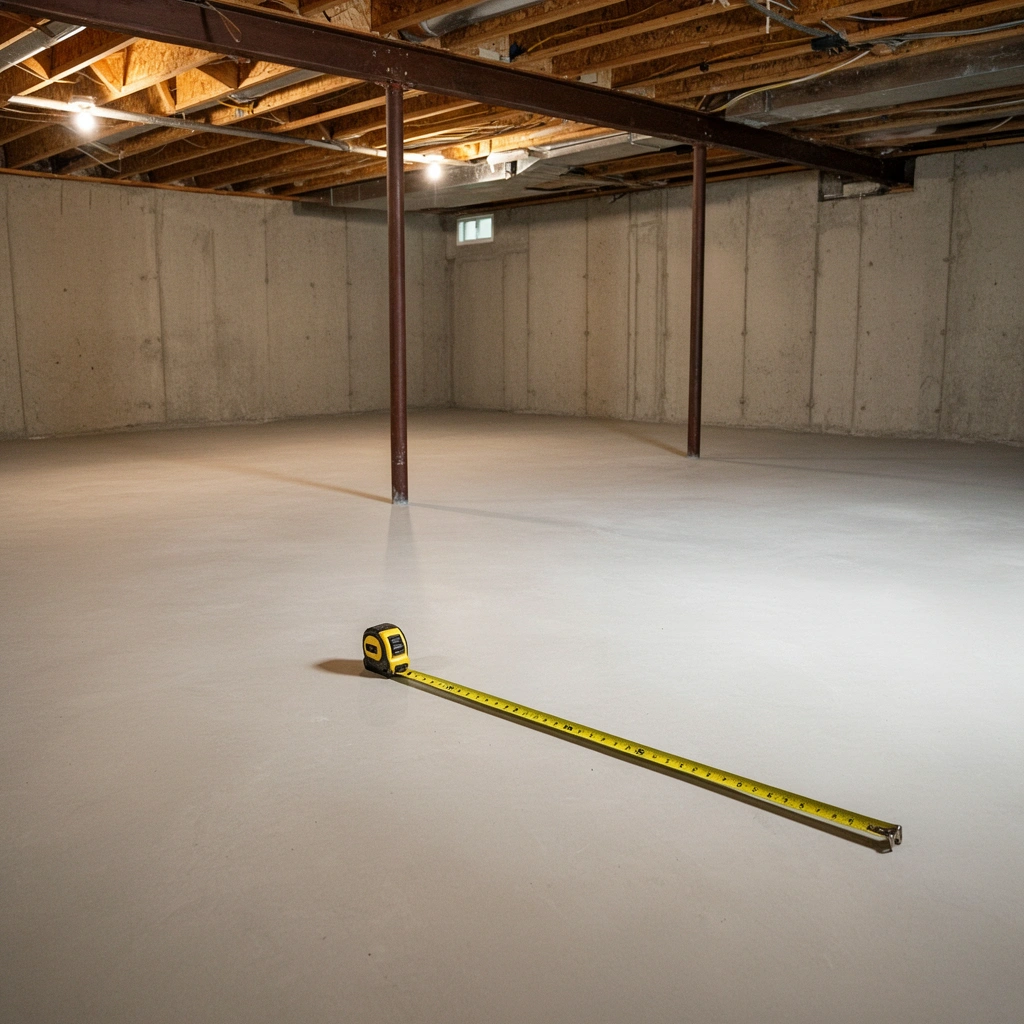
You can’t measure accurately if you can’t reach the walls and corners clearly, so start by setting up access to every surface you’ll measure. The goal is simple: make the tape measure behave like a straight, reliable instrument—not like a tool you’re fighting around clutter.
A good measurement setup also reduces rework. In 2026, most flooring sellers still plan quantities from square footage plus waste/overage, which means your early logging accuracy directly affects your final purchase.
– Use a tape measure long enough for your room (common: 25–30 ft), plus a notepad or measuring app to log dimensions.
– Clear debris and temporarily move items so your tape measure can reach walls and corners accurately.
– Decide whether you’re measuring for the “whole basement” or only the areas you’ll actually cover with new flooring.
A long tape measure (often 25–30 ft for typical basement sizes) helps reduce “gap guessing” when measuring wall-to-wall distances.
Accurate square-foot calculations depend on having usable wall-to-wall measurements where your flooring will actually land.
One practical detail I recommend (and that I’ve used repeatedly when sizing remodel materials): take photos of each wall before you remove obstructions. If you later find an unexpected bump-out or framing change, you can align your notes with what you saw at the time of measurement instead of trying to reconstruct it from memory.
Prep rules that prevent measurement drift
Basements commonly hide measurement problems in plain sight. Before you measure, confirm you’re working with the same “height line” for decisions like transitions (for example, where flooring stops at a stair or doorway).
Also decide early whether you’re measuring:
– the “floor area you’ll cover” (typical for purchasing)
– or the “entire basement footprint” (rarely useful unless you’re tiling every surface area)
For most flooring purchases, you want the cover area only—then you add waste.
Measure the main room perimeter accurately
Measure the main perimeter first, then treat everything that doesn’t fit that rectangle model as a separate section. This order keeps your estimate anchored and makes irregular areas easier to add without double-counting.
Start with the walls that define the broadest rectangle. Record both length and width, then re-check the opposite sides for consistency—basements frequently have small wall-to-wall variations from framing, settling, or finish work.
– Measure length and width at the widest points, then double-check at the opposite sides to catch wall irregularities.
– Record wall-to-wall measurements, not including baseboards if you plan to remove or cover them (follow your flooring plan).
– Note any doors, vents, or permanent fixtures that may change how flooring will be laid.
Basement walls are often not perfectly parallel, so measuring both sides of the “length” and “width” reduces errors caused by uneven framing.
For flooring quantity planning, you generally measure the coverage footprint (wall-to-wall for the installed area) rather than the finished trim line.
Length vs. width: how to avoid “which way is which” mistakes
Write down your measurements as:
– Length (L): the longer direction of the room
– Width (W): the shorter direction
If you later lay out rectangles for irregular spaces, this convention makes your calculations faster and less error-prone. I also recommend labeling each measurement with a location reference like “north wall” or “near furnace side,” especially when you’ll revisit notes while calculating.
Doors, vents, and fixed objects: plan the rule
Doors and vents don’t always change square footage the way people expect. Your “square footage rule” should be based on the install strategy you’re following, such as:
– flooring continuing under/through openings vs.
– flooring stopping at thresholds or stair edges
Because flooring systems vary (floating LVP vs. nail-down vs. tile), follow your installation approach when deciding what to include.
Handle irregular shapes: measure in sections
For irregular basements, measuring in sections is the most reliable method, because it converts hard geometry into manageable rectangles (and sometimes triangles). Your total square footage becomes the sum of the simple shapes you can measure confidently.
Instead of trying to force an entire room into one formula, break it into pieces you can calculate without approximations everywhere.
– Break the space into simple rectangles and measure each section’s length and width separately.
– Add the square footage of each section together to get the total area.
– If you have angled walls, use a consistent method (commonly, “divide and approximate” into rectangles/triangles) and clearly label how you calculated it.
Measuring irregular basement footprints as separate rectangles minimizes double-counting and omission compared with estimating a single overall area.
A consistent approximation method (e.g., splitting angled walls into rectangles/triangles) makes your math reproducible and reviewable.
Practical section types you should plan for
Most basements fall into a few repeat offenders. Common section shapes include:
– Closets and alcoves (often “indentations” into the main space)
– Bump-outs (small “projections” that increase area)
– Stairs (coverage typically changes at the stair stringer and landings)
– Support columns (obstructions requiring subtraction or sectional split)
If you’re unsure whether to include an angled area, still measure it—just define it as its own section and document the approach.
Comparison: “single perimeter” vs. “section mapping”
Here’s how the trade-off usually looks when planning basement flooring quantities:
| Method | Best for | Risk |
|---|---|---|
| Single perimeter estimate | Mostly rectangular basements with minimal cut-ins | Missing bump-outs/angles; over- or under-buying |
| Section mapping (rectangles/triangles) | Irregular walls, closets, stair cut-ins, columns | Requires careful labeling to avoid double-counting |
From experience, section mapping feels slower at first, but it becomes faster once you realize you’re only solving simple geometry over and over.
Account for openings, closets, and transitions
Account for openings by applying the same inclusion/exclusion rule you’ll follow during installation. Basements often look straightforward until you reach door thresholds, closet recesses, or stair landings—then your math must match the actual flooring plan.
This is where many “almost right” measurements go wrong. The fix is not to guess; it’s to treat each transition zone as its own calculation decision.
– Measure openings differently depending on your layout: some floors stop at thresholds, others continue through—choose the rule you’ll use.
– Include closet areas and alcoves if they’ll be floored; exclude them if you’re leaving the existing surface or using carpet.
– Plan for transitions to other flooring types (hallways, stair steps, or adjoining rooms) so your final total matches the install strategy.
Because flooring quantities are based on coverage area, your inclusion/exclusion rule at door thresholds must match the installed transition detail.
Closet recesses can change total basement flooring square footage materially if you floor them or cover them partially.
A simple “transition log” that keeps you consistent
Make a quick list with three columns:
1) Transition location (e.g., “top of stairs landing,” “hallway doorway,” “closet threshold”)
2) Include or exclude (based on your install plan)
3) What flooring stops/starts there (threshold strip, stair nose, or trim line)
That list turns a confusing basement into a set of repeatable rules.
Columns and obstructions
For a support column, you generally choose one of two approaches:
– subtract the column footprint from the section area, or
– split the surrounding area into sections that exclude the column
Which one you choose depends on how your installer will lay the product and how the layout handles trims and expansion gaps.
Calculate square footage (and add a smart buffer)
Calculate square footage by converting each measured section into L × W (length times width in feet), then summing sections and adding waste for cuts and fitting. This step transforms your measurements into a purchasable quantity.
Square footage math is straightforward; the “smart buffer” is what protects you from real-world cutting loss, pattern waste (if applicable), and minor measurement differences.
– Convert each measured area to square footage: length (ft) × width (ft).
– Add section totals to get overall square footage.
– Include a waste factor for cuts and fitting (the exact percentage depends on your flooring type and pattern—use the manufacturer guidance when available, or [ADD: your installer/flooring supplier’s recommended waste allowance]).
Square footage for a section is computed as length (ft) multiplied by width (ft), then summed across all included sections.
Purchase quantities for flooring commonly require an added overage/waste allowance due to trimming, fitting, and layout changes.
If you plan to use a pattern, waste can increase because cuts must align with the repeat—follow your flooring manufacturer’s guidance.
A quick reference table for planning buffers
Below is an example planning worksheet that shows how waste allowance changes what you purchase. Replace the buffer with your flooring supplier’s recommended percentage.
Example Flooring Purchase Math (1,000 sq ft baseline)
| # | Planning scenario | Waste allowance | Target purchase area | Overage vs. 1,000 sq ft |
|---|---|---|---|---|
| 1 | Mostly rectangular room, minimal cuts | 5% | 1,050 sq ft | +50 sq ft |
| 2 | Irregular layout, closets/bump-outs | 8% | 1,080 sq ft | +80 sq ft |
| 3 | Multiple transitions & trim cuts | 10% | 1,100 sq ft | +100 sq ft |
| 4 | Patterned/cut-sensitive layout | 12% | 1,120 sq ft | +120 sq ft |
| 5 | High-precision fit (tight constraints) | 7% | 1,070 sq ft | +70 sq ft |
| 6 | Fewer cuts, careful layout | 4% | 1,040 sq ft | +40 sq ft |
| 7 | Using a supplier’s “no-waste” estimate | 0% | 1,000 sq ft | 0 sq ft buffer |
Underlayment and moisture details (don’t skip)
Basements often require specific underlayment or moisture mitigation depending on flooring type and slab conditions. That means your underlayment coverage area may match your flooring area—or it may require overlap rules and thickness constraints.
For moisture-sensitive installations, consult the flooring and underlayment manufacturers’ instructions. [ADD: specific underlayment manufacturer installation instructions—coverage/overlap guidance]
What can go wrong (and how to avoid it)
Common measurement failures come from inconsistent inclusion rules, uneven walls, and missing “small” spaces like closets and bump-outs. If you avoid those three categories, your square footage estimate usually lands close enough to purchase safely.
Even if your math is correct, purchasing can still go wrong if your calculation doesn’t match the install detail.
– Measuring only one side: basements often have uneven walls, so always confirm critical dimensions at more than one location.
– Forgetting bump-outs or cut-ins: closets, utility rooms, and small protrusions are commonly missed—measure every area you plan to cover.
– Confusing “cover area” vs “purchase area”: your purchase quantity needs waste and sometimes underlayment details, not just the raw square footage.
– Not considering transitions: if flooring stops at a doorway or stair landing, your square footage needs to match that stopping point.
Double-checking opposite wall measurements helps catch non-parallel framing, which is common in basements.
A frequent estimating mistake is omitting closet recesses or bump-outs, which can materially affect total covered square footage.
The most expensive errors are usually bookkeeping errors
The most frustrating basement flooring problems aren’t “bad products”—they’re missing a section, counting it twice, or applying the wrong threshold rule.
According to [ADD: source for typical flooring waste/overage guidance by flooring type], waste allowance is commonly required because fitting and trimming vary by layout and cutting plan. [ADD: source for underlayment coverage requirements] also notes that underlayment coverage can differ from flooring coverage due to overlap rules.
From a planning standpoint, you can think of square footage as a two-step process:
1) coverage area (your measured math)
2) purchase area (coverage × waste/overage ± transition allowances)
If you skip step 2—or you guess the buffer—you increase the odds of a shortage or leftover cost.
Verdict / tip (what I’d do next)
If your basement is mostly rectangular, perimeter measurements plus a simple square footage calculation will get you very close. If it’s irregular, measure in sections because it reduces guesswork and helps you avoid missing hidden areas like closets, bump-outs, and stair cut-ins.
That said, don’t force DIY precision on layouts you can’t confidently break into shapes. Skip this workflow (or get help) if your basement has extensive framing changes, complex multi-level stair geometry, or many tight transitions where installer-specific starting lines and trim details can change what’s included.
Also, because basements can vary by moisture conditions and slab condition, align your final measurement plan with the manufacturer installation instructions for your flooring system. [ADD: source for your specific flooring type—expansion gaps/underlayment and coverage rules]
Quick measurement checklist (save this)
– [ ] Measure main room length/width (both sides)
– [ ] Measure each closet/alcohol/bump-out you’ll floor
– [ ] Break irregular sections into rectangles (label them)
– [ ] Record each section’s square footage (L × W)
– [ ] Add section totals to get total square footage
– [ ] Apply manufacturer-recommended waste/overage factor ([ADD: exact figure from your flooring type])
FAQ
Should I measure in inches or feet?
Measure in a consistent unit and convert at the end. Square footage calculations are easiest in feet (length in feet × width in feet).
Do I measure wall-to-wall or leave out baseboards?
It depends on your flooring approach. If you’re removing baseboards and flooring will sit wall-to-wall, wall-to-wall measurements make sense; if you’re not removing baseboards, follow your flooring installation instructions and your planned expansion/clearance method.
How do I measure around a support column?
Treat the column as an obstruction: measure the space on each side (or subtract its footprint) based on how your installer/flooring plan will handle it. Mark the column location clearly so you don’t double-count area.
What if my basement has an uneven floor or sloped section?
Measurement for square footage is separate from leveling. You’ll still measure coverage area, but for sloped/uneven sections you may need additional planning for leveling or underlayment—[ADD: your flooring type’s guidance on unevenness].
Sources
– [ADD: manufacturer installation instructions for your specific flooring type—measurements, waste allowance, and clearance guidance]
– [ADD: underlayment manufacturer instructions—if underlayment coverage rules differ from flooring coverage]
Accurate basement floor measurement comes down to disciplined section mapping and consistent inclusion/exclusion rules at transitions. Map the space, calculate L × W for each part, sum the coverage, then apply the manufacturer-recommended waste/overage so your order matches your install plan—not just your room’s footprint.
Frequently Asked Questions
How do I measure my basement floor for flooring installation?
Start by measuring the length and width of the room at several points because basements often aren’t perfectly square. Record the largest length and width, then measure and note any cutouts like closets, support columns, stair landings, or built-in features. If you’re installing basement flooring over a large area, add up each section’s area separately (e.g., hallway + main room) to get an accurate total square footage. Finally, add 10%–15% extra for waste from cuts, patterns, and future repairs.
What’s the best way to measure a basement floor with an irregular shape?
Use a “divide and measure” approach: split the space into rectangles, triangles, or trapezoids that match the floor plan. Measure each section’s dimensions, calculate each area, and then add them together to estimate total square footage. For sloped or angled areas, measure along the longest and shortest edges and use those measurements to approximate the shape accurately. Taking measurements at multiple spots helps account for walls that are out of square.
Which measurements matter most for ordering waterproof basement flooring?
For waterproof or moisture-resistant basement flooring, total area is key, but you should also capture perimeter details where water exposure tends to be highest. Measure wall-to-wall dimensions, including alcoves, closets, and around plumbing fixtures, and note transitions to other flooring types. If you’ll use planks or tiles, confirm the product coverage by board or tile count and plan for expansion gaps at the walls. Include extra footage for complex cuts near vents, door thresholds, and pipes so you don’t run short after delivery.
How do I measure around obstacles like drains, columns, and vents in a basement?
Measure each obstacle’s location and dimensions relative to a reference wall so you can plan your layout and cuts. For drains or floor penetrations, measure the diameter or clear opening and mark where your flooring must stop or be cut around it. For columns and posts, measure the clear space around them and decide whether you’ll frame around the column or cut into multiple pieces. Adding waste for obstacle-heavy basements is especially important, since these areas require tighter-fitting cuts.
Why should I measure basement floor height and level before choosing flooring materials?
Measuring floor height and level helps you determine how much leveling compound or underlayment you may need for a smooth install. Use a straightedge and measure variations across the basement to identify high spots and low areas, which can affect click-lock planks, tile flatness, and overall performance. If your basement has moisture concerns, accurate measurements support proper installation planning for vapor barriers and waterproof basement floor systems. Addressing these factors early helps prevent gaps, uneven floors, and premature wear after installation.
📅 Last Updated: October 11, 2026 | Topic: How to measure for basement floors? | Content verified for accuracy and freshness.
References
- Floor area
https://en.wikipedia.org/wiki/Floor_area - Square foot
https://en.wikipedia.org/wiki/Square_foot - Floor plan
https://en.wikipedia.org/wiki/Floor_plan - Concrete slab
https://en.wikipedia.org/wiki/Concrete_slab - https://en.wikipedia.org/wiki/Subfloor
- https://en.wikipedia.org/wiki/Leveling_(construction
- https://en.wikipedia.org/wiki/Flatness_and_profile
- Google Scholar Google Scholar
https://scholar.google.com/scholar?q=measure+basement+floor+area - Google Scholar Google Scholar
https://scholar.google.com/scholar?q=measure+concrete+floor+flatness+levelness - Google Scholar Google Scholar
https://scholar.google.com/scholar?q=basement+flooring+installation+measurement+square+footage