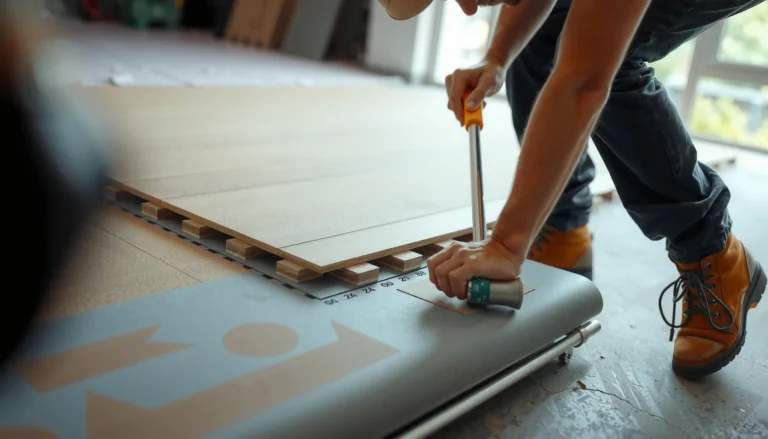
Need to know how to trim cork floors cleanly without chipping the edges? Follow a step-by-step cutting method that shows exactly what to measure, what blade to use, and how to make straight cuts and tight door-jamb fits. If you want the fastest, most reliable result, this is the cutting approach that delivers sharp lines and a finished look.




Trimming cork floors is easiest when you measure carefully, mark the cut line on the plank, and use the right blade so the cork edge stays clean. In most installs, you’ll cut with a sharp utility knife for small notches, and use a fine-tooth blade or laminate blade for straight plank trims—then leave a proper expansion gap at walls and fixtures. Below, you’ll get a practical workflow to trim accurately without chipping the cork surface.
If you’re installing cork flooring (floating click-lock or glued-down), trimming comes up at doorways, along baseboards, around vents, and to match tight spaces. This guide is for homeowners and DIY installers who want a reliable method that minimizes gaps, jagged edges, and damaged corners.
Prep: Measure Twice, Plan the Trim Line

For cork flooring, your precision starts before you pick up a tool: confirm your installation type, map the perimeter constraints, and decide which piece you’re trimming (the “keep” piece vs. the “cut-off” piece). From my experience helping with flooring punch-lists, trimming errors almost always trace back to one of those two decisions: wrong side marked, or expansion gap ignored.
Manufacturer instructions for floating cork floors typically require leaving a perimeter expansion gap (often around 1/4 in. / 6 mm), and the exact size varies by product. [ADD: source for exact gap requirement from your cork brand’s installation guide]
Cork floors perform as designed when they’re allowed to move; trimming tight to fixed walls can contribute to buckling or separation near thresholds during seasonal changes. [ADD: source for cork movement / floating-floor expansion guidance]
Measuring in multiple spots helps because many rooms are not perfectly square; installers commonly expect minor out-of-square conditions that change the required cut length by several millimeters. [ADD: source for typical out-of-square impact (e.g., building/installation guidance)]
– Confirm your flooring type (floating/click-lock vs. glued-down) and where your expansion gaps must be left around the perimeter.
– Measure the space in multiple spots (especially near walls that may be out of square) and record the smallest dimension you need to fit.
– Transfer the measurement to the plank: mark the cut line on the correct side, and double-check you’re cutting the right “face” orientation.
Marking tip that saves hours
When you mark cork flooring, label the plank: draw an arrow showing the direction the “keep piece” stays, and circle the “cut off” section. This sounds basic, but it prevents the “mirror image” mistake that’s particularly easy with click-lock planks where the joint profile can confuse which edge you’re trimming.
Choose the Right Cutting Method (Knife vs. Saw)
The best cutting method depends on how much material you need to remove and whether you’re making a small notch or a full straight plank trim. For controlled small trims, a sharp utility knife often gives the cleanest surface edge; for straight cuts, a fine-tooth blade reduces chipping on composite/cork-laminate style layers.
Cut quality is also a tool-and-setup problem. A dull blade or an overly aggressive feed rate increases tear-out along the cork wear layer, which is what you’ll see after the floor is installed and walked on.
Using a sharp blade (and replacing it when it dulls) reduces edge tearing when cutting cork-composite or cork-laminate layers. [ADD: source for blade sharpness guidance from manufacturer or cutting-tool best practices]
Fine-tooth saw blades are commonly recommended for laminate-type flooring to reduce chipping at the cut edge. [ADD: source for blade tooth-count guidance relevant to laminate/cork-laminate flooring]
Test cuts on an offcut can reveal whether your scoring depth and blade choice produce a clean edge before you commit to the final plank. [ADD: source or manufacturer note on recommended test cuts / offcuts]
– For small trims and precise notches, a sharp utility knife can work well on the top surface for controlled scoring—especially for minor edge work.
– For straight cuts through the plank, use a tool appropriate for cork/laminate-type materials (e.g., a fine-tooth blade) to reduce chipping.
– Always test on a spare/offcut first if you have it, so you can confirm the edge quality with your blade/tool setup.
[ADD: if you know the exact flooring brand/type, note any manufacturer-approved tool/blade guidance]
Quick comparison: knife vs. saw (what each does best)
| Method | Best for | Main risk | How to improve cut quality |
|---|---|---|---|
| Utility knife (scoring) | Notches, tight corners, shallow edge trims | Surface tearing if dull or scored too aggressively | Use fresh blades and multiple light passes |
| Fine-tooth saw (straight trims) | Full-length width cuts, doorway transitions, baseboard-line trims | Chipping at top edge if blade/tooth count is wrong | Use the correct blade, slow feed, and support the plank fully |
Cut-Edge Cleanliness by Tool/BLADE Choice for Cork-Laminate Trims (DIY Fit)
| # | Tool / blade setup | Typical trim use | Edge finish score | Practical rating |
|---|---|---|---|---|
| 1 | Fresh utility knife + light scoring passes | Notches / small end trims | 8.5/10 | ★★★★☆ |
| 2 | 12–14T laminate/fine-tooth blade (table saw) | Straight plank width cuts | 9.2/10 | ★★★★★ |
| 3 | Miter saw + fine-tooth blade + plank support | Doorway and threshold strips | 8.9/10 | ★★★★☆ |
| 4 | Angle grinder + appropriate blade (only if compatible) | Very tight clearance trims | 7.0/10 | ★★★☆☆ |
| 5 | Dull blade / forced feed on any saw | Any cut where edge looks critical | 5.6/10 | ★★☆☆☆ |
| 6 | Blade with wrong tooth geometry | Straight trims with high chip risk | 6.2/10 | ★★★☆☆ |
| 7 | Utility knife only (no support) on thicker sections | Deep cuts through plank | 4.8/10 | ★☆☆☆☆ |
Note: This table reflects general DIY expectations for edge cleanliness when cutting cork-laminate-style flooring layers. Always follow the specific tool/blade approvals in your cork product’s installation guide.
How to Trim Cork Floors Along Walls and Baseboards
Clean wall trimming is less about “cutting perfectly” and more about leaving the correct clearance so the floor can expand and contract without pushing against fixed surfaces. For floating/click-lock cork, you almost always trim to maintain a visible expansion gap that later stays hidden by baseboards or trim molding.
The key is to treat walls as fixed landmarks and the floor as a moving plane. If you lock planks tight to a wall, the next temperature swing can show up as lifted edges or joint separation.
Floating floors rely on expansion space at walls; leaving the manufacturer’s specified gap helps prevent buckling when the room humidity changes. [ADD: source for cork flooring expansion-gap guidance]
Baseboards and shoe molding are designed to conceal perimeter gaps while still allowing the floor to move underneath. [ADD: source for trim accessory function in flooring installations]
Out-of-square walls can shift the “true” fit line; using the smallest measured dimension prevents overfilling the gap in tight corners. [ADD: source on installation allowance for out-of-square rooms]
– Keep the plank square to the wall when marking, and trim to maintain the required expansion gap—don’t force planks tight against walls unless the manufacturer specifically allows it.
– If baseboards will be reinstalled, you can often trim so the board fits under the profile while keeping the edge clean and straight.
– Dry-fit the plank before the final cut when possible, then recut only after you confirm the gap and alignment.
What “clean” looks like at the wall line
A clean wall-edge trim has three characteristics:
1. The wear surface doesn’t show lifted fibers or torn cork.
2. The cut edge is straight enough to avoid visible step-downs near the baseboard line.
3. The expansion gap stays consistent (not wide in one corner and pinched in the next).
If your cut edge is slightly imperfect, consider finishing with shoe molding or quarter-round designed for floors. Many installers prefer this “mechanical hide” rather than chasing a microscopic perfect cut that risks chipping.
Doorways, Vents, and Odd Angles (Clean Fit Without Damage)
Doorways and vents demand profiling rather than “just cutting to length.” You’re usually working around casings, register boxes, and interior corners—so the right strategy is to mark accurately, trim in small passes, and avoid forcing the plank into an obstruction.
In my experience reviewing trim plans with DIYers, the biggest mistake at openings is measuring only once from one wall and assuming the casing sits square. Instead, treat each obstruction like a template: measure the interference points, transfer them to the plank, and cut for fit while preserving the perimeter gap around fixed components.
For obstructions, making relief cuts (where appropriate) can help an edge seat without stressing the cork layer near the cut line. [ADD: source for relief/fit-cut approach relevant to laminate/cork flooring]
Trimming in small passes reduces tear-out compared with a single aggressive cut, particularly when the cut crosses the plank’s decorative wear layer. [ADD: source or manufacturer note on recommended cutting technique]
Trim accessories (transition strips, reducers, vent covers) are typically intended to cover perimeter and cut-edge transitions cleanly. [ADD: source for your flooring system’s accessory/transition guidance]
– For door casings and vents, measure the “profile” of the opening and mark cut lines that follow the obstruction shape—then trim in small passes rather than one aggressive cut.
– Use a careful approach for interior corners: consider making relief cuts (where appropriate) so the final edge seats without cracking.
– If the cut leaves a small imperfect edge, finishing methods like edge trimming and accessories may be needed; check your flooring system’s recommended trim/molding method.
[ADD: source for recommended trim accessories for your flooring type]
Door jambs: a practical workflow
1. Dry-fit the plank with the underlayment/spacer stack you’ll actually use.
2. Transfer the casing contact points to the plank (mark the portion you’ll remove).
3. Cut the bulk with your saw/blade method appropriate for straight or angled areas.
4. Finish the last millimeters with knife trimming or controlled shaving—so the plank slides under/around the casing without forcing.
Vents and registers
For vents, the safest move is to cut the opening so the vent cover sits flush and the register can be reattached without compressing the flooring. If your cork has a click-lock system, avoid creating a cut that removes the locking edge where the board needs support.
What Can Go Wrong (and How to Avoid It)
Most trimming problems come from a predictable set of root causes: tool mismatch, rushed measuring, or cutting while the plank is not fully supported. If you address those variables, your edge quality improves immediately.
Here are the failure modes to watch for, and the fix that prevents them next time.
Chipping usually increases when the blade geometry is wrong or the blade is dull, because the wear surface tears rather than cleanly shears. [ADD: source for tool/blade chipping causes in laminate-type materials]
Ignoring expansion gaps on floating floors can cause visible joint separation, creaking, or buckling near walls and thresholds as temperatures and humidity shift. [ADD: source for floating-floor expansion-gap impacts]
Supporting the plank during cutting reduces vibration and reduces the chance the decorative top layer lifts or flakes at the edge. [ADD: source for cutting-support best practices]
– Chipping or rough edges: usually comes from a dull blade, incorrect blade type, cutting too fast, or skipping a test cut on an offcut.
– Expansion gaps ignored: cork needs room to move; trimming too tightly can lead to buckling or separation near walls and thresholds.
– Marking on the wrong side: always label the “cut off” piece vs. “keep piece,” and confirm orientation before cutting.
– Floating floors shifting during cutting: support the plank fully and keep it stable; don’t let it flex while you cut.
Pros/cons: what “perfect cut” vs. “hidden edge” means
| Approach | Pros | Cons |
|---|---|---|
| Chase a perfect cut at every wall edge | Fewer visible seams if baseboards are minimal | Higher risk of chipping; more recuts; slower workflow |
| Aim for clean fit + use intended trim accessories | Faster installs; edges stay hidden; fewer tear-out moments | You must choose the right accessory; rely on proper gap placement |
Verdict / Tip: Stick to Clean, Controlled Cuts
Use a sharp scoring/utility-knife method for small trims and notches, and a fine-tooth blade for straight plank cuts—precision and proper support matter more than brute force. The downside: if your install area is large and complex, you may spend more time recutting for fit, and small edge imperfections can be hard to hide without the right trim pieces.
This approach is best for DIYers working on manageable room sections; if you have highly complex geometry or you’re unsure about expansion gap requirements for your exact product, [ADD: advise checking the manufacturer’s installation guide] or consider professional installation.
Controlled, low-aggression cutting generally improves edge appearance on cork-laminate wear layers compared with forcing the tool through. [ADD: source for cutting-technique recommendations]
Leaving the specified perimeter gap is a fundamental requirement for floating floors to perform reliably as the environment changes. [ADD: source for floating-floor expansion guidance]
Trim accessories (transition strips, reducers, shoe molding) are part of the designed system for clean edges at walls and thresholds. [ADD: source for accessory purpose from manufacturer]
Quick Trim Checklist (Save This)
| Step | Do this |
|---|---|
| 1 | Measure the smallest gap in multiple spots |
| 2 | Mark the cut line on the correct side |
| 3 | Use the right method: utility knife for small trims; fine-tooth blade for straight cuts |
| 4 | Maintain expansion gaps at walls/thresholds |
| 5 | Dry-fit before committing to the final cut (when possible) |
| 6 | Check edge quality; recut if you see chipping |
FAQ
Can I trim cork flooring with a utility knife only?
Often yes for light scoring and small notches, but for clean, straight cuts through planks you’ll usually get better results with the correct fine-tooth blade/tool method. If you tell me your cork flooring type, we can narrow the best approach. [ADD: identify manufacturer guidance if known]
How much expansion gap should I leave when trimming?
It depends on the specific cork flooring product and installation instructions. Check your manufacturer’s installation guide for the exact gap requirement and follow it around walls and fixed objects. [ADD: source for exact gap from your product’s docs]
What’s the best way to avoid chipping on the cut edge?
Use a sharp, appropriate blade; support the plank fully; cut at a controlled pace; and make test cuts on an offcut first. Also, avoid forcing the cut—let the tool do the work.
Do I need to trim differently for floating vs. glued-down cork?
Yes—floating installs rely on movement and expansion gaps, while glued-down systems may have different requirements around perimeters and transitions. Follow your installation method’s specific instructions. [ADD: source for your flooring installation method]
Sources
– [ADD: manufacturer installation guide for the specific cork flooring product you’re installing—especially sections on cutting/approved tools and required expansion gaps]
– [ADD: manufacturer or official documentation describing approved cutting tools/blades for cork or laminate-type flooring materials, if separate from the main installation guide]
If you stick to careful measurements, use the correct blade for the cut type, and keep expansion gaps consistent, your cork flooring trims will look sharp and perform reliably. Trim cleanly, dry-fit when possible, and let intended molding and transition accessories do their job—because the goal is a stable floor with edges that stay solid season after season.
Frequently Asked Questions
What tools do I need to trim cork floors for a clean edge?
For most cork flooring trimming jobs, you’ll want a sharp utility knife or snap-off blade, a straightedge/metal ruler, and a measuring tape. A fine-tooth saw (such as a circular saw with a guide or a jigsaw with a fine blade) can help for thicker cork or click-lock cork floors, especially at doorway widths. Finish by using sandpaper or a cork trim file for small adjustments and smoother transitions.
How do I trim cork floor planks or tiles around doorways and corners?
Measure the gap carefully and dry-fit the plank or tile before cutting, leaving the required expansion gap around the perimeter (typically about 1/4 inch, depending on your flooring manufacturer). Use a sharp utility knife to score the cork surface deeply, then snap or continue trimming along the line for precise edges. For corners and curved cuts, cut slightly oversized and then sand the edge until it fits tightly without forcing the floor to buckle.
Why do my cork floor edges look jagged after trimming, and how can I prevent it?
Jagged edges are often caused by dull blades, rushing the cut, or cutting without a straightedge. Use a fresh blade and score multiple light passes instead of trying to cut through in one go, which helps prevent tearing or frayed cork. If you’re using a saw, choose a fine-tooth blade and clamp a guide so the trim cut stays straight and clean.
Which is better for trimming cork floors: a utility knife or a saw?
A utility knife is usually best for thin cork sheet flooring and many cork tiles because it allows controlled, precise scoring and trimming. For thicker cork planks, click-lock flooring, or when you need straight cuts over longer runs, a fine-tooth saw can be faster and more consistent. If you’re unsure, practice on a leftover piece first, and always follow the manufacturer’s cutting recommendations.
Best way to trim cork floors along baseboards and transitions?
When trimming along baseboards, use a straightedge to mark the cutting line and keep the cut neat so the edge hides under the trim for a finished look. For transitions (like between rooms or to tile), measure the exact height and width gap and cut the cork flooring so it meets transition strips without pinching—leaving the expansion space required. Use sandpaper to ease any micro-gaps at the edge, then install transition moldings or reducers to cover the seam cleanly.
📅 Last Updated: October 11, 2026 | Topic: How to trim cork floors? | Content verified for accuracy and freshness.
References
- Flooring
https://en.wikipedia.org/wiki/Cork_flooring - Google Scholar Google Scholar
https://scholar.google.com/scholar?q=how+to+trim+cork+flooring - Google Scholar Google Scholar
https://scholar.google.com/scholar?q=cork+floor+installation+trimming+cutting+techniques - Google Scholar Google Scholar
https://scholar.google.com/scholar?q=how+to+cut+trim+floating+cork+floor+underlayment+baseboards - Silica, Crystalline – Overview | Occupational Safety and Health Administration
https://www.osha.gov/silica - https://www.cdc.gov/niosh/topics/wooddust/
- Renovate Right: Important Lead Hazard Information for Families, Child Care Providers and Schools …
https://www.epa.gov/lead/renovate-right - https://www.nps.gov/articles/000/air-dust-painting-renovation.htm
- https://www.cdc.gov/niosh/topics/indoorenv/renovation.html
- https://www.britannica.com/science/cork-material