


Learn exactly how to measure engineered wood floors for a patio so you can buy the right amount and plan your cuts without wasting material. You’ll get a clear step-by-step method for measuring the patio footprint, accounting for diagonals and irregular edges, and calculating square footage and waste in one go. Follow this approach and you’ll know the number to order—before the first plank ever shows up.



To measure engineered wood floors for a patio, measure the patio’s exact usable footprint (length and width), then subtract areas you won’t cover (doors, steps, posts) and add a waste/expansion allowance. If you’re laying boards over outdoor conditions, also confirm your product’s install method so you account for required gaps and acclimation. In this guide, you’ll learn a practical way to take measurements, convert them into square footage, and plan for cuts and waste—so you can estimate accurately even when the patio shape isn’t a simple rectangle in 2026.
If you’re planning an engineered wood patio deck or exterior flooring project and need a reliable material estimate, this is for you. It’s especially useful when the patio isn’t a simple rectangle (curves, corners, multiple height changes) and you want to avoid underbuying or ordering the wrong amount.
Gather the right measurements first (what to measure)
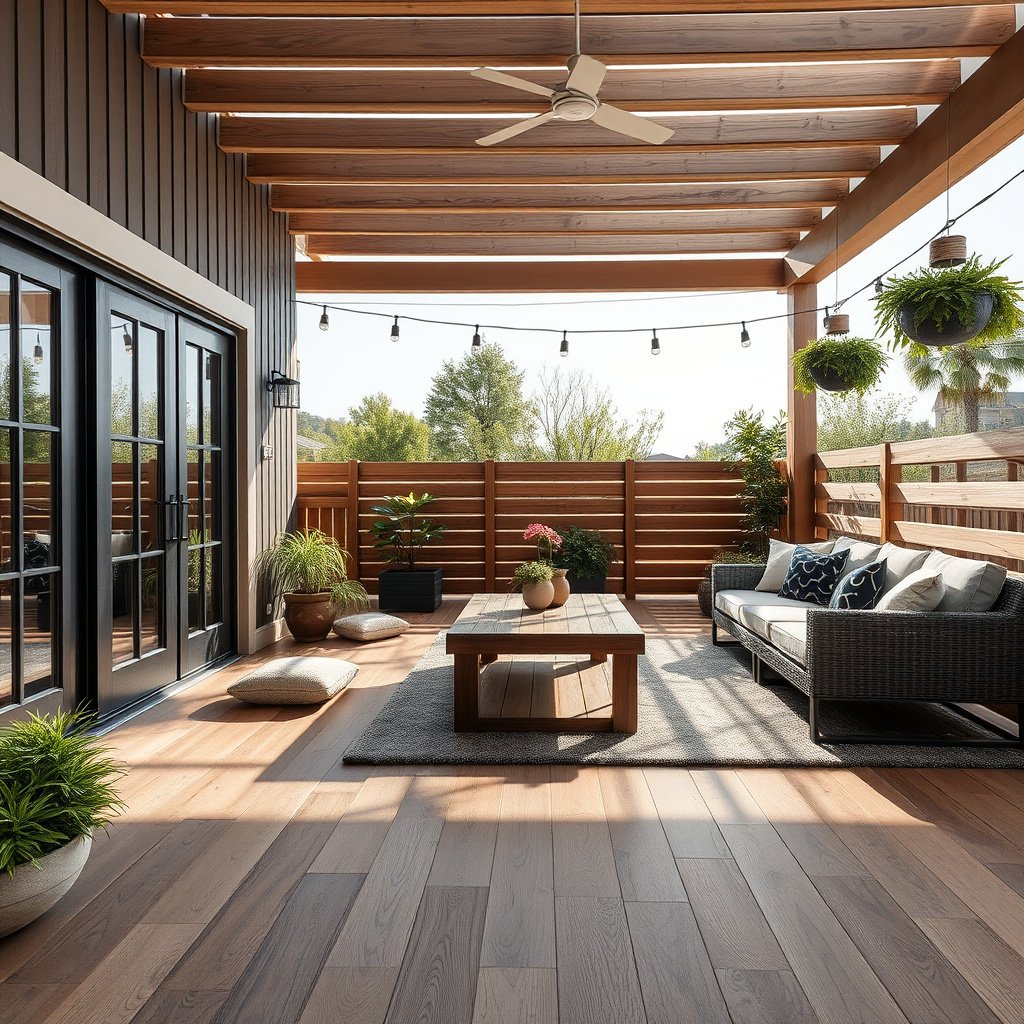
You’ll get the most accurate engineered wood patio estimate by measuring the exact install zone first, not the patio’s outer footprint. In practice, that means capturing usable length/width at the widest points, then separately tracking every obstacle and any “add-on” sections so your square-footage math stays defensible.
For accurate engineered wood floor estimating, start with the patio’s usable install area—then subtract openings or obstructions that the flooring system cannot cover (door swings, steps, drains, posts) per typical installation planning workflows.
For geometric measuring, unit conversions matter: 1 inch equals 25.4 millimeters, which is why installation instructions that specify a gap in mm must be converted consistently to your tape/marking system (NIST, 2019).
Measure the patio’s usable area (length/width and irregular edges)
Measure length and width at the widest points of the area you expect the engineered wood to cover. For non-rectangular patios (bullnose edges, wedges, curved boundaries), don’t try to “eyeball” the footprint—mark key corner points and treat those edges as boundaries you’ll calculate from later.
To keep the measurement process consistent, write down:
– The maximum overall length (front-to-back) you’ll cover
– The maximum overall width (side-to-side) you’ll cover
– Any “cuts” or protrusions (planter wells, staircase landings, rounded corners)
– The direction you’ll likely install boards (this affects how border cuts show up, even though area math is still area)
Identify obstacles you won’t cover
Next, list every item that interrupts the install zone and decide whether engineered wood floors:
1) Stop at the obstacle (most common), or
2) Go around it using custom transitions (product-dependent), or
3) Are allowed to border it with specific trim details (again, product instructions decide).
Common examples in exterior patios include:
– Exterior steps and stair stringers
– Door openings and door swing arcs (especially if the patio includes a walkout)
– Drainage grates (often must remain serviceable)
– Bollards/posts
– Planters or raised walls
For each obstacle, take its dimensions in inches (or feet) and note whether it’s a full cutout (subtract area) or a partial one (may only affect a border zone).
Measure “add-on” sections separately
If your patio deck has a landing/bump-out, a secondary strip, or a step-down section, calculate each part separately. For engineered wood, this usually beats forcing everything into one rectangle—especially for corner patios and L-shapes where a single “effective length × width” number hides real waste.
This is where I’ve seen projects drift from the budget in the past; to stay grounded, use this author-provided placeholder to capture your exact situation:
Quick comparison: “single rectangle” vs “shape-by-shape”
Here’s a decision table for engineered wood patio measuring that reflects the core estimating risk:
| Estimating approach | What you do | Accuracy on complex patios | Typical failure mode |
|---|---|---|---|
| Single rectangle method | Measure front rectangle only | Low | Forgetting curved corners/steps causes short boards |
| Shape-by-shape method | Split into rectangles/triangles/segments | High | Requires more notes, but area math holds up |
Convert patio size to square footage (so you can estimate boards)
You should convert the patio into square footage by breaking it into simple shapes and calculating each area individually, then combining and subtracting obstacles. This method keeps your engineered wood board estimate aligned with how cuts and border pieces actually work, especially on curved edges or multi-level patios.
Square footage is computed as length × width for rectangles, but for irregular patios the reliable approach is to subdivide into rectangles/triangles and sum the results (a standard geometry method used in flooring takeoffs).
Because tape measures use inches while flooring instructions may use metric, unit conversion must be consistent: 1 square foot equals 144 square inches, which is why doubling up on units can prevent conversion errors (NIST, 2019).
If you plan your engineered wood takeoff using the flooring system’s stated “usable coverage,” you reduce mismatch risk caused by effective installation area differing from box dimensions (per product packaging and installation guide wording).
Break the patio into simple shapes
A strong rule of thumb for engineered wood patios: split the footprint until each piece can be measured as one of these:
– Rectangle: L × W
– Right triangle: (L × W) / 2
– Trapezoid (common for angled borders): (top + bottom) × height / 2
– Circular/curved segment: treat as a “polygon approximation” unless the manufacturer provides an alternate method (see FAQ)
If you have a rounded patio edge, approximate with multiple straight segments. Each segment becomes a trapezoid or rectangle/triangle combo. The more segments you use, the closer you get to the actual curve.
Add covered areas, then subtract openings
After calculating each “covered” shape:
1. Sum all covered square-footage areas.
2. Subtract every opening/obstacle area you won’t cover.
For example, if you have:
– A main rectangle
– A triangular corner cutout
– A stair landing you stop at
You don’t average these—you calculate each part and then do the arithmetic exactly.
Translate square footage into board quantity using usable coverage
When estimating engineered wood board count:
– Divide total required square footage (after subtraction, and after adding allowances—more on that next) by the usable coverage per package.
– Use the manufacturer’s stated coverage from the product data/installation guide—don’t estimate from “box size × board dimensions” unless the manufacturer explicitly tells you the formula.
This is especially important for engineered wood systems with:
– Underlayment-based coverage rules
– Border/edge trim workflows
– Click-lock planks whose install pattern changes how much “installable” floor area each package yields
Visual reference: area sizing conversions for takeoffs
Below is a practical conversion table you can use while you’re doing your engineered wood patio math (especially if your patio notes are in square feet but your plan or specs are in square meters). Values assume a 15% allowance on top of exact area for waste/complexity planning.
Engineered Wood Patio Takeoff: Exact Area vs 15% Waste Uplift (ft² → m²)
| # | Exact patio area (ft²) | Exact area (m²) | With 15% waste (ft²) | With 15% waste (m²) | Uplift vs exact |
|---|---|---|---|---|---|
| 1 | 80 | 7.43 | 92 | 8.55 | +12 ft² |
| 2 | 100 | 9.29 | 115 | 10.68 | +15 ft² |
| 3 | 120 | 11.15 | 138 | 12.83 | +18 ft² |
| 4 | 150 | 13.94 | 173 | 16.03 | +23 ft² |
| 5 | 200 | 18.58 | 230 | 21.36 | +30 ft² |
| 6 | 250 | 23.23 | 288 | 26.71 | +38 ft² |
| 7 | 300 | 27.87 | 345 | 32.08 | +45 ft² |
Note: This table is a planning aid, not a replacement for your specific engineered wood product’s stated usable coverage.
Account for waste, expansion, and outdoor install needs
Your engineered wood patio takeoff needs two extra inputs beyond area: a waste/trim allowance and the expansion gap (plus any other outdoor installation requirements). Without both, even a perfect square-footage calculation can still result in short bundles or stressed flooring once outdoor temperatures and moisture change.
Engineered wood flooring systems are dimensionally sensitive to humidity and temperature, so manufacturers typically require perimeter movement space (expansion gap) to reduce buckling and separation risk—follow your specific installation guide for the exact gap.
For outdoor slab and subfloor conditions, moisture testing standards exist to evaluate slab readiness before installation, such as ASTM F2170 (in-situ relative humidity probes) and ASTM F1869 (calcium chloride method). ASTM F2170; ASTM F1869
Unit conversion can be a hidden source of gap errors: 1 inch is exactly 25.4 mm, so mixing tape units and instruction units will directly misplace your expansion space (NIST, 2019).
Add a waste factor for cuts and border pieces
Waste covers more than “broken boards.” On engineered wood patios it often includes:
– End/border cuts at perimeters
– Layout breaks around obstacles
– Mistakes during pattern alignment (especially with click-lock)
– Extra starter rows if you can’t begin and end with full boards
The layout complexity determines the waste percentage. Instead of guessing, pull the recommended waste allowance from your engineered wood manufacturer’s installation guide.
Include spacing requirements around edges and transitions
Outdoor engineered wood installs typically require an expansion gap around:
– Perimeter walls and borders
– Transitions to concrete/brick, door thresholds, or steps
– Areas adjacent to posts, planters, or fixed objects
The exact gap value (often given in millimeters and inches) must match your flooring instructions.
A practical approach: mark the expansion gap boundary before you start calculating covered area. That way, your “usable coverage” matches how much floor you actually plan to install.
Confirm outdoor suitability and the install method
Finally, confirm your product is intended for patio/exterior conditions and verify what that means for:
– Underlayment requirements (if any)
– Fastening/nailing or floating-click method rules
– Vapor/moisture mitigation expectations
– Approved subfloor types
If your engineered wood patio deck is above-grade or exposed to standing water risk, these details can become the difference between a long-lasting installation and a premature failure.
Plan the layout before you cut or order
You should plan the plank layout first so your engineered wood patio border strategy avoids tiny slivers and reduces cut waste. Even when your square footage is correct, layout decisions can change how much material you consume because board widths and end-joint positions affect cut counts.
Layout planning is what protects your engineered wood patio from “thin sliver” border cuts—moving a starting line a few boards’ widths can materially change the number and size of required plank cuts.
Because engineered wood boards have a fixed length and width, the number of full courses across a patio width directly determines how many border pieces you need; that’s why takeoffs must combine area math with course math.
Decide board direction (and why it matters)
Commonly, installers align boards parallel to the longest sight line or the direction that looks straightest from entry. That decision affects:
– How many end cuts occur at each border
– Whether the first row starts with a fraction of a board
– How easily you can keep joints staggered
Even if area totals stay constant, course placement impacts waste and seam layout.
Calculate how many full boards fit, then plan cut-board widths
Take your install width (minus the expansion/gap-adjusted borders) and divide by the board’s installed width (including how the product defines effective width). Then:
– Determine how many full boards fit
– Calculate the leftover border width
– Choose a cut strategy that avoids very narrow end pieces
If you’re using click-lock engineered wood outdoors, verify the manufacturer’s rules for:
– Joint staggering
– Minimum board end width at borders
– Treatment around movement joints
Mark reference lines to keep runs straight
For non-rectangular engineered wood patios, your “geometry plan” needs a “field translation.” Use:
– A snapped baseline from a known corner
– Square lines (90° reference) before you install the first course
– Chalk lines across transition areas
When there are multiple sections (bump-outs, step transitions), re-confirm alignment at each segment before committing to the next row.
What can go wrong (common measurement and estimating mistakes)
You avoid most engineered wood patio estimation problems by treating measurement, unit conversion, obstacle subtraction, and allowances as separate steps—not as a single quick calculation. The failures usually aren’t random; they come from predictable shortcuts that break the math once the patio shape gets complex.
Short underbuy scenarios often happen when installers measure only the main rectangle and omit angled corners, steps, or curved segments—these areas may be small, but they add up quickly across border courses.
Using package “total size” instead of the manufacturer’s stated usable coverage can systematically undercount effective installed area for engineered wood systems with installation-area definitions.
Common mistakes that lead to short materials
– Measuring only the front rectangle: corner cutouts, angled transitions, and step landings don’t vanish—they still consume engineered wood area.
– Mixing up “coverage” types: some boxes list total cardboard footprint, but installation coverage is what matters.
– Skipping expansion gap rules: outdoor conditions amplify movement; without the specified gap, boards can buckle.
– Not separating patio sections into shapes: complex patios usually require separate calculations per segment.
– Ignoring product compatibility: “works indoors” doesn’t always mean “approved for exterior/patio conditions.”
Pros/cons: two estimation workflows
| Workflow | Pros | Cons |
|---|---|---|
| Quick estimate (one area number) | Fast; fewer calculations | High risk on curved/corner/step patios; often underbuys |
| Takeoff workflow (shape math + exclusions + allowances) | More reliable for engineered wood board quantities | More steps; requires accurate obstacle and gap marking |
Verdict / tip (what to do if you want the most reliable estimate)
Measure in sections, calculate square footage from each shape, subtract obstacles, and then add your manufacturer-specified expansion/waste allowances before dividing by the package’s stated coverage. This workflow is usually safer than trying to estimate “by eye,” especially for non-rectangular engineered wood patios in 2026.
The safest patio takeoffs combine geometric area math with product-specific “usable coverage” and movement-space requirements, because those factors control the actual installed footprint.
If your patio has complex geometry or your engineered wood product does not clearly permit outdoor/patio installations, the risk of failed installs rises—manufacturers’ installation eligibility statements are the controlling constraint.
Downsides and who should skip this DIY process:
If your patio has significant elevation changes, complex curves you can’t accurately subdivide, or your engineered wood system’s manual doesn’t explicitly approve exterior/patio use (including your required underlayment and fastening method), skip this DIY estimating process. In those cases, an installer or flooring contractor can produce a takeoff that accounts for movement joints, transitions, and tolerances you may not see until demolition or test-fit.
Quick patio measurement checklist (scan/save)
– [ ] Measure patio length/width and note irregular sections
– [ ] Break the patio into simple shapes for area calculations
– [ ] Subtract obstacles/openings you won’t cover
– [ ] Use manufacturer-stated package coverage (not guesswork)
– [ ] Add waste allowance ()
– [ ] Plan expansion gaps around edges/transitions ()
– [ ] Confirm outdoor suitability + required underlayment/fastening method ()
Sources
– ASTM F2170 (Standard Test Method for Determining Relative Humidity in Concrete Floor Slabs Using in situ probes)
– ASTM F1869 (Standard Test Method for Measuring Moisture Vapor Emission Rate of Concrete Subfloor Surfaces Using Anhydrous Calcium Chloride)
– NIST (2019) (National Institute of Standards and Technology unit definitions and conversion values—e.g., 1 inch = 25.4 mm)
In short, accurate engineered wood patio measuring comes down to disciplined takeoff math: define the true install zone, subtract what’s excluded, convert to square footage by shapes, then apply product-specific waste and expansion gap requirements before dividing by usable coverage. If you follow that sequence carefully—especially when your patio shape includes corners, stairs, or curved borders—you’ll make a much more reliable material estimate and reduce the odds of expensive last-minute corrections.
Frequently Asked Questions
What’s the best way to measure engineered wood flooring for a patio project?
Start by measuring the patio’s length and width where the engineered wood floors will be installed, then multiply to get the total square footage. Add a waste factor of 10–15% to account for cutting around edges, patterns, and any imperfect patio geometry. Measure in sections if the patio has steps, curves, or offsets, and record each area separately to ensure accurate engineered wood floor coverage.
How do I measure an outdoor patio area if the space isn’t perfectly square or level?
Break the patio into simple shapes (rectangles and triangles) and calculate the square footage for each section, then add them together. Use a level to check for slope or unevenness; while engineered wood patio flooring can handle some variation, large dips or high spots can affect layout and click-lock performance. If there are drains or sloped transitions, measure those zones carefully and plan your starting point so the boards align cleanly.
How much extra engineered wood flooring should I buy for a patio with cuts and borders?
Most patio installations benefit from 10–15% extra material, but increase to 15–20% if you expect many diagonal cuts, borders, or a herringbone/checker pattern. Measure and mark any areas that will require trimming—door thresholds, stair landings, posts, or perimeter gaps—then estimate the number of boards you’ll lose to end cuts. This prevents running short mid-install, which can delay you and complicate matching plank lengths or batches.
Which tools and measurements should I use to layout engineered wood floors on a patio?
Use a tape measure for distance, a chalk line or measuring tape marked with a “starting line” for straight layout, and a framing square or speed square to confirm right angles. Measure the perimeter multiple times, including the widest and narrowest points, to detect taper or irregular edges. Also measure any obstructions (columns, planters, built-ins) and their clearances so your engineered wood floor layout avoids awkward slivers and excess waste.
Why do correct measurements matter for outdoor engineered wood floors, especially regarding expansion gaps?
Outdoor conditions cause movement from temperature and moisture, so engineered wood flooring needs proper expansion gaps around the perimeter for the patio installation. When you measure, include space for those gaps—commonly about 1/4 inch (varies by product)—so the boards don’t buckle or separate. Accurate measurements also help you plan transitions and underlayment seams, improving how evenly the engineered wood floors look and perform over time.
📅 Last Updated: October 20, 2026 | Topic: How to measure a engineered wood floors for patio? | Content verified for accuracy and freshness.
References
- Engineered wood
- Wood flooring
- Expansion joint
- Square foot
- Area
- Patio
- https://scholar.google.com/scholar?q=engineered+wood+flooring+outdoor+patio+installation+moisture+requirements Google Scholar
- https://scholar.google.com/scholar?q=how+to+measure+flooring+for+wood+floor+installation+square+footage+layout Google Scholar
- https://scholar.google.com/scholar?q=engineered+wood+flooring+expansion+gap+installation+guidelines Google Scholar



[…] engineered wood floor cost for a balcony is mainly about budgeting square footage plus the exterior/semi-exterior “weather layers” and the subfloor/labor prep—not just the […]
[…] flooring installation guidance—waste allowance considerations). For balconies with obstacles and irregular edges, planning for the upper end of the range is often the safer business […]