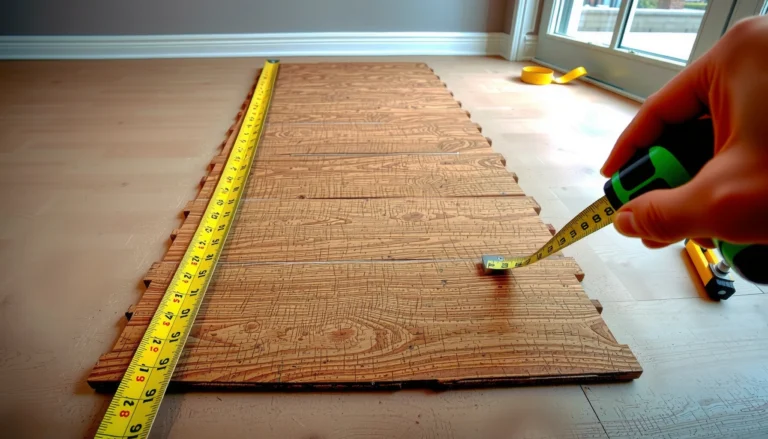

Measure hardwood floors for a warehouse by splitting the space into consistent rectangles (or grid sections), calculating square footage for each section (length × width), then subtracting permanent obstacles and adding a single waste/installation allowance. This section-by-section “takeoff” approach matches how installers and estimators prevent short orders and costly layout fixes.



If you’re planning a warehouse install, you’ll also need to account for door openings, columns, floor drains, and any height changes so you don’t end up short (or with unusable extra). This guide walks you through a practical way to measure like an installer would—section by section—so your takeoff is ready for materials estimating.
This is for facility managers, GC estimators, flooring contractors, and procurement leads measuring large industrial interiors—especially when layouts include bays, offices, irregular wall lines, or multiple obstacle types. It’s also useful when you’re switching from “rough area” estimates to a proper ordering takeoff that can survive plan reviews and submittals.
Plan the measurement zones first (don’t measure “randomly”)

Zone-based measurement is the fastest way to get accuracy because it turns an irregular warehouse floor into repeatable calculation units. Start by defining the exact “receiving area” for the hardwood—then measure each zone using the same reference points.
The big idea: you’re not measuring the warehouse; you’re measuring the surface that will receive the specific hardwood installation. That receiving area may exclude ramps, docks, transitions, or zones that will be covered by other flooring systems.
A zone-based takeoff reduces errors because every rectangle uses the same reference rules for where measurements start and stop.
You should include only areas that will receive the wood flooring (receiving area), not every square foot of the warehouse shell.
From experience (and from what we commonly see during warehouse walkthroughs), the most expensive mistakes usually happen before anyone writes numbers down—when two people measure “the same area” using different boundaries. For example: one person measures to the outside of a column’s casing, another measures to the centerline; or one includes an office lobby while the other assumes it’s a different finish.
Practical zoning approach for warehouse hardwood
– Mark zones by function and finish changes. Common examples: warehouse bays, break rooms, offices, storage corridors, or any area separated by walls/partitions.
– Treat finish boundaries as measurement boundaries. If hardwood stops at a threshold, treat that threshold consistently as either *in* or *out*—but don’t change your rule mid-project.
– Separate different height conditions. If there’s a height change (slab break, step, or transition to another level), split zones at that change so the receiving area stays accurate.
– Confirm whether “special areas” are included. Ask what’s included for:
– dock approach areas,
– ramp footprints,
– any floor that will remain uncovered,
– transition areas to tile/epoxy/metal grating.
Quick unit sanity check (helps avoid “wrong units” takeoffs): According to NIST, 1 ft = 0.3048 m (exact) and therefore 1 sq ft = 0.092903 m² (from the exact conversion) National Institute of Standards and Technology (NIST), exact unit conversions (SI definitions). When teams mix metric drawings and imperial field tape, this check prevents order-quantity slips.
Measurement consistency rule: Once you decide your zone boundaries, keep them consistent—same method, same boundary definition, same rounding practice across all zones.
Zone-based vs. “whole-room” measurement (why zones win)
| Method | Best for | Common failure mode | Result |
|---|---|---|---|
| **Zone-based rectangles/grid** | Warehouses with bays, obstacles, or irregular walls | Forgetting to split a zone at a boundary | Correctable with a clean re-check |
| **Single overall rectangle** | Simple, open, obstacle-light slabs | Including unreceiving areas (or missing cutouts) | Short orders or expensive returns |
Measure each zone and record dimensions
For each zone, measure inside-to-inside length and width using consistent reference points. Then record dimensions in a structured list so you can re-check quickly without re-walking the space.
This section is about repeatability: when your notes are audit-friendly, your estimate becomes contractor-ready. A warehouse can have dozens of obstacles, so your record format must make cross-checking simple.
Measure inside-to-inside (or the defined receiving-area boundary) for every zone so length × width represents actual hardwood coverage.
Use the same reference points for every zone—walls, fixed barriers, or marked layout lines—to avoid boundary drift.
What to measure (and what to avoid)
– Measure length and width for each rectangle. If a zone is irregular, split it into rectangles where each rectangle can be described by a single length and a single width.
– Use fixed reference points. Examples:
– the face of a wall,
– the edge of a permanent base,
– the centerline (only if that’s your consistent boundary rule),
– marked layout lines on drawings.
– Write down the basis. In the notes, indicate your boundary definition once per project (e.g., “dimensions measured to face of columns”).
– Tie notes to the plan. If possible, reference a drawing grid, bay numbering, or location labels.
Record format that actually helps
Use the same structure every time so you (and reviewers) can find errors fast:
– Zone A: L = , W = , Area =
– Zone B: L = , W = , Area =
– Zone C: L = , W = , Area =
From a project-management perspective, this format also prevents the classic mismatch between “field notes” and “estimator takeoff sheet.” If someone later asks, you can point to the exact zone and the dimensions used.
Convert to square footage and total it up
Compute square footage per zone using square footage = length × width, then sum zones to get gross receiving-area coverage. After totals are verified, apply a waste/installation allowance once.
This is the math stage—where accuracy depends on how cleanly your zoning stage was done. If your zones are consistent rectangles, your square-foot calculations are straightforward and easy to audit.
Rectangle takeoffs are reliable because each zone’s area comes directly from length × width with no hidden geometry.
Add waste/cut allowance after summing the gross receiving area so you don’t double-count.
Carrying the numbers without losing them
– Calculate each rectangle’s area and store it in your takeoff sheet.
– Sum gross hardwood coverage across all zones.
– Apply waste/installation allowance once to the gross total—then move to net after subtracting obstacles.
Unit reminder (useful when drawings are metric): According to NIST, 1 in = 25.4 mm (exact) NIST, SI unit definitions (exact conversions). If you convert thicknesses or gaps, do it carefully so you don’t misinterpret a millimeter-based requirement as inches on the ordering sheet.
Example dataset (illustrative takeoff math)
7 Example Warehouse Zones: Rectangle Areas for Hardwood Takeoffs
| # | Zone type | Length (ft) | Width (ft) | Area (sq ft) | Cut/trim complexity | Repeatability rating |
|---|---|---|---|---|---|---|
| 1 | Open bay (no cutouts) | 60 | 30 | 1,800 | Low | ★★★★★ |
| 2 | Office rectangle | 24 | 18 | 432 | Low–Med | ★★★★☆ |
| 3 | Bay with one column | 50 | 25 | 1,250 | Med | ★★★☆☆ |
| 4 | Hallway + door cut line | 40 | 8 | 320 | Med | ★★★★☆ |
| 5 | Warehouse office suite | 36 | 20 | 720 | Low–Med | ★★★★☆ |
| 6 | Bay with two drains | 55 | 22 | 1,210 | High | ★★★☆☆ |
| 7 | Irregular bay split into rectangles | 28 | 16 | 448 | Med–High | ★★☆☆☆ |
Account for obstacles, offsets, and installation allowances
Subtract permanent obstacles after you’ve calculated receiving-area totals, then add expansion gaps and allowances based on your exact product’s installation instructions. This is where “looks right on paper” becomes “fits on site.”
A warehouse is rarely obstacle-free: columns, floor drains, fixed equipment bases, and embedded curbs all interrupt laying patterns. The measurement method doesn’t change—only the receiving-area boundaries do.
Subtract permanent obstacles from the receiving-area total so your ordered square footage matches what can actually be installed.
Perimeter expansion gaps and transitions don’t usually change total receiving-area square footage, but they do affect detailing and required materials.
Subtract what’s permanent—and clarify what’s not
Subtract (typically):
– columns (to your defined boundary—consistent with your measuring rule),
– floor drains and grates (if the hardwood won’t cover them),
– built-ins and fixed equipment bases,
– permanent curbs/raised housings that stop the flooring.
Do not subtract (unless your scope excludes it):
– removable or temporary equipment,
– items outside the receiving area per scope drawings,
– finish changes that still include hardwood (e.g., if hardwood continues through a doorway opening).
Add allowance once (waste + install reality)
Waste/installation allowance covers:
– board cutting around obstacles,
– end matching and layout losses,
– yield adjustments based on plank dimensions and joint layout.
Use the exact allowance recommended by your flooring manufacturer and/or installer for your specific installation scenario: ().
Expansion gaps and transitions (manufacturer-specific)
Plan for:
– expansion gaps around the perimeter,
– transitions at different materials or floor heights,
– transfers at door thresholds depending on your installation plan.
Use the exact gap size required by your hardwood manufacturer’s installation guide (). In many warehouse projects, teams underestimate how quickly perimeter detailing adds up—especially along long wall runs.
Height changes: split zones early, detail late
If there’s a height change (slab break, ramp transition, step-up/step-down), treat it as:
– a zone boundary in your takeoff,
– a transition/detaling requirement in your installation plan.
This prevents a common issue: estimating the square feet as if the same installation method continues, when the transition system changes.
What can go wrong when measuring warehouse hardwood
Warehouse takeoffs commonly fail when teams measure the wrong boundaries, double-count allowance, or mismatch the install method to the space conditions. Even a good area calculation can become unusable when detailing requirements aren’t matched to product specs.
Here’s what to watch for—these are the errors that show up during procurement reviews, field fit-ups, and punch lists.
Measuring outside warehouse dimensions instead of the actual receiving area can inflate totals and create layout mismatches.
Double-counting waste/allowance is a frequent estimator error: it inflates orders and complicates plank layout and transition planning.
Common mistake patterns (and how to avoid them)
– Wrong boundaries
– Measuring outside the walls when hardwood starts at a specific inside face.
– Missing door openings or treating every doorway as fully covered when the scope says otherwise.
– Obstacle handling errors
– Forgetting to subtract columns or drains.
– Subtracting removable objects that don’t actually interrupt the floor receiving area.
– Allowance math errors
– Adding waste before totaling gross, then adding again after.
– Using a generic waste % that contradicts the product’s installation requirements.
– Installation method mismatch
– Glue-down, nail-down, and floating systems often require different prep/detailed transitions.
– Your square-foot takeoff may be correct, but the install requirements (vapor/adhesives/fasteners) can still force layout changes that affect yield.
A practical note: if the product is engineered wood installed with a specific fastening schedule, your “receiving area” still matters—but the board layout rules may require additional detailing around obstacles that effectively changes yield.
Verdict / tip: Use a repeatable takeoff method, not “best guesses”
The most reliable warehouse hardwood estimate comes from a repeatable, zone-based takeoff: rectangle/grid measurement, zone-by-zone area calculation, obstacle subtraction, and exactly one allowance application. Then you compare your totals to the flooring contractor or manufacturer guidance for that product type.
The upside is accuracy and auditability; the downside is time. This method takes longer than grabbing one length and width, and irregular warehouse geometry can lead to missed zones if your sketch and numbering aren’t disciplined.
A zone-by-zone takeoff is more defensible than a single overall estimate because it documents how receiving-area boundaries were defined.
If the manufacturer’s installation instructions specify expansion gaps and transitions, your measurement and ordering must follow those requirements.
Skip the DIY approach if…
– Your warehouse has frequent complicated cuts (many curved corners, unusual elevations, or mixed flooring heights).
– You don’t have clear drawings and must estimate from guesswork.
– The hardwood product has strict installation requirements you can’t verify from the manufacturer’s instructions ().
Who should still do it (and who should delegate it)
– Do it yourself if your scope is mostly rectangular bays and you can create clean zone splits with a tape measure and reference marks.
– Delegate or bring in a pro if the estimate will be used for procurement under tight timelines, or if the install method requires precise transition detailing around drains, dock interfaces, or specialized foundations.
Quick checklist & scan-save table
Use this checklist to keep your measurement workflow consistent from zone to zone—so your final net hardwood area is ready to order.
Fast takeoff checklist
– [ ] Split the warehouse into zones (A, B, C…)
– [ ] Measure inside length and width for each zone
– [ ] Calculate area for each zone (L × W)
– [ ] Subtract permanent obstacles
– [ ] Add waste/installation allowance once (use your product/contractor guidance)
– [ ] Confirm expansion gaps + transitions per manufacturer instructions
– [ ] Keep a sketch with measurements tied to each zone
Sample “takeoff” table (copy/paste)
| Zone | Length (ft) | Width (ft) | Area (sq ft) | Notes (doors/obstacles) |
|---|---|---|---|---|
| A | ||||
| B | ||||
| C | ||||
| **Gross total:** | ||||
| Minus obstacles | — | — | **- ** | Columns/drains/bases |
| Allowance (waste/cuts) | — | — | **+ ** | Per guidance |
| **Net hardwood area** | — | — | **= ** | Order quantity basis |
Frequently Asked Questions
What is the best way to measure a hardwood floor for a warehouse before ordering?
Start by measuring the total warehouse floor area by multiplying the room’s length by its width, including any irregular sections by dividing them into rectangles. Add any aisles, offices, loading areas, or odd cutouts (like columns or drains) and subtract spaces that won’t receive hardwood flooring. Measure in consistent units (feet or meters), then convert to the flooring vendor’s required unit for square footage coverage. Finally, include a waste/installation allowance (often 5–10% for hardwood) to account for cuts and layout errors.
How do I measure for hardwood plank or board width and calculate the number of planks for the warehouse?
Measure the warehouse area in square feet, then confirm the exact coverage per plank after accounting for the tongue-and-groove or overlap (many vendors list “coverage per board,” not just board width). Divide the total required square footage (plus waste) by the per-plank coverage to estimate how many boards you need. For long warehouses, also check plank orientation (lengthwise vs. widthwise) because layout choices can affect cutting waste and board count. If your warehouse has consistent dimensions, plan a layout that avoids narrow end pieces near walls to reduce scrap.
How do I measure around columns, dock areas, or obstacles for hardwood flooring in a warehouse?
Measure each obstacle area separately—columns, posts, pits, drains, or fixed equipment—by determining their length and width, then calculate square footage to subtract from the gross area. For dock leveler zones or areas that will remain concrete, clearly outline boundaries and measure only the regions intended for hardwood flooring. Use a simple floor plan sketch and label dimensions to prevent missed spaces, especially in large warehouses with multiple zones. If expansion joints or threshold transitions are required, measure those clearances early so your installer can plan transitions correctly.
Why is accurate measurement critical when installing hardwood floors in a warehouse setting?
Warehouse flooring is typically subject to heavy foot traffic, pallets, rolling carts, and frequent sweeping or cleaning, so ordering the correct amount of hardwood is essential to avoid shortages or unnecessary seams. Miscalculations can lead to running out of specific batches or finishes, which can cause visible color variation and delays. Accurate measurements also help ensure the subfloor preparation and layout supports proper installation requirements for hardwood flooring. Taking time to measure precisely reduces rework, cost overruns, and timeline risk.
Which measurement approach should I use for large warehouse floors—manual measuring or laser measurement?
For large warehouse floors, laser distance measurement or a full-area scan is often the best option because it reduces human error across long distances and complex layouts. Use laser measurements to capture length and width for each zone, then cross-check with at least one manual tape measurement to confirm accuracy. If the warehouse has slopes, uneven transitions, or non-square corners, measure multiple points along each wall and use the smallest practical footprint for flooring layout. For best results, create a zone-by-zone dimension sheet so you can calculate square footage accurately for each section of hardwood flooring.
📅 Last Updated: October 17, 2026 | Topic: How to measure a hardwood floors for warehouse? | Content verified for accuracy and freshness.
References
- Square foot
- Board foot
- Floor plan
- Area
- Quantity surveyor
- Floor
- Flooring
- https://scholar.google.com/scholar?q=how+to+measure+hardwood+flooring+for+installation+square+footage+waste+factor Google Scholar
- https://scholar.google.com/scholar?q=warehouse+hardwood+floor+takeoff+how+to+calculate+materials+board+feet Google Scholar
- https://scholar.google.com/scholar?q=quantity+surveying+floor+area+measurement+construction+estimation Google Scholar