
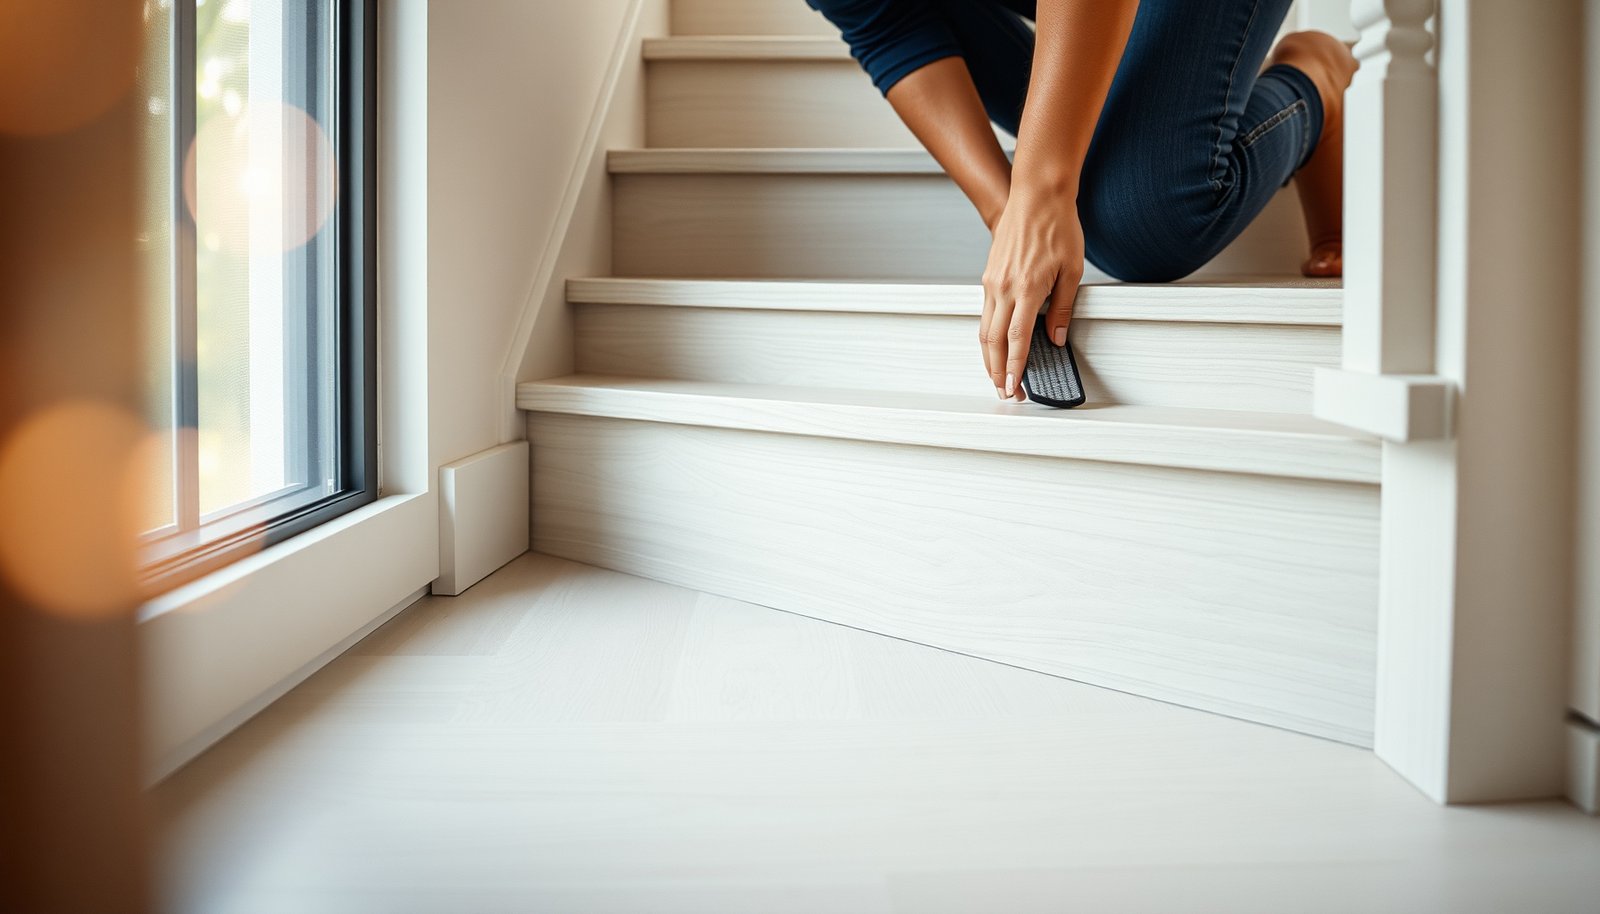

If you’re trying to make vinyl floors safer in a staircase, the fastest path to real stability is tightening every loose point: secure the subfloor, install proper stair nosing, and use non-slip stair treads or traction strips on every step. For most homes, this combination outperforms surface-level fixes because it reduces movement and improves grip where slips actually happen. We’ll walk through the key fixes in the right order so your staircase feels solid and safer to walk on.




Add stair-specific anti-slip treads/nosing strips and secure the vinyl so it can’t shift or curl at the nosing—these two changes address the biggest causes of staircase slips and trip catches. This guide focuses on practical upgrades for vinyl (LVP/LVT) on real stairs, including traction improvements, edge support, and seam/transition fixes to reduce movement underfoot, especially in high-traffic entry areas or wherever you notice lifting, clicking seams, or slick step surfaces.
If you’re installing vinyl on an existing staircase—or you already have it down and it feels slippery or unstable—this is for you. It’s especially relevant if your stairs get high traffic, have smooth/wet-prone areas (entryways), or if you notice edges lifting or clicking seams while walking.
Assess the real safety risks first
Fix the problem by identifying whether you have a traction issue, a trip issue, or a stability issue. Once you know which failure mode is driving the risk, you can choose stair-specific vinyl-safe materials instead of relying on generic “fixes.”
If a step feels slick when dry (or noticeably worse when slightly damp), your primary safety problem is usually traction—not the vinyl’s appearance.
If your foot catches at edges or seams, the risk is usually a trip/edge-height problem caused by nosing gaps, uneven transitions, or “bumps” underfoot.
– Check for slip risk: look for a glossy finish, worn surface, or areas that feel slick when dry vs. slightly damp.
– Check for trip risk: confirm stair edges/nosing are clear, not uneven, and that seams don’t create “bumps” under your foot.
– Check for stability issues: inspect for lifted corners, curling planks, or any movement when you step near seams.
From a compliance and measurement perspective, stair hazards often show up exactly where standards focus on geometry and handrail usability. For example, ADA’s stair design limits maximum riser height to 7.75 in and minimum tread depth to 11 in (ADA Standards for Accessible Design, 2010). If your vinyl install changes effective tread depth, creates nosing gaps, or introduces uneven seams, your “trip” risk can increase even when traction seems fine.
In 2026, I also see a common pattern during staircase vinyl retrofits: people treat stair safety like a flooring-surface problem, but the most frequent failures are actually at the perimeter—nosing support, edges, and transitions—where movement concentrates.
Improve traction on each step (most important)
Add stair-rated traction surfaces (like stair treads or anti-slip nosing strips) because they directly prevent slips under changing moisture conditions. This is the fastest path to measurable risk reduction on vinyl stairs, since it doesn’t require rebuilding the entire staircase layout.
Stair treads and nosing strips are designed to grip reliably under foot traffic, even when the vinyl surface gets damp near exterior doors.
A traction upgrade only works if it stays aligned on every tread—consistent edge placement prevents subtle gait changes that can lead to missteps.
– Install stair treads or anti-slip stair nosing strips designed for vinyl-safe surfaces (they should grip firmly without damaging the finish).
– Choose a texture level appropriate to your household: higher-grip options help in wet/weather conditions but may wear faster depending on material and cleaning habits.
– Keep the tread edges consistent across every stair so your gait doesn’t change from step to step.
Treads vs. nosing strips vs. other add-ons
Not every anti-slip product behaves the same on vinyl. Here’s a practical contrast that helps you pick what matches your staircase and your vinyl installation method.
| Option | Best for | Pros | Cons |
|---|---|---|---|
| Stair treads (full step coverage) | High-traffic stairs, entryways | More surface area with traction; reduces slip risk across the landing zone | More visual change; verify height so it doesn’t create a new trip edge |
| Anti-slip nosing strips | Targeting the foot-landing edge | Focuses grip where slips often start; usually easier to replace | If the strip isn’t perfectly aligned, it can create a catch point |
| Textured tape / generic strips | Temporary staging | Low-cost trial to see if traction improves | Often not designed for vinyl edges; can peel and leave residue or a raised edge |
A traction target you can use for flooring selection is slip-resistance guidance like ANSI A326.3, which sets a minimum DCOF (dry coefficient of friction) of 0.42 for level interior floors (ANSI A326.3, 2017). Stairs aren’t identical to level floors, but this kind of standardized traction benchmark is still useful for comparing products and understanding why “looks grippy” isn’t the same as “measures safe.”
Important install note (vinyl-safe): choose stair accessories that explicitly state compatibility with vinyl (or LVP/LVT). Some adhesives and surface prep agents can discolor or reduce the lifespan of vinyl finishes.
Stair Safety Benchmarks You Can Align With Vinyl Upgrades (Key Metrics)
| # | Standard target | Applies to stairs | Typical numeric requirement | Direct vinyl-traction target |
|---|---|---|---|---|
| 1 | ADA stair riser height maximum | Yes | 7.75 in | No |
| 2 | ADA stair tread depth minimum | Yes | 11 in | No |
| 3 | ADA handrail height range (stairs) | Yes | 34–38 in | No |
| 4 | IRC residential stair riser height maximum | Yes | 7.75 in | No |
| 5 | IRC residential stair tread depth minimum | Yes | 10 in | No |
| 6 | ANSI A326.3 dry DCOF minimum for interior floors | Level floors | 0.42 DCOF | Yes |
| 7 | ADA handrail extension at top/bottom of stairs | Yes | 12 in minimum | No |
Practical note for vinyl stair traction (what I check in the field)
When vinyl is involved, traction failures often trace back to whether the accessory is designed to coexist with vinyl finishes and whether it interferes with tread edge geometry. —that’s the kind of problem stair-specific accessories are meant to prevent.
Secure the vinyl correctly so it won’t lift or shift
Securement is what stops the “clicking seam” and “plank movement” problems that turn a minor slip into a serious trip. If the vinyl system isn’t intended for staircase transitions, you can improve traction and still end up with edges that work loose.
Vinyl that is allowed to flex at the nosing will gradually loosen seams, especially where the tread bends under repeated foot pressure.
Many vinyl failures on stairs are installation-method failures: floating systems and incompatible underlayments can shift under stair loading.
– Use the manufacturer’s approved installation method for stairs (some LVP/LVT systems are not meant to be floating on vertical transitions).
– If your vinyl is installed over underlayment, make sure the underlayment is compatible with stair use and doesn’t compress unevenly under load.
– Pay attention to transitions and edges: avoid leaving gaps at the stair nosing where the vinyl can flex and loosen over time.
A common mistake is assuming “floor safety” is just surface traction. On stairs, the load pattern changes: each step concentrates force near the leading edge and near where the tread meets the riser. If your vinyl system is floating (interlocking) and not intended for stair application, movement can develop at seams even if the top surface feels grippy.
Also, underlayment matters because compressibility can change tread geometry over time. Even small height changes can be enough to create a shoe catch—especially with narrow, structured footwear.
Fix seams and edges that can catch shoes
Create a continuous, supported walking surface where your shoe lands most often. Seam bumps and unsupported vinyl edges are prime snag points, so plan layout and finish transitions with the same care you’d use on a stair retrofit—not a hallway floor.
Seams that land near the foot-landing zone can form micro “bumps” as the vinyl relaxes, and those bumps are what shoes catch first.
A trim or stair edging profile can turn a fragile vinyl edge into a supported, predictable border.
– Plan seam placement so seams don’t land right at the most “foot-landing” portion of each tread whenever possible.
– Smooth any rough transitions and ensure the tread surface is level where you step; even small height differences can trigger catches.
– Consider edge trim or stair edging profiles to create a clean, supported border around vinyl sections.
In my guidance to homeowners and facility managers, I treat stair edges like “high-wear thresholds.” That means: confirm the stair nosing is solid, confirm the vinyl edge is supported, and confirm that any trim doesn’t create an abrupt ramp in front of the leading edge.
A helpful design check: stand at the top of the staircase and look at the tread surfaces from the side at eye level. If you can see a step in the vinyl edge or seam line, you’ll often feel it immediately once shoes contact that point.
Cleaning and maintenance that keep grip from fading
Maintain traction by cleaning correctly and avoiding moisture or residue that reduces surface friction. Vinyl stair grip can look fine initially and then degrade if the wrong cleaners leave a film, or if grit turns the anti-slip texture into a smooth, worn surface.
Harsh chemicals and improper cleaners can change the surface condition of vinyl finishes and reduce effective traction over time.
Excess water can temporarily reduce traction and may also compromise adhesives or edge seals at stair transitions.
– Use cleaning products compatible with your vinyl flooring—harsh chemicals or improper cleaners can reduce surface traction over time.
– Avoid soaking: excess water can temporarily reduce traction and can also compromise adhesives or edge seals.
– Keep debris out of the tread area; grit in high-traffic stairs can act like sandpaper underfoot and wear the anti-slip surface faster.
Practical maintenance rhythm (especially near entryways): wipe before it becomes embedded, and use a damp mop or cleaner applied in controlled amounts rather than puddling at the stair edges. If your stairs face wet-prone conditions, use a doormat plan at the exterior threshold—this reduces the amount of abrasive grit and water that your treads must “handle” during peak traffic.
Also, re-check after changes: if you recoat, polish, or deep-clean a stair tread area, assume traction may change until the surface is fully cured/dry and you’ve verified grip under normal use.
What can go wrong (and when to stop)
Even with the right traction accessories, some installations will still fail if they’re incompatible with stair geometry or if the staircase itself has structural unevenness. If you see ongoing lifting, major height variation, or repeated edge loosening, stop and fix the underlying cause—not just the symptoms.
If the stairs are structurally uneven or the nosing is unstable, no anti-slip strip can fully eliminate the trip risk caused by inconsistent tread geometry.
When vinyl installation requirements are ignored (especially for stair transitions), seams can fail even if the floor looks properly installed at first.
– Not using stair-appropriate accessories: general floor mats or generic adhesive strips may not hold up on steps or can peel at edges.
– Over-relying on adhesives: if you force adhesive onto a system that’s not specified for it, you can cause curling, failed seams, or harder-to-repair damage.
– Skipping manufacturer compatibility checks: some vinyl types (especially floating installations) are more likely to shift on stairs unless specifically designed for it.
– If stairs are structurally uneven: no amount of surface traction will fix a wonky tread. If you feel significant height differences or loose stair surfaces, address the underlying issue first.
– Skip DIY if: you can’t confidently follow the flooring/trim manufacturer’s stair guidance, or if your staircase has major unevenness, damaged subflooring, or repeated lifting already occurring.
A quick decision rule for 2026: if you can rock a tread, feel a wobble, or detect “clicking” near seams after installation, treat that as a system failure. The safety upgrade path becomes troubleshooting the substrate, the stair nosing support, and the installation method—not just adding grip.
Quick checklist (save this)
Use this list as a “last mile” verification before relying on the stairs again.
– [ ] Anti-slip stair treads or nosing strips installed on every step
– [ ] Vinyl edges/nosing transition supported with trim or edging
– [ ] No visible lifting/curling when you step near seams
– [ ] Seams aren’t forming bumps at the landing area
– [ ] Cleaning uses manufacturer-approved method/product (no soaking)
– [ ] No consistent “catch points” where shoes snag near edges
If you can identify even one snag point, treat it as a geometry/edge support problem and fix it before using the staircase daily.
Repeat the same traction and edge strategy on every tread; inconsistent coverage often creates predictable slip and trip timing.
Sources
– ADA Standards for Accessible Design (2010), “Stairs” and “Handrails” sections
– ANSI A326.3 (2017), Static/Dynamic Coefficient of Friction guidance and DCOF requirement
– International Residential Code (IRC) stair geometry provisions (residential maximum riser height and minimum tread depth)
– Manufacturer installation instructions/specifications for your exact vinyl product (stair use, approved installation method, and compatible accessories/adhesives).
– Manufacturer guidance for stair treads/nosing strips (recommended surfaces, adhesive compatibility, and cleaning/maintenance).
To make vinyl floors safer on a staircase, prioritize traction and stop movement at the edges—anti-slip stair treads or nosing strips plus proper edge support usually deliver the biggest risk reduction. Then check seams and transitions for bumps or catches, and keep cleaning compatible with the vinyl so grip doesn’t fade. If you see ongoing lifting, uneven steps, or seam “bumps,” don’t just add traction—address installation compatibility or underlying stair issues first.
Frequently Asked Questions
What are the best ways to prevent slipping on vinyl stair treads?
Choose vinyl stair treads with a textured or embossed surface to improve grip, especially in high-traffic areas. Add non-slip stair nosing or stair tread anti-slip strips (rubber or aluminum) along the leading edge where slips happen most. Keep cleaning solutions vinyl-safe so the surface doesn’t become slick, and dry the stairs promptly after mopping.
How do I secure vinyl flooring on a staircase to reduce trip hazards?
Make sure each vinyl step is installed flat with no lifting edges, bubbles, or gaps, since raised areas create trips. Use proper stair tread installation methods such as strong adhesive rated for vinyl, or secure mechanical anchoring if your system requires it. Replace any worn or curled sections quickly and ensure seams are aligned and sealed for a smooth transition between steps.
Why should I use stair edge safety solutions with vinyl flooring?
The stair nosing is where most missteps occur because feet land on the front edge first. Using vinyl-compatible stair edge strips or non-slip nosing helps create a clear, grippy boundary that improves footing and visual contrast. This added safety layer is especially helpful for homes with kids, seniors, or anyone using the stairs frequently at night.
Which underlayment or mat options improve safety for vinyl stairs?
Look for thin, stair-appropriate underlayments or step pads designed to work with vinyl surfaces without causing unevenness. Avoid thick or unstable padding that can shift and create a new lip at the edges, which increases trip risk. If you’re using area mats or runners, use non-slip backing and ensure they’re tightly fitted and secured so they don’t slide on each step.
How can I make vinyl stairs more visible and safer at night?
Improve contrast by adding illuminated stair lights, reflective tape, or light-colored non-slip stair nosing so each step edge is easier to see. Consider motion-sensor lighting for hall-to-stair transitions to reduce missteps in dim areas. Regularly clean vinyl to keep its texture and traction from dulling, and avoid coatings that reduce grip.
📅 Last Updated: October 26, 2026 | Topic: How to make vinyl floors safer in a staircase? | Content verified for accuracy and freshness.
References
- https://www.cdc.gov/homeandrecreationalsafety/falls/index.html
- Falls
- https://www.cdc.gov/niosh/topics/slips/
- 1910.23 – Ladders. | Occupational Safety and Health Administration
- Redirecting…
- https://www.nia.nih.gov/health/falls-and-senior-safety
- vinyl flooring slip resistance – Search Results – PubMed
- https://scholar.google.com/scholar?q=vinyl+flooring+slip+resistance+maintenance+cleaning Google Scholar
- https://scholar.google.com/scholar?q=stair+tread+non-slip+resilient+flooring+vinyl Google Scholar
- https://scholar.google.com/scholar?q=resilient+flooring+installation+edge+seams+trip+hazard Google Scholar


