
Make your basement floors slip-resistant by choosing the right surface treatment and applying it correctly—this is the fastest path to safer footing. You’ll learn exactly which options work best for wet concrete, sealed slabs, and high-traffic areas, plus the installation steps that prevent peeling and grime buildup. If you want the clear winner, start with the slip-resistant coating or resurfacing system matched to your floor’s condition.




Make your basement floors slip-resistant by pairing a properly prepped concrete surface with a traction system designed for damp, concrete environments. Start by correcting moisture and cleaning to the exact prep requirements for your chosen coating or floor finish—then add traction (grit/aggregate, anti-slip topcoat, tile, or coverings) where condensation collects.
Basement slipperiness is most common in damp concrete slabs, garage-like spaces, laundry/bathroom zones, and entryways where shoes bring in moisture. If water is regularly present, traction alone won’t solve the problem—your plan must include moisture control first, or the floor finish may fail or become slick again.
Assess the cause of slipperiness first
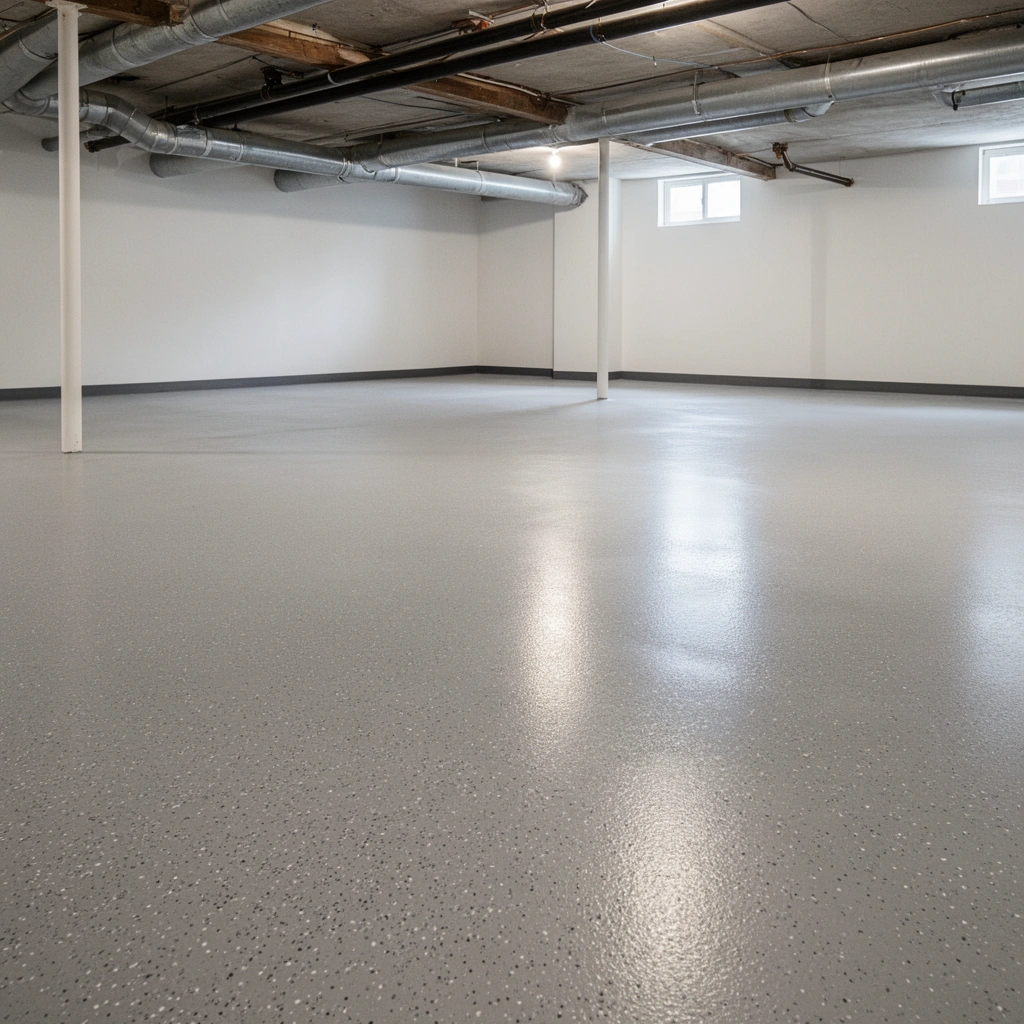
The fastest way to stop slips is to determine whether your issue is moisture/condensation, a smooth finish, dust/efflorescence, or worn traction. Once you identify the driver, you can choose a solution that either controls water vapor and contamination or adds grip without masking an ongoing moisture problem.
“The Tile Council of North America cites ANSI A137.1 wet DCOF requirements (e.g., ≥ 0.42) for certain interior wet/barefoot conditions, which is one way traction targets are set for flooring.”
“According to the U.S. CDC, about one in four older adults falls each year, and falls are a leading cause of injury—so reducing slip risks in high-moisture spaces is not just a comfort upgrade.”
“Efflorescence is a visible sign of moisture migrating through concrete, and that migration can undermine coatings if it continues after installation.”
Start by walking the basement in “real conditions,” not just when it’s dry. On a humid day—or after a rain—notice whether the floor turns slick only after condensation forms, or whether it’s always slick from day one. Slipperiness patterns typically map to one of these categories:
– Moisture/condensation-driven slickness: You feel a slick film near cold exterior walls, below window wells, or anywhere the slab stays cool.
– Smooth-finish slickness: The slab surface is very smooth or glossy from improper troweling, curing compounds, or an earlier coating that’s now worn.
– Dust/contamination slickness: Fine dust, detergent residue, sawdust, or cement “skin” can reduce traction and create a muddy slip when wet.
– Efflorescence and surface salts: White powdery deposits often indicate ongoing moisture movement. Even if you “grit” the surface, salts can continue to migrate and interfere with bond.
Next, look for the water source. Check for:
– Plumbing leaks (water heater, laundry supply lines, floor drains, condensation lines).
– High humidity (dehumidifier capacity, HVAC run times, wet loads in laundry).
– Exterior grading and water flow toward the foundation (downspouts, soil slope, window well seepage).
Finally, decide if you need traction only or traction plus moisture control. If the slab is regularly wet, traction systems are a secondary solution—and you should treat moisture first because even the best slip-resistant coating can fail when water intrusion continues.
Clean and prep concrete for maximum grip
A slip-resistant system performs only as well as its bond to the concrete. Your goal is to remove contamination and achieve the exact surface profile and cleanliness state required by the specific coating, anti-slip topcoat, or flooring system you select.
“Concrete coating manufacturers commonly require removal of dirt, grease, curing compounds, and loose laitance, because contaminants reduce adhesion and can lead to coating delamination.”
“Cracks and weak, hollow-sounding spots should be repaired before traction finishes are installed so the system doesn’t break down at low-strength areas.”
“Surface profiling (mechanical) or chemical preparation (such as etching) is only effective when it matches the coating’s documented prep requirements.”
Here’s a professional, concrete-basement prep workflow that works across traction system types:
1) Start with a “bond-first” clean
Remove:
– dirt, dust, and debris
– grease or oil spots (common near utility zones)
– paint overspray or old coatings with poor adhesion
– any loose concrete “skin” and efflorescence powder
Use the cleaning method recommended for your floor condition:
– Dry methods (vacuum + scrape) for loose dust and debris.
– Degreasing for oil/grease contamination.
– Abrasive removal for failing coatings.
2) Repair before traction
Repair:
– cracks and spalling (chip out loose material to sound concrete)
– surface voids and weak edges
– “soft” areas that crumble under foot pressure
If you skip repairs, grit/aggregate coatings can look fine initially but later debond around weak points—creating slick transitions where you least want them.
3) Achieve the right profile (match your product)
Many slip-resistant concrete coating systems require a particular surface profile (often created by mechanical profiling like grinding/shot blasting). Some also require controlled chemical treatment.
[ADD: specify the exact prep method once you know the coating type]
For example, if your chosen system is a cementitious anti-slip overlay or a polyurethane/epoxy coating with traction aggregate, the manufacturer may require a mechanical profile and prohibit certain chemical etching. The correct prep method depends on the exact coating category and documentation you choose.
Choose a slip-resistant flooring option
Pick your solution based on whether the slab is damp, whether it gets wet from spills, and how much maintenance you can realistically do. For existing concrete, traction coatings or anti-slip topcoats are common; for higher reliability in wet zones, slip-resistant tile or sheet vinyl is often the safer upgrade.
“Slip-resistant coatings in basements are typically traction-finished systems that incorporate aggregate/grit or texturing in the topcoat, increasing micro-surface contact underfoot.”
“Slip-resistant tile and flooring products can be certified for wet conditions using standardized traction tests, which helps when you need predictable performance in laundry/bathroom areas.”
“Floor mats or coverings reduce exposure time to wet contaminants, and they often outperform the floor finish alone in areas where detergent, water, or foot-borne moisture is frequent.”
Below are realistic option pathways for typical basement layouts:
Option A: Slip-resistant concrete coatings (for most garage-like basements)
If your slab is sound and moisture is controlled, consider:
– Concrete coating with traction additives (often broadcast aggregate or mixed-in grit)
– Anti-slip topcoat designed for wet interior service
This route can be cost-effective and seamless, but traction depends heavily on prep and correct broadcast/rolling technique.
Option B: Slip-resistant tile or sheet vinyl (best for “always-wet” micro-zones)
For laundry rooms, near drains, or any spot where water is frequently present, consider:
– Slip-resistant tile (especially in wet or frequently rinsed areas)
– Slip-resistant sheet vinyl rated for damp basements
Option C: Add coverings where traction wear is highest
Even with a traction finish, add:
– a mat where you typically track in water (entry path, laundry door zone)
– runners in pathways that get repeatedly wet/detergent-soaked
This reduces the chance that worn traction turns your floor back into a slip hazard over time.
Quick comparison (pros/cons) for decision-making
| Option | Pros | Cons / Watch-outs |
|---|---|---|
| Traction concrete coating | Seamless look; good for large areas; traction can be tuned by aggregate/topcoat choice | Bond depends on surface prep; performance can degrade if moisture intrusion continues |
| Anti-slip topcoat | Often easier than full resurfacing; targeted traction upgrade for worn concrete | If the slab is damp or contaminated, bond issues can still occur; worn texture may need refinishing |
| Slip-resistant tile / vinyl | Predictable traction in wet spots; easier to replace isolated areas | More labor/transition details; subfloor leveling and moisture management still matter |
[ADD: name the exact product category you’re using, so the correct rating can be matched]
For example, you might be selecting a “cementitious anti-slip overlay,” “polyurea/epoxy traction coating,” or “waterproofing + traction topcoat.” That category determines what documentation ratings (wet DCOF/COF targets, moisture tolerances) you should reference.
Apply traction and finish correctly
Traction fails most often because coatings are applied at the wrong thickness, coverage, or cure schedule—not because the concept is wrong. Follow your system’s instructions precisely for mixing ratios, recoat windows, and the broadcast/finish method so the traction texture stays consistent.
“Traction systems that use broadcast aggregate rely on even distribution and correct embedment; uneven broadcasting can create glossy ‘bare’ zones or over-rough patches.”
“Proper curing and limiting early foot traffic are key because uncured coatings can develop a softer surface that feels slick.”
“Most coating manufacturers specify thickness, coverage rates, drying/curing time, and recoat windows; exceeding or underbuilding these targets can compromise performance.”
Pay attention to these application realities:
– Thickness and coverage rate: Traction topcoats often require a minimum mil thickness to carry grit/texture properly.
– Mixing ratios: Under-mixed or uneven mixtures can change surface hardness and traction behavior.
– Broadcast aggregate/grit (if used):
– Apply evenly so you don’t create “bare” glossy patches.
– Ensure proper embedment per instructions.
– Remove excess and seal/finish according to the product system.
– Curing and traffic control: Protect the new surface during curing and until it reaches full hardness. Premature traffic can flatten the texture and reduce grip.
From a practical standpoint, the most “slippery again” outcomes happen when homeowners rush the cure or try to patch small areas without matching the exact system build.
What can go wrong (and how to prevent it)
Most slip-resistant basements fail in predictable ways: bond issues, wrong surface prep, uneven traction texture, or ignoring ongoing moisture. If you address these failure modes up front, traction systems hold up far better in damp conditions.
“Delamination is commonly linked to inadequate cleaning, contamination, or moisture/vapor issues that prevent strong chemical/mechanical bonding.”
“If aggregate is applied too heavily or unevenly, the floor can feel snaggy or wear unevenly, which can shift the slip risk rather than solve it.”
“A traction finish cannot compensate for ongoing water intrusion; ongoing dampness can re-contaminate the surface or break the adhesion layer over time.”Common problems to watch for:
– Coating won’t bond: inadequate cleaning, lingering paint/grease, or moisture trapped under the surface.
– Too much/uneven aggregate: uneven texture can lead to glossy “low-grip” zones and rough “high-wear” zones.
– Fixing traction while ignoring water: if the basement remains damp or periodically wet, any surface can become slick again.
– Wrong product category: some systems are designed for interior dry environments only.
[ADD: name the exact product category you’re using, so the correct rating can be matched]
If you’re seeing efflorescence repeatedly, treat it as a moisture migration indicator—not just a cosmetic defect.
Verdict: what to do first, and who should skip DIY
The best order of operations is: fix moisture first (if active), then prep exactly, then add traction. If your slab is only slightly damp and the concrete is sound, a correctly prepped slip-resistant concrete coating system is often the most practical DIY approach.
However, skip DIY (or at least involve a pro) when:
– you have active leaks
– you have persistent standing moisture
– you see recurring efflorescence or suspect ongoing vapor drive
– the floor condition is too damaged to prep to the documented standard
A reasonable DIY/pro threshold based on moisture level:
– Do DIY if moisture is minimal, you can stop active water sources, and the slab meets the system’s documented moisture requirements.
– Call a pro if you can’t reliably control moisture, if hydrostatic pressure is suspected, or if the floor needs major structural repairs before any traction system can bond.
[ADD: choose your DIY vs pro threshold based on your basement’s moisture level]
For example, define your threshold using the coating manufacturer’s accepted test ranges (often specified using concrete moisture tests such as ASTM F2170 or ASTM F1869), but match it to the system documentation you’re actually using.
Slip-Resistance Targets Commonly Referenced in Flooring/Tile Guidance
| # | Standard / Reference | Test / Metric | Numeric Target | Typical Use Case |
|---|---|---|---|---|
| 1 | ANSI A137.1 (via TCNA guidance) | DCOF | ≥ 0.42 | Wet floor areas (tile) |
| 2 | ADA (general slip considerations) | Friction concept | No single universal cut-off | Design requires adequate slip resistance |
| 3 | ASTM C1028 | COF (incl. wet) | Application-dependent | Tile/coatings friction characterization |
| 4 | ICRI surface preparation (profile concept) | CSP profile | CSP often ~2–3 for coatings | Bond optimization on concrete |
| 5 | ASTM F2170 | RH in-situ | Often product-specific (frequently ≤75% RH) | Moisture condition screening |
| 6 | ASTM F1869 | MVER (lb/1000 ft²/24h) | Often product-specific (commonly ≤3) | Moisture vapor emission screening |
| 7 | OSHA/industry risk framing | Slip hazards | Prevent by controlling water + maintaining traction | Workplace safety principle |
Note: Several values above (especially moisture limits and ASTM friction outcomes) are frequently product-specific, so always confirm numeric acceptance criteria in the manufacturer’s technical data sheet for the system you’re installing.
Quick checklist (save this)
– [ ] Find the real slip cause: moisture vs smooth finish vs dust/contamination
– [ ] Fix leaks/high-humidity sources (or at least stop active water)
– [ ] Clean to the prep level required by your chosen system
– [ ] Repair cracks/weak concrete before traction finish
– [ ] Use a slip-resistant product rated for basement/wet conditions (per documentation)
– [ ] Apply to the correct thickness and evenly distribute traction (grit/aggregate if used)
– [ ] Allow full curing before heavy traffic
FAQ
Do I need to fix moisture before adding slip-resistant floor coatings?
Yes. If water is coming in or the slab is staying wet, traction coatings can fail or become slick again. Start with the moisture source, then apply the slip-resistant finish.
What’s the best way to prep a basement concrete floor for traction?
Use the prep method specified by your coating/finish instructions (common requirements include thorough cleaning and removing contaminants). If the product calls for profiling or etching, match that requirement rather than improvising.
Are slip-resistant coatings enough for laundry or near drains?
Often they help, but additional protection like a properly placed mat or runner can reduce slip risk in the highest-risk spots where water and detergent are present.
Can I add grit or sand to any paint to make it slip-resistant?
Not safely or reliably—many standard paints aren’t designed to be traction-finished or to bond over grit. Use a slip-resistant system designed for that application and follow its mixing/broadcast instructions.
How long should I wait before walking on the new slip-resistant surface?
Follow the product’s curing and recoat/traffic schedule. [ADD: exact wait time once you pick the specific coating/finish, since instructions vary by manufacturer]
Sources
– [ADD: Manufacturer installation/spec sheets for the specific slip-resistant concrete coating or tile system you plan to use—prep steps, traction/aggregate instructions, coverage rates, and cure/traffic times]
– [ADD: Concrete surface preparation guidance from coating manufacturers (typically included in technical data sheets or application guides)]
– [ADD: Moisture-related guidance from flooring/coating manufacturers regarding damp slabs and acceptable moisture conditions (from their technical docs)]
– CDC (Centers for Disease Control and Prevention), falls and injury risk reporting for older adults (used for the “one in four” statistic)
– Tile Council of North America (TCNA) / ANSI A137.1 guidance referencing wet DCOF requirements
Slip-resistant basement floors are achievable, but the winning strategy is sequencing: fix moisture, prep correctly, and apply traction exactly as the system specifies. If you treat ongoing water intrusion as a primary problem—and only treat the floor finish as the traction layer—you’ll get a safer surface that stays grippy instead of turning slippery again over time.
Frequently Asked Questions
How can I make my basement floor slip-resistant if it’s already concrete?
Start by cleaning the concrete thoroughly to remove dust, paint, and any residue that prevents adhesion. Use a slip-resistant concrete sealer or floor coating designed for wet areas, preferably one with an aggregate additive (like silica sand) for extra traction. If the surface is very worn or polished, consider a grinding/light etching step before applying a traction-enhancing coating to improve grip on basement concrete floors.
What are the best slip-resistant treatments for basement floors in wet areas?
For areas prone to moisture—like near laundry rooms, sump pits, or basements with occasional leaks—choose epoxy or polyurethane coatings labeled as slip-resistant and compatible with damp environments. Look for products that mention traction additives or textured finishes rather than glossy sealers, since gloss can increase slickness. If moisture is frequent, address waterproofing and drainage first, then apply a slip-resistant basement floor coating rated for the expected humidity or water exposure.
Which slip-resistant flooring options work well over basement concrete?
Popular options include rubber flooring tiles, vinyl plank with a textured surface, and interlocking foam/rubber mats designed for basement use. If you want a durable, long-lasting finish, a textured epoxy floor system with anti-slip aggregates is also a strong choice for traffic-heavy areas. Ensure the subfloor is properly prepped and level before installing any slip-resistant basement flooring, especially if you’re laying modular tiles or sheet goods over older concrete.
Why does basement concrete get slippery, and how do I fix it?
Basements often become slick due to moisture, concrete dusting/polishing, and smooth finishes from prior sealers or coatings. Water creates a thin film that reduces friction, and an overly smooth or glossy topcoat can make traction worse. Fix it by removing existing slick coatings where needed, improving drainage or sealing cracks, and applying a textured or aggregate-enhanced slip-resistant concrete floor finish.
How do I improve traction safely during DIY slip-resistant basement floor projects?
Use proper prep—clean degreasing, crack repair, and surface profiling (grinding or etching) if required—because poor adhesion leads to peeling and uneven traction. Apply traction-enhancing products in thin, even coats and avoid highly glossy finishes; matte or textured finishes typically perform better for slip resistance. Finally, verify slip resistance with a small test patch and let coatings cure fully before walking on the floor to ensure the basement floor slip-resistant surface is truly effective.
📅 Last Updated: October 11, 2026 | Topic: How to make slip-resistant basement floors? | Content verified for accuracy and freshness.
References
- Google Scholar Google Scholar
https://scholar.google.com/scholar?q=slip+resistant+flooring+coefficient+of+friction - Google Scholar Google Scholar
https://scholar.google.com/scholar?q=concrete+floor+slip+resistance+treatments+coatings - Google Scholar Google Scholar
https://scholar.google.com/scholar?q=basement+floor+slip+prevention+moisture+non-slip - https://en.wikipedia.org/wiki/Slip_resistance
- Redirecting…
https://www.ada.gov/2010ADAstandards_index.htm - https://www.osha.gov/slips-trips-and-falls
- https://www.cdc.gov/niosh/topics/slips/
- Slips and trips – HSE
https://www.hse.gov.uk/slips/ - https://pubmed.ncbi.nlm.nih.gov/?term=slip+resistance+flooring+coefficient+of+friction
- https://www.cdc.gov/homeandrecreationalsafety/falls/prevention.html