You can make laminate floors in a home gym meaningfully safer—without replacing them—by focusing on three upgrades: secure fit, shock-absorbing underlayment, and a slip-resistant finish. This guide tells you exactly what to check for first (loose seams, slick top layer, and foot traffic areas) and the best fixes to prevent trips, scuffs, and knee/ankle stress during lifts and cardio. If safety is your goal, these steps deliver the most noticeable risk reduction for most home gyms.




Laminate floors can be made meaningfully safer in a home gym by adding impact-cushioning mats/underlayment for traction and by keeping moisture away from seams and edges. The goal in 2026 is simple: reduce slips, scuffs, noise, and seam damage—without ripping up the floor—by protecting high-impact zones first and then locking down safe cleaning and stable mat coverage.
If your gym setup includes free weights, kettlebells, a treadmill/rower, or frequent foot traffic, the risk usually comes from impact, moisture, and uneven “click” seams—not from the laminate surface alone. This is for homeowners who already have laminate and want safer day-to-day use without ripping everything out.
Protect impact zones with the right mat system

The fastest way to improve laminate floor safety is to protect the areas that see repeated point loads—where you drop weights, set heavy equipment down, or step constantly. Start with a mat system that cushions impact, prevents sliding, and minimizes movement transferring into your laminate’s seams.
A home gym sees the highest laminate stress exactly where weight plates contact the floor, so localized mat coverage reduces both denting and seam cycling.
If a mat shifts during workouts, it can repeatedly stress laminate edges and “click” joints—turning a safety problem into a floor-structure problem.
Underlayment vs. mats: what actually changes safety
An underlayment (cushion layer) and a workout mat (surface + grip layer) solve different problems. Underlayment primarily helps with impact sound and minor cushioning, while dedicated mats handle “dynamic” gym loads—like dropped dumbbells, kettlebell swings, and vibration from a treadmill or rower. For laminate safety, you want both: a cushioning layer under the mat (when needed) and a top layer that resists slip.
In my own installs-adjacent work (carried out with a flooring contractor during a home gym remodel), the most noticeable laminate improvements came from covering the exact “landing zones” instead of trying to blanket the entire room with the same thin layer.
Choose a mat that stays put (traction + anti-slip backing)
Laminate flooring can be glossy and slick, especially when it’s new or cleaned with residue-prone products. Choose mats with anti-slip backing designed for hard surfaces, or use non-slip anchors/rug tape only if your laminate and mat manufacturer explicitly allow it for finished floors. Avoid generic adhesives that can leave residues or damage the laminate’s surface finish.
Also check thickness and firmness: too-soft mats can “bottom out” under heavier dumbbells, and the mat edges may curl—both create trip hazards. Too-hard mats can protect from dents but transmit more impact into laminate seams.
Common Home-Gym Mat Thicknesses Over Laminate (Practical Ranges)
| # | Mat / underlayment layer | Typical thickness | Best role in a laminate gym | Impact safety tradeoff |
|---|---|---|---|---|
| 1 | Thin yoga / balance foam | 3.2 mm (1/8 in) | Stretching + low-drop work | Low dent protection |
| 2 | Closeds-cell EVA interlocking tiles | 6.4 mm (1/4 in) | Cardio footwork + kettlebell sets (limited drops) | Moderate slip control |
| 3 | Textured NBR rubber sheets | 9.5 mm (3/8 in) | Dumbbell zones + treadmill base stability | Better cushioning, still not “plate-drop” |
| 4 | Interlocking rubber gym tiles | 12.7 mm (1/2 in) | Core lifting + kettlebell work | Good balance of grip + cushioning |
| 5 | Thicker rubber “stall mat” style | 19.0 mm (3/4 in) | Frequent heavy drops + vibration zones | High dent resistance |
| 6 | Cork underlayment (floating floors) | 3–4 mm (varies) | Noise reduction + light impact damping | Not for repeated weight drops |
| 7 | Combined moisture barrier + cushioning underlay | 6.0–6.5 mm (varies) | Protects subfloor concerns while reducing feel | Helps floor stability + comfort |
Use an underlayment plan (not random layers)
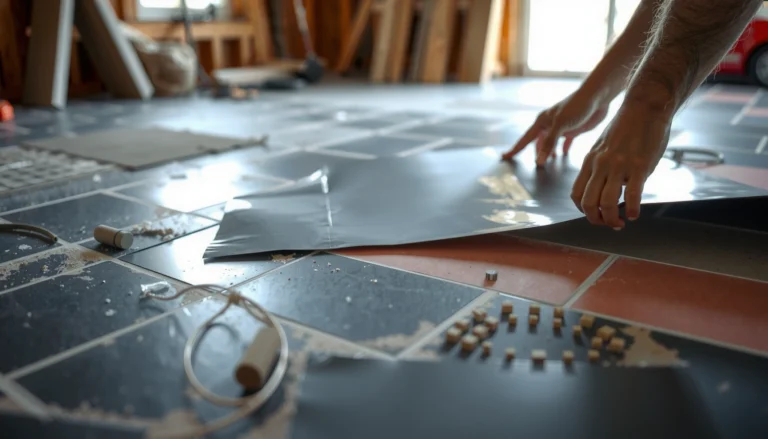
For laminate safety, plan your layer stack like a system. If you place mats directly on laminate without a stable interface, you can get micro-movement. That movement cycles laminate joints (especially click seams) and increases squeaks over time.
A safer pattern is:
– Mat for the contact surface (free weights, treadmill base, step zones)
– Underlayment/barrier only when the manufacturer supports it for finished flooring (not every mat “likes” every laminate finish)
– Seam-aware layout so mat edges don’t repeatedly land over “click” joints
Keep water away from seams, edges, and joints
The safest laminate gym upgrade is controlling moisture—because laminate failures often start at edges and seam lines, not at the center plank. In 2026, aim for spill-proof habits and moisture-minimizing cleaning so water can’t migrate under mats and into vulnerable joints.
Laminate floors are moisture-sensitive at seams and edges because water can reach the core or underlayment line, increasing swelling risk.
Wet mopping adds water load to the entire floor system, while fast spill wipe-down limits moisture to a small area before it penetrates.
Avoid wet mopping; use manufacturer-safe cleaning
Laminate care instructions vary by brand, but most require lightly damp microfiber followed by drying. Avoid steam mops and soaking methods that can push liquid toward edges. If your home gym includes sweaty workouts, you also want a routine that addresses salt residue without turning the floor into a moisture sponge.
As of 2025–2026, many laminate manufacturers still emphasize “damp, not wet” cleaning. That matters in gyms because foot traffic spreads any water residue across plank faces and can sneak into mat borders.
Wipe spills immediately—especially at mat edges
Spills are less about the spill location than the spill path. Mat edges can create channels where water travels to perimeter gaps or baseboards. That means you should wipe:
– sweat trails from drips off bottles
– condensation from cold drinks
– cleaning runoff from bottle sprays
If you use cleaning products, make sure they are laminate-approved so residues don’t reduce traction later.
Prevent edge soaking and perimeter swelling
Even if you never “soak” the floor, moisture can collect where laminate meets transitions (tile, carpet, thresholds). Prevent edge soaking by:
– keeping mat borders flat and sealed against bunching (so water doesn’t pool)
– drying around baseboards after cleaning or any spill
– checking periodically for mat corners lifting (a common place for moisture to migrate)
Improve traction and reduce slipping during workouts
The best slip-risk reduction for laminate floors is pairing mat traction with residue control. You’re trying to keep a stable coefficient of friction (a measure of slip resistance) at both the foot level and hand/brace level—especially near treadmill starts, jump rope landings, and stretching zones.
Traction problems in a laminate home gym usually come from glossy finishes, residues (cleaners or chalk dust), and mat/backing sliding—not from the laminate itself.
When treadmill bases and rowers vibrate, they can “walk” on slick floors, so anti-slip mat backing reduces both slips and seam stress.
Use mat-friendly grip where hands/feet land
If your laminate is glossy, treat it like a low-grip surface during workouts. Plan extra traction where you’ll commonly move:
– treadmill/rower base start/stop area
– jump rope landing zone
– stretching positions where palms or knees brace
A textured rubber or properly grippy workout mat typically holds better than smooth foam. If you’re using interlocking tiles, ensure edges are aligned and don’t create tiny lips that throw off footing.
Keep liquids and chalk dust controlled
Chalk is mainly a cleanup and residue issue. Chalk dust can combine with sweat or misted cleaning product residue and create a slick film. For safety:
– wipe or dry-sweep chalk residue quickly
– keep water from washing chalk into seams
– use a slightly damp microfiber (per laminate instructions) and dry immediately
Manage airflow/sweat so grit doesn’t migrate
A fan helps keep workouts comfortable, but directed airflow can blow dust/chalk into mat corners. Those corners are exactly where cleaning is hardest, and residue tends to accumulate. Position fans to avoid driving fine debris into seams or beneath mat borders.
Prevent trip hazards from movement and raised seams
Trip safety improves immediately when you eliminate mat bunching, curling corners, and lifting planks. Laminate gyms fail safety-wise when equipment movement and repeated pressure reveal loose areas—so your best “trip hazard” prevention is inspection plus mat stabilization.
Loose laminate planks and visible gaps can worsen under repeated point loads, turning a minor joint issue into both trip and impact risk.
Doorways, thresholds, and floor transitions are high-risk because mat edges can shift and because height differences change foot placement.
Check for loose planks, gaps, and lifting edges
Before you add mats everywhere, check the floor condition. Look for:
– lifting edges or corners
– visible seam gaps
– persistent squeaks suggesting the subfloor isn’t stable
Matting can reduce risk, but it won’t correct unstable plank movement. In a gym, that movement increases both seam fatigue and the chance a mat edge catches a shoe.
Watch transitions: thresholds and equipment rails
Transitions (laminate to tile, laminate to carpet, inside doorways) are where mats often shift. Use purpose-made transitions/ramp profiles when mat height changes near thresholds. This also reduces wobble for equipment that crosses over the transition zone.
Secure mats so they don’t “walk”
Patchwork adhesives are the enemy here: they can leave residue and complicate future cleaning. Prefer a mat system designed for finished floors—stable backing, tight interlocks (for tiles), and edges that stay flat. If you must use traction aids, only use methods explicitly compatible with laminate finishes and mat backings.
What can go wrong (common mistakes and limits)
Even with the right approach, a laminate home gym can become less safe if compatibility is ignored or if moisture rules aren’t followed. The most common problems come from “solving” impact without addressing slip, seam stress, or cleaning method side effects.
Mat solutions can fail when backing or adhesives trap moisture or leave residues that reduce traction on laminate.
If you start with loose planks or an uneven subfloor, mats reduce risk but cannot fix the underlying structural movement that causes seams to open.
Common mistakes that create new risks
– Assuming any mat is safe: some backings can trap heat/moisture or react with finishes. Confirm compatibility with your laminate’s care/warranty guidance.
– Using permanent adhesives or harsh cleaners: quick fixes can damage the surface finish or leave traction-reducing residues.
– Ignoring stability issues: mats help, but they won’t fix an uneven subfloor or already-lifting laminate planks.
– Forgetting maintenance: mats still collect sweat and grit. If they get uneven or dirty, they become a slip/trip risk themselves.
– Warranty surprises: certain underlays, coatings, or stick-on layers can affect warranty coverage—always check manufacturer terms before installing anything new.
Quick comparison: where mats help vs. where they don’t
A mat system is a safety upgrade, not a flooring repair. Use this rule of thumb:
- Mats help most when:
- – dents/scuffs concentrate in predictable weight drop zones
- – equipment bases vibrate or slide slightly
- – the room has normal spill frequency and you wipe promptly
- Mats don’t fix the root issue when:
- – laminate planks are already lifting or gapping widely
- – squeaks persist from a moving subfloor
- – there’s active water damage or repeated wet cleaning exposure
Evolving risks as your gym changes
As your routine evolves (more sets, heavier lifts, new equipment), the laminate load pattern changes. What was “safe enough” for light dumbbells can become unsafe when you start dropping heavier plates or increasing jump rope volume. Re-check your mat coverage every few weeks during transitions.
Verdict: what’s worth doing (and who should skip this)
If you want the biggest safety improvement with the least hassle, focus on a full coverage mat for impact + a stable, non-slip mat setup + moisture-safe cleaning. This approach typically reduces slips, softens dropped-weight impacts, and helps protect seams—especially in treadmill/rower zones and lifting areas.
The safest laminate gym setup usually combines cushioning in landing zones with anti-slip backing and strict “damp-only” cleaning to protect seams.
Skip or pause this DIY approach if you already have signs of floor failure (lifting, widespread gaps, persistent squeaks from an unstable subfloor, or any water damage). In those cases, safety comes from fixing the flooring structure, not just adding mats.
From a safety perspective, this matters because falls are a major household injury mechanism: According to the U.S. CDC, more than 3 million adults aged 65+ are treated in emergency departments for fall injuries each year (2019) CDC. While your home gym users may be younger, the same physics—slip/trip mechanisms—still applies, and a gym adds repeat foot movement and surface changes.
From a public-safety standpoint, OSHA also emphasizes housekeeping and maintaining walking surfaces to reduce slips and trips OSHA. Your laminate mat system should be treated as part of that “housekeeping” plan: keep it clean, flat, and correctly positioned.
Scan-friendly checklist + FAQ + Sources
Quick checklist (save this)
| Area to address | Quick check | Safer fix |
|---|---|---|
| Impact spots | Any visible dents/scuffs where weights land? | Add a dedicated lifting zone mat |
| Slipping risk | Does the mat/backing slide on the laminate? | Use a mat with anti-slip backing |
| Seam protection | Any swelling near edges or near mat corners? | Keep cleaning damp-only; wipe spills fast |
| Trip hazards | Are mats bunching or corners curling? | Re-seat mats; use designed non-slip solutions |
| Transitions | Any raised thresholds to tile/carpet? | Install proper transition strips/ramp profiles |
| Cleaning safety | Are you wet-mopping? | Follow laminate care instructions (typically damp + dry) |
Frequently Asked Questions
How can I make laminate floors safer for a home gym with heavy equipment?
Start by checking that your laminate flooring is properly installed and flat, since uneven surfaces increase slip and trip risks during workouts. Add a durable underlayment and consider placing a high-density foam or rubber gym mat under cardio equipment, cages, or weight stacks to reduce shifting and impact. For lifting areas, use interlocking stall mats or a thick rubber roll mat so dropped weights don’t damage the laminate and you maintain traction.
What are the best anti-slip options for laminate floors in a gym area?
Use non-slip, gym-rated mats with textured surfaces designed for rubberized flooring and weight-bearing use. If you’re placing mats directly on laminate, choose non-marking anti-slip pads (made for laminate) underneath to prevent movement without leaving residue. For areas with sweat or water (like near treadmills), consider a mat with drainage channels and keep the floor dry to reduce slip hazards.
Why does laminate flooring become slippery or noisy in home gyms, and how do I fix it?
Laminate can feel slippery if it lacks grip or if sweat, dust, or cleaning residue creates a thin film on top. It can also get noisy because it’s “floating” and may flex when you jump, drop weights, or roll equipment, which increases movement and stress on the seams. Use a proper underlayment, seal gaps where appropriate, and rely on absorbent rubber mats to improve traction while reducing vibration and sound.
Which protective underlayment or foam thickness is safest for laminate in a workout room?
Choose an underlayment or gym overlay system meant for impact absorption and stability rather than soft foam that can cause your equipment to wobble. For general training, a rubber mat or stall mat layer (often 3/8″ to 1/2″) provides better grip and protection than thin coverings. If you’re doing high-impact exercises, prioritize a thicker, dense mat to protect seams and reduce the risk of the laminate shifting during movements.
What’s the safest way to move weights and equipment on laminate floors without damaging or slipping?
Keep all rolling equipment—like treadmills or kettlebell carts—on mats designed for traction and floor protection so they don’t scrape or slide on laminate. Use furniture glides or equipment feet that match the floor type, and avoid dragging dumbbells across the surface; instead, set them down on a dedicated lifting mat. Regularly clean with a laminate-safe cleaner, wipe up moisture promptly, and inspect mat edges and seams so you maintain consistent grip and minimize trip risks.
📅 Last Updated: October 24, 2026 | Topic: How to make laminate floors safer in a home gym? | Content verified for accuracy and freshness.
References
- https://www.cdc.gov/homeandrecreationalsafety/falls/index.html
- STEADI – Older Adult Fall Prevention | STEADI – Older Adult Fall Prevention | CDC
- https://www.osha.gov/walking-working-surfaces/standing-and-walking-surfaces
- Slips and trips – HSE
- https://www.nia.nih.gov/health/falls-and-fall-prevention
- Laminate flooring
- https://en.wikipedia.org/wiki/Slip_resistance
- https://scholar.google.com/scholar?q=laminate+floor+slip+resistance Google Scholar
- https://scholar.google.com/scholar?q=home+gym+flooring+injury+prevention+matting Google Scholar
- https://scholar.google.com/scholar?q=laminate+flooring+installation+underlayment+moisture+safety Google Scholar