
Learn how to install WPC floors in a bedroom with a step-by-step process that tells you exactly what to do from subfloor prep to the final boards. If you want a clean, click-lock style install that minimizes mess and downtime, this guide walks you through the right order, key tools, and common mistake to avoid. By the end, you’ll know how to lay WPC flooring accurately so the finish looks sharp and stays stable under everyday foot traffic.




WPC floors are best installed in a bedroom by preparing the subfloor carefully, using the correct underlayment, and leaving proper expansion gaps around the perimeter. If you’re installing click-lock WPC planks, you’ll typically lay rows straight from a reference line and lock each plank firmly before moving to the next—do those three things correctly and you prevent most of the visible defects (gapping, noise, and misalignment). If your bedroom sits over a concrete slab or has an existing floor, follow the subfloor and moisture guidance closely so the floor system performs as the manufacturer intended.
If you’re planning a bedroom refresh—especially over a concrete slab or an existing floor—this is for you. It’s also helpful if you’re trying to avoid common issues like gapping at the edges, noisy movement, or uneven plank alignment.
Common Underlayment Thicknesses Used Under Floating Floors (mm)
| # | Underlayment type | Typical thickness | Best use in bedrooms | Comfort vs. flatness |
|---|---|---|---|---|
| 1 | EVA foam | 1.0–1.5 mm | Light cushioning with low height build-up | ★★★★☆ |
| 2 | XPE foam | 1.5–2.0 mm | Balanced sound reduction for walking comfort | ★★★★☆ |
| 3 | Cork underlayment | 2.0–3.0 mm | Quiet feel with moderate cushioning | ★★★☆☆ |
| 4 | Felt-backed foam | 2.5–3.5 mm | Noise control in upstairs bedrooms | ★★★☆☆ |
| 5 | Cushion vinyl-backed (for floating) | 2.0–3.0 mm | Comfort underfoot for daily bedroom use | ★★★★☆ |
| 6 | Integrated IXPE / “attached pad” | 0.5–1.0 mm (attached) | Fast installs where compatible with the system | ★★★★☆ |
| 7 | High-density foam (thin premium) | 1.0–2.0 mm | When the subfloor is mostly flat and you want crisp lock-up | ★★★★☆ |
Plan Your Bedroom Layout First

A straight reference line makes a click-lock floor look straight because every subsequent row inherits the first-row alignment.
Dry-laying several rows helps you avoid ending with an awkward cut strip that may be too narrow to install comfortably.
Choose the install direction based on the longest run and the room’s “visual lines” (often light direction or main walkway path) to minimize obvious joint variation.
Start by measuring the room and mapping obstacles: closet openings, bay windows, door swings, radiators, and any floor-to-ceiling cabinetry that can’t be moved. Mark a reference line using a chalk line or laser level, then plan your “starting wall” so the first plank row carries the full length of the room without forcing short end-cuts near high-visibility areas. In my own projects, the cleanest bedroom results come from treating the first row like the “spine” of the job—if it’s truly straight, the rest of the installation typically reads as intentional rather than improvised. If you’re installing over concrete slab, you’ll also want to confirm moisture-related requirements early so layout work doesn’t stall later.
Repeat the same process for thickness transitions. If your bedroom meets hallway flooring, tile, or carpet, plan the transition location before cutting planks. Proper transitions reduce the temptation to “bridge” gaps with trim that can unintentionally restrict expansion—one of the biggest causes of edge buckling.
Prep the Subfloor (This Step Makes or Breaks WPC)
Prep the subfloor by cleaning, checking flatness, and addressing moisture risks before you lay any underlayment. WPC is more forgiving than some floor types, but locking floors still depend on a firm, flat base to prevent clicking and joint separation.
ASTM F710 is widely used for identifying resilient flooring substrate requirements, including flatness targets measured with a straightedge. (source: ASTM F710—Standard Practice for Preparing Concrete Floors to Receive Resilient Flooring)
Loose dust and bond-contaminants can prevent underlayment to lay flat and can contribute to localized movement under a floating click-lock floor.
If the slab moisture is uncertain, you should test and correct first; otherwise a floating floor can still develop odor, discomfort, or long-term edge issues when conditions shift.
First, remove everything that prevents full contact: dust, construction debris, paint flakes, old adhesive ridges, and tacky residues. Concrete should be dry and vacuumed thoroughly. If you’re working over an existing floor, check whether the surface is stable and flat—WPC planks generally should not be installed over soft, moving, or crumbling layers. For uneven areas, use a floor patch or leveling compound appropriate for your substrate. Allow full curing time per the compound’s technical data sheet.
Next, check flatness. Use a long straightedge (commonly 6–10 ft / 1.8–3 m) and measure how much the floor varies high or low. Subfloor flatness directly influences how well the click-lock tolerates movement: when the base flexes, the plank edges experience repeated micro-loading and you may hear clicking. Where flatness is poor, reducing comfort by choosing a thicker “cushion” underlayment can backfire by amplifying movement.
Moisture and temperature matter in bedrooms. Many floor manufacturers reference normal indoor climate conditioning, and wood-floor industry guidance often targets stable relative humidity to reduce dimensional changes. For example, the National Wood Flooring Association (NWFA) commonly cites maintaining indoor relative humidity around 30–50% for wood flooring stability. (source: NWFA—industry guidance on indoor relative humidity control) While WPC is not identical to solid wood, bedrooms still experience seasonal swings, and floating floors still need room for movement.
Choose and Install the Right Underlayment
Choose underlayment that matches your exact WPC system and obey the manufacturer’s spec. The wrong underlayment can cause lock failures, excessive movement, or trapped moisture—especially when you’re installing over concrete.
Floating click-lock floors require underlayment compatibility—some systems allow foam-only, while others mandate moisture control or prohibit extra padding.
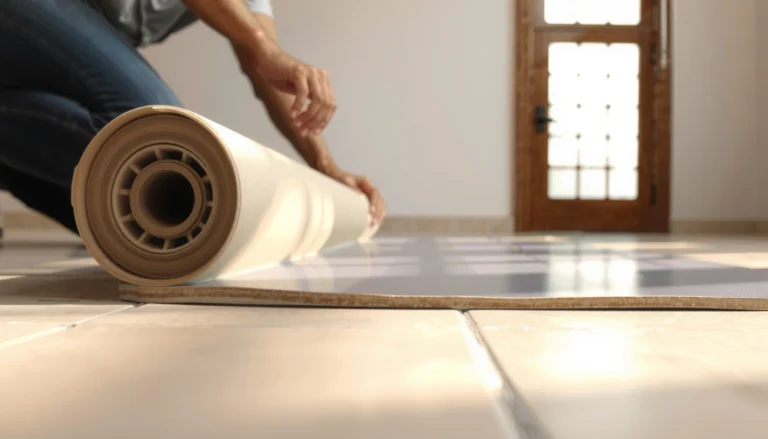
Underlayment installation quality matters: seams should be taped and rolled flat so the planks don’t “span” a raised joint.
Around doorways and walls, keep underlayment edges neat so the perimeter trim sits flush without creating localized height bumps.
Start with the WPC product documentation. Some WPC products include an attached pad, and many manufacturers explicitly instruct you not to add additional underlayment (or to add only a specific compatible vapor barrier layer). Others allow a separate foam underlay but restrict thickness. As a practical planning step, compare underlayment thickness against the manufacturer’s maximum permitted reduction (e.g., systems that require a thinner build-up to avoid transitions binding). If your bedroom doors have tight clearances, the underlayment build-up can also affect how well the doors swing after installation.
Finally, remember that underlayment is not a substitute for leveling. If your subfloor is out of tolerance, the solution is patching and leveling, not cushioning.
Install the WPC Planks (Click-Lock or Glue-Down Considerations)
Install WPC by following the system type: click-lock floors lock row-by-row, while glue-down floors require controlled adhesive application. In both cases, the biggest success factor is correct expansion spacing and maintaining a clean locking edge during installation.
For click-lock WPC, the first row alignment is critical; if the first row drifts, every subsequent seam will visibly compound the error.
Debris on the tongue-and-groove or locking lip can prevent full engagement and later lead to gapping between planks.
For glue-down WPC, adhesive coverage and dwell time must follow the manufacturer’s instructions to prevent weak spots and hollow-sounding areas.
If you’re installing click-lock WPC planks
1. Set expansion gaps first. Place spacers along walls and fixed points. Use consistent thickness spacers so you don’t end up with a tight edge on one side and a wide edge on another.
2. Start from your reference line. Fit the first plank row without forcing it into position. Adjust as needed before locking.
3. Lock each plank firmly. Apply steady pressure to ensure full engagement. If a plank won’t lock, don’t force it—remove, check for debris, and realign.
4. Stagger joints. Offset end joints according to the manufacturer’s recommended pattern (commonly involving a minimum offset distance). This reduces weak alignment lines.
5. Maintain edge cleanliness. During installation, wipe plank tongues/grooves with a dry cloth. I’ve seen small dust buildup create “almost locked” joints that later open by a few millimeters.
If you’re installing glue-down WPC
Glue-down installation changes the process and tolerances. You’ll generally need:
– the correct adhesive specified for your WPC system,
– the right trowel/notch size if the manufacturer provides one,
– controlled spread time (open time) and appropriate cure/wait time.
Because glue-down tolerances depend heavily on the specific product, follow your documentation exactly. If you do not have it, obtain the correct installation guide for your exact model before you spread adhesive.
Practical install direction tips
Align planks so the eye follows the floor naturally. If your bedroom has a strong view from the doorway, you usually want the longer plank runs to “support” that visual line instead of fighting it. When possible, keep plank end cuts away from the most noticeable side of the room.
Finish Details: Trims, Edges, and Doorways
Finish details correctly so the perimeter gap remains free to expand and your transitions look deliberate. This is where many installs fail visually—or mechanically—if trim is installed in a way that traps the floor.
Expansion gaps are designed to remain open; trim should cover the gap without locking the planks tight against walls.
At doorways, transition strips are usually the cleanest way to manage height changes and keep expansion movement unblocked.
Skirting/base trims should be installed to the wall (or ceiling track where applicable), not pinned through the flooring surface, so the floor can float.
Leave the required expansion gap around walls, door jambs, and fixed objects. Use spacers until the last planks are in place, then remove them before installing trims. Use your WPC’s installation spec for the exact gap value; if you don’t have it, don’t guess. (source: WPC manufacturer installation guide—use your model’s required expansion gap)
[ADD: exact gap value from your product documentation] rather than guessing.
At the perimeter, install skirting/base trims to cover the gap. Don’t use a sealant that glues the floor to the wall. When you do doorways, plan for transitions (thresholds or reducer strips). They provide a safe and tidy junction where flooring height or substrate changes.
For built-in cabinetry, plan ahead. If the cabinetry is fixed and you can’t maintain the correct expansion allowance, you may need a different installation strategy (or a layout adjustment that stops planks earlier). This is also why measuring and planning first matters.
What Can Go Wrong (Common Bedroom Installation Mistakes)
Most bedroom WPC problems come from skipping measurement, ignoring subfloor flatness, or misunderstanding how expansion works. If you avoid a few high-risk mistakes, your floor will usually stay quiet and tight for years.
Not leaving an expansion gap is a frequent cause of buckling or lifted edges when seasonal temperature and humidity conditions change.
Underlayment incompatibility can increase plank movement and contribute to joint gapping in floating systems.
A misaligned first row is the fastest way to produce “straight-but-wrong” seams that look uneven even when cuts are correct.
Here’s a quick comparison of the most common mistakes and the typical outcome:
| Mistake | Why it breaks | What you’ll see later |
|---|---|---|
| Skipping expansion gaps | The floating floor needs room to move with climate | Edge buckling, peaking, or tight seams |
| Poor flatness checks | Click-lock systems rely on a stable base | Clicking, micro-gapping, uneven feel |
| Wrong underlayment | Some systems need specific cushioning/moisture control | Lock wear, movement, or moisture-related issues |
| Rushing the first row | Every later row inherits the initial angle | Wavy seams that are hard to fix later |
| Ignoring vents and fixed elements | Floors must expand around fixed points | Tight spots near vents/cabinetry, edge failure |
Also watch for bedroom-specific constraints:
– Heavy furniture and dragging. WPC can handle typical household loads, but dragging loads can mark or stress the surface. Use pads.
– Baseboard removal and reinstall. If you remove skirting, you still need to respect the perimeter gap. Over-trimming can expose gaps you didn’t plan for.
– Uneven transitions. If your hallway floor is higher, an aggressive reducer can create a “lip” that people feel every day.
Verdict: When DIY Installation Makes Sense (and When It Doesn’t)
DIY installation makes sense when your bedroom subfloor is already reasonably flat, dry, clean, and you’re using a click-lock WPC system with clear manufacturer instructions. Skip DIY—or plan to get help—if you have significant subfloor unevenness, unresolved moisture concerns, or you’re unsure whether your current surface is acceptable for your specific WPC model.
DIY is typically feasible for click-lock WPC when the room is straightforward and the first-row alignment can be set accurately.
Professional support is advisable when moisture conditions over concrete require testing and remedial steps before installation.
Glue-down WPC is more sensitive to adhesive choice, spread rate, and cure timing, so following documentation precisely is non-negotiable.
Here’s the honest trade-off:
– Pros of DIY: You control layout and can take your time with alignment, cleaning, and joint staggering—often the difference between a neat floor and a frustrating one.
– Cons of DIY: Small errors in the first row, underlayment compatibility, or expansion trimming can create defects that are difficult to fix without partial removal.
Important note for your project: [ADD: note whether your WPC is click-lock or glue-down, and follow the exact manufacturer instructions for gap size and underlayment.] If you can’t locate the installation guide for your exact model, don’t proceed based on assumptions—get the correct documentation first.
Quick Scan Checklist (Save This)
– [ ] Measure room and plan starting line
– [ ] Confirm WPC type (click-lock vs glue-down)
– [ ] Subfloor clean, dry, and flat
– [ ] Correct underlayment installed (per manufacturer)
– [ ] Expansion gap used along walls/fixed points
– [ ] First row aligned before continuing
– [ ] Joints staggered as recommended
– [ ] Transitions/trim fitted without blocking expansion
FAQ
Do WPC floors need an underlayment in a bedroom?
Often yes, but it depends on the specific WPC product system and whether it includes an attached underlayer. Always match the underlayment type to the manufacturer’s requirements.
How much space should I leave around the walls?
You should leave an expansion gap sized according to your WPC manufacturer’s instructions. If you don’t have the spec sheet, [ADD: exact gap value from your product documentation] rather than guessing.
Can I install WPC over existing flooring?
Sometimes, but it depends on the existing surface condition (flatness, cleanliness, and whether it’s suitable under the manufacturer’s installation guidance). [ADD: confirm whether your current floor is vinyl, tile, laminate, or hardwood and what the manufacturer allows.]
What’s the biggest cause of gapping between planks?
The most common causes are debris in the locking mechanism, imperfect tongue/groove alignment, or subfloor unevenness that flexes the boards. Recheck the first-row alignment and flatness before continuing.
Are WPC floors suitable for bedrooms with heavy furniture?
Yes in general, but avoid dragging furniture across the boards and use felt pads where appropriate. If you have extremely heavy loads, follow the flooring manufacturer’s guidance on point loads and transitions.
Sources
– [ADD: WPC flooring manufacturer installation guide for your exact product model—especially required expansion gap, underlayment compatibility, and subfloor flatness limits]
– [ADD: manufacturer technical data sheet for the same WPC product—installation requirements and floor system specifications]
– ASTM F710—Standard Practice for Preparing Concrete Floors to Receive Resilient Flooring
– National Wood Flooring Association (NWFA)—guidance on indoor relative humidity for floor stability
When you treat WPC installation as a system—subfloor readiness, compatible underlayment, correct expansion spacing, and accurate first-row alignment—you prevent the bedroom’s most common failure points: gapping, noise, and crooked seams. Plan the layout, confirm flatness and moisture suitability, follow the underlayment rules for your exact model, and finish transitions so nothing blocks natural movement. If you do those steps carefully, your bedroom floor should feel solid underfoot and look consistently straight from day one through the next seasonal change.
Frequently Asked Questions
What are the key steps to install WPC floors in a bedroom?
Start by preparing the subfloor: it should be clean, dry, and level, with no loose tiles or high spots. Acclimate the WPC flooring planks or tiles in the bedroom for the recommended time before installation, then install the underlayment if your product requires it. Use the proper expansion gap around the room perimeter, click-lock or glue the WPC floor based on your flooring type, and finish with skirting boards to cover the gap.
How do you prepare a room for WPC floor installation in a bedroom?
Remove old flooring, vacuum thoroughly, and repair cracks or uneven areas so the surface is smooth and stable. Check moisture levels—bedrooms can still have humidity issues, so addressing dampness prevents future lifting or noise. Plan your layout to reduce cuts near the entrance and ensure the boards run in a visually appealing direction, then confirm you have the correct tools for WPC flooring installation and trimming.
Which underlayment is best for bedroom WPC floors?
For most click-lock WPC floors, the best underlayment choice depends on whether your planks have an attached pad and what your subfloor is made of. If you’re installing over concrete, use a moisture barrier/underlayment system designed for vinyl or WPC flooring to reduce condensation and protect the joints. For upstairs bedrooms on wood floors, a sound-reducing underlayment can help minimize footsteps and improve comfort.
Why do WPC floors need an expansion gap in a bedroom installation?
WPC floors expand and contract with temperature and humidity changes, even indoors like bedrooms. Leaving a proper expansion gap around the walls allows the floor to move without buckling or stressing the click joints. After installation, cover the gap using skirting boards or trim so the floor looks clean while still maintaining the required movement.
How do you cut and fit WPC floor planks around doors and corners in a bedroom?
Measure carefully and dry-fit the planks first, especially near door frames and skirting where clearance is tight. Use the right cutting tools for WPC flooring (fine-tooth saw or jigsaw with a suitable blade) to avoid chipping, and maintain the recommended gap at all fixed points. For smooth transitions, use transition strips at doorways or between rooms, and ensure the last row is trimmed evenly so the bedroom WPC floor installation looks professional.
📅 Last Updated: October 08, 2026 | Topic: How to install in a bedroom WPC floors? | Content verified for accuracy and freshness.
References
- Vinyl flooring
https://en.wikipedia.org/wiki/Vinyl_flooring - Laminate flooring
https://en.wikipedia.org/wiki/Laminate_flooring - Floating floor
https://en.wikipedia.org/wiki/Floating_floor - https://en.wikipedia.org/wiki/Subfloor
- https://en.wikipedia.org/wiki/Floor_underlayment
- https://en.wikipedia.org/wiki/Moisture_barrier
- https://en.wikipedia.org/wiki/Floor_expansion_joint
- Google Scholar Google Scholar
https://scholar.google.com/scholar?q=WPC+flooring+installation+guide - Google Scholar Google Scholar
https://scholar.google.com/scholar?q=rigid+core+vinyl+plank+floating+floor+installation+subfloor+moisture - Google Scholar Google Scholar
https://scholar.google.com/scholar?q=how+to+install+luxury+vinyl+plank+floating+floor+acclimation