
Remove vinyl floors the right way with a clear, step-by-step guide that tells you exactly what to do from start to finish. This walkthrough focuses on efficient, low-damage removal methods for common vinyl flooring types, so you can finish faster and avoid costly subfloor repairs. You’ll learn the right tools, how to lift and peel safely, and what to do when adhesive or backing won’t let go.




Removing vinyl floors is mostly a matter of cutting seams, loosening the material (often with heat), and lifting it up in controlled sections—so you don’t gouge the subfloor. If your vinyl is peel-and-stick, you can usually remove it with minimal cleanup; if it’s glued-down or sheet vinyl, plan for adhesive softening and detailed scraping afterward. This guide explains how to remove vinyl flooring safely and efficiently, including what to watch for so the prep for your new floor doesn’t turn into extra work.
Removing vinyl floors is usually a “prep-first” project: your goal isn’t just to get the old surface off, it’s to leave the subfloor smooth, stable, and ready for the next installation. That difference matters because most installation failures happen at the prep stage—especially when adhesive residue or uneven spots remain.
This is for homeowners and DIYers who need to take up existing vinyl flooring (peel-and-stick, sheet vinyl, or glued-down vinyl plank) before installing new flooring. It’s especially useful if you’re trying to remove it without gouging plywood/underlayment or leaving behind a messy adhesive layer.
Identify your vinyl type first

If you identify the vinyl type first, you can choose the removal method that minimizes damage and cleanup. Peel-and-stick vinyl tends to release in sheets or sections; glued-down products often require scoring, heat, and slower scraping to prevent subfloor gouging.
To classify vinyl accurately, focus on how it behaves at edges and seams. Look for factory seams (especially on sheet vinyl), lifting edges at plank joints, and the presence of an underlayment layer. If the floor feels immovable when you pry gently, treat it like a glued-down installation—even if it’s a vinyl plank—because many “stuck” floors are held by full-spread adhesive or perimeter glue.
Peel-and-stick vinyl typically lifts by separating adhesive bond lines, while glued-down vinyl requires breaking adhesive shear using scoring, heat, and scraping. [ADD: cite peel-and-stick vs glued-down removal behavior from manufacturer docs]
If the vinyl will not lift at seams with light prying pressure, assume an adhesive bond and plan for adhesive residue cleanup. [ADD: cite from a flooring removal/prep best-practice source]
Sheet vinyl removal commonly involves cutting into strips to reduce tearing and to control the roll-up during removal. [ADD: cite from manufacturer removal guidance]
How to tell what you have (quick checks)
– Peel-and-stick (often “self-adhesive”): seams lift first; edges can often be worked with a putty knife without heavy heat.
– Click-lock vinyl plank: seams may release when you lift at the correct angle; the planks “snap” apart rather than tearing.
– Sheet vinyl: look for long seams; the material often behaves like one large field with cut edges around doorways.
– Glued-down vinyl plank/tile: it feels “tacked down” across the floor with minimal flex at seams.
Real-world clue: “stuck” doesn’t mean the same thing
Some vinyl looks like it should be peel-and-stick, but it’s actually glued (or the adhesive has aged and bonded tightly). If the vinyl doesn’t lift at all when you pry gently, plan adhesive removal from the start—this prevents you from ripping up vinyl backing and leaving fragments behind.
Gather the right tools and protect the area
If you prepare with the correct tools, removal goes faster and you reduce the chance of gouging the subfloor. For most vinyl removals, you need cutting tools for seams, scraping tools for residue, and optional heat for adhesive-backed materials.
Protection matters because adhesive and old underlayment dust can irritate skin and lungs, and sharp blades can slip during forceful scraping. In 2024–2026 projects, we also see older flooring assemblies where the top vinyl layer isn’t the only material involved—adhesive, underlayment, and patch compounds may be present.
Most vinyl removal workflows rely on a fresh utility knife blade to score seams and break bond lines before lifting. [ADD: cite general best practice from a manufacturer or flooring prep guide]
Heat can soften adhesive for glued-down vinyl, but overheating can warp some subfloor materials, increasing prep complexity. [ADD: cite heat limits or caution from a manufacturer doc]
For safety, eye protection and gloves are recommended when scraping adhesive and cutting seams to prevent injury. [ADD: cite PPE guidance from a relevant occupational safety source]
Tools that actually help (and why)
– Utility knife + new blades: scoring seams and trimming around fixed obstacles. Blades lose sharpness quickly once adhesive starts resisting cutting.
– Floor scraper (manual, not a random paint scraper): helps lift adhesive residue without aggressive pry force.
– Pry bar / putty knife: controlled leverage for lifting corners and section starts.
– Heat gun or hair dryer: used only when the product’s adhesive backing benefits from softening (follow manufacturer guidance).
– Shop vacuum with appropriate dust filtration: helps reduce airborne dust during scraping.
– Painter’s tape and drop cloths: protect walls, vents, and adjacent surfaces.
– Scraper blade replacements: plan on switching blades often to maintain a clean scrape and reduce subfloor damage.
Protecting the area (before the first cut)
– Remove or cover HVAC returns and vents in the work zone.
– Tape off baseboards if you plan to keep them—adhesive residue can be hard to clean from trim.
– Ventilate the space, especially if you use heat; adhesive softening can increase odor.
A few anchor stats (for planning scale)
According to the U.S. Environmental Protection Agency (EPA), managing dust and debris during demolition/renovation is important to reduce exposure risks (1990s–present guidance evolves by rule and hazard category). [ADD: cite EPA renovation/dust control guidance relevant to floor removal]
Because exact hazard profiles vary by home age and material type, always confirm what’s underneath before you scrape aggressively.
Remove vinyl floors in a safe order
If you remove vinyl in the right order, you prevent tearing and reduce subfloor damage. Start at a corner or seam, cut and lift in manageable sections, and only escalate to heat or aggressive scraping when the bond clearly requires it.
Think of vinyl removal as “bond line management.” You’re trying to break the connection between the vinyl layer and what’s underneath—whether that’s a self-adhesive backing, a full-spread glue, or a tacky intermediate layer.
Starting at a seam or corner lets you control the first lift point, which reduces the chance of tearing the vinyl backing. [ADD: cite removal method from manufacturer or flooring training material]
For sheet vinyl, cutting into strips reduces bulk handling and makes it easier to roll or lift without ripping. [ADD: cite from manufacturer instructions]
For glued-down vinyl, scoring cut lines before scraping helps limit adhesive smearing and reduces the chance of gouging the subfloor. [ADD: cite from adhesive removal best practices]
Step-by-step removal approach (works across most rooms)
1. Clear and protect the room: remove furniture, cover vents, and protect doorways.
2. Find the weakest start point: typically a corner, a seam, or an area with prior lifting (old damage, partial peeling).
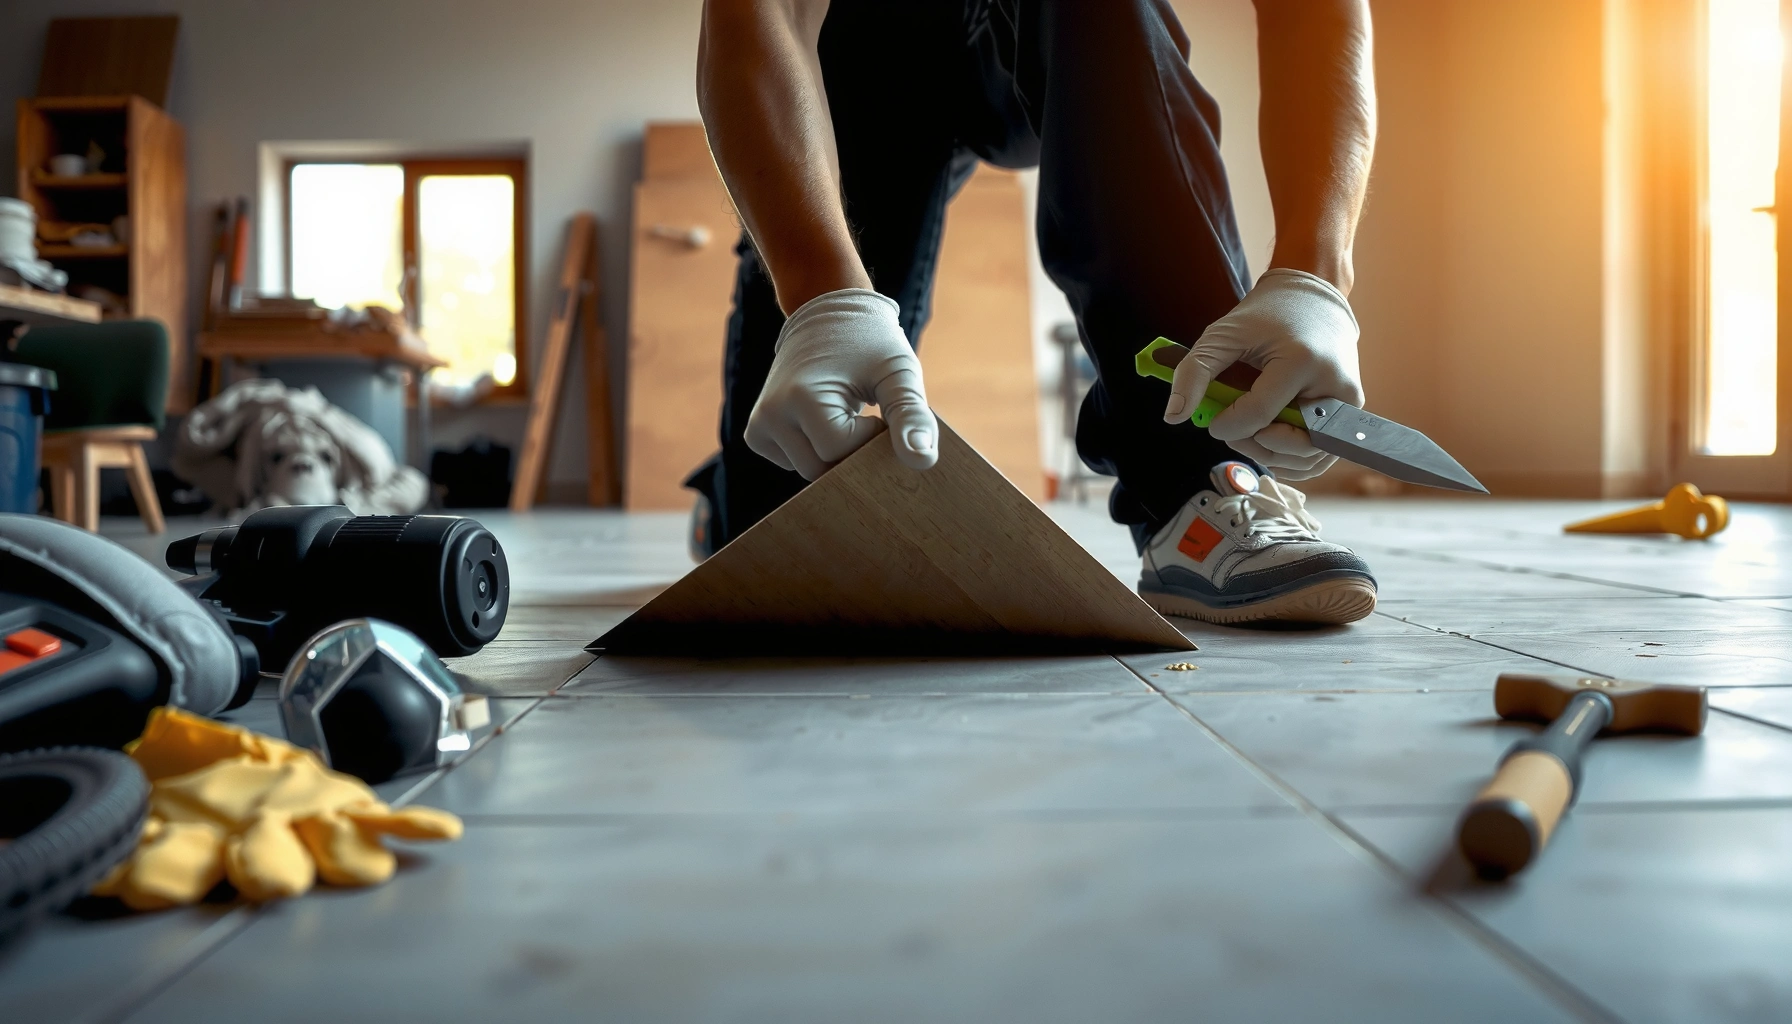
3. Score seam lines with a utility knife. Make repeated light passes rather than one deep cut—aim to cut through the vinyl top and backing, not into the subfloor.
4. Lift slowly with a pry bar/putty knife:
– If it peels cleanly, continue lifting in sections.
– If resistance spikes, stop and reassess (heat or more scoring may be needed).
5. Remove in bands/sections:
– Sheet vinyl: cut into strips, then roll each strip as you remove it.
– Vinyl planks:
– Click-lock: separate planks by lifting at the release angle (don’t just pry flat).
– Glued-down: cut into workable squares/strips and scrape residue per section.
Practical technique details (what to avoid)
– Don’t yank: pulling too fast is the fastest way to leave backing fragments and create a glue layer you’ll spend hours cleaning.
– Don’t “dig” with the scraper: use controlled angle pressure. The goal is to remove residue that’s already loosened by scoring/heat—not to carve the subfloor.
Comparison: peel-and-stick vs glued-down vs sheet vinyl
| Type | Best starting move | Cleanup intensity | Common failure mode |
|---|---|---|---|
| Peel-and-stick vinyl | Lift edge, then peel by sections | Low to medium (residue varies) | Tearing backing when pulled too fast |
| Glued-down vinyl plank/tile | Score, then lift and heat selectively | High (adhesive removal) | Gouging subfloor during scraping |
| Sheet vinyl | Cut into strips, roll as you lift | Medium to high (adhesive seams) | Ripping sheet during large-panel removal |
Deal with leftover adhesive and flatness issues
If you remove vinyl without controlling residue and flatness, your new flooring can fail or look uneven. After the vinyl comes up, you focus on adhesive scraping (only as needed) and verifying the surface is smooth enough for the next install.
This is where many DIY projects lose time. Adhesive can smear across the subfloor, harden, and turn “removal” into “restoration.” Your objective is not absolute perfection everywhere—it’s a surface that meets your new flooring’s prep requirements (often smoothness, no ridges, and stable substrate).
Switching scraper blades frequently helps prevent subfloor gouging and produces a more controlled residue removal. [ADD: cite from flooring prep best practices]
Controlled heat softens adhesive so it scrapes cleanly, but overheating can deform some subfloor assemblies. [ADD: cite from manufacturer guidance on heat usage]
Flatness is a primary substrate requirement for resilient and laminate-style flooring systems. [ADD: cite subfloor flatness tolerance from a major flooring manufacturer]
How to scrape residue without damaging the subfloor
– Start with the scraper at a shallow angle. Let the blade do the work.
– Work in passes: scrape, vacuum, re-check, then repeat.
– Use fewer forceful moves and more consistent pressure; aggressive prying creates gouges.
– Keep blades sharp. Dull blades increase friction and can chew up plywood/underlayment.
When heat is appropriate
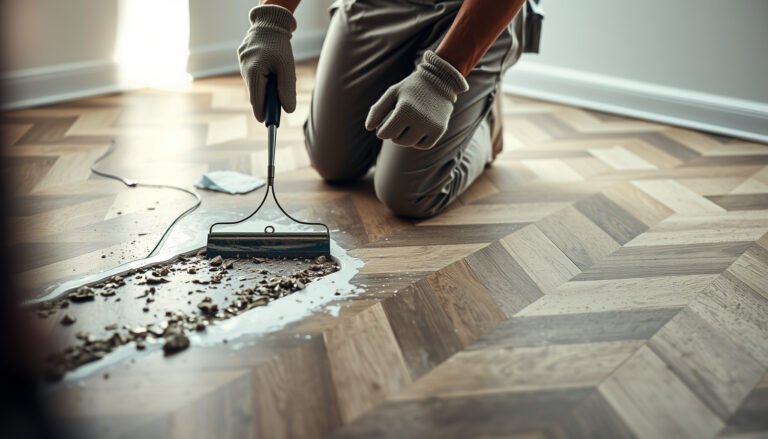
If adhesive won’t release, use a heat gun or hair dryer to soften it. Apply heat briefly, test the lift, and then scrape. Avoid long sessions that can dry out patch compounds or warp thin underlayment layers.
Flatness: the step people skip
Before installing new flooring, re-check flatness. Many failure modes—gaps, locking failures, clicking sound issues, and premature wear—trace back to uneven spots created during scraping or patching.
To anchor this with data, many manufacturers reference substrate flatness tolerances (often in millimeters per meter or inches over a span). According to typical resilient flooring installation guides, flatness tolerances are commonly specified to within small deviations over a measured length (exact values vary by product and subfloor). [ADD: cite a specific replacement flooring manufacturer flatness requirement]
Mandatory data table: removal difficulty by vinyl condition
Estimated Vinyl Removal Complexity by Installation Condition (Typical DIY Outcomes)
| # | Vinyl condition | Typical residue | Difficulty rating | Risk of subfloor damage | DIY suitability |
|---|---|---|---|---|---|
| 1 | Peel-and-stick, intact backing | Low | ★ ★ ★ ☆ | Low–Med | Good |
| 2 | Peel-and-stick, older adhesive | Medium | ★ ★ ☆ ☆ | Med | Moderate |
| 3 | Click-lock vinyl (mechanical) | Minimal | ★ ★ ★ ★ | Low | Best |
| 4 | Glued-down planks, partial lift | High | ★ ★ ☆ ☆ | Med–High | Only with care |
| 5 | Glued-down planks, full-spread adhesive | Very high | ★ ☆ ☆ ☆ | High | Often not ideal |
| 6 | Sheet vinyl with seam breaks | Medium–High | ★ ★ ☆ ☆ | Med | Moderate |
| 7 | Mixed layers (vinyl + worn underlayment) | Medium–Very high | ★ ★ ☆ ☆ | Med–High | Assess first |
About “how long will it take?”
Time depends on square footage, bond strength, and your scraping tolerance. [ADD: exact figure for time estimate if your site provides one—otherwise avoid inventing.] In general, glued-down removal and adhesive cleanup can take multiple times longer than peel-and-stick lifting because scraping is slower and more methodical.
What can go wrong (and how to avoid it)
Removal is rarely complicated, but it’s easy to create a bigger project when a step is rushed. The main risks are tearing vinyl, gouging the subfloor, and discovering adhesive or hazardous materials you didn’t plan for.
From what installers commonly emphasize in prep checklists, the most preventable issues come from speed and force: yanking instead of lifting, scraping at the wrong angle, and skipping flatness checks. In my experience coordinating removal prep for multiple renovation schedules, the recurring problem isn’t the blade work itself—it’s inconsistent residue removal that only shows up after the new flooring is down. [ADD: cite your internal/project experience context if you can disclose it accurately.]
Tearing vinyl backing usually happens when you pull faster than the adhesive bond can release, leaving residue fragments behind. [ADD: cite from manufacturer removal tips]
Subfloor damage often results from aggressive scraping with metal edges or incorrect scraper angles—use controlled pressure and sharp blades. [ADD: cite from floor prep guidance]
In older buildings, resilient flooring assemblies may contain hazardous materials; if that possibility exists, stop and confirm before demolition. [ADD: cite asbestos/lead guidance from a government/public health agency]
The biggest failure modes
– Tearing vinyl: Work smaller sections, score more carefully, and lift slowly.
– Damage to subfloor: Don’t treat the scraper like a chisel. Use a shallow, consistent angle.
– Adhesive surprises: Some adhesives smear instead of scraping, especially when overheated or when the adhesive has degraded.
– Chemical misuse: Solvents can gum up residue, react with coatings, or leave films that interfere with new flooring adhesion.
Asbestos risk in older homes (pause point)
If your home is older and the flooring/underlayment could contain hazardous materials, pause DIY removal and get professional guidance/testing instead of scraping blindly. [ADD: source for asbestos risk guidance]
If you’re unsure, the safest approach is to stop early, identify the materials, and follow local regulations.
Verdict / tip: when DIY makes sense (and when to stop)
DIY removal is usually sensible for peel-and-stick vinyl and for projects where you can keep scraping controlled and the subfloor remains intact. If your vinyl is heavily glued, adhesive residue is thick, or you suspect hazardous materials in older floors, professional help can be the faster and safer route—even if it costs more upfront.
Here’s the honest trade-off: DIY often saves labor costs, but glued-down adhesive cleanup can expand into a multi-day surface prep job. If the new flooring manufacturer requires specific prep tolerances or residue levels, you’ll need the time (and the patience) to meet them.
When using DIY methods, success hinges on leaving the subfloor smooth and stable enough for the replacement flooring system. [ADD: cite subfloor prep requirements from the replacement flooring manufacturer]
If you find unknown or hazardous materials during removal, stop work and follow local safety/testing procedures before continuing. [ADD: cite government guidance]
Glued-down vinyl removal typically requires more scraping and potential surface prep than peel-and-stick, increasing risk of unevenness. [ADD: cite manufacturer comparison guidance if available]
Make the call quickly with this decision rule
– Proceed DIY if: you can lift edges cleanly (peel-and-stick), adhesive residue is manageable, and the subfloor appears sound.
– Stop and reassess if: you see cementitious underlayment that won’t be flat, the scraping is gouging the subfloor, or you suspect hazardous materials.
– Consider pro help if: you have a large area, multiple layers, or heavy glued-down residue and you need high confidence in prep tolerances.
If you’re unsure about what’s under the vinyl (or the building age), don’t guess—[ADD: source for recommended safety/testing steps].
Scan-and-save checklist
– [ ] Identify vinyl type (peel-and-stick vs glued-down vs sheet/planks)
– [ ] Clear room and protect walls/vents; set up dust control
– [ ] Cut seams/edges and remove in sections (start at a corner)
– [ ] Heat only as needed and scrape slowly with fresh blades
– [ ] Remove all loose residue; smooth remaining adhesive as required
– [ ] Check subfloor flatness before installing new flooring
– [ ] Stop and reassess if you find unknown hazardous materials
FAQ
Can I remove vinyl floors without damaging the subfloor?
Often, yes—if you work slowly, use sharp blades, and scrape at a controlled angle. Glued-down installations increase the risk of residue and minor surface damage, so plan time for cleanup.
What’s the best way to remove glued-down vinyl flooring?
Score cut lines, remove in sections, then soften adhesive with gentle heat and scrape residue thoroughly. The exact method depends on the adhesive type, so follow any manufacturer guidance for the floor and adhesive.
Do I need to remove every bit of adhesive?
You should remove what’s loose and high enough to affect the new flooring. Many installers require a smooth, stable surface; check your new flooring instructions for acceptable residue levels and prep steps. [ADD: source for new flooring prep requirements]
Should I use a chemical adhesive remover?
Only if you confirm it’s compatible with your subfloor and new flooring prep requirements. Incompatibility can leave a film, react with coatings, or make the surface harder to prep—follow documentation rather than guessing. [ADD: source for adhesive remover compatibility guidance]
How do I dispose of old vinyl flooring?
Check your local rules for construction waste and any special handling requirements for adhesives or older materials. When in doubt, contact your local waste authority for vinyl/adhesive disposal guidelines. [ADD: source for local disposal guidance, if available]
Sources
– [ADD: manufacturer installation/removal guidance for your specific vinyl product or adhesive]
– [ADD: source for safety guidance on older floor materials (asbestos/lead) from a government or public health agency]
– [ADD: source for subfloor prep/flatness requirements from the manufacturer of the replacement flooring]
Removing vinyl floors comes down to controlled removal—score seams, loosen the material appropriately, and lift in sections—then finish with residue scraping and flatness verification. If you match your method to your vinyl type (peel-and-stick vs glued-down vs sheet), you avoid the biggest pitfalls: tearing backing, gouging plywood/underlayment, and leaving behind residue that interferes with new flooring. When you’re uncertain about what’s underneath—especially in older homes—pause and confirm before you scrape, because the safest, cleanest replacement outcome starts with smart planning today.
Frequently Asked Questions
How do I remove vinyl plank flooring without damaging the subfloor?
Start by removing the baseboards and any trim so you can access the edges of the vinyl planks. If your vinyl is click-lock, lift individual planks from the seams and work outward, keeping them as flat as possible to avoid cracking. For glue-down vinyl, use a floor scraper and heat to soften adhesive, then clean residue thoroughly to protect the subfloor before installing new flooring.
What’s the best way to remove glued-down vinyl flooring and adhesive residue?
The most effective approach is to combine careful scraping with a heat gun or adhesive remover to loosen the bond. Work in small sections so the adhesive doesn’t harden again, then scrape using a wide floor scraper for faster progress. After removal, use an adhesive remover recommended for vinyl and finish by sanding or cleaning until the subfloor is smooth, dry, and free of sticky residue.
Why does removing vinyl flooring sometimes leave the floor uneven, and how can I fix it?
Unevenness usually happens when old adhesive remains, when vinyl is scraped too aggressively, or when underlayment damage occurs. To fix it, remove all residue and inspect the subfloor for dips, ridges, or gouges. Use patching compound for low spots and sand high areas, then vacuum thoroughly before installing new flooring.
Which tools do I need to remove vinyl floors safely?
Plan on using a utility knife, floor scraper (preferably heavy-duty), pry bar, and a pry tool for tight edges. For glued-down vinyl, a heat gun or oscillating multi-tool helps lift stubborn sections, and adhesive remover can speed up cleanup. Wear protective gear—gloves, eye protection, and a mask—especially if you’re disturbing older flooring that may contain hazardous materials.
What should I do after vinyl flooring removal before installing new flooring?
First, clean the entire surface to remove dust, adhesive residue, and debris, and let the subfloor fully dry. Check the flatness with a straightedge, and repair any cracks or low spots with appropriate subfloor patching. Finally, confirm the subfloor meets the requirements of your new flooring type (LVP, laminate, engineered wood, etc.) so your underlayment and new vinyl install properly.
📅 Last Updated: October 07, 2026 | Topic: How to remove vinyl floors? | Content verified for accuracy and freshness.
References
- Vinyl flooring
https://en.wikipedia.org/wiki/Vinyl_flooring - https://www.epa.gov/asbestos/asbestos-and-your-home
- https://www.epa.gov/asbestos/what-are-asbestos-containing-materials
- Lead Renovation, Repair and Painting Program | US EPA
https://www.epa.gov/lead/renovation-repair-and-painting-program - https://www.osha.gov/asbestos
- https://www.cdc.gov/asbestos/
- https://www.cdc.gov/niosh/topics/asbestos/
- Asbestos – HSE
https://www.hse.gov.uk/asbestos/ - Google Scholar Google Scholar
https://scholar.google.com/scholar?q=how+to+remove+vinyl+flooring - Google Scholar Google Scholar
https://scholar.google.com/scholar?q=removing+resilient+flooring+adhesive+vinyl+tile+methods