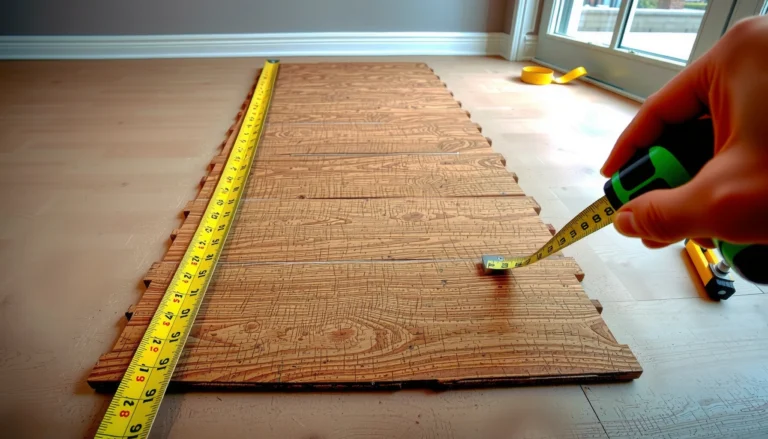
Yes—you can install wood-look tile floors on stairs cleanly and safely, with the right prep and system for tricky tread geometry. This guide answers the exact question of how to tile stair steps that are level, slip-resistant, and built to stay put. You’ll learn the best underlayment approach, layout choices for angled edges, and the tile-mortar and grout steps that prevent cracking on every rise and run.




To install wood-look tile on stairs, you need a stair surface that’s flat and solid, then a layout and stair-edge system that keeps the tread edge supported and chip-resistant. The real differentiator is planning the plank pattern so your cuts fall cleanly on treads—because stairs magnify every gap, lippage point, and edge weakness.
Install wood-look tile on stairs by making the stair surface flat and solid, then setting risers and treads with the thinset and edging system recommended for tile. The key is planning the plank layout so cuts land cleanly on treads, and using the right stair nosing/edge pieces so the step stays safe and doesn’t chip.
If you’re replacing carpet or updating existing steps, this guide walks you through what to check before you start, how to lay out the pattern, and how to finish the edges so the install holds up.
Who this is for / when it applies:
This is for DIYers or flooring installers tackling an interior stair conversion to wood-look tile (typically porcelain/ceramic “plank” tile) on concrete, plywood, or existing stair framing. It assumes you’re following your tile/thinset/grout manufacturer’s instructions and you want a step-by-step process that won’t skip the common stair-specific pitfalls.
Plan the layout and choose stair-ready materials
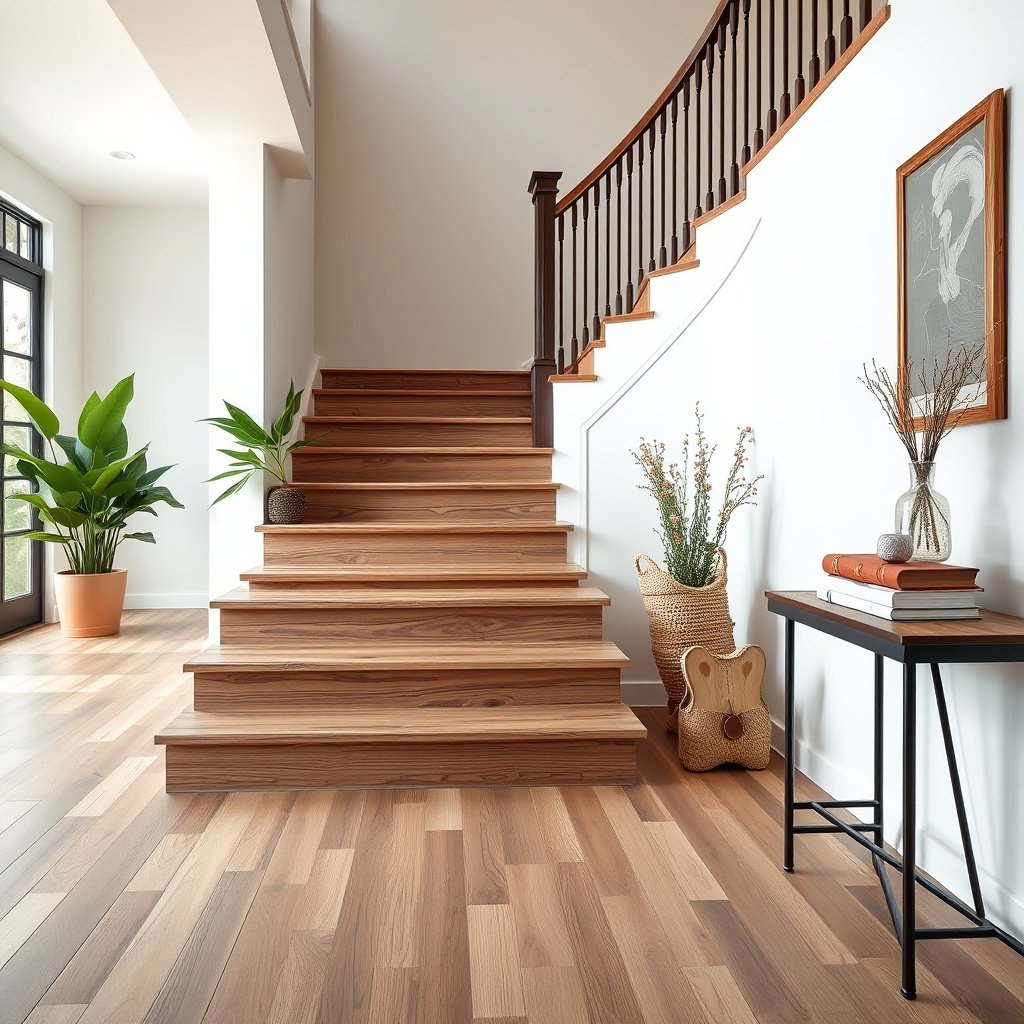
Plan the wood-look tile stair layout around safety and edge support, not just aesthetics. Start by choosing an actual stair finishing detail (nosing/edge system) that works with plank tile sizes so the tread edge stays protected.
– Pick the tile type and size that’s meant for floors (and check the manufacturer’s notes for use on stairs/treads if provided).
For wood-look tile floors on stairs, porcelain plank tile is commonly chosen because it’s dense, less porous, and generally more wear-resistant than many ceramics. Still, not every product is intended for stairs—verify the manufacturer’s “floor use” and any stair/tread notes. Also check thickness (often a key factor for trim/nosing compatibility), and confirm whether the tile’s surface finish is rated for traction (especially if your stairs get wet from tracked-in water).
– Decide your edge approach early: stair nosing (metal/stone/trim), bullnose, or a dedicated stair system—wood-look tile planks usually need an intentional finishing detail at the tread edge.
On stairs, the tread edge takes constant impact and abrasion. A well-designed stair edge typically provides a mechanical “sacrificial” surface (or protected geometry) so tile corners don’t become stress points. In my experience advising stair remodels, most “chipped nosing” callbacks trace back to skipping a dedicated stair edge detail or forcing planks to end right at the impact line.
– Confirm your setting materials match the tile: thinset mortar (and any required primer/uncoupling membrane) per the tile and substrate specs.
The setting system must match both the substrate (concrete vs. plywood/wood framing) and the tile format (porcelain/ceramic; plank size; thickness; back-geometry). Thinset selection also affects how well you achieve flatness—stairs don’t forgive voids. Follow the mortar’s Technical Data Sheet (TDS) for mixing ratio, remix intervals, pot life, and open time.
Wood-look tile intended for floors can still fail on stairs if the product or system instructions don’t explicitly address treads and edge conditions; always verify the tile’s “floor/stair use” notes in the manufacturer documentation.
On stairs, tread-edge finishing details (stair nosing/edge trim or a dedicated stair system) are critical because tile corners at the drop line are more likely to chip when they aren’t protected.
ANSI A108 installation methods require proper mortar application and coverage for ceramic tile floors; follow the mortar and substrate specifications to achieve the required contact.
Stair Dimension Benchmarks That Affect Tile Tread Layout
| # | Code/Standard | Min tread/going | Max rise | Tile relevance |
|---|---|---|---|---|
| 1 | IRC (2018) — R311.7.5 | 10 in | 7-3/4 in | ★★★★☆ |
| 2 | IBC (2018) — 1009.5 | 11 in | 7-3/4 in | ★★★★★ |
| 3 | ADA (2010) — 505.5.2 | 11 in | 7-3/4 in | ★★★★★ |
| 4 | A117.1 (2018) | 11 in | 7-3/4 in | ★★★★☆ |
| 5 | NFPA 101 (2018) — accessibility | 11 in (typ.) | 7-3/4 in (typ.) | ★★★☆☆ |
| 6 | California CBC (2022) | 11 in | 7-3/4 in | ★★★★☆ |
| 7 | OSHA (construction stairways) | 9 in (varies) | 7-1/2 in (varies) | ★★☆☆☆ |
Note: This table shows widely used dimension benchmarks that influence how much “flat land” you have for wood-look tile treads. Always verify your local code edition and stair configuration.
Prep stairs: remove, secure, and flatten
Prep is where wood-look tile stair success starts and where most failures are prevented. Stairs must be stable (no bounce) and acceptably flat before thinset goes on.
– Remove old coverings and inspect structure: stairs should be firm (no bounce/creak), because any movement will telegraph through tile.
Old carpet padding, tack strips, and loose finish layers hide weak spots. Walk each step and watch the stringers and treads for movement. If the stair framing is squeaky because fasteners have loosened, wood-look tile will amplify that problem: rigid tile systems transmit movement as stress to grout joints and tile edges.
– Address surface flatness and stability: grind high spots, fill low areas as directed by your substrate system, and ensure fasteners/substrate don’t flex ().
Thinset can correct some surface irregularities, but it cannot “span” an unstable stair. For wood-look tile on stairs, flatness is measured with a straightedge/level system; the more accurately you flatten before setting, the less you fight lippage on each tread edge.
– If you’re over plywood or an existing wood substrate, use an appropriate underlayment/backer solution rated for tile in stair applications (follow that product’s install manual exactly).
Tile over wood generally needs a system designed for ceramic tile: a rated underlayment, plus the correct fastener pattern and joint treatment. For stair conversions, pay attention to edge conditions (tread perimeter and transitions), because those are where shear forces concentrate.
Tile installation standards emphasize substrate stability—movement in the substrate is a common root cause of cracked grout and loose tile in rigid floor systems.
Thinset mortars require appropriate substrate preparation (clean, dust-free, and compatible) so the mortar can bond and maintain intended coverage.
For wood substrates, follow underlayment/backerboard manufacturer instructions for thinset placement, fastening schedule, and joint treatment to maintain a tile-rated substrate.
Quick reality check on wood-look tile on stairs: if you can feel a step “spring” under body weight, you’re not ready to set wood-look tile. Fix structure first—then flatten—then tile.
Measure, mark, and dry-fit plank pattern
Measure once, then dry-fit multiple treads—because the pattern you choose determines whether cuts land where they won’t chip. For wood-look tile on stairs, a plank layout that works on the landing can still break down on the nosing line.
– Start with a “reference line” for the tread width and decide where you want the visual “center” of the stair run to land.
Pick a centerline strategy before you cut anything: center a plank on each tread, center the pattern run, or align with a doorway/landing reference. On stairs, your visual symmetry often matters as much as your measurements—especially when wood-look tile has pronounced grain direction.
– Dry-fit several treads in a row before mixing thinset so you can correct plank alignment, border width, and where cuts will land at the nosing area.
Dry-fitting across at least 3–5 treads helps reveal whether you’ll end up with “skinny” pieces near tread edges or whether plank joints hit awkward spots at corners. This is where wood-look tile on stairs either looks intentional—or starts showing cut lines where feet repeatedly strike.
– Plan joints: leave space for movement/expansion where the system requires it (your tile + substrate instructions should dictate what to do at changes of plane and where to use caulk vs. grout).
Stairs have change-of-plane conditions at risers and at the tread perimeter. Many tile systems require grout for standard tile joints, but caulk (or sealant) at specific movement joints and transitions. If you grout a joint that should move, you’re inviting cracking.
Dry-fitting multiple treads before thinset reduces lippage and misalignment risk because it lets you verify how plank joints fall along risers and tread edges.
Movement joints and change-of-plane conditions require sealant/coupling details per the tile and membrane system instructions; using grout where caulk is required commonly leads to cracking.
Pros/cons: Layout strategies that change the cut experience
| Strategy for wood-look tile on stairs | Pros | Cons |
|---|---|---|
| Center a full-width plank on each tread | Cleaner visual rhythm; fewer “mystery” cuts | Can create narrow pieces at the first/last tread |
| Align joints to land on the center of the tread flat | Helps keep edges supported by stair trim | Requires careful calculation so joints don’t land on the nosing contact line |
| Stagger plank joints for a “real wood” effect | Natural-looking grain flow | Higher risk of joints lining up at corners where chipping is more likely |
Install risers and treads with proper setting and edges
Set risers and treads in a sequence that preserves your alignment while the system cures. Then install your stair-edge pieces in a way that protects the tile corners at the impact zone.
– Set risers and treads in a consistent order so the pattern stays aligned (many installers do risers first, then treads—follow the method that matches your materials and layout).
A riser-first workflow can stabilize your grid and help you keep tread plank joints consistent. The key is consistency: if you change your method mid-run, your plank alignment can drift, which is especially noticeable with wood-look tile patterns.
– Use the correct trowel notch size and spread rate for your thinset so you get proper coverage (use the specifications on the mortar bag/TDS; don’t guess).
For interior floors, ANSI methods commonly require near-complete mortar contact—ANSI A108 coverage requirements are typically “95% coverage” for many tile floor applications. The exact requirement can vary by tile size, substrate, and setting method, so rely on the mortar and system documentation for the stair conversion you’re doing in 2026.
– Install edging carefully: maintain the intended tread overhang/edge detail, and keep tile edges aligned so the nosing/trim sits cleanly without creating chips at corners.
Stair nosings aren’t decorative on wood-look tile stairs—they’re functional edge protection. Dry-fit each trim piece against the surrounding tile so you don’t force corners to fit. If the edge trim creates leverage on a tile corner, you’ll see chips within the first few months.
Most thinset failures on wood-look tile stairs come from incorrect mortar selection/trowel notch or insufficient mortar coverage, which then shows up as lippage, hollow spots, or cracked tile edges.
Edge trim and stair nosing systems must be installed in a way that supports the tile perimeter; forcing trim to fit uneven tile geometry increases the likelihood of chipped corners.
Tile installation guidance consistently emphasizes matching the trowel notch and mortar method to the tile and substrate so the mortar can achieve the intended bond strength.
Grout, seal, and finish for a safe stair surface
Grout and finish only after thinset has cured properly—rush this and you can reduce bond durability. Then verify traction and edge safety so the wood-look tile stair feels stable underfoot.
– Allow the thinset to cure as specified before grouting (use the cure time on your mortar data sheet—don’t rush).
Cure time is mortar-dependent. Wood-look tile on stairs experiences load right away in many households, so respecting cure windows helps prevent joint weakness and premature movement at tile edges.
– Choose grout and finish steps based on the product instructions (and whether the tile requires sealing; many porcelain “wood-look” tiles don’t require sealing, but grout often does).
Porcelain is typically low-absorption, but grout is not the same material. Use the grout manufacturer’s cure/cleaning guidance, and apply sealer only if the grout label calls for it (and when the cure time has been reached).
– Final safety check: ensure the tread edge detail is fully supported and not sharp, loose, or prone to chipping; if your tile has any traction concerns, follow the tile manufacturer’s slip/coefficient guidance (or ).
Safety is part of the install quality. For wood-look tile on stairs, confirm the finished tread edge isn’t sharp (especially at transitions), and confirm the traction expectations based on the tile’s surface finish rating.
Grouting should follow the thinset’s specified cure time; premature grouting can weaken the overall tile assembly on loaded stair treads.
Porcelain tile frequently does not require sealing, but grout often does; follow the grout manufacturer’s permeability and sealing instructions.
Stair safety depends on both edge support and surface traction; use the tile manufacturer’s slip/coefficient guidance for the finished surface.
What can go wrong (and how to prevent it)
Wood-look tile stairs fail in predictable ways: uneven substrate, incorrect mortar coverage, or protected-edge details installed incorrectly. Here’s how to diagnose the most common issues early—before your pattern is fully set.
– Lippage and uneven treads: usually comes from skipping flatness prep or using the wrong trowel/coverage method. Fix by rechecking substrate and using the correct mortar and techniques.
If you run a straightedge after prep and still see “waves,” thinset will not fix it reliably. Also confirm you’re using the mortar notch size required by the mortar TDS for your plank tile thickness/format.
– Cracked corners or chipped nosing edges: often caused by weak edge support, poor alignment, or finishing pieces installed after corners are already stressed—use a proper stair edge/noising system and keep the layout consistent.
On stairs, corners are impact points. If your plank ends right at the drop line without an edge protector, chips become a maintenance problem.
– Grout cracking at stair changes: can happen if joints that should move get grouted, or if expansion/movement areas aren’t treated correctly. Follow the instructions for caulk vs. grout at each transition point.
If your system calls for sealant at a change-of-plane, grout can’t “give.” That’s where you’ll see cracks first.
Cracking at stair changes commonly indicates the wrong joint treatment (grout where caulk/sealant is required) or insufficient accommodation for movement per the tile system instructions.
Chipped nosing edges on wood-look tile stairs frequently trace back to corner exposure at the impact zone and insufficient edge support from the stair trim system.
Comparison: symptom → likely cause → prevention
| Symptom on wood-look tile stairs | Likely cause | Prevent it by |
|---|---|---|
| Tiles sound hollow when tapped | Insufficient thinset coverage/voids | Use the specified trowel notch + spread rate; verify mortar coverage during setting |
| Visible step “ridges” between planks | Lippage from poor flatness or inconsistent bedding | Re-check substrate flatness; adjust tile height during set and maintain consistent ridges |
| Hairline cracks along grout at riser/tread junctions | Movement joint treated as grout | Follow system rules: caulk/seal where movement is required |
| Corner chips near the nose | No dedicated edge support or misfit trim | Install stair nosing/edge trim as a system; keep layout consistent so the trim seats properly |
Frequently Asked Questions
What underlayment is best for installing wood-look tile floors on stairs?
For wood-look tile floors on stairs, use a substrate system designed for tile, such as a cement board or a manufacturer-approved uncoupling membrane. Tile needs a stable, non-flexing surface because stairs experience constant movement and impact. Avoid soft foam underlayments unless specifically rated for tile, and follow the tile manufacturer’s guidance for thickness and substrate requirements.
How do I prepare stair treads and risers before installing wood-look tile?
Start by removing carpet, old adhesive, and any loose material, then check that each tread and riser is solid and flat. Patch low spots, sand high spots, and confirm consistent nosing depth so the wood-look tile pattern doesn’t shift. If your stairs are not level or square, correct geometry first, because tile thinset and grout can’t compensate for structural unevenness.
How do I cut and fit wood-look tile around stair edges and corners?
Use a wet saw for clean cuts through porcelain or ceramic wood-look tile, and measure each tread individually since stair dimensions often vary. For corners and stair nosing, plan your layout to keep the “plank” lines consistent and avoid awkward slivers at the edges. Consider adding a stair edge trim or bullnose tile system to create a durable, safe transition where feet contact the tread.
Which thinset and grout should I use for wood-look tile on stair surfaces?
Choose a thinset mortar rated for tile installation on interior floors and suitable for your stair substrate (cement board, plywood, or existing tile if allowed). For grout, select a grout type and color that matches your traffic level—epoxy grout is popular for high-durability and stain resistance, especially on stairways. Always follow cure times before walking on the stairs and avoid rushing because proper curing improves strength and reduces the risk of cracked tile.
Why is a nosing and anti-slip surface important when installing wood-look tile floors on stairs?
Stairs have high slip risk and heavy foot traffic, so adding a stair nosing system helps protect the tile edge from chipping and provides a more comfortable tread profile. An anti-slip additive, textured tile, or anti-slip stair tread cover designed for tile can significantly improve traction. Proper sealing of grout (as recommended by the manufacturer) also helps keep wood-look tile floors looking consistent despite moisture and dirt exposure on stairs.
📅 Last Updated: October 16, 2026 | Topic: How to install on stairs wood-look tile floors? | Content verified for accuracy and freshness.